1. Introduction
Today, it’s very common to write an application and deploy to the cloud and not worry about the infrastructure. Serverless and FaaS have become very popular. In this type of environment, where instances are created and destroyed frequently, the time to boot and time to first request are extremely important, as they can create a completely different user experience.
Languages as JavaScript and Python are always in the spotlight in this type of scenario. In other words, Java with its fat JARs and long booting time was never a top contender.
In this tutorial, we’ll present Quarkus and discuss if it’s an alternative for bringing Java more effectively to the cloud.
2. QuarkusIO
QuarkusIO, the Supersonic Subatomic Java, promises to deliver small artifacts, extremely fast boot time, and lower time-to-first-request. When combined with GraalVM, Quarkus will compile ahead-of-time (AOT).
And, since Quarkus is built on top of standards, we don’t need to learn anything new. Consequently, we can use CDI and JAX-RS, among others. Also, Quarkus has a lot of extensions, including ones that support Hibernate, Kafka, OpenShift, Kubernetes, and Vert.x.
3. Our First Application
The easiest way to create a new Quarkus project is to open a terminal and type:
mvn io.quarkus:quarkus-maven-plugin:0.13.1:create \
    -DprojectGroupId=com.baeldung.quarkus \
    -DprojectArtifactId=quarkus-project \
    -DclassName="com.baeldung.quarkus.HelloResource" \
    -Dpath="/hello"
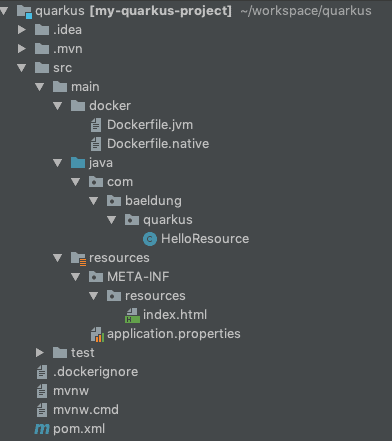
This will generate the project skeleton, a HelloResource with a /hello endpoint exposed, configuration, Maven project, and Dockerfiles.
Once imported into our IDE, we’ll have a structure similar to that shown in the image below:
Let’s examine the content of the HelloResource class:
@Path("/hello")
public class HelloResource {

    @GET
    @Produces(MediaType.TEXT_PLAIN)
    public String hello() {
        return "hello";
    }
}
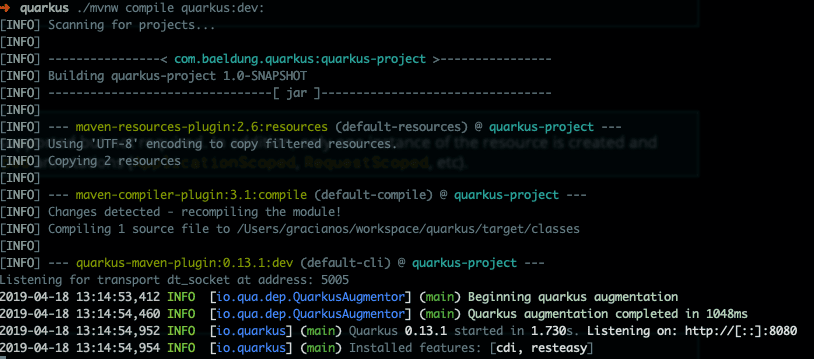
Everything looks good so far. At this point, we have a simple application with a single RESTEasy JAX-RS endpoint. Let’s go ahead and test it by opening a terminal and running the command:
./mvnw compile quarkus:dev:

Our REST endpoint should be exposed at localhost:8080/hello. Let’s test it with the curl command:
$ curl localhost:8080/hello
hello
4. Hot Reload
When running in development mode (./mvn compile quarkus:dev), Quarkus provides a hot-reload capability. In other words, changes made to Java files or to configuration files will automatically be compiled once the browser is refreshed. The most impressive feature here is that we don’t need to save our files. This could be good or bad, depending on our preference.
We’ll now modify our example to demonstrate the hot-reload capability. If the application is stopped, we can simply restart it in dev mode. We’ll use the same example as before as our starting point.
First, we’ll create a HelloService class:
@ApplicationScoped
public class HelloService {
    public String politeHello(String name){
        return "Hello Mr/Mrs " + name;
    }
}
Now, we’ll modify the HelloResource class, injecting the HelloService and adding a new method:
@Inject
HelloService helloService;

@GET
@Produces(MediaType.APPLICATION_JSON)
@Path("/polite/{name}")
public String greeting(@PathParam("name") String name) {
    return helloService.politeHello(name);
}
Next, let’s test our new endpoint:
$ curl localhost:8080/hello/polite/Baeldung
Hello Mr/Mrs Baeldung
We’ll make one more change to demonstrate that the same can be applied to property files. Let’s edit the application.properties file and add one more key:
greeting=Good morning
After that, we’ll modify the HelloService to use our new property:
@ConfigProperty(name = "greeting")
private String greeting;

public String politeHello(String name){
    return greeting + " " + name;
}
If we execute the same curl command, we should now see:
Good morning Baeldung
We can easily package the application by running:
./mvnw package
This will generate 2 jar files inside the target directory:
- quarkus-project-1.0-SNAPSHOT-runner.jar — an executable jar with the dependencies copied to target/lib
- quarkus-project-1.0-SNAPSHOT.jar — contains classes and resource files
We can now run the packaged application:
java -jar target/quarkus-project-1.0-SNAPSHOT-runner.jar
5. Native Image
Next, we’ll produce a native image of our application. A native image will improve start-up time and time to first response. In other words, it contains everything it needs to run, including the minimal JVM necessary to run the application.
To start with, we need to have GraalVM installed and the GRAALVM_HOME environment variable configured.
We’ll now stop the application (Ctrl + C), if not stopped already, and run the command:
./mvnw package -Pnative
This can take a few seconds to complete. Because native images try to create all code AOT to boot faster, as a result, we’ll have longer build times.
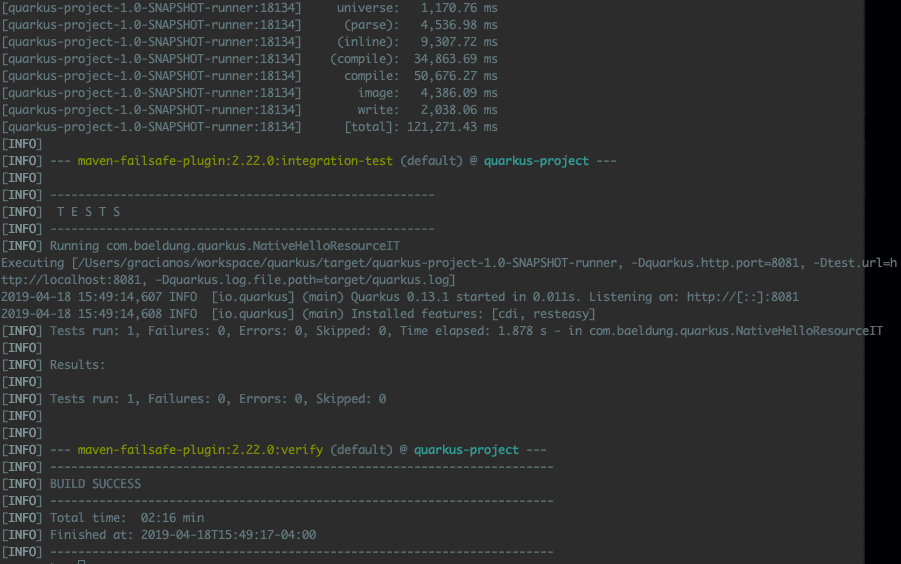
We can run ./mvnw verify -Pnative to verify that our native artifact was properly constructed:

Secondly, we’ll create a container image using our native executable. For that, we must have a container runtime (i.e. Docker) running in our machine. Let’s open up a terminal window and execute:
./mvnw package -Pnative -Dnative-image.docker-build=true
This will create a Linux 64-bit executable, therefore if we’re using a different OS, it might not be runnable anymore. That’s okay for now.
The project generation created a Dockerfile.native for us:
FROM registry.fedoraproject.org/fedora-minimal
WORKDIR /work/
COPY target/*-runner /work/application
RUN chmod 775 /work
EXPOSE 8080
CMD ["./application", "-Dquarkus.http.host=0.0.0.0"]
If we examine the file, we have a hint at what comes next. First, we’ll create a docker image:
docker build -f src/main/docker/Dockerfile.native -t quarkus/quarkus-project .
Now, we can run the container using:
docker run -i --rm -p 8080:8080 quarkus/quarkus-project

The container started in an incredibly low time of 0.009s. That’s one of the strengths of Quarkus.
Finally, we should test our modified REST to validate our application:
$ curl localhost:8080/hello/polite/Baeldung
Good morning Baeldung
6. Deploying to OpenShift
Once we’re done testing locally using Docker, we’ll deploy our container to OpenShift. Assuming we have the Docker image on our registry, we can deploy the application following the steps below:
oc new-build --binary --name=quarkus-project -l app=quarkus-project
oc patch bc/quarkus-project -p '{"spec":{"strategy":{"dockerStrategy":{"dockerfilePath":"src/main/docker/Dockerfile.native"}}}}'
oc start-build quarkus-project --from-dir=. --follow
oc new-app --image-stream=quarkus-project:latest
oc expose service quarkus-project
Now, we can get the application URL by running:
oc get route
Lastly, we’ll access the same endpoint (note that the URL might be different, depending on our IP address):
$ curl http://quarkus-project-myproject.192.168.64.2.nip.io/hello/polite/Baeldung
Good morning Baeldung
7. Conclusion
In this article, we demonstrated that Quarkus is a great addition that can bring Java more effectively to the cloud. For example, it’s possible now to imagine Java on AWS Lambda. Also, Quarkus is based on standards such as JPA and JAX/RS. Therefore, we don’t need to learn anything new.
Quarkus has caught a lot of attention lately, and lots of new features are being added every day. There are several quickstart projects for us to try Quarkus at Quarkus GitHub repository.
As always, the code for this article is available on GitHub. Happy coding!
