1. Overview
In this tutorial, we'll illustrate how we can use Cucumber tag expressions to manipulate the execution of tests and their relevant setups.
We're going to look at how we can separate our API and UI tests and control what configuration steps we run for each.
2. Application with UI and API Components
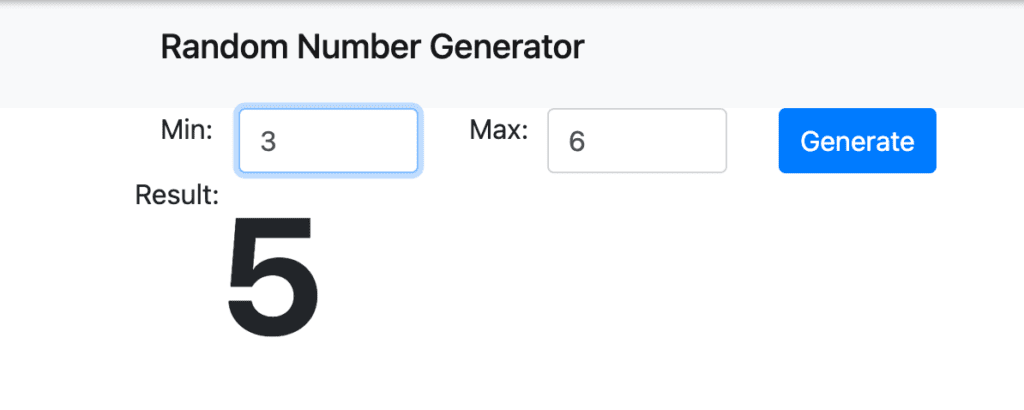
Our sample application has a simple UI for generating a random number between a range of values:

We also have a /status Rest endpoint returning an HTTP status code. We'll cover both of these functionalities with acceptance tests, using Cucumber and Junit 5.
For cucumber to work with Junit 5, we must declare cucumber–junit-platform-engine as its dependency in our pom:
<dependency>
    <groupId>io.cucumber</groupId>
    <artifactId>cucumber-junit-platform-engine</artifactId>
    <version>6.10.3</version>
</dependency>
3. Cucumber Tags and Conditional Hooks
Cucumber tags can help us with grouping our scenarios together. Let's say that we have different requirements for testing the UI and the API. For example, we need to start a browser to test the UI components, but that's not necessary for calling the /status endpoint. What we need is a way to figure out which steps to run and when. Cucumber tags can help us with this.
4. UI Tests
First, let's group our Features or Scenarios together by a tag. Here we mark our UI feature with a @ui tag:
@ui
Feature: UI - Random Number Generator
  Scenario: Successfully generate a random number
    Given we are expecting a random number between min and max
    And I am on random-number-generator page
    When I enter min 1
    And I enter max 10
    And I press Generate button
    Then I should receive a random number between 1 and 10
Then, based on these tags, we can manipulate what we run for this group of features by using conditional hooks. We do this with separate @Before and @After methods annotated with the relevant tags in our ScenarioHooks:
@Before("@ui")
public void setupForUI() {
    uiContext.getWebDriver();
}
@After("@ui")
public void tearDownForUi(Scenario scenario) throws IOException {
uiContext.getReport().write(scenario);
uiContext.getReport().captureScreenShot(scenario, uiContext.getWebDriver());
uiContext.getWebDriver().quit();
}5. API Tests
Similarly to our UI tests, we can mark our API feature with the @api tag:
@api
Feature: Health check
  Scenario: Should have a working health check
    When I make a GET call on /status
    Then I should receive 200 response status code
    And should receive a non-empty body
We also have our @Before and @After methods with @api tag:
@Before("@api")
public void setupForApi() {
    RestAssuredMockMvc.mockMvc(mvc);
    RestAssuredMockMvc.config = RestAssuredMockMvc.config()
      .logConfig(new LogConfig(apiContext.getReport().getRestLogPrintStream(), true));
}
@After("@api")
public void tearDownForApi(Scenario scenario) throws IOException {
    apiContext.getReport().write(scenario);
}
When we run our AcceptanceTestRunnerIT, we can see that our appropriate setup and teardown steps are being executed for the relevant tests.
6. Conclusion
In this article, we have shown how we can control the execution of different sets of tests and their setup/teardown instructions by using Cucumber Tags and Conditional Hooks.
As always, the code for this article is available over on GitHub.
The post Using Cucumber Tags with JUnit 5 first appeared on Baeldung.


