1. Overview
In this tutorial, we’ll learn and compare the different options for debugging a Quarkus application. They all have one thing in common: We need a debugging client (usually an IDE) that connects to the running JVM and allows us to set breakpoints and read stack traces and variables. However, the options for starting the application (the JVM) differ.
2. Debugging a Java Application
Quarkus is Java-based, so we could use common ways to debug Java applications. We could run a main method from within the IDE, with the IDE’s debugger connecting directly to the started JVM. Or we could build the JAR file (e.g., with Maven) and run it using this command:
java \
  -agentlib:jdwp=transport=dt_socket,server=y,suspend=n,address=*:5005 \
  -jar target/quarkus-app/quarkus-run.jar
We could also use this command to run the application within a container using Docker or podman. We then need to publish the port 5005 to the host.
With the application running, we could connect with the IDE to port 5005. In IntelliJ, we could do this using Run > Edit Configurations > Remote JVM Debug.
3. Quarkus Dev Mode
The best way to debug a Quarkus application is to start it in Dev Mode. This not only starts the JVM in debug mode, listening to port 5005, but also activates features such as the Dev UI, Dev Services, Live Reload, and Continuous Testing. We can find details about these in the Quarkus documentation.
3.1. Start from Command-Line
To start the application from the command line, we could use the following command:
# Maven
mvn quarkus:dev
# Quarkus CLI
quarkus dev
We could optionally provide further parameters to all of these commands:
- -Ddebug=<port> to specify another port than 5005
- -Dsuspend to wait for the debugger to be connected before running the application code
Then, we connect to the JVM with our IDE in the same way as described previously.
3.2. Start from IDE
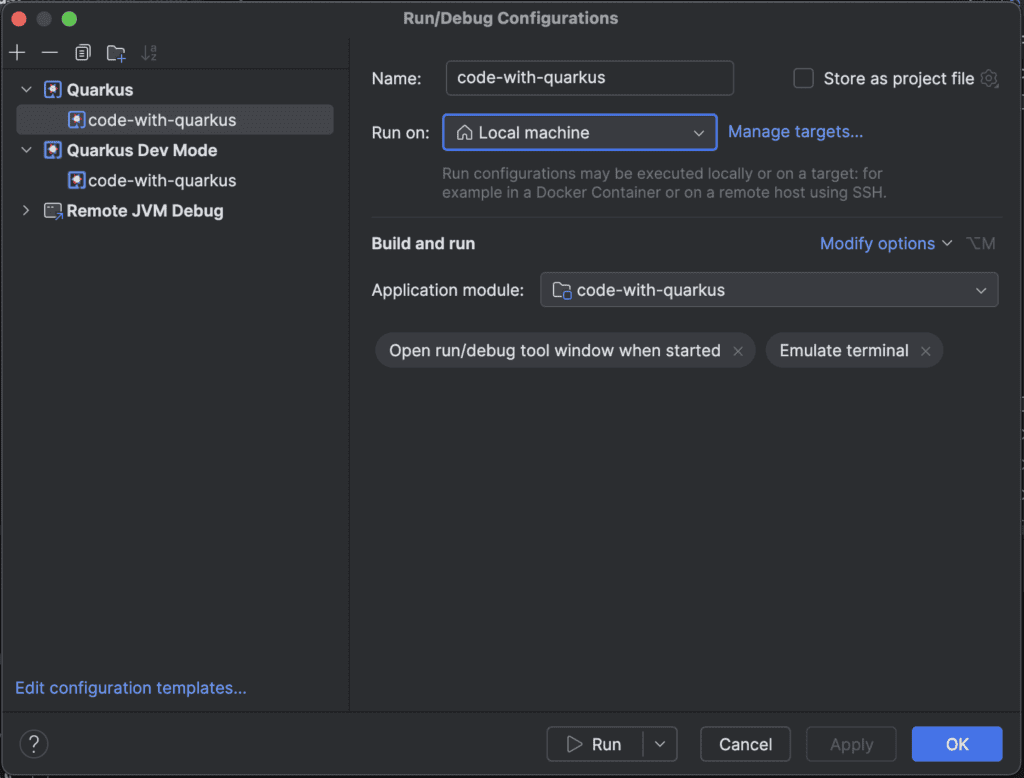
Our IDE might help us start the Quarkus application and connect with the debugger in a single step. With Quarkus plugins (Quarkus, Quarkus Run Configs, and Quarkus Tools) installed, IntelliJ has run configurations that are especially for Quarkus.

If not, Quarkus allows us to create a custom main method that we could run directly from any Java IDE in debug mode:
@QuarkusMain
public class MyQuarkusApplication {
    public static void main(String[] args) {
        Quarkus.run(args);
    }
}
3.3. Quarkus Remote Development
We could also deploy and run the Quarkus application in a container or a Kubernetes environment like OpenShift. For this, we need to add the openshift extension to our application, e.g. using Maven:
# Maven
mvn quarkus:add-extension -Dextensions="io.quarkus:quarkus-openshift"
# Quarkus CLI
quarkus ext add io.quarkus:quarkus-openshift
Then, we could use the following commands to create a project in the OpenShift cluster and to deploy the application as a so-called Mutable JAR to OpenShift:
# login to OpenShift
oc login ...
# create a project (connect to a project)
oc new-project quarkus-remote
# deploy the application to the OpenShift project, incl. a Route
mvn clean package -DskipTests \
  -Dquarkus.kubernetes.deploy=true \
  -Dquarkus.package.jar.type=mutable-jar  \
  -Dquarkus.live-reload.password=changeit \
  -Dquarkus.container-image.build=true \
  -Dquarkus.kubernetes-client.trust-certs=true \
  -Dquarkus.kubernetes.deployment-target=openshift \
  -Dquarkus.openshift.route.expose=true \
  -Dquarkus.openshift.env.vars.quarkus-launch-devmode=true
  -Dquarkus.openshift.env.vars.java-enable-debug=true
# with the Quarkus CLI, use "quarkus build -D..."
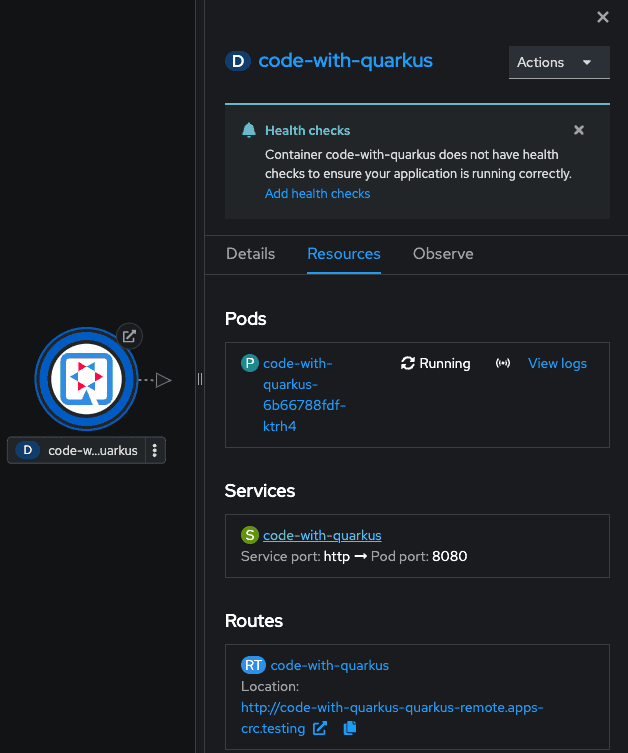
This also activates Live Coding. We could then find a deployment with a single pod, a service, and a route in our OpenShift project:

For remote development with live reload and debugging, we copy the route and run the following command:
# Maven
mvn quarkus:remote-dev \
  -Dquarkus.package.jar.type=mutable-jar \
  -Dquarkus.live-reload.password=changeit \
  -Dquarkus.live-reload.url=http://YOUR_APP_ROUTE_URL
# with the Quarkus CLI, use "quarkus "
Then, we connect to the JVM with our IDE in the same way as described previously.
4. Conclusion
In this article, we learned about the possibility of running our Quarkus application locally and on remote machines in debug mode. Developing and debugging in a container might help fix environmental issues.


