
1. Overview
In this article, we’ll learn how to quickly build a JAR file in the Eclipse IDE. We’ll follow two approaches. First, we’ll use the Eclipse-specific .jardesc file for quick JAR creation. We’ll also learn about the structure of the .jardesc file.
Then, we’ll create a custom Ant Builder to automatically produce a JAR file of a project on a successful build.
2. Using .jardesc File
A .jardesc file defines how to turn a Java project into a JAR (Java Archive) file. The JAR file includes the necessary source and class files, the dependencies, resources, and a manifest file that contains information about the JAR file.
2.1. Creating a .jardesc
The .jardesc is an XML file that we can use to quickly create a JAR in a few simple steps inside the Eclipse IDE. We can generate the file in the JAR export wizard in a fairly user-friendly way.
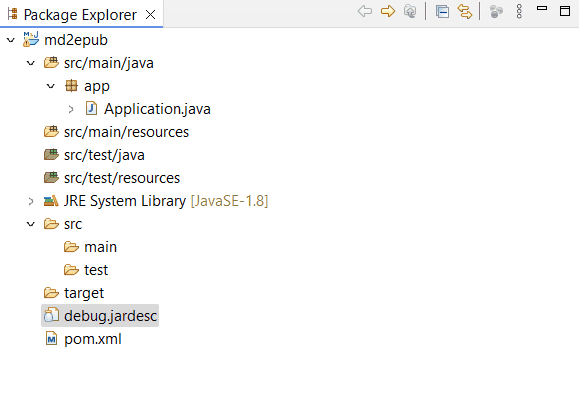
For instance, we have the following project layout:
md2epub
├── pom.xml
└── src
├── main
│ ├── java
│ │ └── app
│ │ └── Application.java
│ └── resources
└── test
├── java
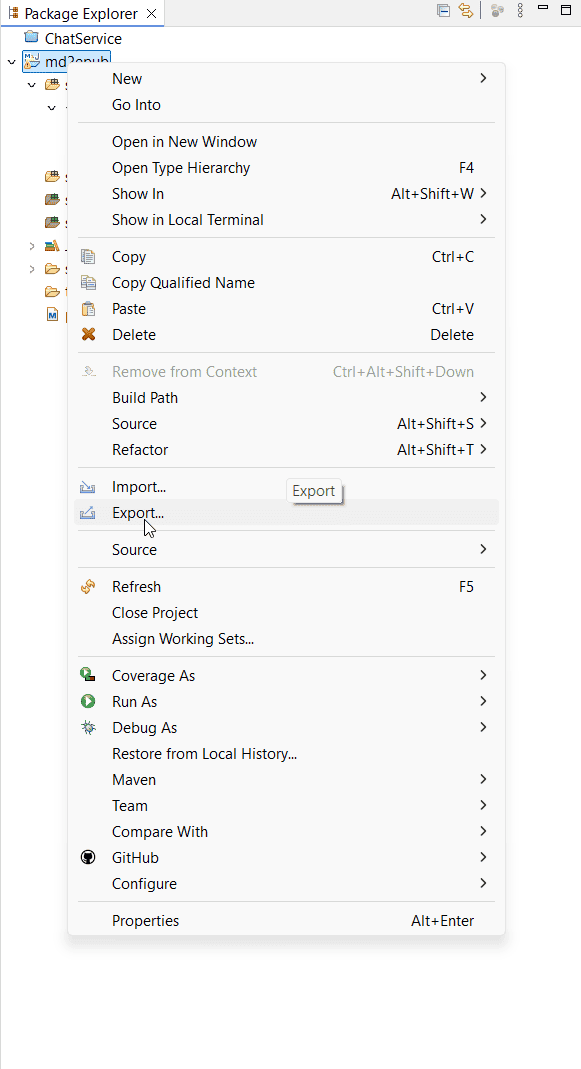
└── resourcesWe create a JAR of the project by right-clicking the project in the package explorer view and selecting the “Export” option from the menu:
Once we select “Export“, we’ll be presented with the Export Wizard, where we choose the export format:
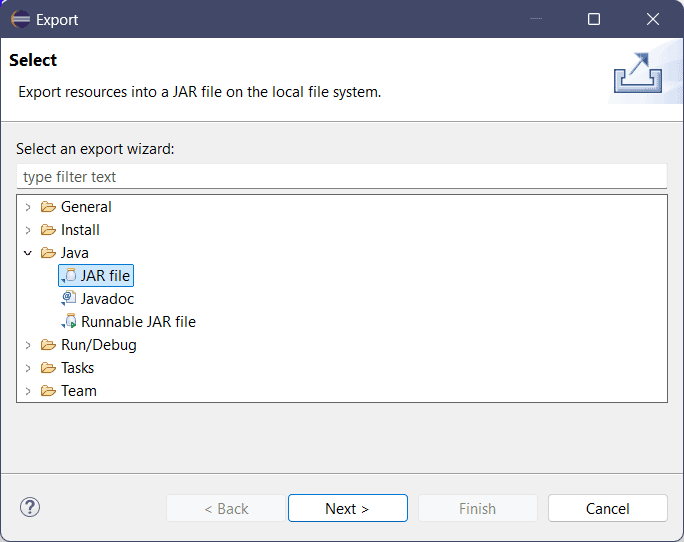
From the tree, we select “JAR file” and press “Next“:
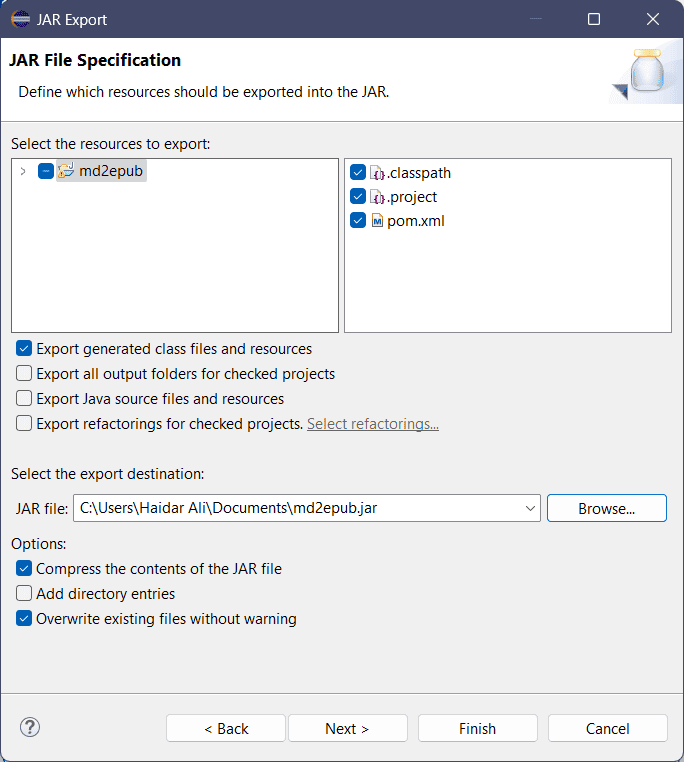
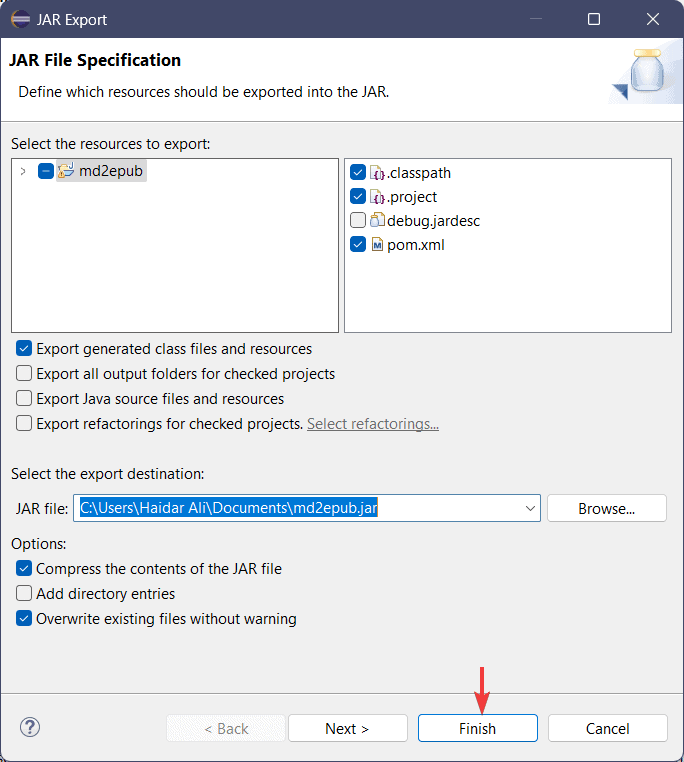
Here, we select the required files we want to include in the JAR file. Then, we choose the destination for the JAR file and check the required options. Once done, press “Next“:

This is an important step. Here, we check the “Save the description of this JAR in the workspace” option, which creates a .jardesc file. In this scenario, the debug.jardesc file will be created at the root of the project. Once we’re set, we press “Next“:
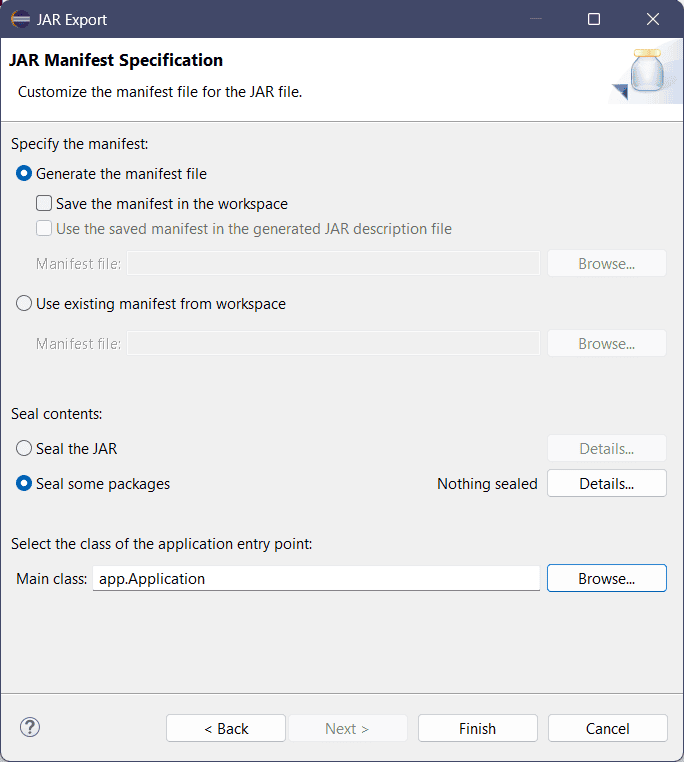
In this view, we can generate or select an existing manifest file by choosing the “Use existing manifest from workspace” option. However, in this scenario, we create a default manifest file.
At this point, we’re done and we press “Finish“. Once the file is created, we can see it in Package Explorer:
Now, every time, when we need to create a JAR file, we double-click this file and it presents us with the options dialog:
Notably, it remembers all the options we initially selected when creating the JAR file. We can change these options and press “Finish” to produce the JAR at the specified location.
2.2. Structure of a .jardesc
The .jardesc file is a standard XML file:
<?xml version="1.0" encoding="UTF-8" standalone="no"?>
<jardesc>
    <jar path="C:/Users/Haidar Ali/Documents/md2epub.jar"/>
    <options buildIfNeeded="true" compress="true" descriptionLocation="/md2epub/debug.jardesc"
      exportErrors="true" exportWarnings="true" includeDirectoryEntries="false" overwrite="true"
      saveDescription="true" storeRefactorings="false" useSourceFolders="false"/>
    <storedRefactorings deprecationInfo="true" structuralOnly="false"/>
    <selectedProjects/>
    <manifest generateManifest="true" manifestLocation="" manifestVersion="1.0" reuseManifest="false"
      saveManifest="false" usesManifest="true">
        <sealing sealJar="false">
            <packagesToSeal/>
            <packagesToUnSeal/>
        </sealing>
    </manifest>
    <selectedElements exportClassFiles="true" exportJavaFiles="false" exportOutputFolder="false">
        <folder path="/md2epub/src"/>
        <folder path="/md2epub/target"/>
        ...
    </selectedElements>
</jardesc>
We can change these options with no issues. Better yet, we can create a copy of this file that we tune for our default .jardesc configuration and use that file in new projects.
This approach is indeed very productive. However, there are some limitations to it. One of the limitations is the absence of adding dynamic information to the filename. For instance, we can’t add a build number or date to the filename. Therefore, we’ll have to add this information manually.
3. Creating JAR With Ant Builder
In Eclipse, we can create custom builders that can perform automated tasks during project building. For our use case, we’ll define an Ant Builder that creates the JAR file during the project build.
First, we’ll need to create a build.xml file in the workspace root by heading over to New → File:
<?xml version="1.0" ?>
<!-- Build file for creating JAR file -->
<project name="md2epub" default="CreateJar">
    <target name="CreateJar" description="Create JAR file">
        <!-- JAR Options -->
        <jar jarfile="debug.jar" basedir="." includes="*.class" />
    </target>
</project>
This file specifies basic project information and options for the JAR. Next, we’ll create a custom Ant Builder by going to File -> Properties:
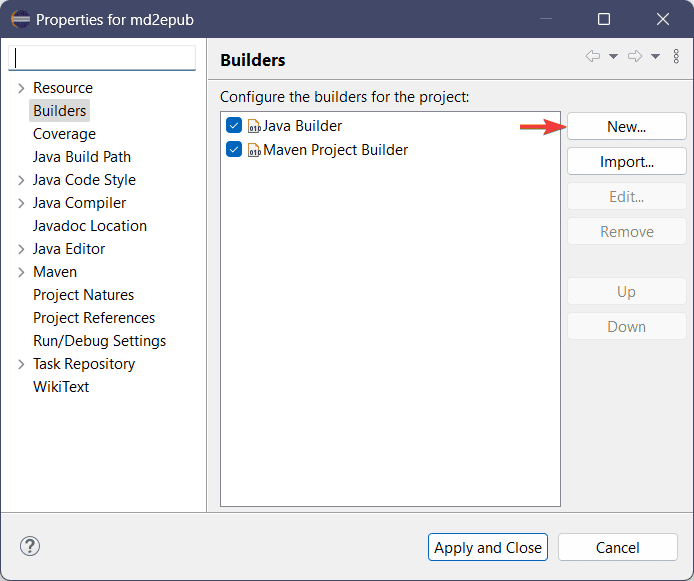
Here, we navigate to “Builders” and select “New“:
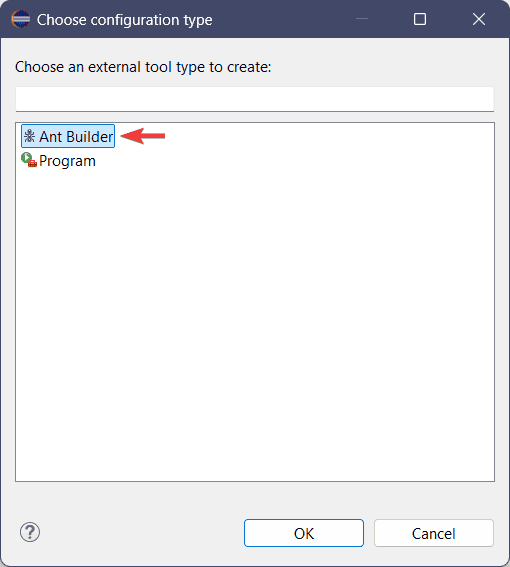
We select “Ant Builder” from the options and press “OK“. It displays the configuration dialog:
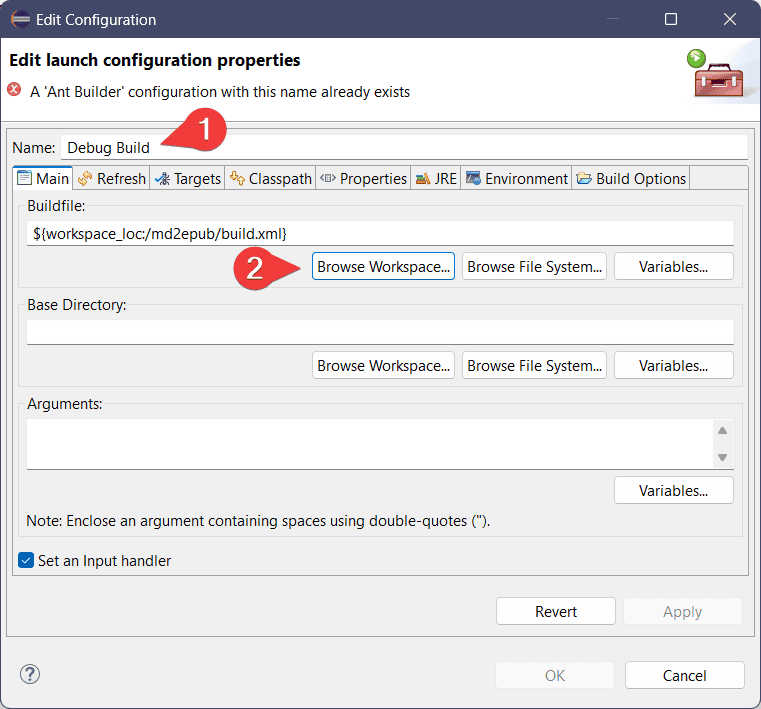
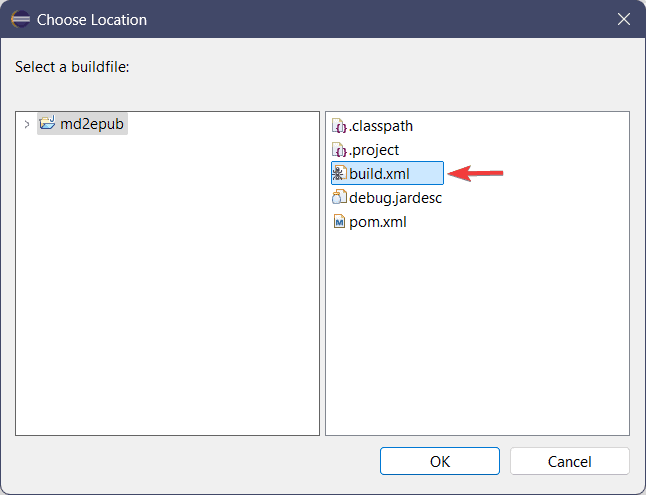
In the view, we rename the configuration and select the build.xml file, which we previously added to the workspace:
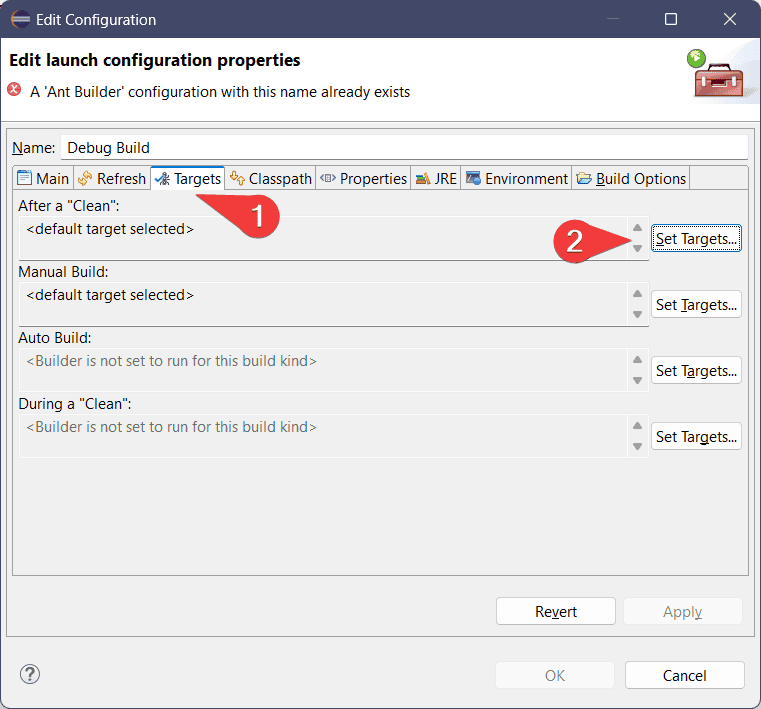
Afterward, we head over to the “Targets” tab and select “Set Targets“:
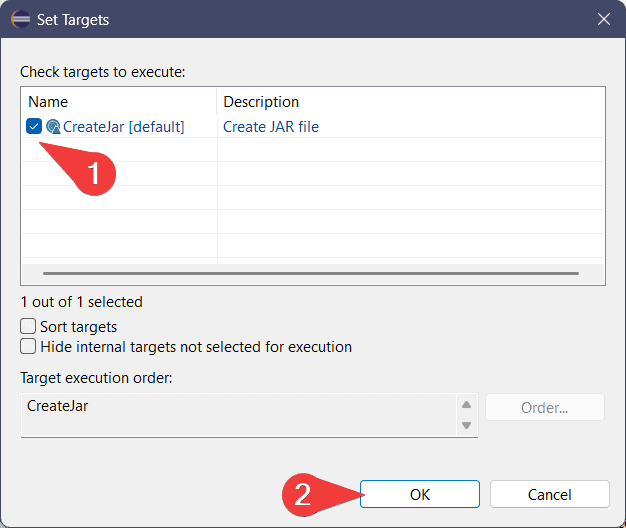
In the list, we can observe that it automatically picked the “CreateJar” target from our build.xml file. It contains other targets if they’re available in build.xml. However, in this case, we already have one which will be set by default:
Now, when we successfully build the project, it creates debug.jar in the workspace root:
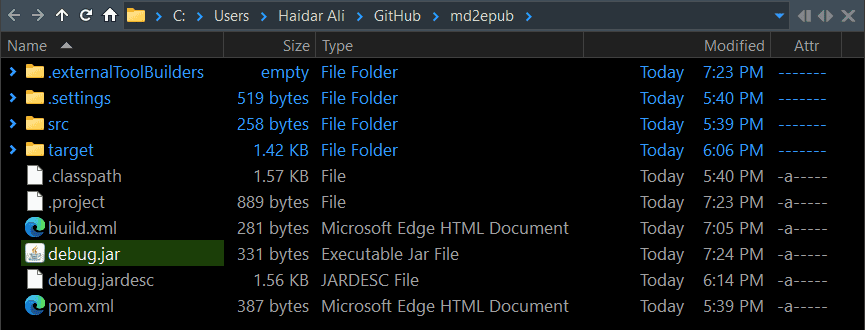
We can change the filename in build.xml if we need to.
4. Conclusion
This article covered two quick methods for creating a JAR file in Eclipse. We can use any one of these approaches depending on the project. For a simple project, creating and using a .jardesc file will suffice. However, for complex projects, using an Ant Builder is a good choice due to the flexibility it offers.


