1. Overview
In this article, we’re going to use Apache JMeter to configure and run performance tests.
2. Setting up JMeter
Let’s download JMeter, unzip it, go to the bin folder and run the executable (*.bat for Windows and *.sh for Linux/Unix).
Next, we just need to add this folder to the path environment variable so that it’s accessible from the command line.
The most stable version at the time of writing is the 3.3 – we can check the newest version here.
3. Creating JMeter Scripts
Now let’s write our first JMeter script (a file containing a technical description of our tests).
This API is a simple SpringBoot application exposing a REST API.
Let’s update the Test plan one and change its name first, then add a Thread Group.
A Thread Group allows us to know the user flow and simulates how they interact with the app, right click on our script name on the GUI and follow the selected menu:

Now we head to the configuration part of the Thread Group, where we specify the number of users making requests to our application in parallel:
Here, we specified parameters like:
– Name: the name we want to give to the thread group
– The number of Threads (users): the number of parallel users
– Ramp-up time: time needed for going from 0 to the declared number of users
– Loop count: number of repetitions
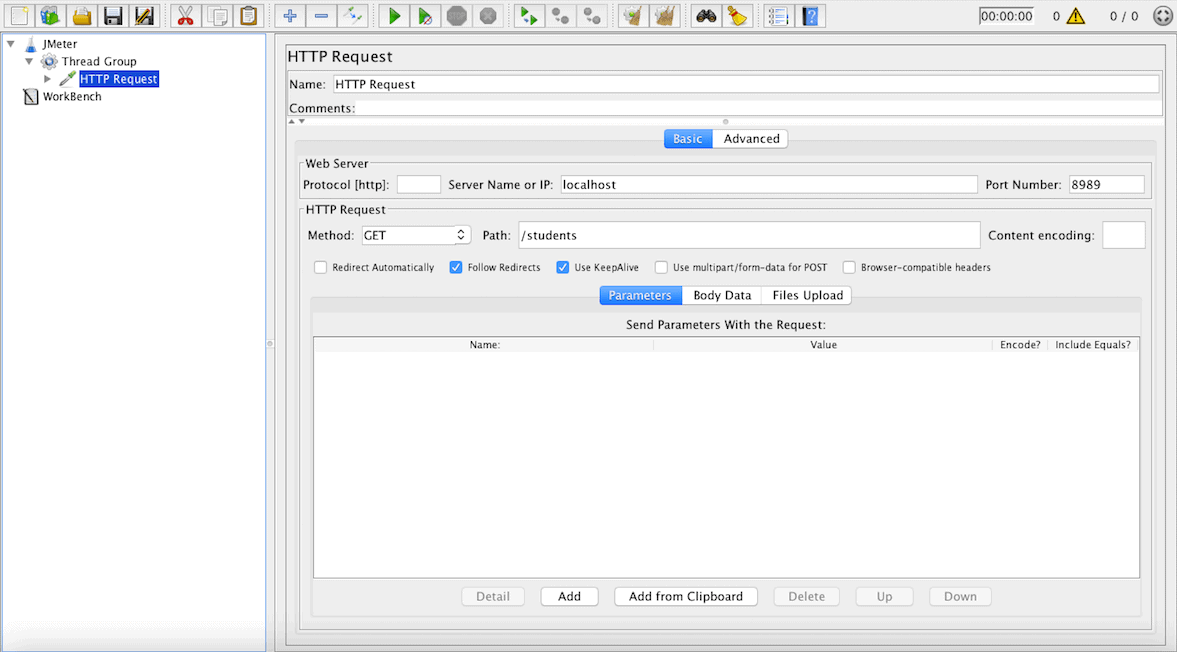
Add an HTTP Request as it’s the one we’ll simulating as coming from each of 5 users.
Let’s fill the info to address our API described up there like in the image below:
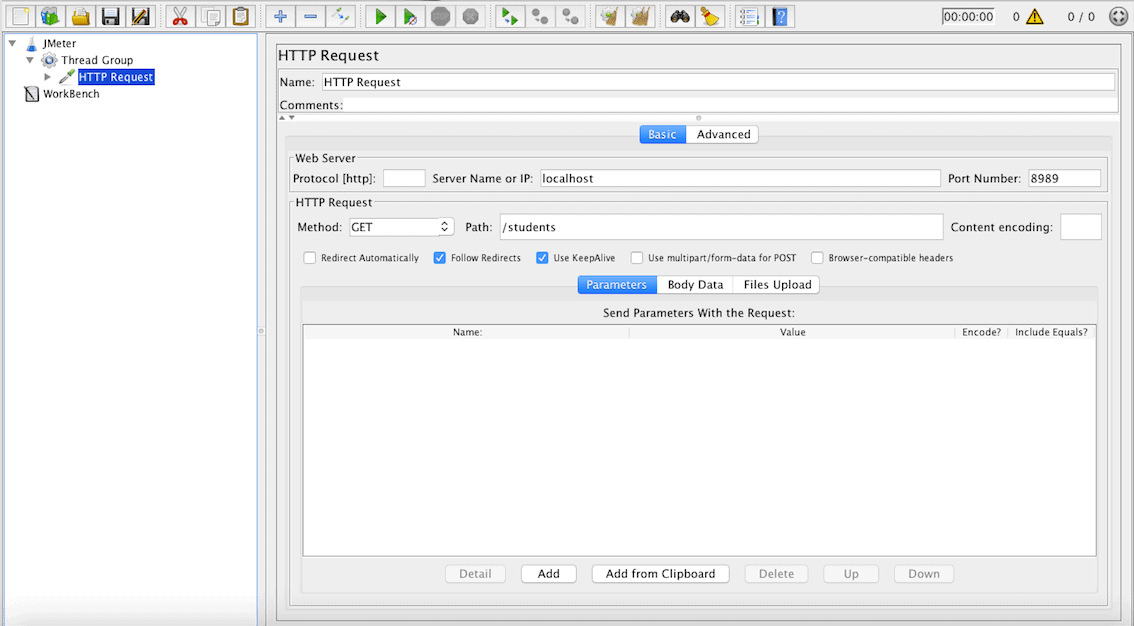
We just fill the website address, the port, and the specific path.
Next, let’s simulate users’ requests after adding a View Results Tree (Use View Results in Table if the results is a list of records) by following the menu “Add > Listener”.
Hit the green arrow right button on the top to run the test and see the response data:
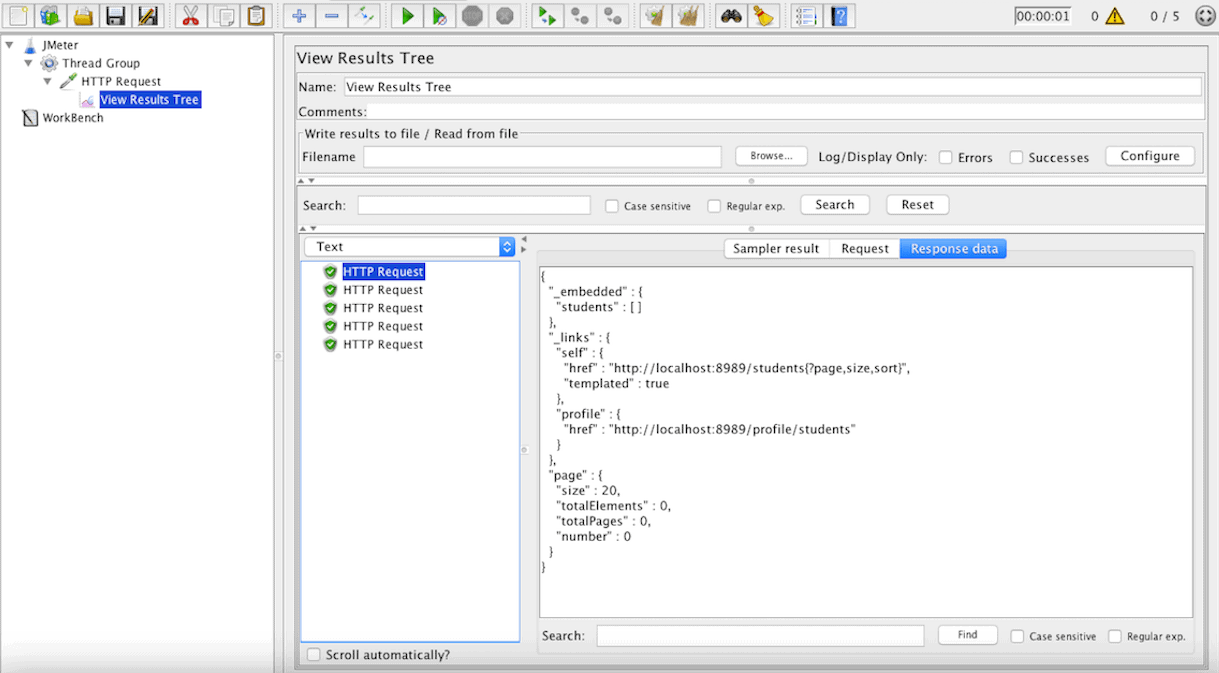
We can see a more detailed representation of the response on the Sampler result tab.
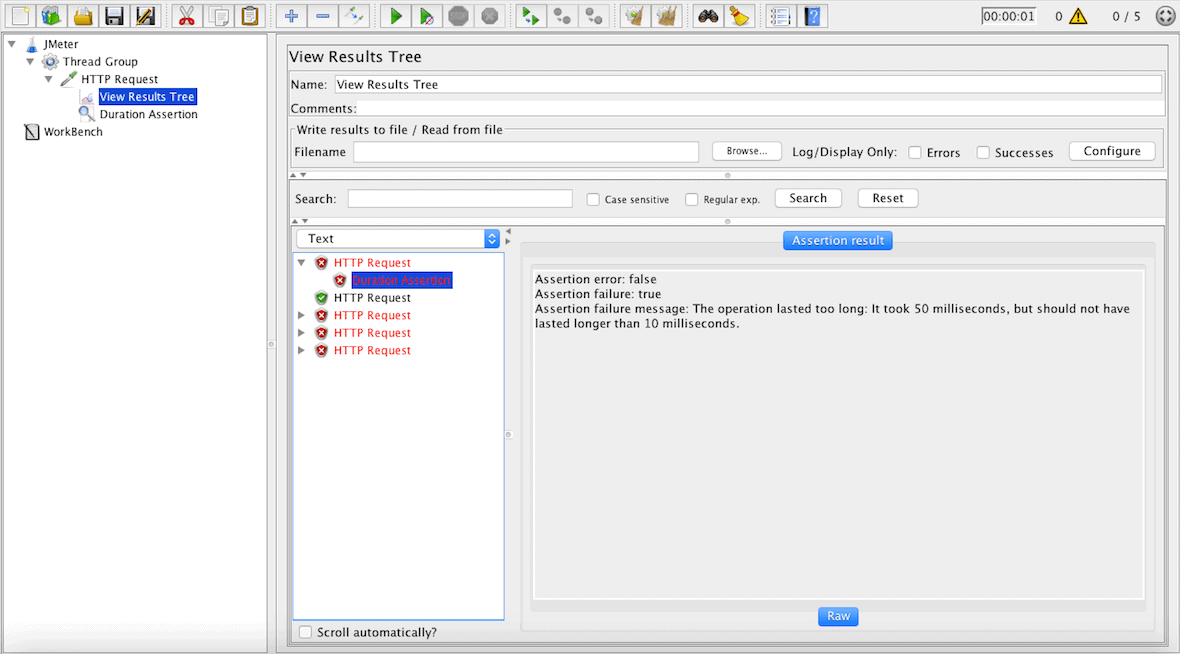
Let’s end by adding a Duration Assertion in the HTTP Request, so every request that lasts longer than ten milliseconds will be considered as a failed test:
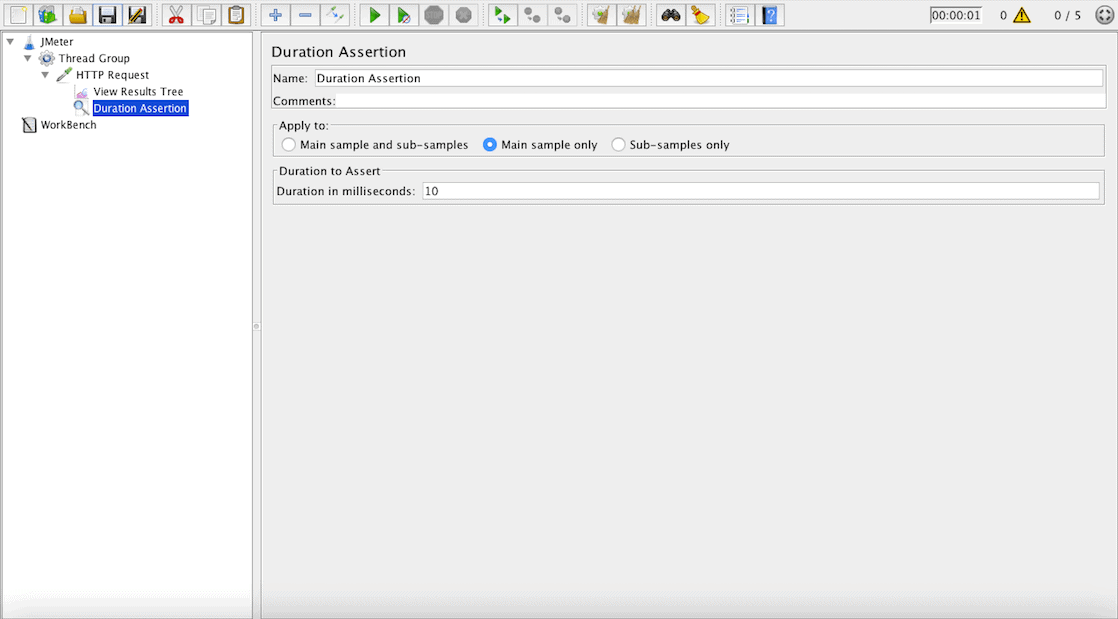
After rerunning the test, we see that there are some (here it’s 3) users that cannot get the lists of students in less than ten milliseconds:
Now, let’s save the test with the extension .jmx in the resource folder of the API.
More elements are available to configure our test file:
- JDBC Request: useful to send a JDBC request(SQL query) to a database, before using it we need to set up a JDBC connection configuration element
- XML Assertion: tests that the response data is of a properly correct XML document
- Size Assertion: asserts that the response contains the right number of bytes in it
- JMS Publisher: to publish messages to a given target(topic/queue) following J2EE specification for messaging
All available components are detailed in the user manual.
4. Run the JMeter tests
There’re two ways to run JMeter tests, one of them consists of using the available Maven plugin and the other one the standalone JMeter app in the non-GUI mode.
In any case, both need to know where to reach the JMeter script we configured earlier.
4.1. JMeter Maven Plugin
JMeter Maven Plugin is a Maven plugin that brings the facility to run JMeter tests as part of our build; his last version right now is 2.6.0 who is compatible with Apache JMeter 3.3.
Let’s add it to the pom.xml of our project:
<plugin>
    <groupId>com.lazerycode.jmeter</groupId>
    <artifactId>jmeter-maven-plugin</artifactId>
    <version>2.6.0</version>
    <executions>
        <execution>
            <id>jmeter-tests</id>
            <goals>
                <goal>jmeter</goal>
            </goals>
        </execution>
    </executions>
    <configuration>
        <testFilesDirectory>${project.basedir}/src/main/resources</testFilesDirectory>
        <resultsDirectory>${project.basedir}/src/main/resources</resultsDirectory>
    </configuration>
</plugin>
After this, we can run all our tests with mvn verify or just the JMeter ones with mvn jmeter:jmeter; here is the console output of the command:

Note: Here we specified the directory where our tests are located in the project, either the default one(${project.basedir}/src/test/jmeter) will be chosen; likewise is configured the result directory else the default one will be ${project.basedir}/target/jmeter/results.
The full plugin documentation is accessible here.
4.2. Non-GUI Mode
The other way to do it’s via the JMeter executable, assuming that it’s available via the command line we can do this:
jmeter -Jjmeter.save.saveservice.output_format=xml
-n -t src/main/resources/JMeter.jmx -l src/main/resources/JMeter.jtl
We set XML as the output format, which fills the exact test file and the result one.
Note: it’s recommended to not use GUI mode for load testing, only for test creation and test debugging.
5. Conclusion
In this quick tutorial, we’ve set up Apache JMeter on a SpringBoot app to run performance tests with a Maven plugin while looking practically how to design a basic performance test.
As always, the source code for this article can be found over on GitHub.