Quantcast
Channel: Baeldung
Viewing all 4703 articles
Browse latest View live

Tips for Creating Efficient Docker Images

$
0
0

1. Overview

During the past few years, Docker has become the de facto standard for containerization on Linux. Docker is easy to use and provides lightweight virtualization, making it ideal for building applications and microservices as more and more services run in the cloud.

Although creating our first images can be relatively easy, building an efficient image requires forethought. In this tutorial, we'll see examples of how to write efficient Docker images and the reasons behind each recommendation.

Let's start with the use of official images.

2. Base Your Image on an Official One

2.1. What Are Official Images?

Official Docker images are those created and maintained by a team sponsored by Docker, or at least approved by them. They manage the Docker images publicly on GitHub projects. They also make changes when vulnerabilities are discovered and ensure that the image is up-to-date and follows best practices.

Let's see this more clearly with an example that uses the Nginx official image. The creators of the webserver maintain this image.

Let's say we want to use Nginx to host our static website. We can create our Dockerfile and base it on the official image:

FROM nginx:1.19.2
COPY my-static-website/ /usr/share/nginx/html

Then we can build our image:

$ docker build -t my-static-website .

And lastly, run it:

$ docker run -p 8080:80 -d my-static-website

Our Dockerfile is only two lines long. The base official image took care of all the details of an Nginx server, like a default configuration file and ports that should be exposed.

More specifically, the base image stops Nginx from becoming a daemon and ending the initial process. This behavior is expected in other environments, but in Docker, this is interpreted as the end of the application, so the container terminates. The solution is to configure Nginx not to become a daemon. This is the configuration in the official image:

CMD ["nginx", "-g", "daemon off;"]

When we base our images on official ones, we avoid unexpected errors that are hard to debug. The official image maintainers are specialists in Docker and in the software we want to use, so we benefit from all their knowledge and potentially save time, too.

2.2. Images Maintained by Their Creators

Although not official in the sense explained before, there are other images in the Docker Hub that are also maintained by the creators of the application.

Let's illustrate this with an example. EMQX is an MQTT Message broker. Let's say we want to use this broker as one of the microservices in our application. We could base our image on theirs and add our configuration file. Or even better, we could use their provision for configuring EMQX through environment variables.

For example, to change the default port where EMQX is listening, we can add the EMQX_LISTENER__TCP__EXTERNAL environment variable:

$ docker run -d -e EMQX_LISTENER__TCP__EXTERNAL=9999 -p 9999:9999 emqx/emqx:v4.1.3

As the community behind a particular software, they are in the best position to provide a Docker image with their software.

In some cases, we won't find an official image of any kind for the application we want to use. Even in those situations, we'll benefit from searching the Docker Hub for images we can use as a reference.

Let's take H2 as an example. H2 is a lightweight relational database written in Java. Although there are no official images for H2, a third party created one and documented it well. We can use their GitHub project to learn how to use H2 as a standalone server, and even collaborate to keep the project up-to-date.

Even if we use a Docker image project only as a starting point to build our image, we may learn more than starting from scratch.

3. Avoid Building New Images When Possible

When getting up-to-speed with Docker, we may get in the habit of always creating new images, even when there is little change compared to the base image. For those cases, we may consider adding our configuration directly to the running container instead of building an image.

Custom Docker images need to be re-built every time there is a change. They also need to be uploaded to a registry afterward. If the image contains sensitive information, we may need to store it on a private repository. In some cases, we may get more benefit by using base images and configuring them dynamically, instead of building a custom image every time.

Let's use HAProxy as an example to illustrate this. Like Nginx, HAProxy can be used as a reverse proxy. The Docker community maintains its official image.

Suppose we need to configure HAProxy to redirect requests to the appropriate microservices in our application. All that logic can be written in one configuration file, let's say my-config.cfg. The Docker image requires us to place that configuration on a specific path.

Let's see how we can run HAProxy with our custom configuration mounted on the running container:

$ docker run -d -v my-config.cfg:/usr/local/etc/haproxy/haproxy.cfg:ro haproxy:2.2.2

This way, even upgrading HAProxy becomes more straightforward, as we only need to change the tag. Of course, we also need to confirm that our configuration still works for the new version.

If we're building a solution composed of many containers, we may already be using an orchestrator, like Docker Swarm or Kubernetes. They provide the means to store configuration and then link it to running containers. Swarm calls them Configs, and Kubernetes calls them ConfigMaps.

Orchestration tools already consider that we may store some configuration outside the images we use. Keeping our configuration outside the image may be the best compromise in some cases.

4. Create Slimmed Down Images

Image size is important for two reasons. First, lighter images are transferred faster. It may not look like a game-changer when we're building the image in our development machine. Still, when we build several images on a CI/CD pipeline and deploy maybe to several servers, the total time saved on each deployment may be perceptible.

Second, to achieve a slimmer version of our image, we need to remove extra packages that the image isn't using. This will help us decrease the attack surface and, therefore, increase the security of the images.

Let's see two easy ways to reduce the size of a Docker image.

4.1. Use Slim Versions When Available

Here, we have two main options: the slim version of Debian and the Alpine Linux distribution.

The slim version is an effort of the Debian community to prune unnecessary files from the standard image. Many Docker images already are slimmed-down versions based on Debian.

For example, the HAProxy and Nginx images are based on the slim version of the Debian distribution debian:buster-slim. Thanks to that, these images went from hundreds of MB to only a few dozen MB.

In some other cases, the image offers a slim version along with the standard full-size version. For example, the latest Python image provides a slim version, currently python:3.7.9-slim, which is almost ten times smaller than the standard image.

On the other hand, many images offer an Alpine version, like the Python image we mentioned before. Images based on Alpine are usually around 10 MB in size.

Alpine Linux was designed from the beginning with resource efficiency and security in mind. This makes it a perfect fit for base Docker images.

A point to keep in mind is that Alpine Linux chose some years ago to change system libraries from the more common glibc to musl. Although most software will work without issues, we do well to test our application thoroughly if we choose Alpine as our base image.

4.2. Use Multi-Stage Builds

The multi-stage build feature allows building images in more than one stage in the same Dockerfile, typically using the result of a previous stage in the next one. Let's see how this can be useful.

Let's say we want to use HAProxy and configure it dynamically with its REST API, the Data Plane API. Because this API binary is not available in the base HAProxy image, we need to download it during build time.

We can download the HAProxy API binary in one stage and make it available to the next:

FROM haproxy:2.2.2-alpine AS downloadapi
RUN apk add --no-cache curl
RUN curl -L https://github.com/haproxytech/dataplaneapi/releases/download/v2.1.0/dataplaneapi_2.1.0_Linux_x86_64.tar.gz --output api.tar.gz
RUN tar -xf api.tar.gz
RUN cp build/dataplaneapi /usr/local/bin/
FROM haproxy:2.2.2-alpine
COPY --from=downloadapi /usr/local/bin/dataplaneapi /usr/local/bin/dataplaneapi
...

The first stage, downloadapi, downloads the latest API and uncompresses the tar file. The second stage copies the binary so that HAProxy can use it later. We don't need to uninstall curl or delete the downloaded tar file, as the first stage is completely discarded and won't be present in the final image.

There are some other situations where the benefit of multi-stage images is even clearer. For example, if we need to build from source code, the final image won't need any build tools. A first stage can install all building tools and build the binaries, and the next stage will only copy those binaries.

Even if we don't always use this feature, it's good to know that it exists. In some cases, it may be the best choice to slim down our image.

5. Conclusion

Containerization is here to stay, and Docker is the easiest way to start using it. Its simplicity helps us be productive quickly, although some lessons are only learned through experience.

In this tutorial, we reviewed some tips to build more robust and secure images. As containers are the building blocks of modern applications, the more reliable they are, the stronger our application will be.

The post Tips for Creating Efficient Docker Images first appeared on Baeldung.


Using Hidden Inputs with Spring and Thymeleaf

$
0
0

1. Introduction

Thymeleaf is one of the most popular template engines in the Java ecosystem. It allows us to easily use data from our Java applications to create dynamic HTML pages.

In this tutorial, we'll look at several ways to use hidden inputs with Spring and Thymeleaf.

2. Thymeleaf with HTML Forms

Before we look at working with hidden fields, let's take a step back and look at how Thymeleaf works with HTML forms in general.

The most common use case is to use an HTML form that maps directly to a DTO in our application.

For example, let's assume we're writing a blog application and have a DTO that represents a single blog post:

class BlogDTO {
    long id;
    String title;
    String body;
    String category;
    String author;
    Date publishedDate;  
}

We can use an HTML form to create a new instance of this DTO using Thymeleaf and Java:

<form action="#" method="post" th:action="@{/blog}" th:object="${blog}">
    <input type="text" th:field="*{title}">
    <input type="text" th:field="*{category}">
    <textarea th:field="*{body}"></textarea>
</form>

Notice that the fields in our blog-post DTO map to a single input in the HTML form. This works well in most cases, but what fields shouldn't be editable? This is where hidden inputs can help.

For example, each blog post has a unique ID field that users should not be allowed to edit. Using hidden inputs, we can pass the ID field into the HTML form without allowing it to be displayed or edited.

3. Using the th:field Attribute

The quickest way to assign a value to a hidden input is to use the th:field attribute:

<input type="hidden" th:field="*{blogId}" id="blogId">

This is the simplest way because we don't have to specify the value attribute, but it may not be supported in older versions of Thymeleaf.

4. Using the th:attr Attribute

The next way we can use hidden inputs with Thymeleaf is using the built-in th:attr attribute:

<input type="hidden" th:value="${blog.id}" th:attr="name='blogId'"/>

In this case, we have to reference the id field using the blog object.

5. Using the name Attribute

Another less verbose approach is to use the standard HTML name attribute:

<input type="hidden" th:value="${blog.id}" name="blogId" />

It solely relies on standard HTML attributes. In this case, we also must reference the id field using the blog object.

6. Conclusion

In this tutorial, we looked at several ways to use hidden inputs with Thymeleaf. This is a useful technique for passing read-only fields from our DTOs into HTML forms.

As always, all the code examples used in this tutorial can be found over on Github.

The post Using Hidden Inputs with Spring and Thymeleaf first appeared on Baeldung.


Hiding Endpoints From Swagger Documentation in Spring Boot

$
0
0

1. Overview

While creating Swagger documentation, we often need to hide endpoints from being exposed to end-users. The most common scenario to do so is when an endpoint is not ready yet. Also, we could have some private endpoints which we don't want to expose.

In this short article, we'll have a look at how we can hide endpoints from Swagger API documentation. To achieve this, we'll be using annotations in our controller class.

2. Hiding an Endpoint with @ApiIgnore

The @ApiIgnore annotation allows us to hide an endpoint. Let's add this annotation for an endpoint in our controller:

@ApiIgnore
@ApiOperation(value = "This method is used to get the author name.")
@GetMapping("/getAuthor")
public String getAuthor() {
    return "Umang Budhwar";
}

3. Hiding an Endpoint with @ApiOperation

Alternatively, we can use @ApiOperation to hide a single endpoint:

@ApiOperation(value = "This method is used to get the current date.", hidden = true)
@GetMapping("/getDate")
public LocalDate getDate() {
    return LocalDate.now();
}

Notice that we need to set the hidden property to true to make Swagger ignore this endpoint.

4. Hiding all Endpoints with @ApiIgnore

Nonetheless, sometimes we need to hide all the endpoints of a controller class. We can achieve this by annotating the controller class with @ApiIgnore:

@ApiIgnore
@RestController
public class RegularRestController {
    // regular code
}

It is to be noted that this will hide the controller itself from the documentation.

5. Conclusion

In this tutorial, we've seen how we can hide the endpoints from Swagger documentation. We discussed how to hide a single endpoint and also all the endpoints of a controller class.

As always, the complete code for this example is available over on GitHub.

The post Hiding Endpoints From Swagger Documentation in Spring Boot first appeared on Baeldung.


Java Weekly, Issue 349

$
0
0

1. Spring and Java

>> Composite Repositories – Extend your Spring Data JPA Repository [thorben-janssen.com]

When derived queries come up short: enriching and extending Spring Data JPA repositories with custom and complex queries.

>> Heap Snapshotting [inside.java]

Meet Heap Snapshotting: an approach to reduce the startup time of JVM applications.

>> Spring Boot Test Slices Overview and Usage [rieckpil.de]

Testing one layer without involving others: an in-depth guide on testing application slices in Spring Boot.

Also worth reading:

Webinars and presentations:

Time to upgrade:

2. Technical

>> GitHub Actions and Maven releases [blog.frankel.ch]

Releasing Maven artifacts via GitHub actions: Covering distribution and release management, authentication, and GitHub integration.

Also worth reading:

3. Musings

>> Audio-video setup for meetings and videos [kylecordes.com]

Getting ready for a technical talk or daily meeting? Here are some useful tips to make the most of video calls.

Also worth reading:

4. Comics

And my favorite Dilberts of the week:

>> No More Id Badges [dilbert.com]

>> Word Salad [dilbert.com]

>> Not a Monopoly [dilbert.com]

5. Pick of the Week

>> The Levels of Eye Contact [markmanson.net]

The post Java Weekly, Issue 349 first appeared on Baeldung.


Custom User Attributes with Keycloak

$
0
0

1. Overview

Keycloak is a third-party authorization server that manages users of our web or mobile applications.

It offers some default attributes, such as first name, last name, and email to be stored for any given user. But many times, these are not enough, and we might need to add some extra user attributes specific to our application.

In this tutorial, we'll see how we can add custom user attributes to our Keycloak authorization server and access them in a Spring-based backend.

First, we'll see this for a standalone Keycloak server, and then for an embedded one.

2. Standalone Server

2.1. Adding Custom User Attributes

The first step here is to go to Keycloak's admin console. For that, we'll need to start the server by running this command from our Keycloak distribution's bin folder:

./standalone.sh -Djboss.socket.binding.port-offset=100

Then we need to go to the admin console and key-in the initial1/zaq1!QAZ credentials.

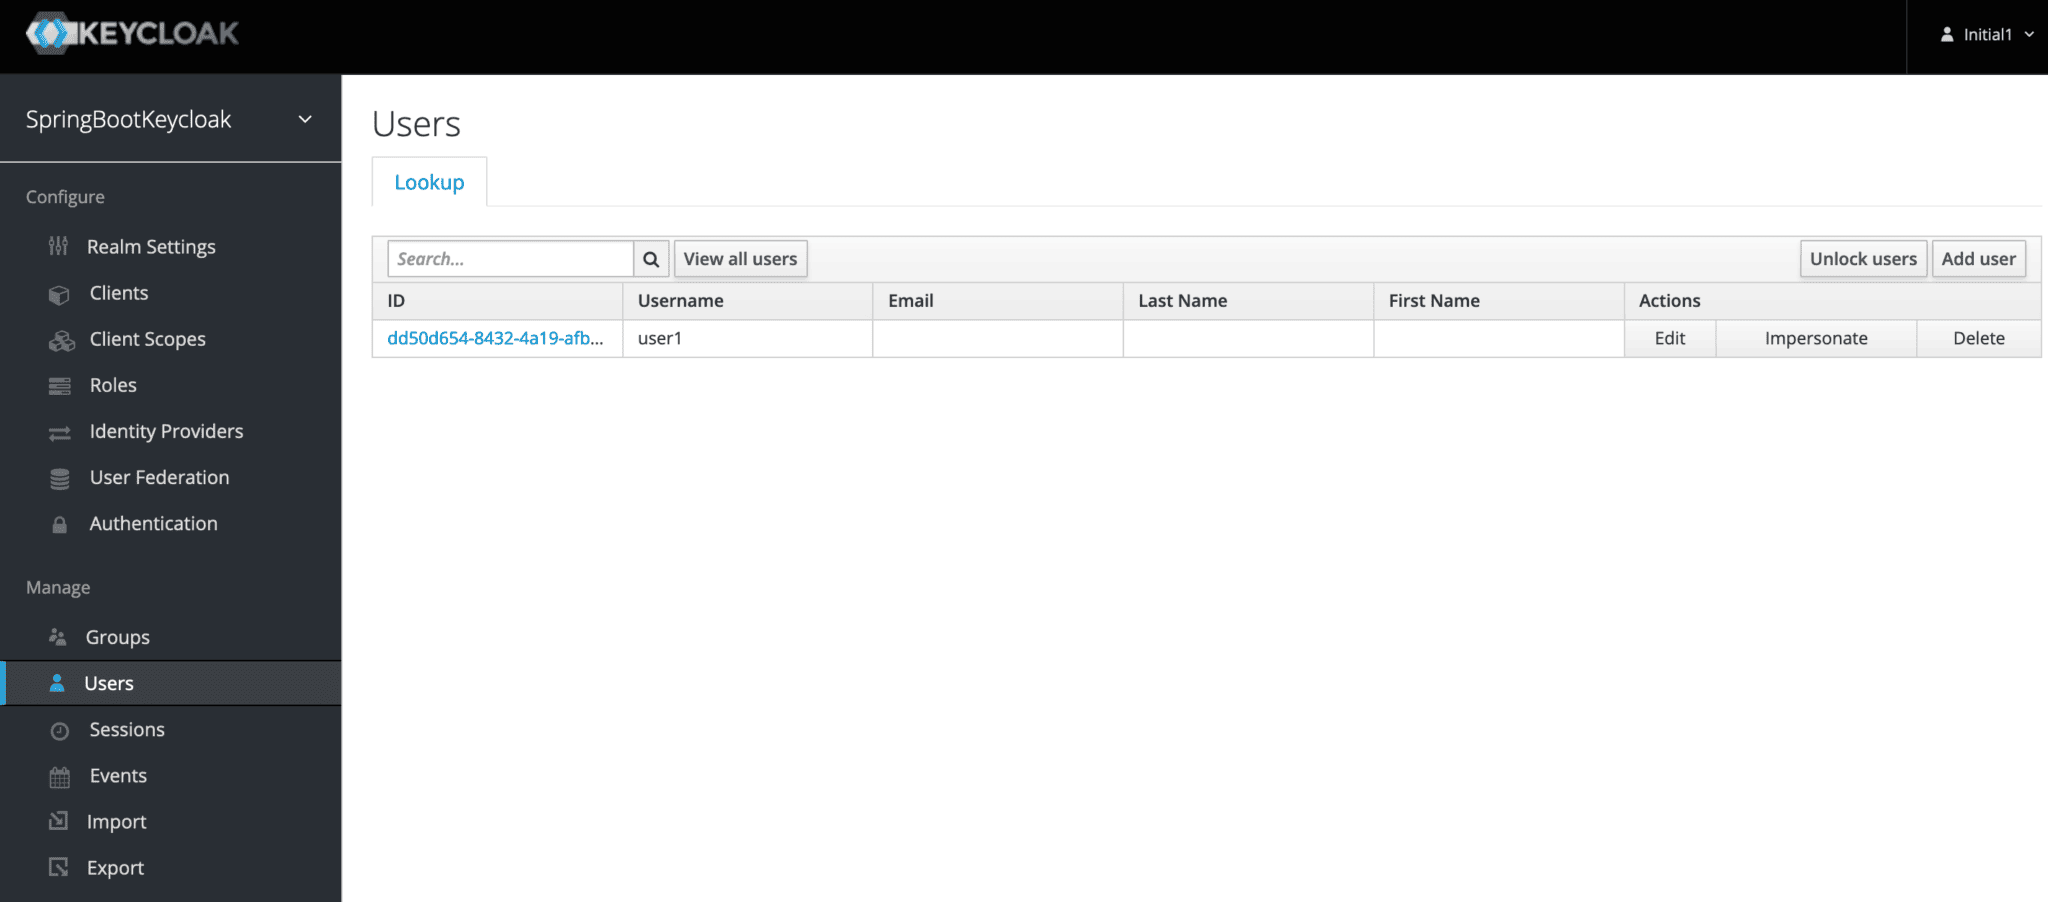
Next, we'll click on Users under the Manage tab and then View all users:

Here we can see the user we'd added previouslyuser1.

Now let's click on its ID and go to the Attributes tab to add a new one, DOB for date of birth:

After clicking Save, the custom attribute gets added to the user's information.

Next, we need to add a mapping for this attribute as a custom claim so that it's available in the JSON payload for the user's token.

For that, we need to go to our application's client on the admin console. Recall that earlier we'd created a client, login-app:

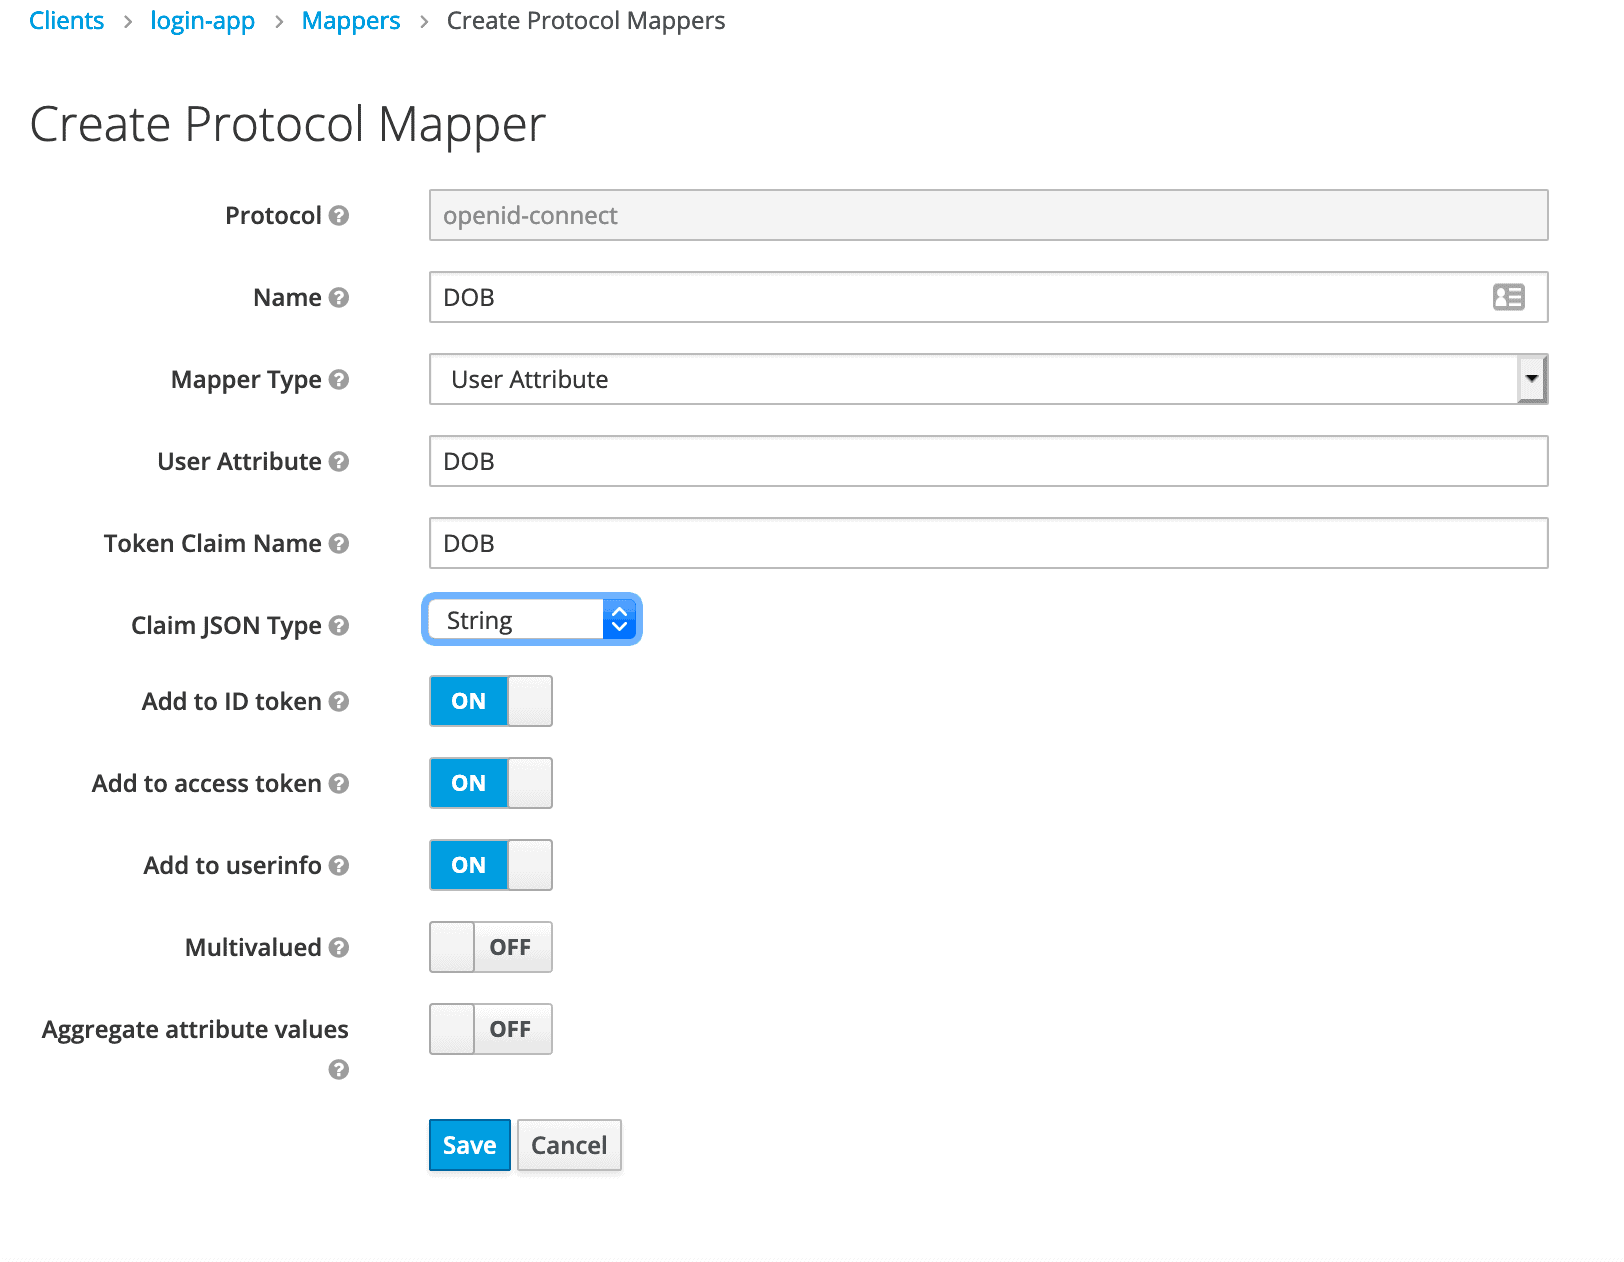
Now, let's click on it and go to its Mappers tab to create a new mapping:

First, we'll select the Mapper Type as User Attribute and then set Name, User Attribute, and Token Claim Name as DOB. Claim JSON Type should be set as String.

On clicking Save, our mapping is ready. So now, we're equipped from the Keycloak end to receive DOB as a custom user attribute.

In the next section, we'll see how to access it via an API call.

2.2. Accessing Custom User Attributes

Building on top of our Spring Boot application, let's add a new REST controller to get the user attribute we added:

@Controller
public class CustomUserAttrController {
    @GetMapping(path = "/users")
    public String getUserInfo(Model model) {
        KeycloakAuthenticationToken authentication = (KeycloakAuthenticationToken) 
          SecurityContextHolder.getContext().getAuthentication();
        
        Principal principal = (Principal) authentication.getPrincipal();        
        String dob="";
        
        if (principal instanceof KeycloakPrincipal) {
            KeycloakPrincipal kPrincipal = (KeycloakPrincipal) principal;
            IDToken token = kPrincipal.getKeycloakSecurityContext().getIdToken();
            Map<String, Object> customClaims = token.getOtherClaims();
            if (customClaims.containsKey("DOB")) {
                dob = String.valueOf(customClaims.get("DOB"));
            }
        }
        
        model.addAttribute("username", principal.getName());
        model.addAttribute("dob", dob);
        return "userInfo";
    }
}

As we can see, here we first obtained the KeycloakAuthenticationToken from the security context and then extracted the Principal from it. After casting it as a KeycloakPrincipal, we obtained its IDToken.

DOB can then be extracted from this IDToken‘s OtherClaims.

Here's the template, named userInfo.html, that we'll use to display this information:

<div id="container">
    <h1>Hello, <span th:text="${username}">--name--</span>.</h1>
    <h3>Your Date of Birth as per our records is <span th:text="${dob}"/>.</h3>
</div>

2.3. Testing

On starting the Boot application, we should navigate to http://localhost:8081/users. We'll first be asked to enter credentials.

After entering user1‘s credentials, we should see this page:

3. Embedded Server

Now let's see how to achieve the same thing on an embedded Keycloak instance.

3.1. Adding Custom User Attributes

Basically, we need to do the same steps here, only that we'll need to save them as pre-configurations in our realm definition file, baeldung-realm.json.

To add the attribute DOB to our user john@test.com, first, we need to configure its attributes:

"attributes" : {
    "DOB" : "1984-07-01"
},

Then add the protocol mapper for DOB:

"protocolMappers": [
    {
    "id": "c5237a00-d3ea-4e87-9caf-5146b02d1a15",
    "name": "DOB",
    "protocol": "openid-connect",
    "protocolMapper": "oidc-usermodel-attribute-mapper",
    "consentRequired": false,
    "config": {
        "userinfo.token.claim": "true",
        "user.attribute": "DOB",
        "id.token.claim": "true",
        "access.token.claim": "true",
        "claim.name": "DOB",
        "jsonType.label": "String"
        }
    }
]

That's all we need here.

Now that we've seen the authorization server part of adding a custom user attribute, it's time to look at how the resource server can access the user's DOB.

3.2. Accessing Custom User Attributes

On the resource server-side, the custom attributes will simply be available to us as claim values in the AuthenticationPrincipal.

Let's code an API for it:

@RestController
public class CustomUserAttrController {
    @GetMapping("/user/info/custom")
    public Map<String, Object> getUserInfo(@AuthenticationPrincipal Jwt principal) {
        return Collections.singletonMap("DOB", principal.getClaimAsString("DOB"));
    }
}

3.3. Testing

Now let's test it using JUnit.

We'll first need to obtain an access token and then call the /user/info/custom API endpoint on the resource server:

@Test
public void givenUserWithReadScope_whenGetUserInformationResource_thenSuccess() {
    String accessToken = obtainAccessToken("read");
    Response response = RestAssured.given()
      .header(HttpHeaders.AUTHORIZATION, "Bearer " + accessToken)
      .get(userInfoResourceUrl);
    assertThat(response.as(Map.class)).containsEntry("DOB", "1984-07-01");
}

As we can see, here we verified that we're getting the same DOB value as we added in the user's attributes.

4. Conclusion

In this tutorial, we learned how to add extra attributes to a user in Keycloak.

We saw this for both a standalone and an embedded instance. We also saw how to access these custom claims in a REST API on the backend in both scenarios.

As always, the source code is available over on GitHub. For the standalone server, it's on the tutorials GitHub, and for the embedded instance, on the OAuth GitHub.

The post Custom User Attributes with Keycloak first appeared on Baeldung.


IllegalMonitorStateException in Java

$
0
0

1. Overview

In this short tutorial, we'll learn about java.lang.IllegalMonitorStateException. 

We'll create a simple sender-receiver application that throws this exception. Then, we'll discuss possible ways of preventing it.  Finally, we'll show how to implement these sender and receiver classes correctly.

2. When Is It Thrown?

The IllegalMonitorStateException is related to multithreading programming in Java. If we have a monitor we want to synchronize on, this exception is thrown to indicate that a thread tried to wait or to notify other threads waiting on that monitor, without owning it. In simpler words, we'll get this exception if we call one of the wait(), notify(), or notifyAll() methods of the Object class outside of a synchronized block.

Let's now build an example that throws an IllegalMonitorStateException. For this, we'll use both wait() and notifyAll() methods to synchronize the data exchange between a sender and a receiver.

Firstly, let's look at the Data class that holds the message we're going to send:

public class Data {
    private String message;
    public void send(String message) {
        this.message = message;
    }
    public String receive() {
        return message;
    }
}

Secondly, let's create the sender class that throws an IllegalMonitorStateException when invoked. For this purpose, we'll call the notifyAll() method without wrapping it in a synchronized block:

class UnsynchronizedSender implements Runnable {
    private static final Logger log = LoggerFactory.getLogger(UnsychronizedSender.class);
    private final Data data;
    public UnsynchronizedSender(Data data) {
        this.data = data;
    }
    @Override
    public void run() {
        try {
            Thread.sleep(1000);
            data.send("test");
            data.notifyAll();
        } catch (InterruptedException e) {
            log.error("thread was interrupted", e);
            Thread.currentThread().interrupt();
        }
    }
}

The receiver is also going to throw an IllegalMonitorStateException. Similarly to the previous example, we'll make a call to the wait() method outside a synchronized block:

public class UnsynchronizedReceiver implements Runnable {
    private static final Logger log = LoggerFactory.getLogger(UnsynchronizedReceiver.class);
    private final Data data;
    private String message;
    public UnsynchronizedReceiver(Data data) {
        this.data = data;
    }
    @Override
    public void run() {
        try {
            data.wait();
            this.message = data.receive();
        } catch (InterruptedException e) {
            log.error("thread was interrupted", e);
            Thread.currentThread().interrupt();
        }
    }
    public String getMessage() {
        return message;
    }
}

Finally, let's instantiate both classes and send a message between them:

public void sendData() {
    Data data = new Data();
    UnsynchronizedReceiver receiver = new UnsynchronizedReceiver(data);
    Thread receiverThread = new Thread(receiver, "receiver-thread");
    receiverThread.start();
    UnsynchronizedSender sender = new UnsynchronizedSender(data);
    Thread senderThread = new Thread(sender, "sender-thread");
    senderThread.start();
    senderThread.join(1000);
    receiverThread.join(1000);
}

When we try to run this piece of code, we'll receive an IllegalMonitorStateException from both UnsynchronizedReceiver and UnsynchronizedSender classes:

[sender-thread] ERROR com.baeldung.exceptions.illegalmonitorstate.UnsynchronizedSender - illegal monitor state exception occurred
java.lang.IllegalMonitorStateException: null
	at java.base/java.lang.Object.notifyAll(Native Method)
	at com.baeldung.exceptions.illegalmonitorstate.UnsynchronizedSender.run(UnsynchronizedSender.java:15)
	at java.base/java.lang.Thread.run(Thread.java:844)
[receiver-thread] ERROR com.baeldung.exceptions.illegalmonitorstate.UnsynchronizedReceiver - illegal monitor state exception occurred
java.lang.IllegalMonitorStateException: null
	at java.base/java.lang.Object.wait(Native Method)
	at java.base/java.lang.Object.wait(Object.java:328)
	at com.baeldung.exceptions.illegalmonitorstate.UnsynchronizedReceiver.run(UnsynchronizedReceiver.java:12)
	at java.base/java.lang.Thread.run(Thread.java:844)

3. How to Fix It

To get rid of the IllegalMonitorStateException, we need to make every call to wait(), notify(), and notifyAll() methods within a synchronized block. With this in mind, let's see how the correct implementation of the Sender class should look like:

class SynchronizedSender implements Runnable {
    private final Data data;
    public SynchronizedSender(Data data) {
        this.data = data;
    }
    @Override
    public void run() {
        synchronized (data) {
            data.send("test");
            data.notifyAll();
        }
    }
}

Note we're using the synchronized block on the same Data instance we later call its notifyAll() method.

Let's fix the Receiver in the same way:

class SynchronizedReceiver implements Runnable {
    private static final Logger log = LoggerFactory.getLogger(SynchronizedReceiver.class);
    private final Data data;
    private String message;
    public SynchronizedReceiver(Data data) {
        this.data = data;
    }
    @Override
    public void run() {
        synchronized (data) {
            try {
                data.wait();
                this.message = data.receive();
            } catch (InterruptedException e) {
                log.error("thread was interrupted", e);
                Thread.currentThread().interrupt();
            }
        }
    }
    public String getMessage() {
        return message;
    }
}

If we again create both classes and try to send the same message between them, everything works well, and no exception is thrown.

4. Conclusion

In this article, we learned what causes IllegalMonitorStateException and how to prevent it.

As always, the code is available over on GitHub.

The post IllegalMonitorStateException in Java first appeared on Baeldung.


Creating Temporary Directories in Java

$
0
0

1. Overview

Temporary directories come in handy when we need to create a set of files that we can later discard. When we create temporary directories, we can delegate to the operating system where to put them or specify ourselves where we want to place them.

In this short tutorial, we'll learn how to create temporary directories in Java using different APIs and approaches. All the examples in this tutorial will be performed using plain Java 7+, Guava, and Apache Commons IO.

2. Delegate to the Operating System

One of the most popular approaches used to create temporary directories is to delegate the destination to the underlying operating system. The location is given by the java.io.tmpdir property, and every operating system has its own structure and cleanup routines.

In plain Java, we create a directory by specifying the prefix we want the directory to take:

String tmpdir = Files.createTempDirectory("tmpDirPrefix").toFile().getAbsolutePath();
String tmpDirsLocation = System.getProperty("java.io.tmpdir");
assertThat(tmpdir).startsWith(tmpDirsLocation);

Using Guava, the process is similar, but we can't specify how we want to prefix our directory:

String tmpdir = Files.createTempDir().getAbsolutePath();
String tmpDirsLocation = System.getProperty("java.io.tmpdir");
assertThat(tmpdir).startsWith(tmpDirsLocation);

Apache Commons IO doesn't provide a way to create temporary directories. It provides a wrapper to get the operating system temporary directory, and then, it's up to us to do the rest:

String tmpDirsLocation = System.getProperty("java.io.tmpdir");
Path path = Paths.get(FileUtils.getTempDirectory().getAbsolutePath(), UUID.randomUUID().toString());
String tmpdir = Files.createDirectories(path).toFile().getAbsolutePath();
assertThat(tmpdir).startsWith(tmpDirsLocation);

In order to avoid name clashes with existing directories, we use UUID.randomUUID() to create a directory with a random name.

3. Specifying the Location

Sometimes we need to specify where we want to create our temporary directory. A good example is during a Maven build. Since we already have a “temporary” build target directory, we can make use of that directory to place temporary directories our build might need:

Path tmpdir = Files.createTempDirectory(Paths.get("target"), "tmpDirPrefix");
assertThat(tmpdir.toFile().getPath()).startsWith("target");

Both Guava and Apache Commons IO lack methods to create temporary directories at specific locations.

It's worth noting that the target directory can be different depending on the build configuration. One way to make it bullet-proof is to pass the target directory location to the JVM running the test.

As the operating system isn't taking care of the cleanup, we can make use of File.deleteOnExit():

tmpdir.toFile().deleteOnExit();

This way, the file is deleted once the JVM terminates, but only if the termination is graceful.

4. Using Different File Attributes

Like any other file or directory, it's possible to specify file attributes upon the creation of a temporary directory. So, if we want to create a temporary directory that can only be read by the user that creates it, we can specify the set of attributes that will accomplish that:

FileAttribute<Set> attrs = PosixFilePermissions.asFileAttribute(
  PosixFilePermissions.fromString("r--------"));
Path tmpdir = Files.createTempDirectory(Paths.get("target"), "tmpDirPrefix", attrs);
assertThat(tmpdir.toFile().getPath()).startsWith("target");
assertThat(tmpdir.toFile().canWrite()).isFalse();

As expected, Guava and Apache Commons IO do not provide a way to specify the attributes when creating temporary directories.

It's also worth noting that the previous example assumes we are under a Posix Compliant Filesystem such as Unix or macOS.

More information about file attributes can be found in our Guide to NIO2 File Attribute APIs.

5. Conclusion

In this short tutorial, we explored how to create temporary directories in plain Java 7+, Guava, and Apache Commons IO. We saw that plain Java is the most flexible way to create temporary directories as it offers a wider range of possibilities while keeping the verbosity to a minimum.

As usual, all the source code for this tutorial is available over on GitHub.

The post Creating Temporary Directories in Java first appeared on Baeldung.


Dates in OpenAPI Files

$
0
0

1. Introduction

In this tutorial, we'll see how to declare dates in an OpenAPI file, in this case, implemented with Swagger. This will allow us to manage input and output dates in a standardized way when calling external APIs.

2. Swagger vs. OAS

Swagger is a set of tools implementing the OpenAPI Specification (OAS),  a language-agnostic interface to document RESTful APIs. This allows us to understand the capabilities of any service without accessing the source code.

To implement this,  we'll have a file in our project, typically YAML or JSON, describing APIs using OAS. We'll then use Swagger tools to:

  • edit our specification through a browser (Swagger Editor)
  • auto-generate API client libraries (Swagger Codegen)
  • show auto-generated documentation (Swagger UI)

The OpenAPI file example contains different sections, but we'll focus on the model definition.

3. Defining a Date

Let's define a User entity using the OAS:

components:
  User:
    type: "object"
    properties:
      id:
        type: integer
        format: int64
      createdAt:
        type: string
        format: date
        description: Creation date
        example: "2021-01-30"
      username:
        type: string

To define a date, we use an object with:

  • the type field equals to string
  • the format field which specifies how the date is formed

In this case, we used the date format to describe the createdAt date. This format describes dates using the ISO 8601 full-date format.

4. Defining a Date-Time

Additionally, if we also want to specify the time, we'll use date-time as the format. Let's see an example:

createdAt:
  type: string
  format: date-time
  description: Creation date and time
  example: "2021-01-30T08:30:00Z"

In this case, we're describing date-times using the ISO 8601 full-time format.

5. The pattern field

Using OAS, we can describe dates with other formats as well. To do so, let's use the pattern field:

customDate: 
  type: string 
  pattern: '^\d{4}(0[1-9]|1[012])(0[1-9]|[12][0-9]|3[01])$'
  description: Custom date 
  example: "20210130"

Clearly, this is the less readable method, but the most powerful. Indeed, we can use any regular expression in this field.

6. Conclusion

In this article, we've seen how to declare dates using OpenAPI. We can use standard formats offered by OpenAPI as well as custom patterns to match our needs. As always, the source code of the example we used is available over on GitHub.

The post Dates in OpenAPI Files first appeared on Baeldung.


Rolling Back Migrations with Flyway

$
0
0

1. Introduction

In this short tutorial, we'll explore a couple of ways to rollback a migration with Flyway.

2. Simulate Rollback with a Migration

In this section, we'll rollback our database using a standard migration file.

In our examples, we'll use the command-line version of Flyway. However, the core principles are equally applicable to the other formats, such as the core API, Maven plugin, etc.

2.1. Create Migration

First, let's add a new book table to our database. In order to do this, we'll create a migration file called V1_0__create_book_table.sql:

create table book (
  id numeric,
  title varchar(128),
  author varchar(256),
  constraint pk_book primary key (id)
);

Secondly, let's apply the migration:

./flyway migrate

2.2. Simulate Rollback

Then, at some point, say we need to reverse the last migration.

In order to restore the database to before the book table was created, let's create migration called V2_0__drop_table_book.sql:

drop table book;

Next, let's apply the migration:

./flyway migrate

Finally, we can check the history of all the migrations using:

./flyway info

which gives us the following output:

+-----------+---------+-------------------+------+---------------------+---------+
| Category  | Version | Description       | Type | Installed On        | State   |
+-----------+---------+-------------------+------+---------------------+---------+
| Versioned | 1.0     | create book table | SQL  | 2020-08-29 16:07:43 | Success |
| Versioned | 2.0     | drop table book   | SQL  | 2020-08-29 16:08:15 | Success |
+-----------+---------+-------------------+------+---------------------+---------+

Notice that our second migration ran successfully.

As far as Flyway is concerned, the second migration file is just another standard migration. The actual restoring of the database to the previous version is done entirely through SQL. For example, in our case, the SQL of dropping the table is the opposite of the first migration, which creates the table.

Using this method, the audit trail doesn't show us that the second migration is related to the first, as they have different version numbers. In order to get such an audit trail, we need to use Flyway Undo.

3. Using Flyway Undo

Firstly, it's important to note that Flyway Undo is a commercial feature of Flyway and isn't available in the Community Edition. Therefore, we'll need either the Pro Edition or Enterprise Edition in order to use this feature.

3.1. Create Migration Files

First, let's create a migration file called V1_0__create_book_table.sql:

create table book (
  id numeric,
  title varchar(128),
  author varchar(256),
  constraint pk_book primary key (id)
);

Secondly, let's create the corresponding undo migration file U1_0__create_book_table.sql:

drop table book;

In our undo migration, notice how the filename prefix is ‘U' compared with the normal migration prefix of ‘V'. Also, in our undo migration files, we write the SQL that reverses the changes of the corresponding migration file. In our case, we're dropping the table that's created by the normal migration.

3.2. Apply Migrations

Next, let's check the current state of the migrations:

./flyway -pro info

This gives us the following output:

+-----------+---------+-------------------+------+--------------+---------+----------+
| Category  | Version | Description       | Type | Installed On | State   | Undoable |
+-----------+---------+-------------------+------+--------------+---------+----------+
| Versioned | 1.0     | create book table | SQL  |              | Pending | Yes      |
+-----------+---------+-------------------+------+--------------+---------+----------+

Notice the last column, Undoable, which indicates Flyway has detected an undo migration file that accompanies our normal migration file.

Next, let's apply our migrations:

./flyway migrate

When it completes, our migrations are complete, and our schema has a new book table:

                List of relations
 Schema |         Name          | Type  |  Owner   
--------+-----------------------+-------+----------
 public | book                  | table | baeldung
 public | flyway_schema_history | table | baeldung
(2 rows)

3.3. Rollback the Last Migration

Finally, let's undo the last migration using the command line:

./flyway -pro undo

After the command has run successfully, we can check the status of the migrations again:

./flyway -pro info

which gives us the following output:

+-----------+---------+-------------------+----------+---------------------+---------+----------+
| Category  | Version | Description       | Type     | Installed On        | State   | Undoable |
+-----------+---------+-------------------+----------+---------------------+---------+----------+
| Versioned | 1.0     | create book table | SQL      | 2020-08-22 15:48:00 | Undone  |          |
| Undo      | 1.0     | create book table | UNDO_SQL | 2020-08-22 15:49:47 | Success |          |
| Versioned | 1.0     | create book table | SQL      |                     | Pending | Yes      |
+-----------+---------+-------------------+----------+---------------------+---------+----------+

Notice how the undo has been successful, and the first migration is back to pending. Also, in contrast to the first method, the audit trail clearly shows the migrations that were rolled back.

Although Flyway Undo can be useful, it assumes that the whole migration has succeeded. For example, it may not work as expected if a migration fails partway through.

4. Conclusion

In this short tutorial, we looked at restoring our database using a standard migration. We also looked at the official way of rolling back migrations using Flyway Undo. As usual, all of our code that relates to this tutorial can be found over on GitHub.

The post Rolling Back Migrations with Flyway first appeared on Baeldung.


SSH Connection With Java

$
0
0

1. Introduction

SSH, also known as Secure Shell or Secure Socket Shell, is a network protocol that allows one computer to securely connect to another computer over an unsecured network. In this tutorial, we'll show how to establish a connection to a remote SSH server with Java using the JSch and Apache MINA SSHD libraries.

In our examples, we'll first open the SSH connection, then execute one command, read the output and write it to the console, and, finally, close the SSH connection. We'll keep the sample code as simple as possible.

2. JSch

JSch is the Java implementation of SSH2 that allows us to connect to an SSH server and use port forwarding, X11 forwarding, and file transfer. Also, it is licensed under the BSD style license and provides us with an easy way to establish an SSH connection with Java.

First, let's add the JSch Maven dependency to our pom.xml file:

<dependency>
    <groupId>com.jcraft</groupId>
    <artifactId>jsch</artifactId>
    <version>0.1.55</version>
</dependency>

2.1. Implementation

To establish an SSH connection using JSch, we need a username, password, host URL, and SSH port. The default SSH port is 22, but it could happen that we'll configure the server to use other port for SSH connections:

public static void listFolderStructure(String username, String password, 
  String host, int port, String command) throws Exception {
    
    Session session = null;
    ChannelExec channel = null;
    
    try {
        session = new JSch().getSession(username, host, port);
        session.setPassword(password);
        session.setConfig("StrictHostKeyChecking", "no");
        session.connect();
        
        channel = (ChannelExec) session.openChannel("exec");
        channel.setCommand(command);
        ByteArrayOutputStream responseStream = new ByteArrayOutputStream();
        channel.setOutputStream(responseStream);
        channel.connect();
        
        while (channel.isConnected()) {
            Thread.sleep(100);
        }
        
        String responseString = new String(responseStream.toByteArray());
        System.out.println(responseString);
    } finally {
        if (session != null) {
            session.disconnect();
        }
        if (channel != null) {
            channel.disconnect();
        }
    }
}

As we can see in the code, we first create a client session and configure it for connection to our SSH server. Then, we create a client channel used to communicate with the SSH server where we provide a channel type – in this case, exec, which means that we'll be passing shell commands to the server.

Also, we should set the output stream for our channel where the server response will be written. After we establish the connection using the channel.connect() method, the command is passed, and the received response is written on the console.

Let's see how to use different configuration parameters that JSch offers:

  • StrictHostKeyChecking – it indicates whether the application will check if the host public key could be found among known hosts. Also, available parameter values are ask, yes, and no, where ask is the default. If we set this property to yes, JSch will never automatically add the host key to the known_hosts file, and it'll refuse to connect to hosts whose host key has changed. This forces the user to manually add all new hosts. If we set it to no, JSch will automatically add a new host key to the list of known hosts
  • compression.s2c – specifies whether to use compression for the data stream from the server to our client application. Available values are zlib and none where the second is the default
  • compression.c2s – specifies whether to use compression for the data stream in the client-server direction. Available values are zlib and none where the second is the default

It's important to close the session and the SFTP channel after the communication with the server is over to avoid memory leaks.

3. Apache MINA SSHD

Apache MINA SSHD provides SSH support for Java-based applications. This library is based on Apache MINA, a scalable and high-performance asynchronous IO library.

Let's add the Apache Mina SSHD Maven dependency:

<dependency>
    <groupId>org.apache.sshd</groupId>
    <artifactId>sshd-core</artifactId>
    <version>2.5.1</version>
</dependency>

3.1. Implementation

Let's see the code sample of connecting to the SSH server using Apache MINA SSHD:

public static void listFolderStructure(String username, String password, 
  String host, int port, long defaultTimeoutSeconds, String command) throws IOException {
    
    SshClient client = SshClient.setUpDefaultClient();
    client.start();
    
    try (ClientSession session = client.connect(username, host, port)
      .verify(defaultTimeoutSeconds, TimeUnit.SECONDS).getSession()) {
        session.addPasswordIdentity(password);
        session.auth().verify(defaultTimeoutSeconds, TimeUnit.SECONDS);
        
        try (ByteArrayOutputStream responseStream = new ByteArrayOutputStream(); 
          ClientChannel channel = session.createChannel(Channel.CHANNEL_SHELL)) {
            channel.setOut(responseStream);
            try {
                channel.open().verify(defaultTimeoutSeconds, TimeUnit.SECONDS);
                try (OutputStream pipedIn = channel.getInvertedIn()) {
                    pipedIn.write(command.getBytes());
                    pipedIn.flush();
                }
            
                channel.waitFor(EnumSet.of(ClientChannelEvent.CLOSED), 
                TimeUnit.SECONDS.toMillis(defaultTimeoutSeconds));
                String responseString = new String(responseStream.toByteArray());
                System.out.println(responseString);
            } finally {
                channel.close(false);
            }
        }
    } finally {
        client.stop();
    }
}

When working with the Apache MINA SSHD, we have a pretty similar sequence of events as with JSch. First, we establish a connection to an SSH server using the SshClient class instance. If we initialize it with SshClient.setupDefaultClient(), we'll be able to work with the instance that has a default configuration suitable for most use cases. This includes ciphers, compression, MACs, key exchanges, and signatures.

After that, we'll create ClientChannel and attach the ByteArrayOutputStream to it, so that we'll use it as a response stream. As we can see, SSHD requires defined timeouts for every operation. It also allows us to define how long it will wait for server response after the command is passed by using Channel.waitFor() method.

It's important to notice that SSHD will write complete console output into the response stream. JSch will do it only with the command execution result.

Complete documentation on Apache Mina SSHD is available on the project's official GitHub repository.

4. Conclusion

This article illustrated how to establish an SSH connection with Java using two of the available Java libraries – JSch and Apache Mina SSHD. We also showed how to pass the command to the remote server and get the execution result. Also, complete code samples are available over on GitHub.

The post SSH Connection With Java first appeared on Baeldung.


Difference Between when() and doXxx() Methods in Mockito

$
0
0

1. Introduction

Mockito is a popular Java mocking framework. With it, it's simple to create mock objects, configure mock behavior, capture method arguments, and verify interactions with mocks.

Now, we'll focus on specifying mock behavior. We have two ways to do that: the when().thenDoSomething() and the doSomething().when() syntax.

In this short tutorial, we'll see why we have both of them.

2. when() Method

Let's consider the following Employee interface:

interface Employee {
    String greet();
    void work(DayOfWeek day);
}

In our tests, we use a mock of this interface. Let's say we want to configure the mock's greet() method to return the string “Hello”. It's straightforward to do so using Mockito's when() method:

@Test
void givenNonVoidMethod_callingWhen_shouldConfigureBehavior() {
    // given
    when(employee.greet()).thenReturn("Hello");
    // when
    String greeting = employee.greet();
    // then
    assertThat(greeting, is("Hello"));
}

What happens? The employee object is a mock. When we call any of its methods, Mockito registers that call. With the call of the when() method, Mockito knows that this invocation wasn't an interaction by the business logic. It was a statement that we want to assign some behavior to the mock object. After that, with one of the thenXxx() methods, we specify the expected behavior.

Until this point, it's good old mocking. Likewise, we want to configure the work() method to throw an exception, when we call it with an argument of Sunday:

@Test
void givenVoidMethod_callingWhen_wontCompile() {
    // given
    when(employee.work(DayOfWeek.SUNDAY)).thenThrow(new IAmOnHolidayException());
    // when
    Executable workCall = () -> employee.work(DayOfWeek.SUNDAY);
    // then
    assertThrows(IAmOnHolidayException.class, workCall);
}

Unfortunately, this code won't compile, because in the work(employee.work(…)) call, the work() method has a void return type; hence we cannot wrap it into another method call. Does it mean that we can't mock void methods? Of course, we can. doXxx methods to the rescue!

3. doXxx() Methods

Let's see how we can configure the exception throwing with the doThrow() method:

@Test
void givenVoidMethod_callingDoThrow_shouldConfigureBehavior() {
    // given
    doThrow(new IAmOnHolidayException()).when(employee).work(DayOfWeek.SUNDAY);
    // when
    Executable workCall = () -> employee.work(DayOfWeek.SUNDAY);
    // then
    assertThrows(IAmOnHolidayException.class, workCall);
}

This syntax is slightly different than the previous one: we don't try to wrap a void method call inside another method call. Therefore, this code compiles.

Let's see what just happened. First, we stated that we want to throw an exception. Next, we called the when() method, and we passed the mock object. After that, we specified which mock interaction's behavior we want to configure.

Note that this isn't the same when() method we used before. Also, note that we chained the mock interaction after the invocation of when(). Meanwhile, we defined it inside the parentheses with the first syntax.

Why do we have the first when().thenXxx(), when it isn't capable of such a common task, as configuring a void invocation? It has multiple advantages to the doXxx().when() syntax.

First, it's more logical for developers to write and read statements like “when some interaction, then do something” than “do something, when some interaction”.

Second, we can add multiple behaviors to the same interaction with chaining. That's because when() returns an instance of the class OngoingStubbing<T>, which's thenXxx() methods return the same type.

On the other hand, doXxx() methods return a Stubber instance, and Stubber.when(T mock) returns T, so we can specify what kind of method invocation we want to configure. But T is part of our application, for example, Employee in our code snippets. But T won't return a Mockito class, so we won't be able to add multiple behaviors with chaining.

4. BDDMockito

BDDMockito uses an alternative syntax to those which we covered. It's pretty simple: in our mock configurations, we have to replace the keyword “when” to “given” and the keyword “do” to “will“. Other than that, our code remains the same:

@Test
void givenNonVoidMethod_callingGiven_shouldConfigureBehavior() {
    // given
    given(employee.greet()).willReturn("Hello");
    // when
    String greeting = employee.greet();
    // then
    assertThat(greeting, is("Hello"));
}
@Test
void givenVoidMethod_callingWillThrow_shouldConfigureBehavior() {
    // given
    willThrow(new IAmOnHolidayException()).given(employee).work(DayOfWeek.SUNDAY);
    // when
    Executable workCall = () -> employee.work(DayOfWeek.SUNDAY);
    // then
    assertThrows(IAmOnHolidayException.class, workCall);
}

5. Conclusion

We saw the advantages and disadvantages of the configuring a mock object the when().thenXxx() or the doXxx().when() way. Also, we saw how these syntaxes work and why we have both.

As usual, the examples are available over on GitHub.

The post Difference Between when() and doXxx() Methods in Mockito first appeared on Baeldung.


Getting Network Information from Docker

$
0
0

1. Overview

One of the main features of Docker is creating and isolating networks.

In this tutorial, we'll see how to extract information about networks and the containers they hold.

2. Networking in Docker

When we run a Docker container, we can define what ports we want to expose to the outside world. What this means is that we use (or create) an isolated network and put our container inside. We can decide how we'll communicate both with and inside this network.

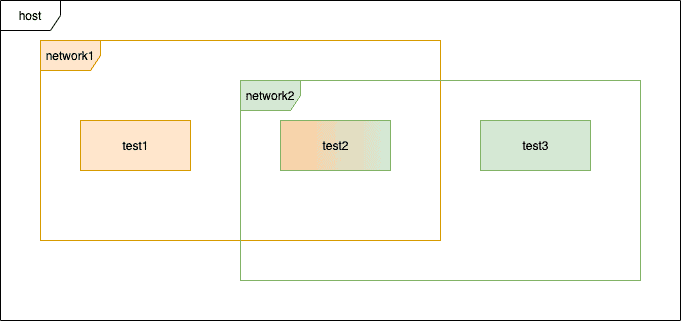
Let's create a few containers and configure networking between them. They will all internally work on port 8080, and they will be placed in two networks.

Each of them will host a simple “Hello World” HTTP service:

version: "3.5"
services:
  test1:
    image: node
    command: node -e "const http = require('http'); http.createServer((req, res) => { res.write('Hello from test1\n'); res.end() }).listen(8080)"
    ports:
      - "8080:8080"
    networks:
      - network1
  test2:
    image: node
    command: node -e "const http = require('http'); http.createServer((req, res) => { res.write('Hello from test2\n'); res.end() }).listen(8080)"
    ports:
      - "8081:8080"
    networks:
      - network1
      - network2
  test3:
    image: node
    command: node -e "const http = require('http'); http.createServer((req, res) => { res.write('Hello from test3\n'); res.end() }).listen(8080)"
    ports:
      - "8082:8080"
    networks:
      - network2
networks:
  network1:
    name: network1
  network2:
    name: network2

Here's a diagram of these containers for a more visual representation:

Let's start them all with the docker-compose command:

$ docker-compose up -d
Starting bael_test2_1 ... done
Starting bael_test3_1 ... done
Starting bael_test1_1 ... done

3. Inspecting the Network

Firstly, let's list all available Docker's networks:

$ docker network ls
NETWORK ID          NAME                DRIVER              SCOPE
86e6a8138c0d        bridge              bridge              local
73402de5766c        host                host                local
e943f7124776        network1            bridge              local
3b9a28673a16        network2            bridge              local
9361d16a834a        none                null                local

We can see the bridge network, which is the default network used when we use the docker run command. Also, we can see the networks we created with a docker-compose command.

Let's inspect them with the docker inspect command:

$ docker inspect network1 network2
[
    {
        "Name": "network1",
        "Id": "e943f7124776d45a1481ee26795b2dba3f2ab51f000d875a179a99ce832eee9f",
        "Created": "2020-08-22T10:38:22.198709146Z",
        "Scope": "local",
        "Driver": "bridge",
        "EnableIPv6": false,
        // output cutout for brevity
    }
],
    {
        "Name": "network2",
        // output cutout for brevity
    }
}

This will produce lengthy, detailed output. We rarely need all of this information. Fortunately, we can format it using Go templates and extract only the elements that suit our needs. Let's get only the subnet of network1:

$ docker inspect -f '{{range .IPAM.Config}}{{.Subnet}}{{end}}' network1
172.22.0.0/16

4. Inspecting the Container

Similarly, we can inspect a specific container. First, let's list all containers with their identifiers:

$ docker ps --format 'table {{.ID}}\t{{.Names}}'
CONTAINER ID        NAMES
78c10f03ad89        bael_test2_1
f229dde68f3b        bael_test3_1
b09a8f47e2a8        bael_test1_1

Now we'll use the container's ID as an argument to the inspect command to find its IP address. Similarly to networks, we can format output to get just the information we need. We'll check the second container and its address in both networks we created:

$ docker inspect 78c10f03ad89 --format '{{.NetworkSettings.Networks.network1.IPAddress}}'
172.22.0.2
$ docker inspect 78c10f03ad89 --format '{{.NetworkSettings.Networks.network2.IPAddress}}'
172.23.0.3

Alternatively, we can print hosts directly from a container using the docker exec command:

$ docker exec 78c10f03ad89 cat /etc/hosts
127.0.0.1	localhost
::1	localhost ip6-localhost ip6-loopback
fe00::0	ip6-localnet
ff00::0	ip6-mcastprefix
ff02::1	ip6-allnodes
ff02::2	ip6-allrouters
172.22.0.2	78c10f03ad89
172.23.0.3	78c10f03ad89

5. Communication Between Containers

Using knowledge about our Docker networks, we can establish communication between containers in the same network.

First, let's get inside the  “test1” container:

$ docker exec -it b09a8f47e2a8 /bin/bash

Then, use curl to send a request to the “test2” container:

root@b09a8f47e2a8:/# curl 172.22.0.2:8080
Hello from test2

Since we're inside the Docker's network, we can also use the alias instead of the IP address. Docker's builtin DNS service will resolve the address for us:

root@b09a8f47e2a8:/# curl test2:8080
Hello from test2

Mind that we can't connect to the “test3” container because it's in a different network. Connecting by the IP address will time out:

root@b09a8f47e2a8:/# curl 172.23.0.2:8080

Connecting by the alias will also fail because the DNS service won't recognize it:

root@b09a8f47e2a8:/# curl test3:8080
curl: (6) Could not resolve host: test3

To make this work, we need to add “test3” container to “network1” (from outside of the container):

$ docker network connect --alias test3 network1 f229dde68f3b

Now request to “test3” will work correctly:

root@b09a8f47e2a8:/# curl test3:8080
Hello from test3

6. Conclusion

In this tutorial, we've seen how to configure networks for Docker containers and then query information about them.

The post Getting Network Information from Docker first appeared on Baeldung.

DAO vs Repository Patterns

$
0
0

1. Overview

Often, the implementations of repository and DAO are considered interchangeable, especially in data-centric apps. This creates confusion about their differences.

In this article, we'll discuss the differences between DAO and Repository patterns.

2. DAO Pattern

The Data Access Object Pattern, aka DAO Pattern, is an abstraction of data persistence and is considered closer to the underlying storage, which is often table-centric.

Therefore, in many cases, our DAOs match database tables, allowing a more straightforward way to send/retrieve data from storage, hiding the ugly queries.

Let's examine a simple implementation of the DAO pattern.

2.1. User

First, let's create a basic User domain class:

public class User {
    private Long id;
    private String userName;
    private String firstName;
    private String email;
    // getters and setters
}

2.2. UserDao

Then, we'll create the UserDao interface that provides simple CRUD operations for the User domain:

public interface UserDao {
    void create(User user);
    User read(Long id);
    void update(User user);
    void delete(String userName);
}

2.3. UserDaoImpl

Last, we'll create the UserDaoImpl class that implements the UserDao interface:

public class UserDaoImpl implements UserDao {
    private final EntityManager entityManager;
    
    @Override
    public void create(User user) {
        entityManager.persist(user);
    }
    @Override
    public User read(long id) {
        return entityManager.find(User.class, id);
    }
    // ...
}

Here, for simplicity, we've used the JPA EntityManager interface to interact with underlying storage and provide a data access mechanism for the User domain.

3. Repository Pattern

As per Eric Evans' book Domain-Driven Design, the “repository is a mechanism for encapsulating storage, retrieval, and search behavior, which emulates a collection of objects.”

Likewise, according to Patterns of Enterprise Application Architecture, it “mediates between the domain and data mapping layers using a collection-like interface for accessing domain objects.”

In other words, a repository also deals with data and hides queries similar to DAO. However, it sits at a higher level, closer to the business logic of an app.

Consequently, a repository can use a DAO to fetch data from the database and populate a domain object. Or, it can prepare the data from a domain object and send it to a storage system using a DAO for persistence.

Let's examine a simple implementation of the Repository pattern for the User domain.

3.1. UserRepository

First, let's create the UserRepository interface:

public interface UserRepository {
    User get(Long id);
    void add(User user);
    void update(User user);
    void remove(User user);
}

Here, we've added a few common methods like get, add, update, and remove to work with the collection of objects.

3.2. UserRepositoryImpl

Then, we'll create the UserRepositoryImpl class providing an implementation of the UserRepository interface:

public class UserRepositoryImpl implements UserRepository {
    private UserDaoImpl userDaoImpl;
    
    @Override
    public User get(Long id) {
        User user = userDaoImpl.read(id);
        return user;
    }
    @Override
    public void add(User user) {
        userDaoImpl.create(user);
    }
    // ...
}

Here, we've used the UserDaoImpl to send/retrieve data from the database.

So far, we can say that the implementations of DAO and repository look very similar because the User class is an anemic domain. And, a repository is just another layer over the data-access layer (DAO).

However, DAO seems a perfect candidate to access the data, and a repository is an ideal way to implement a business use-case.

4. Repository Pattern With Multiple DAOs

To clearly understand the last statement, let's enhance our User domain to handle a business use-case.

Imagine we want to prepare a social media profile of a user by aggregating his Twitter tweets, Facebook posts, and more.

4.1. Tweet

First, we'll create the Tweet class with a few properties that hold the tweet information:

public class Tweet {
    private String email;
    private String tweetText;    
    private Date dateCreated;
    // getters and setters
}

4.2. TweetDao and TweetDaoImpl

Then, similar to the UserDao, we'll create the TweetDao interface that allows fetching tweets:

public interface TweetDao {
    List<Tweet> fetchTweets(String email);    
}

Likewise, we'll create the TweetDaoImpl class that provides the implementation of the fetchTweets method:

public class TweetDaoImpl implements TweetDao {
    @Override
    public List<Tweet> fetchTweets(String email) {
        List<Tweet> tweets = new ArrayList<Tweet>();
        
        //call Twitter API and prepare Tweet object
        
        return tweets;
    }
}

Here, we'll call Twitter APIs to fetch all tweets by a user using his email.

So, in this case, a DAO provides a data access mechanism using third-party APIs.

4.3. Enhance User Domain

Last, let's create the UserSocialMedia subclass of our User class to keep a list of the Tweet objects:

public class UserSocialMedia extends User {
    private List<Tweet> tweets;
    // getters and setters
}

Here, our UserSocialMedia class is a complex domain containing the properties of the User domain too.

4.4. UserRepositoryImpl

Now, we'll upgrade our UserRepositoryImpl class to provide a User domain object along with a list of tweets:

public class UserRepositoryImpl implements UserRepository {
    private UserDaoImpl userDaoImpl;
    private TweetDaoImpl tweetDaoImpl;
    
    @Override
    public User get(Long id) {
        UserSocialMedia user = (UserSocialMedia) userDaoImpl.read(id);
        
        List<Tweet> tweets = tweetDaoImpl.fetchTweets(user.getEmail());
        user.setTweets(tweets);
        
        return user;
    }
}

Here, the UserRepositoryImpl extracts user data using the UserDaoImpl and user's tweets using the TweetDaoImpl.

Then, it aggregates both sets of information and provides a domain object of the UserSocialMedia class that is handy for our business use-case. Therefore, a repository relies on DAOs for accessing data from various sources.

Similarly, we can enhance our User domain to keep a list of Facebook posts.

5. Comparing the Two Patterns

Now that we've seen the nuances of the DAO and Repository patterns, let's summarize their differences:

  • DAO is an abstraction of data persistence. However, a repository is an abstraction of a collection of objects
  • DAO is a lower-level concept, closer to the storage systems. However, Repository is a higher-level concept, closer to the Domain objects
  • DAO works as a data mapping/access layer, hiding ugly queries. However, a repository is a layer between domains and data access layers, hiding the complexity of collating data and preparing a domain object
  • DAO can't be implemented using a repository. However, a repository can use a DAO for accessing underlying storage

Also, if we have an anemic domain, the repository will be just a DAO.

Additionally, the repository pattern encourages a domain-driven design, providing an easy understanding of the data structure for non-technical team members, too.

6. Conclusion

In this article, we explored differences between DAO and Repository patterns.

First, we examined a basic implementation of the DAO pattern. Then, we saw a similar implementation using the Repository pattern.

Last, we looked at a Repository utilizing multiple DAOs, enhancing the capabilities of a domain to solve a business use-case.

Therefore, we can conclude that the Repository pattern proves a better approach when an app moves from being data-centric to business-oriented.

As usual, all the code implementations are available over on GitHub.

The post DAO vs Repository Patterns first appeared on Baeldung.


Keycloak User Self-Registration

$
0
0

1. Overview

We can use Keycloak as a third-party authorization server to manage users of our web or mobile applications.

While it's possible for an administrator to add users, Keycloak also has the ability to allow users to register themselves. Additionally, along with default attributes such as first name, last name, and email, we can also add extra user attributes specific to our application's need.

In this tutorial, we'll see how we can enable self-registration on Keycloak and add custom fields on the user registration page.

We're building on top of customizing the login page, so it'll be helpful to go through it first for the initial setup.

2. Standalone Server

First, we'll see user self-registration for a standalone Keycloak server.

2.1. Enabling User Registration

Initially, we need to enable Keycloak to allow user registration. For that, we'll first need to start the server by running this command from our Keycloak distribution's bin folder:

./standalone.sh -Djboss.socket.binding.port-offset=100

Then we need to go to the admin console and key-in the initial1/zaq1!QAZ credentials.

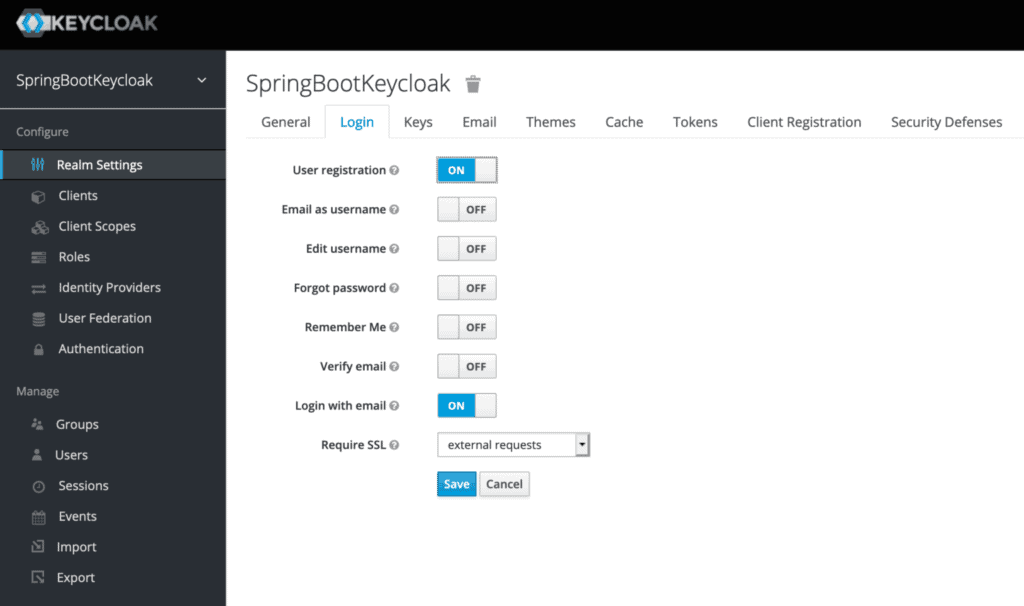
Next, in the Login tab on the Realm Settings page, we'll toggle the User registration button:

That's all! We just need to click Save and self-registration gets enabled.

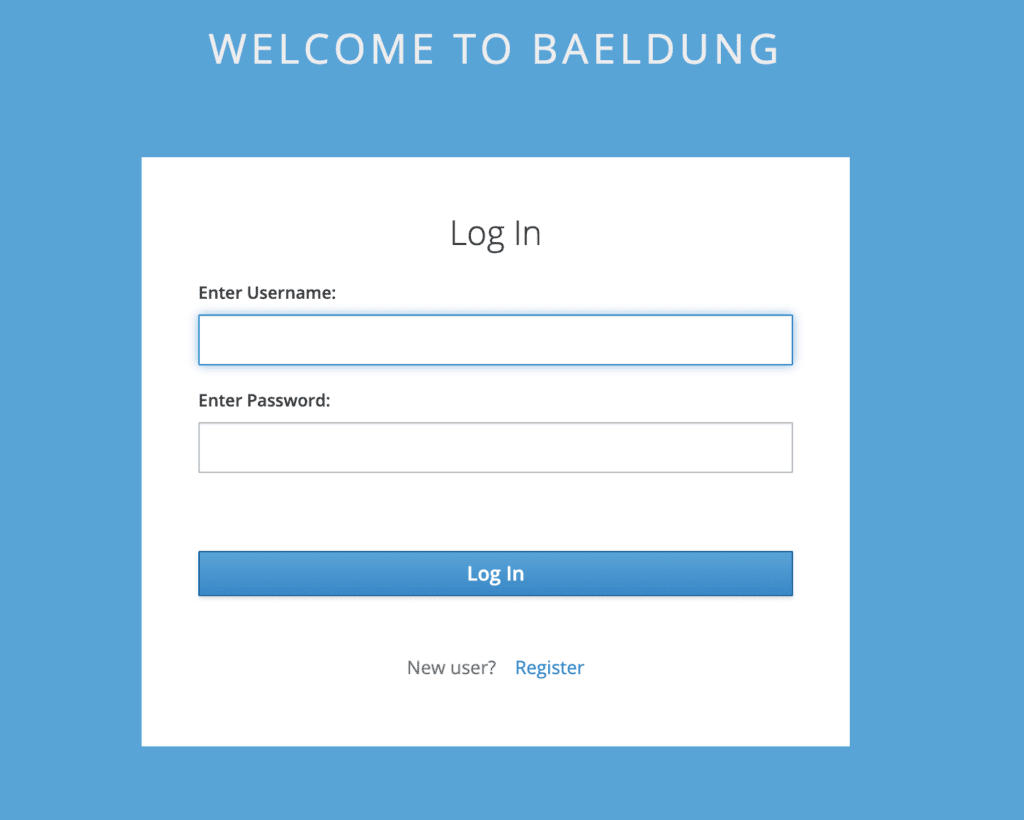
So now we'll get a link named Register on the login page:

Again, recall that the page looks different than Keycloak's default login page because we're extending the customizations we did earlier.

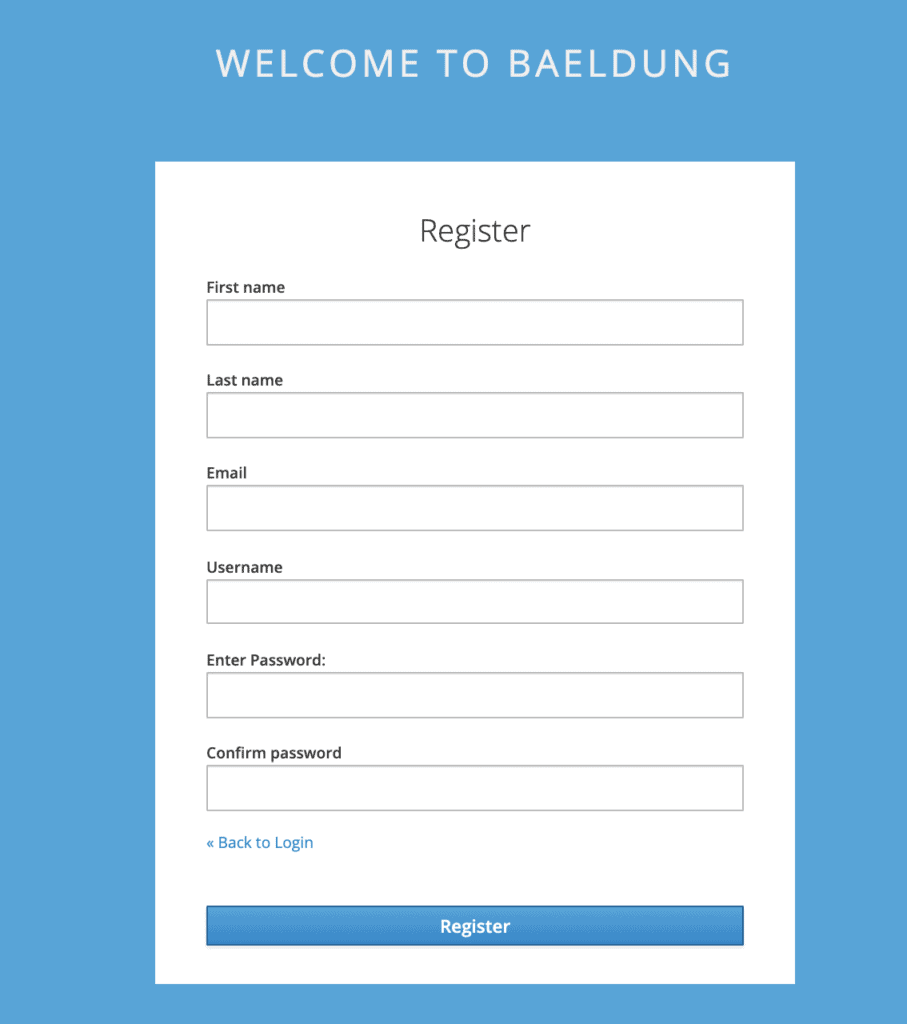
The register link takes us to the Register page:

As we can see, the default page includes the basic attributes of a Keycloak user.

In the next section, we'll see how we can add extra attributes of our choice.

2.2. Adding Custom User Attributes

Continuing with our custom theme, let's copy the existing template base/login/register.ftl to our custom/login folder.

We'll now try adding a new field dob for Date of birth. For that, we'll need to modify the above register.ftl and add this:

<div class="form-group">
    <div class="${properties.kcLabelWrapperClass!}">
        <label for="user.attributes.dob" class="${properties.kcLabelClass!}">
          Date of birth</label>
    </div>
    <div class="${properties.kcInputWrapperClass!}">
        <input type="date" class="${properties.kcInputClass!}" 
          id="user.attributes.dob" name="user.attributes.dob" 
          value="${(register.formData['user.attributes.dob']!'')}"/>
    </div>
</div>

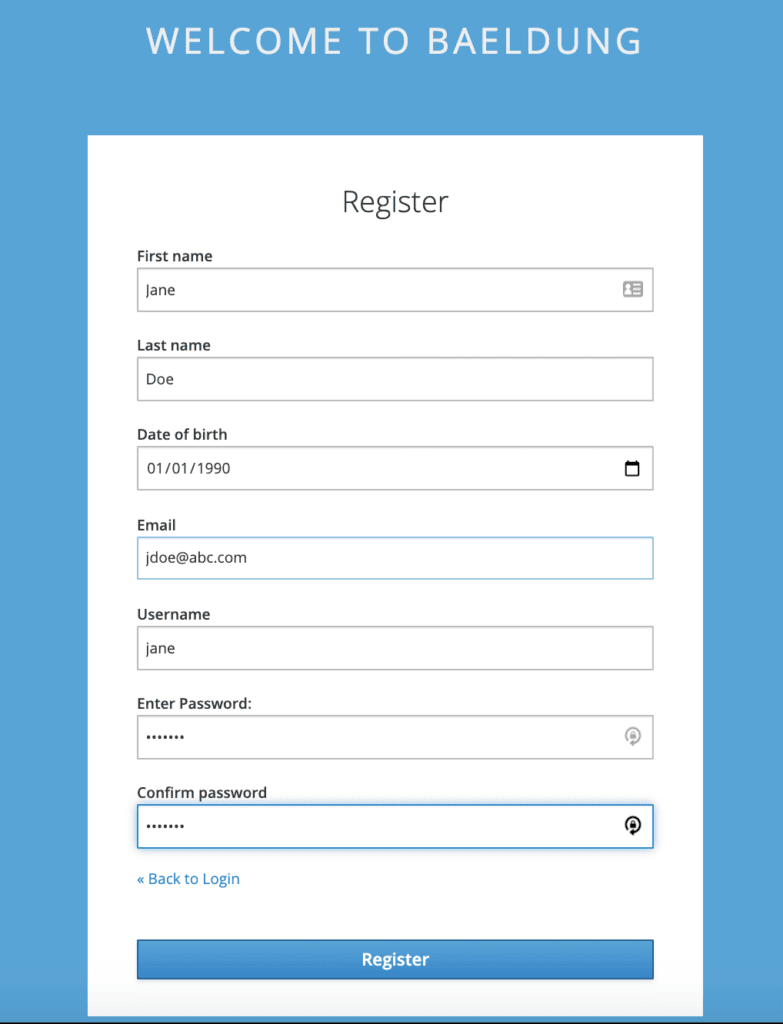
Now when we register a new user on this page, we can enter its Date of birth as well:

To verify, let's open up the Users page on the admin console and lookup Jane:

Next, let's go to Jane‘s Attributes and check out the DOB:

As is evident, the same date of birth is displayed here as we entered on the self-registration form.

3. Embedded Server

Now let's see how we can add custom attributes for self-registration for a Keycloak server embedded in a Spring Boot application.

Same as the first step for the standalone server, we need to enable user registration in the beginning.

We can do this by setting registrationAllowed to true in our realm definition file, baeldung-realm.json:

"registrationAllowed" : true,

After that, we need to add Date of birth to register.ftl, exactly the same way as done previously.

Next, let's copy this file to our src/main/resources/themes/custom/login directory.

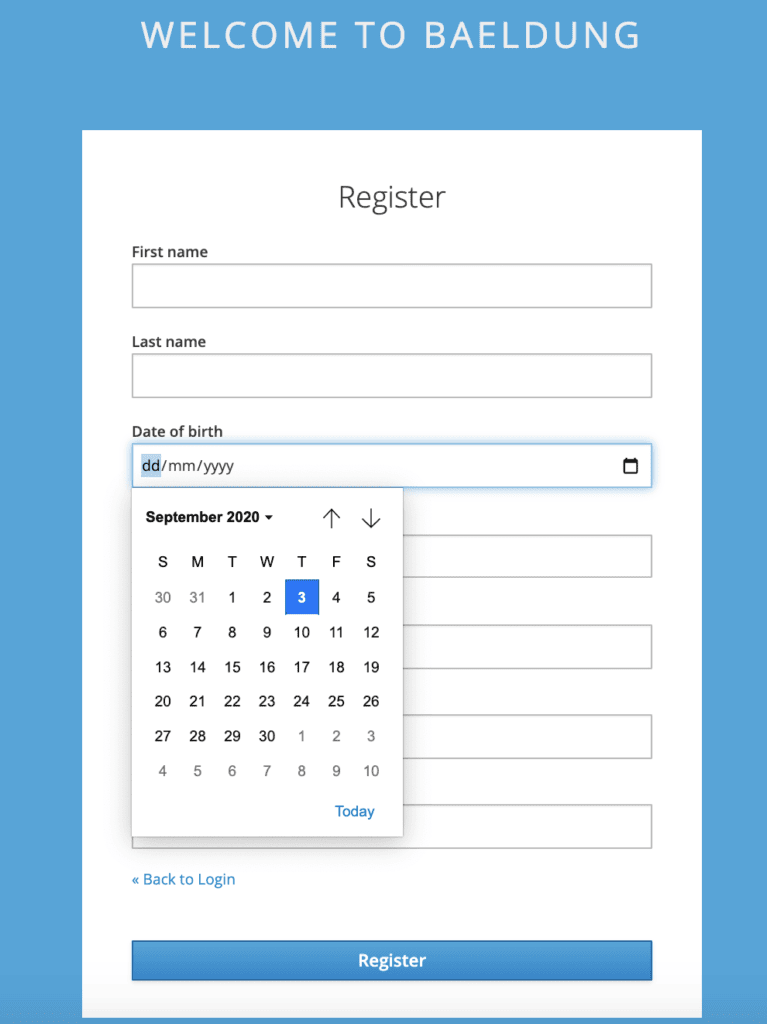
Now on starting the server, our login page carries the register link. Here's the self-registration page with our custom field Date of birth:

It's important to bear in mind that the user added via the self-registration page for the embedded server is transient.

Since we did not add this user to the pre-configuration file, it won't be available on a server restart. However, this comes in handy during the development phase, when we're only checking design and functionality.

To test, before restarting the server, we can verify that the user is added with DOB as a custom attribute from the admin console. We can also try to log in using the new user's credentials.

4. Conclusion

In this tutorial, we learned how to enable user self-registration in Keycloak. We also saw how to add custom attributes while registering as a new user.

We looked at examples on how to do this for both a standalone as well as an embedded instance.

As always, the source code is available over on GitHub.

The post Keycloak User Self-Registration first appeared on Baeldung.


Java Weekly, Issue 350

$
0
0

1. Spring and Java

>> How to encrypt and decrypt JSON properties with JPA [vladmihalcea.com]

Revisit the JPA lifecycle events: encrypting and decrypting JSON properties with JPA

>> Creating Optimized Docker Images for a Spring Boot Application [reflectoring.io]

Leverage Buildpacks to optimize the Docker images for Spring Boot

Also worth reading:

Webinars and presentations:

Time to upgrade:

2. Technical

>> Edgar: Solving Mysteries Faster with Observability [netflixtechblog.com]

Meet Edgar: a service to troubleshoot distributed systems more efficiently, built on top of the idea of distributed tracing

Also worth reading:

3. Musings

>> Reasons to hire inexperienced engineers [benjiweber.co.uk]

Always looking for senior engineers? An unorthodox take on why should we hire more junior developers!

Also worth reading:

4. Comics

And my favorite Dilberts of the week:

>> Artificial Dumbness [dilbert.com]

>> Lifetime Of Being Wrong [dilbert.com]

5. Pick of the Week

>> How to measure the accuracy of forecasts [blog.asmartbear.com]

The post Java Weekly, Issue 350 first appeared on Baeldung.


How to Implement Hibernate in an AWS Lambda Function in Java

$
0
0

1. Overview

AWS Lambda allows us to create lightweight applications that can be deployed and scaled easily. Though we can use frameworks like Spring Cloud Function, for performance reasons, we usually use as little framework code as possible.

Sometimes we need to access a relational database from a Lambda. This is where Hibernate and JPA can be very useful. But, how do we add Hibernate to our Lambda without Spring?

In this tutorial, we'll look at the challenges of using any RDBMS within a Lambda, and how and when Hibernate can be useful. Our example will use the Serverless Application Model to build a REST interface to our data.

We'll look at how to test everything on our local machine using Docker and the AWS SAM CLI.

2. Challenges Using RDBMS and Hibernate in Lambdas

Lambda code needs to be as small as possible to speed up cold starts. Also, a Lambda should be able to do its job in milliseconds. However, using a relational database can involve a lot of framework code and can run more slowly.

In cloud-native applications, we try to design using cloud-native technologies. Serverless databases like Dynamo DB can be a better fit for Lambdas. However, the need for a relational database may come from some other priority within our project.

2.1. Using an RDBMS From a Lambda

Lambdas run for a small amount of time and then their container is paused. The container may be reused for a future invocation, or it may be disposed of by the AWS runtime if no longer needed. This means that any resources the container claims must be managed carefully within the lifetime of a single invocation.

Specifically, we cannot rely on conventional connection pooling for our database, as any connections opened could potentially stay open without being safely disposed of. We can use connection pools during the invocation, but we have to create the connection pool each time. Also, we need to shut down all connections and release all resources as our function ends.

This means that using a Lambda with a database can cause connection problems. A sudden upscale of our Lambda can consume too many connections. Although the Lambda may release connections straight away, we still rely on the database being able to prepare them for the next Lambda invocation. Therefore, it's often a good idea to use a maximum concurrency limit on any Lambda that uses a relational database.

In some projects, Lambda is not the best choice for connecting to an RDBMS, and a traditional Spring Data service, with a connection pool, perhaps running in EC2 or ECS, may be a better solution.

2.2. The Case for Hibernate

A good way to determine if we need Hibernate is to ask what sort of code we'd have to write without it.

If not using Hibernate would cause us to have to code complex joins or lots of boilerplate mapping between fields and columns, then from a coding perspective, Hibernate is a good solution. If our application does not experience a high load or the need for low latency, then the overhead of Hibernate may not be an issue.

2.3. Hibernate Is a Heavyweight Technology

However, we also need to consider the cost of using Hibernate in a Lambda.

The Hibernate jar file is 7 MB in size. Hibernate takes time at start-up to inspect annotations and create its ORM capability. This is enormously powerful, but for a Lambda, it can be overkill. As Lambdas are usually written to perform small tasks, the overhead of Hibernate may not be worth the benefits.

It may be easier to use JDBC directly. Alternatively, a lightweight ORM-like framework such as JDBI may provide a good abstraction over queries, without too much overhead.

3. An Example Application

In this tutorial, we'll build a tracking application for a low-volume shipping company. Let's imagine they collect large items from customers to create a Consignment. Then, wherever that consignment travels, it's checked in with a timestamp, so the customer can monitor it. Each consignment has a source and destination, for which we'll use what3words.com as our geolocation service.

Let's also imagine that they're using mobile devices with bad connections and retries. Therefore, after a consignment is created, the rest of the information about it can arrive in any order. This complexity, along with needing two lists for each consignment – the items and the check-ins – is a good reason to use Hibernate.

3.1. API Design

We'll create a REST API with the following methods:

  • POST /consignment – create a new consignment, returning the ID, and supplying the source and destination; must be done before any other operations
  • POST /consignment/{id}/item – add an item to the consignment; always adds to the end of the list
  • POST /consignment/{id}/checkin – check a consignment in at any location along the way, supplying the location and a timestamp; will always be maintained in the database in order of timestamp
  • GET /consignment/{id} – get the full history of a consignment, including whether it has reached its destination

3.2. Lambda Design

We'll use a single Lambda function to provide this REST API with the Serverless Application Model to define it. This means our single Lambda handler function will need to be able to satisfy all of the above requests.

To make it quick and easy to test, without the overhead of deploying to AWS, we'll test everything on our development machines.

4. Creating the Lambda

Let's set up a fresh Lambda to satisfy our API, but without implementing its data access layer yet.

4.1. Prerequisites

First, we need to install Docker if we do not have it already. We'll need it to host our test database, and it's used by the AWS SAM CLI to simulate the Lambda runtime.

We can test whether we have Docker:

$ docker --version
Docker version 19.03.12, build 48a66213fe

Next, we need to install the AWS SAM CLI and then test it:

$ sam --version
SAM CLI, version 1.1.0

Now we're ready to create our Lambda.

4.2. Creating the SAM Template

The SAM CLI provides us a way of creating a new Lambda function:

$ sam init

This will prompt us for the settings of the new project. Let's choose the following options:

1 - AWS Quick Start Templates
13 - Java 8
1 - maven
Project name - shipping-tracker
1 - Hello World Example: Maven

We should note that these option numbers may vary with later versions of the SAM tooling.

Now, there should be a new directory called shipping-tracker in which there's a stub application. If we look at the contents of its template.yaml file, we'll find a function called HelloWorldFunction with a simple REST API:

Events:
  HelloWorld:
    Type: Api 
    Properties:
      Path: /hello
      Method: get

By default, this satisfies a basic GET request on /hello. We should quickly test that everything is working, by using sam to build and test it:

$ sam build
... lots of maven output
$ sam start-api

Then we can test the hello world API using curl:

$ curl localhost:3000/hello
{ "message": "hello world", "location": "192.168.1.1" }

After that, let's stop sam running its API listener by using CTRL+C to abort the program.

Now that we have an empty Java 8 Lambda, we need to customize it to become our API.

4.3. Creating our API

To create our API, we need to add our own paths to the Events section of the template.yaml file:

CreateConsignment:
  Type: Api 
  Properties:
    Path: /consignment
    Method: post
AddItem:
  Type: Api
  Properties:
    Path: /consignment/{id}/item
    Method: post
CheckIn:
  Type: Api
  Properties:
    Path: /consignment/{id}/checkin
    Method: post
ViewConsignment:
  Type: Api
  Properties:
    Path: /consignment/{id}
    Method: get

Let's also rename the function we're calling from HelloWorldFunction to ShippingFunction:

Resources:
  ShippingFunction:
    Type: AWS::Serverless::Function 

Next, we'll rename the directory it's in to ShippingFunction and change the Java package from helloworld to com.baeldung.lambda.shipping. This means we'll need to update the CodeUri and Handler properties in template.yaml to point to the new location:

Properties:
  CodeUri: ShippingFunction
  Handler: com.baeldung.lambda.shipping.App::handleRequest

Finally, to make space for our own implementation, let's replace the body of the handler:

public APIGatewayProxyResponseEvent handleRequest(APIGatewayProxyRequestEvent input, Context context) {
    Map<String, String> headers = new HashMap<>();
    headers.put("Content-Type", "application/json");
    headers.put("X-Custom-Header", "application/json");
    return new APIGatewayProxyResponseEvent()
      .withHeaders(headers)
      .withStatusCode(200)
      .withBody(input.getResource());
}

Though unit tests are a good idea, for this example, we'll also delete the provided unit tests by deleting the src/test directory.

4.4. Testing the Empty API

Now we've moved things around and created our API and a basic handler, let's double-check everything still works:

$ sam build
... maven output
$ sam start-api

Let's use curl to test the HTTP GET request:

$ curl localhost:3000/consignment/123
/consignment/{id}

We can also use curl -d to POST:

$ curl -d '{"source":"data.orange.brings", "destination":"heave.wipes.clay"}' \
  -H 'Content-Type: application/json' \
  http://localhost:3000/consignment/
/consignment

As we can see, both requests end successfully. Our stub code outputs the resource – the path of the request – which we can use when we set up routing to our various service methods.

4.5. Creating the Endpoints Within the Lambda

We're using a single Lambda function to handle our four endpoints. We could've created a different handler class for each endpoint in the same codebase or written a separate application for each endpoint, but keeping related APIs together allows a single fleet of Lambdas to serve them with common code, which can be a better use of resources.

However, we need to build the equivalent of a REST controller to dispatch each request to a suitable Java function. So, we'll create a stub ShippingService class and route to it from the handler:

public class ShippingService {
    public String createConsignment(Consignment consignment) {
        return UUID.randomUUID().toString();
    }
    public void addItem(String consignmentId, Item item) {
    }
    public void checkIn(String consignmentId, Checkin checkin) {
    }
    public Consignment view(String consignmentId) {
        return new Consignment();
    }
}

We'll also create empty classes for ConsignmentItem, and Checkin. These will soon become our model.

Now that we have a service, let's use the resource to route to the appropriate service methods. We'll add a switch statement to our handler to route requests to the service:

Object result = "OK";
ShippingService service = new ShippingService();
switch (input.getResource()) {
    case "/consignment":
        result = service.createConsignment(
          fromJson(input.getBody(), Consignment.class));
        break;
    case "/consignment/{id}":
        result = service.view(input.getPathParameters().get("id"));
        break;
    case "/consignment/{id}/item":
        service.addItem(input.getPathParameters().get("id"),
          fromJson(input.getBody(), Item.class));
        break;
    case "/consignment/{id}/checkin":
        service.checkIn(input.getPathParameters().get("id"),
          fromJson(input.getBody(), Checkin.class));
        break;
}
return new APIGatewayProxyResponseEvent()
  .withHeaders(headers)
  .withStatusCode(200)
  .withBody(toJson(result));

We can use Jackson to implement our fromJson and toJson functions.

4.6. A Stubbed Implementation

So far, we've learned how to create an AWS Lambda to support an API, test it using sam and curl, and build basic routing functionality within our handler. We could add more error handling on bad inputs.

We should note that the mappings within the template.yaml already expect the AWS API Gateway to filter requests that are not for the right paths in our API. So, we need less error handling for bad paths.

Now, it's time to implement our service with its database, entity model, and Hibernate.

5. Setting up the Database

For this example, we'll use PostgreSQL as the RDBMS. Any relational database could work.

5.1. Starting PostgreSQL in Docker

First, we'll pull a PostgreSQL docker image:

$ docker pull postgres:latest
... docker output
Status: Downloaded newer image for postgres:latest
docker.io/library/postgres:latest

Let's now create a docker network for this database to run in. This network will allow our Lambda to communicate with the database container:

$ docker network create shipping

Next, we need to start the database container within that network:

docker run --name postgres \
  --network shipping \
  -e POSTGRES_PASSWORD=password \
  -d postgres:latest

With –name, we've given the container the name postgres. With –network, we've added it to our shipping docker network. To set the password for the server, we used the environment variable POSTGRES_PASSWORD, set with the -e switch.

We also used -d to run the container in the background, rather than tie up our shell. PostgreSQL will start in a few seconds.

5.2. Adding a Schema

We'll need a new schema for our tables, so let's use the psql client inside our PostgreSQL container to add the shipping schema:

$ docker exec -it postgres psql -U postgres
psql (12.4 (Debian 12.4-1.pgdg100+1))
Type "help" for help.
postgres=#

Within this shell, we create the schema:

postgres=# create schema shipping;
CREATE SCHEMA

Then we use CTRL+D to exit the shell.

We now have PostgreSQL running, ready for our Lambda to use it.

6. Adding our Entity Model and DAO

Now we have a database, let's create our entity model and DAO. Although we're only using a single connection, let's use the Hikari connection pool to see how it could be configured for Lambdas that maybe need to run multiple connections against the database in a single invocation.

6.1. Adding Hibernate to the Project

We'll add dependencies to our pom.xml for both Hibernate and the Hikari Connection Pool. We'll also add the PostgreSQL JDBC driver:

<dependency>
    <groupId>org.hibernate</groupId>
    <artifactId>hibernate-core</artifactId>
    <version>5.4.21.Final</version>
</dependency>
<dependency>
    <groupId>org.hibernate</groupId>
    <artifactId>hibernate-hikaricp</artifactId>
    <version>5.4.21.Final</version>
</dependency>
<dependency>
    <groupId>org.postgresql</groupId>
    <artifactId>postgresql</artifactId>
    <version>42.2.16</version>
</dependency>

6.2. Entity Model

Let's flesh out the entity objects. A Consignment has a list of items and check-ins, as well as its source, destination, and whether it has been delivered yet (that is, whether it has checked into its final destination):

@Entity(name = "consignment")
@Table(name = "consignment")
public class Consignment {
    private String id;
    private String source;
    private String destination;
    private boolean isDelivered;
    private List items = new ArrayList<>();
    private List checkins = new ArrayList<>();
    
    // getters and setters
}

We've annotated the class as an entity and with a table name. We'll provide getters and setters, too. Let's mark the getters with the column names:

@Id
@Column(name = "consignment_id")
public String getId() {
    return id;
}
@Column(name = "source")
public String getSource() {
    return source;
}
@Column(name = "destination")
public String getDestination() {
    return destination;
}
@Column(name = "delivered", columnDefinition = "boolean")
public boolean isDelivered() {
    return isDelivered;
}

For our lists, we'll use the @ElementCollection annotation to make them ordered lists in separate tables with a foreign key relation to the consignment table:

@ElementCollection(fetch = EAGER)
@CollectionTable(name = "consignment_item", joinColumns = @JoinColumn(name = "consignment_id"))
@OrderColumn(name = "item_index")
public List getItems() {
    return items;
}
@ElementCollection(fetch = EAGER)
@CollectionTable(name = "consignment_checkin", joinColumns = @JoinColumn(name = "consignment_id"))
@OrderColumn(name = "checkin_index")
public List getCheckins() {
    return checkins;
}

Here's where Hibernate starts to pay for itself, performing the job of managing collections quite easily.

The Item entity is more straightforward:

@Embeddable
public class Item {
    private String location;
    private String description;
    private String timeStamp;
    @Column(name = "location")
    public String getLocation() {
        return location;
    }
    @Column(name = "description")
    public String getDescription() {
        return description;
    }
    @Column(name = "timestamp")
    public String getTimeStamp() {
        return timeStamp;
    }
    // ... setters omitted
}

It's marked as @Embeddable to enable it to be part of the list definition in the parent object.

Similarly, we'll define Checkin:

@Embeddable
public class Checkin {
    private String timeStamp;
    private String location;
    @Column(name = "timestamp")
    public String getTimeStamp() {
        return timeStamp;
    }
    @Column(name = "location")
    public String getLocation() {
        return location;
    }
    // ... setters omitted
}

6.3. Creating a Shipping DAO

Our ShippingDao class will rely on being passed an open Hibernate Session. This will require the ShippingService to manage the session:

public void save(Session session, Consignment consignment) {
    Transaction transaction = session.beginTransaction();
    session.save(consignment);
    transaction.commit();
}
public Optional<Consignment> find(Session session, String id) {
    return Optional.ofNullable(session.get(Consignment.class, id));
}

We'll wire this into our ShippingService later on.

7. The Hibernate Lifecycle

So far, our entity model and DAO are comparable to non-Lambda implementations. The next challenge is creating a Hibernate SessionFactory within the Lambda's lifecycle.

7.1. Where Is The Database?

If we're going to access the database from our Lambda, then it needs to be configurable. Let's put the JDBC URL and database credentials into environment variables within our template.yaml:

Environment: 
  Variables:
    DB_URL: jdbc:postgresql://postgres/postgres
    DB_USER: postgres
    DB_PASSWORD: password

These environment variables will get injected into the Java runtime. The postgres user is the default for our Docker PostgreSQL container. We assigned the password as password when we started the container earlier.

Within the DB_URL, we have the server name – //postgres is the name we gave our container – and the database name postgres is the default database.

It's worth noting that, though we're hard-coding these values in this example, SAM templates allow us to declare inputs and parameter overrides. Therefore, they can be made parameterizable later on.

7.2. Creating the Session Factory

We have both Hibernate and the Hikari connection pool to configure. To provide settings to Hibernate, we add them to a Map:

Map<String, String> settings = new HashMap<>();
settings.put(URL, System.getenv("DB_URL"));
settings.put(DIALECT, "org.hibernate.dialect.PostgreSQLDialect");
settings.put(DEFAULT_SCHEMA, "shipping");
settings.put(DRIVER, "org.postgresql.Driver");
settings.put(USER, System.getenv("DB_USER"));
settings.put(PASS, System.getenv("DB_PASSWORD"));
settings.put("hibernate.hikari.connectionTimeout", "20000");
settings.put("hibernate.hikari.minimumIdle", "1");
settings.put("hibernate.hikari.maximumPoolSize", "2");
settings.put("hibernate.hikari.idleTimeout", "30000");
settings.put(HBM2DDL_AUTO, "create-only");
settings.put(HBM2DDL_DATABASE_ACTION, "create");

Here, we're using System.getenv to pull runtime settings from the environment. We've added the HBM2DDL_ settings to make our application generate the database tables. However, we should comment out or remove these lines after the database schema is generated, and should avoid allowing our Lambda to do this in production. It's helpful for our testing now, though.

As we can see, many of the settings have constants already defined in the AvailableSettings class in Hibernate, though the Hikari-specific ones don't.

Now that we have the settings, we need to build the SessionFactory. We'll individually add our entity classes to it:

StandardServiceRegistry registry = new StandardServiceRegistryBuilder()
  .applySettings(settings)
  .build();
return new MetadataSources(registry)
  .addAnnotatedClass(Consignment.class)
  .addAnnotatedClass(Item.class)
  .addAnnotatedClass(Checkin.class)
  .buildMetadata()
  .buildSessionFactory();

7.3. Add to the Handler

We need the handler to create and guarantee to close the session factory on each invocation. With that in mind, let's extract most of the controller functionality into a method called routeRequest and modify our handler to create the SessionFactory in a try-with-resources block:

try (SessionFactory sessionFactory = createSessionFactory()) {
    ShippingService service = new ShippingService(sessionFactory, new ShippingDao());
    return routeRequest(input, service);
}

We've also changed our ShippingService to have the SessionFactory and ShippingDao as properties, injected via the constructor, but it's not using them yet.

7.4. Testing Hibernate

At this point, though the ShippingService does nothing, invoking the Lambda should cause Hibernate to start up and generate DDL.

Let's double-check the DDL it generates before we comment out the settings for that:

$ sam build
$ sam local start-api --docker-network shipping

We build the application as before, but now we're adding the –docker-network parameter to sam local. This runs the test Lambda within the same network as our database so that the Lambda can reach the database container by using its container name.

When we first hit the endpoint using curl, our tables should be created:

$ curl localhost:3000/consignment/123
{"id":null,"source":null,"destination":null,"items":[],"checkins":[],"delivered":false}

The stub code still returned a blank Consignment. But, let's now check the database to see if the tables were created:

$ docker exec -it postgres pg_dump -s -U postgres
... DDL output
CREATE TABLE shipping.consignment_item (
    consignment_id character varying(255) NOT NULL,
...

Once we're happy our Hibernate setup is working, we can comment out the HBM2DDL_ settings.

8. Complete the Business Logic

All that remains is to make the ShippingService use the ShippingDao to implement the business logic. Each method will create a session factory in a try-with-resources block to ensure it gets closed.

8.1. Create Consignment

A new consignment hasn't been delivered and should receive a new ID. Then we should save it in the database:

public String createConsignment(Consignment consignment) {
    try (Session session = sessionFactory.openSession()) {
        consignment.setDelivered(false);
        consignment.setId(UUID.randomUUID().toString());
        shippingDao.save(session, consignment);
        return consignment.getId();
    }
}

8.2. View Consignment

To get a consignment, we need to read it from the database by ID. Though a REST API should return Not Found on an unknown request, for this example, we'll just return an empty consignment if none is found:

public Consignment view(String consignmentId) {
    try (Session session = sessionFactory.openSession()) {
        return shippingDao.find(session, consignmentId)
          .orElseGet(Consignment::new);
    }
}

8.3. Add Item

Items will go into our list of items in the order received:

public void addItem(String consignmentId, Item item) {
    try (Session session = sessionFactory.openSession()) {
        shippingDao.find(session, consignmentId)
          .ifPresent(consignment -> addItem(session, consignment, item));
    }
}
private void addItem(Session session, Consignment consignment, Item item) {
    consignment.getItems()
      .add(item);
    shippingDao.save(session, consignment);
}

Ideally, we'd have better error handling if the consignment did not exist, but for this example, non-existent consignments will be ignored.

8.4. Check-In

The check-ins need to be sorted in order of when they happen, not when the request is received. Also, when the item reaches the final destination, it should be marked as delivered:

public void checkIn(String consignmentId, Checkin checkin) {
    try (Session session = sessionFactory.openSession()) {
        shippingDao.find(session, consignmentId)
          .ifPresent(consignment -> checkIn(session, consignment, checkin));
    }
}
private void checkIn(Session session, Consignment consignment, Checkin checkin) {
    consignment.getCheckins().add(checkin);
    consignment.getCheckins().sort(Comparator.comparing(Checkin::getTimeStamp));
    if (checkin.getLocation().equals(consignment.getDestination())) {
        consignment.setDelivered(true);
    }
    shippingDao.save(session, consignment);
}

9. Testing the App

Let's simulate a package traveling from The White House to the Empire State Building.

An agent creates the journey:

$ curl -d '{"source":"data.orange.brings", "destination":"heave.wipes.clay"}' \
  -H 'Content-Type: application/json' \
  http://localhost:3000/consignment/
"3dd0f0e4-fc4a-46b4-8dae-a57d47df5207"

We now have the ID 3dd0f0e4-fc4a-46b4-8dae-a57d47df5207 for the consignment. Then, someone collects two items for the consignment – a picture and a piano:

$ curl -d '{"location":"data.orange.brings", "timeStamp":"20200101T120000", "description":"picture"}' \
  -H 'Content-Type: application/json' \
  http://localhost:3000/consignment/3dd0f0e4-fc4a-46b4-8dae-a57d47df5207/item
"OK"
$ curl -d '{"location":"data.orange.brings", "timeStamp":"20200101T120001", "description":"piano"}' \
  -H 'Content-Type: application/json' \
  http://localhost:3000/consignment/3dd0f0e4-fc4a-46b4-8dae-a57d47df5207/item
"OK"

Sometime later, there's a check-in:

$ curl -d '{"location":"united.alarm.raves", "timeStamp":"20200101T173301"}' \
-H 'Content-Type: application/json' \
http://localhost:3000/consignment/3dd0f0e4-fc4a-46b4-8dae-a57d47df5207/checkin
"OK"

And again later:

$ curl -d '{"location":"wink.sour.chasing", "timeStamp":"20200101T191202"}' \
-H 'Content-Type: application/json' \
http://localhost:3000/consignment/3dd0f0e4-fc4a-46b4-8dae-a57d47df5207/checkin
"OK"

The customer, at this point, requests the status of the consignment:

$ curl http://localhost:3000/consignment/3dd0f0e4-fc4a-46b4-8dae-a57d47df5207
{
  "id":"3dd0f0e4-fc4a-46b4-8dae-a57d47df5207",
  "source":"data.orange.brings",
  "destination":"heave.wipes.clay",
  "items":[
    {"location":"data.orange.brings","description":"picture","timeStamp":"20200101T120000"},
    {"location":"data.orange.brings","description":"piano","timeStamp":"20200101T120001"}
  ],
  "checkins":[
    {"timeStamp":"20200101T173301","location":"united.alarm.raves"},
    {"timeStamp":"20200101T191202","location":"wink.sour.chasing"}
  ],
  "delivered":false
}%

They see the progress, and it's not yet delivered.

A message should have been sent at 20:12 to say it reached deflection.famed.apple, but it gets delayed, and the message from 21:46 at the destination gets there first:

$ curl -d '{"location":"heave.wipes.clay", "timeStamp":"20200101T214622"}' \
-H 'Content-Type: application/json' \
http://localhost:3000/consignment/3dd0f0e4-fc4a-46b4-8dae-a57d47df5207/checkin
"OK"

The customer, at this point, requests the status of the consignment:

$ curl http://localhost:3000/consignment/3dd0f0e4-fc4a-46b4-8dae-a57d47df5207
{
  "id":"3dd0f0e4-fc4a-46b4-8dae-a57d47df5207",
...
    {"timeStamp":"20200101T191202","location":"wink.sour.chasing"},
    {"timeStamp":"20200101T214622","location":"heave.wipes.clay"}
  ],
  "delivered":true
}

Now it's delivered. So, when the delayed message gets through:

$ curl -d '{"location":"deflection.famed.apple", "timeStamp":"20200101T201254"}' \
-H 'Content-Type: application/json' \
http://localhost:3000/consignment/3dd0f0e4-fc4a-46b4-8dae-a57d47df5207/checkin
"OK"
$ curl http://localhost:3000/consignment/3dd0f0e4-fc4a-46b4-8dae-a57d47df5207
{
"id":"3dd0f0e4-fc4a-46b4-8dae-a57d47df5207",
...
{"timeStamp":"20200101T191202","location":"wink.sour.chasing"},
{"timeStamp":"20200101T201254","location":"deflection.famed.apple"},
{"timeStamp":"20200101T214622","location":"heave.wipes.clay"}
],
"delivered":true
}

The check-in is put in the right place in the timeline.

10. Conclusion

In this article, we discussed the challenges of using a heavyweight framework like Hibernate in a lightweight container such as AWS Lambda.

We built a Lambda and REST API and learned how to test it on our local machine using Docker and AWS SAM CLI. Then, we constructed an entity model for Hibernate to use with our database. We also used Hibernate to initialize our tables.

Finally, we integrated the Hibernate SessionFactory into our application, ensuring to close it before the Lambda exited.

As usual, the example code for this article can be found over on GitHub.

The post How to Implement Hibernate in an AWS Lambda Function in Java first appeared on Baeldung.


Passing Command Line Arguments in Gradle

$
0
0

1. Overview

Sometimes, we want to execute various programs from Gradle that require input parameters.

In this quick tutorial, we’re going to see how to pass command-line arguments from Gradle.

2. Types of Input Arguments

When we want to pass input arguments from the Gradle CLI, we have two choices:

  • setting system properties with the -D flag
  • setting project properties with the -P flag

In general, we should use project properties unless we want to customize settings in the JVM.

Although it is possible to hijack system properties to pass our inputs, we should avoid doing this.

Let's see these properties in action. First, we configure our build.gradle:

apply plugin: "java"
description = "Gradle Command Line Arguments examples"
task propertyTypes(){
    doLast{
        if (project.hasProperty("args")) {
            println "Our input argument with project property ["+project.getProperty("args")+"]"
        }
        println "Our input argument with system property ["+System.getProperty("args")+"]"
    }
}

Notice we read them differently in our task.

We do this because project.getProperty() throws a MissingPropertyException in case our property is not defined.

Unlike project properties, System.getProperty() returns a null value in case the property is not defined.

Next, let’s run the task and see its output:

$ ./gradlew propertyTypes -Dargs=lorem -Pargs=ipsum
> Task :cmd-line-args:propertyTypes
Our input argument with project property [ipsum]
Our input argument with system property [lorem]

3. Passing Command Line Arguments

So far, we’ve seen just how to read the properties. In practice, we need to send these properties as arguments to our program of choice.

3.1. Passing Arguments to Java Applications

In a previous tutorial, we explained how to run Java main classes from Gradle. Let’s build upon that and see how we can also pass arguments.

First, let’s use the application plugin in our build.gradle:

apply plugin: "java"
apply plugin: "application"
description = "Gradle Command Line Arguments examples"
 
// previous declarations
 
ext.javaMainClass = "com.baeldung.cmd.MainClass"
 
application {
    mainClassName = javaMainClass
}

Now, let’s take a look at our main class:

public class MainClass {
    public static void main(String[] args) {
        System.out.println("Gradle command line arguments example");
        for (String arg : args) {
            System.out.println("Got argument [" + arg + "]");
        }
    }
}

Next, let’s run it with some arguments:

$ ./gradlew :cmd-line-args:run --args="lorem ipsum dolor"
> Task :cmd-line-args:run
Gradle command line arguments example
Got argument [lorem]
Got argument [ipsum]
Got argument [dolor]

Here, we don’t use properties to pass arguments. Instead, we pass the –args flag and the corresponding inputs there.

This is a nice wrapper provided by the application plugin. However, this is only available from Gradle 4.9 onward.

Let’s see what this would look like using a JavaExec task.

First, we need to define it in our build.gradle:

ext.javaMainClass = "com.baeldung.cmd.MainClass"
if (project.hasProperty("args")) {
    ext.cmdargs = project.getProperty("args")
} else { 
    ext.cmdargs = ""
}
task cmdLineJavaExec(type: JavaExec) {
    group = "Execution"
    description = "Run the main class with JavaExecTask"
    classpath = sourceSets.main.runtimeClasspath
    main = javaMainClass
    args cmdargs.split()
}

Let’s take a closer look at what we did. We first read the arguments from a project property.

Since this contains all the arguments as one string, we then use the split method to obtain an array of arguments.

Next, we pass this array to the args property of our JavaExec task.

Let’s see what happens when we run this task, passing project properties with the -P option:

$ ./gradlew cmdLineJavaExec -Pargs="lorem ipsum dolor"
> Task :cmd-line-args:cmdLineJavaExec
Gradle command line arguments example
Got argument [lorem]
Got argument [ipsum]
Got argument [dolor]

3.2. Passing Arguments to Other Applications

In some cases, we might want to pass some arguments to a third-party application from Gradle.

Luckily, we can use the more generic Exec task to do so:

if (project.hasProperty("args")) {
    ext.cmdargs = project.getProperty("args")
} else { 
    ext.cmdargs = "ls"
}
 
task cmdLineExec(type: Exec) {
    group = "Execution"
    description = "Run an external program with ExecTask"
    commandLine cmdargs.split()
}

Here, we use the commandLine property of the task to pass the executable along with any arguments. Again, we split the input based on spaces.

Let’s see how to run this for the ls command:

$ ./gradlew cmdLineExec -Pargs="ls -ll"
> Task :cmd-line-args:cmdLineExec
total 4
drwxr-xr-x 1 user 1049089    0 Sep  1 17:59 bin
drwxr-xr-x 1 user 1049089    0 Sep  1 18:30 build
-rw-r--r-- 1 user 1049089 1016 Sep  3 15:32 build.gradle
drwxr-xr-x 1 user 1049089    0 Sep  1 17:52 src

This can be pretty useful if we don’t want to hard-code the executable in the task.

4. Conclusion

In this quick tutorial, we saw how to pass input arguments from Gradle.

First, we explained the types of properties we can use. Although we can use system properties to pass input arguments, we should prefer project properties instead.

Then, we explored different approaches for passing command-line arguments to Java or external applications.

As usual, the complete code can be found over on GitHub.

The post Passing Command Line Arguments in Gradle first appeared on Baeldung.


Checking if a Class Exists in Java

$
0
0

1. Overview

Checking for the existence of a class could be useful when determining which implementation of an interface to use. This technique is commonly used during older JDBC setups.

In this tutorial, we'll explore the nuances of using Class.forName() to check the existence of a class in the Java classpath.

2. Using Class.forName()

We can check for the existence of a class using Java Reflection, specifically Class.forName(). The documentation shows that a ClassNotFoundException will be thrown if the class cannot be located.

2.1. When to Expect ClassNotFoundException

First, let's write a test that will certainly throw a ClassNotFoundException so that we can know that our positive tests are safe:

@Test(expected = ClassNotFoundException.class)
public void givenNonExistingClass_whenUsingForName_thenClassNotFound() throws ClassNotFoundException {
    Class.forName("class.that.does.not.exist");
}

So, we've proven that a class that doesn't exist will throw a ClassNotFoundException. Let's write a test for a class that indeed does exist:

@Test
public void givenExistingClass_whenUsingForName_thenNoException() throws ClassNotFoundException {
    Class.forName("java.lang.String");
}

These tests prove that running Class.forName() and not catching a ClassNotFoundException is equivalent to the specified class existing on the classpath. However, this isn't quite a perfect solution due to side effects.

2.2. Side Effect: Class Initialization

It is essential to point out that, without specifying a class loader, Class.forName() has to run the static initializer on the requested class. This can lead to unexpected behavior.

To exemplify this behavior, let's create a class that throws a RuntimeException when its static initializer block is executed so that we can know immediately when it is executed:

public static class InitializingClass {
    static {
        if (true) { //enable throwing of an exception in a static initialization block
            throw new RuntimeException();
        }
    }
}

We can see from the forName() documentation that it throws an ExceptionInInitializerError if the initialization provoked by this method fails.

Let's write a test that will expect an ExceptionInInitializerError when trying to find our InitializingClass without specifying a class loader:

@Test(expected = ExceptionInInitializerError.class)
public void givenInitializingClass_whenUsingForName_thenInitializationError() throws ClassNotFoundException {
    Class.forName("path.to.InitializingClass");
}

Since the execution of a class' static initialization block is an invisible side effect, we can now see how it could cause performance issues or even errors. Let's look at how to skip the class initialization.

3. Telling Class.forName() to Skip Initialization

Luckily for us, there is an overloaded method of forName(), which accepts a class loader and whether the class initialization should be executed.

According to the documentation, the following calls are equivalent:

Class.forName("Foo")
Class.forName("Foo", true, this.getClass().getClassLoader())

By changing true to false, we can now write a test that checks for the existence of our InitializingClass without triggering its static initialization block:

@Test
public void givenInitializingClass_whenUsingForNameWithoutInitialization_thenNoException() throws ClassNotFoundException {
    Class.forName("path.to.InitializingClass", false, getClass().getClassLoader());
}

4. Java 9 Modules

For Java 9+ projects, there's a third overload of Class.forName(), which accepts a Module and a String class name. This overload doesn't run the class initializer by default. Also, notably, it returns null when the requested class does not exist rather than throwing a ClassNotFoundException.

5. Conclusion

In this short tutorial, we've exposed the side effect of class initialization when using Class.forName() and have found that you can use the forName() overloads to prevent that from happening.

The source code with all the examples in this tutorial can be found over on GitHub.

The post Checking if a Class Exists in Java first appeared on Baeldung.


Arrays.asList vs new ArrayList(Arrays.asList())

$
0
0

1. Overview

In this short tutorial, we'll take a look at the differences between Arrays.asList(array) and ArrayList(Arrays.asList(array)).

2. Arrays.asList

Let's start with the Arrays.asList method.

Using this method, we can convert from an array to a fixed-size List object. This List is just a wrapper that makes the array available as a list. No data is copied or created.

Also, we can't modify its length because adding or removing elements is not allowed.

However, we can modify single items inside the array. Note that all the modifications we make to the single items of the List will be reflected in our original array:

String[] stringArray = new String[] { "A", "B", "C", "D" };
List stringList = Arrays.asList(stringArray);

Now, let's see what happens if we modify the first element of stringList:

stringList.set(0, "E");
 
assertThat(stringList).containsExactly("E", "B", "C", "D");
assertThat(stringArray).containsExactly("E", "B", "C", "D");

As we can see, our original array was modified, too. Both the list and the array now contain exactly the same elements in the same order.

Let's now try to insert a new element to stringList:

stringList.add("F");
java.lang.UnsupportedOperationException
	at java.base/java.util.AbstractList.add(AbstractList.java:153)
	at java.base/java.util.AbstractList.add(AbstractList.java:111)

As we can see, adding/removing elements to/from the List will throw java.lang.UnsupportedOperationException.

3. ArrayList(Arrays.asList(array))

Similar to the Arrays.asList method, we can use ArrayList<>(Arrays.asList(array)) when we need to create a List out of an array.

But, unlike our previous example, this is an independent copy of the array, which means that modifying the new list won't affect the original array. Additionally, we have all the capabilities of a regular ArrayList, like adding and removing elements:

String[] stringArray = new String[] { "A", "B", "C", "D" }; 
List stringList = new ArrayList<>(Arrays.asList(stringArray));

Now let's modify the first element of stringList:

stringList.set(0, "E");
 
assertThat(stringList).containsExactly("E", "B", "C", "D");

And now, let's see what happened with our original array:

assertThat(stringArray).containsExactly("A", "B", "C", "D");

As we can see, our original array remains untouched.

Before wrapping up, if we take a look at the JDK source code, we can see the Arrays.asList method returns a type of ArrayList that is different from java.util.ArrayList. The main difference is that the returned ArrayList only wraps an existing array — it doesn't implement the add and remove methods.

4. Conclusion

In this short article, we took a look at the differences between two ways of converting an array into an ArrayList. We saw how those two options behave and the difference between how they implement their internal arrays.

As always, the code samples can be found over on GitHub.

The post Arrays.asList vs new ArrayList(Arrays.asList()) first appeared on Baeldung.


Social Login with Spring Security in a Jersey Application

$
0
0

1. Overview

Security is a first-class citizen in the Spring ecosystem. Therefore, it's not surprising that OAuth2 can work with Spring Web MVC with almost no configuration.

However, a native Spring solution isn't the only way to implement the presentation layer. Jersey, a JAX-RS compliant implementation, can also work in tandem with Spring OAuth2.

In this tutorial, we'll find out how to protect a Jersey application with Spring Social Login, which is implemented using the OAuth2 standard.

2. Maven Dependencies

Let's add the spring-boot-starter-jersey artifact to integrate Jersey into a Spring Boot application:

<dependency>
    <groupId>org.springframework.boot</groupId>
    <artifactId>spring-boot-starter-jersey</artifactId>
</dependency>

To configure Security OAuth2, we need spring-boot-starter-security and spring-security-oauth2-client:

<dependency>
    <groupId>org.springframework.boot</groupId>
    <artifactId>spring-boot-starter-security</artifactId>
</dependency>
<dependency>
    <groupId>org.springframework.security</groupId>
    <artifactId>spring-security-oauth2-client</artifactId>
</dependency>

We'll manage all these dependencies using the Spring Boot Starter Parent version 2.

3. Jersey Presentation Layer

We'll need a resource class with a couple of endpoints to use Jersey as the presentation layer.

3.1. Resource Class

Here's the class that contains endpoint definitions:

@Path("/")
public class JerseyResource {
    // endpoint definitions
}

The class itself is very simple – it has just a @Path annotation. The value of this annotation identifies the base path for all endpoints in the class's body.

It may be worth mentioning that this resource class doesn't carry a stereotype annotation for component scanning. In fact, it doesn't even need to be a Spring bean. The reason is that we don't rely on Spring to handle the request mapping.

3.2. Login Page

Here's the method that handles login requests:

@GET
@Path("login")
@Produces(MediaType.TEXT_HTML)
public String login() {
    return "Log in with <a href=\"/oauth2/authorization/github\">GitHub</a>";
}

This method returns a string for GET requests that target the /login endpoint. The text/html content type instructs the user's browser to display the response with a clickable link.

We'll use GitHub as the OAuth2 provider, hence the link /oauth2/authorization/github. This link will trigger a redirection to the GitHub authorize page.

3.3. Home Page

Let's define another method to handle requests to the root path:

@GET
@Produces(MediaType.TEXT_PLAIN)
public String home(@Context SecurityContext securityContext) {
    OAuth2AuthenticationToken authenticationToken = (OAuth2AuthenticationToken) securityContext.getUserPrincipal();
    OAuth2AuthenticatedPrincipal authenticatedPrincipal = authenticationToken.getPrincipal();
    String userName = authenticatedPrincipal.getAttribute("login");
    return "Hello " + userName;
}

This method returns the home page, which is a string containing the logged-in username. Notice, in this case, we extracted username from the login attribute. Another OAuth2 provider may use a different attribute for the username, though.

Obviously, the above method works for authenticated requests only. If a request is unauthenticated, it'll be redirected to the login endpoint. We'll see how to configure this redirection in section 4.

3.4. Registering Jersey with the Spring Container

Let's register the resource class with a servlet container to enable Jersey services. Fortunately, it's pretty simple:

@Component
public class RestConfig extends ResourceConfig {
    public RestConfig() {
        register(JerseyResource.class);
    }
}

By registering JerseyResource in a ResourceConfig subclass, we informed the servlet container of all the endpoints in that resource class.

The last step is to register the ResourceConfig subclass, which is RestConfig in this case, with the Spring container. We implemented this registration with the @Component annotation.

4. Configuring Spring Security

We can configure security for Jersey just like we would for a normal Spring application:

@Configuration
public class SecurityConfig extends WebSecurityConfigurerAdapter {
    @Override
    protected void configure(HttpSecurity http) throws Exception {
        http
          .authorizeRequests()
          .antMatchers("/login")
          .permitAll()
          .anyRequest()
          .authenticated()
          .and()
          .oauth2Login()
          .loginPage("/login");
    }
}

The most important method in the given chain is oauth2Login. This method configures authentication support using an OAuth 2.0 provider. In this tutorial, the provider is GitHub.

Another noticeable configuration is the login page. By providing string “/login” to the loginPage method, we tell Spring to redirect unauthenticated requests to the /login endpoint.

Note that the default security configuration also provides an auto-generated page at /login. Therefore, even if we didn't configure the login page, an unauthenticated request would still be redirected to that endpoint.

The difference between the default configuration and the explicit setting is that in the default case, the application returns the generated page rather than our custom string.

5. Application Configuration

In order to have an OAuth2-protected application, we'll need to register a client with an OAuth2 provider. After that, add the client's credentials to the application.

5.1. Registering OAuth2 Client

Let's start the registration process by registering a GitHub app. After landing on the GitHub developer page, hit the New OAuth App button to open the Register a new OAuth application form.

Next, fill out the displayed form with appropriate values. For the application name, enter any string that makes the app recognizable. The homepage URL can be http://localhost:8083, and the authorization callback URL is http://localhost:8083/login/oauth2/code/github.

The callback URL is the path to which the browser redirects after the user authenticates with GitHub and grants access to the application.

This is how the registration form may look like:


Now, click on the Register application button. The browser should then redirect to the GitHub app's homepage, which shows up the client ID and client secret.

5.2. Configuring Spring Boot Application

Let's add a properties file, named jersey-application.properties, to the classpath:

server.port=8083
spring.security.oauth2.client.registration.github.client-id=<your-client-id>
spring.security.oauth2.client.registration.github.client-secret=<your-client-secret>

Remember to replace the placeholders <your-client-id> and <your-client-secret> with values from our own GitHub application.

Lastly, add this file as a property source to a Spring Boot application:

@SpringBootApplication
@PropertySource("classpath:jersey-application.properties")
public class JerseyApplication {
    public static void main(String[] args) {
        SpringApplication.run(JerseyApplication.class, args);
    }
}

6. Authentication in Action

Let's see how we can log in to our application after registering with GitHub.

6.1. Accessing the Application

Let's start the application, then access the homepage at the address localhost:8083. Since the request is unauthenticated, we'll be redirected to the login page:


Now, when we hit the GitHub link, the browser will redirect to the GitHub authorize page:


By looking at the URL, we can see that the redirected request carried many query parameters, such as response_type, client_id, and scope:

https://github.com/login/oauth/authorize?response_type=code&client_id=c30a16c45a9640771af5&scope=read:user&state=dpTme3pB87wA7AZ--XfVRWSkuHD3WIc9Pvn17yeqw38%3D&redirect_uri=http://localhost:8083/login/oauth2/code/github

The value of response_type is code, meaning the OAuth2 grant type is authorization code.  Meanwhile, the client_id parameter helps identifies our application. For the meanings of all the parameters, please head over to the GitHub Developer page.

When the authorize page shows up, we need to authorize the application to continue. After the authorization is successful, the browser will redirect to a predefined endpoint in our application, together with a few query parameters:

http://localhost:8083/login/oauth2/code/github?code=561d99681feeb5d2edd7&state=dpTme3pB87wA7AZ--XfVRWSkuHD3WIc9Pvn17yeqw38%3D

Behind the scenes, the application will then exchange the authorization code for an access token. Afterward, it uses this token to get information on the logged-in user.

After the request to localhost:8083/login/oauth2/code/github returns, the browser goes back to the homepage. This time, we should see a greeting message with our own username:


6.2. How to Obtain the Username?

It's clear that the username in the greeting message is our GitHub username. At this point, a question may arise: how can we get the username and other information from an authenticated user?

In our example, we extracted the username from the login attribute. However, this isn't the same across all OAuth2 providers. In other words, a provider may provide data in certain attributes at its own discretion. Therefore, we can say there're simply no standards in this regard.

In the case of GitHub, we can find which attributes we need in the reference documentation. Likewise, other OAuth2 providers provide their own references.

Another solution is that we can launch the application in the debug mode and set a breakpoint after an OAuth2AuthenticatedPrincipal object is created. When going through all attributes of this object, we'll have insight into the user's information.

7. Testing

Let's write a few tests to verify the application's behavior.

7.1. Setting Up Environment

Here's the class that will hold our test methods:

@RunWith(SpringRunner.class)
@SpringBootTest(webEnvironment = RANDOM_PORT)
@TestPropertySource(properties = "spring.security.oauth2.client.registration.github.client-id:test-id")
public class JerseyResourceUnitTest {
    @Autowired
    private TestRestTemplate restTemplate;
    @LocalServerPort
    private int port;
    private String basePath;
    @Before
    public void setup() {
        basePath = "http://localhost:" + port + "/";
    }
    // test methods
}

Instead of using the real GitHub client ID, we defined a test ID for the OAuth2 client. This ID is then set to the spring.security.oauth2.client.registration.github.client-id property.

All annotations in this test class are common in Spring Boot testing, hence we won't cover them in this tutorial. In case any of these annotations are unclear, please head over to Testing in Spring Boot, Integration Testing in Spring, or Exploring the Spring Boot TestRestTemplate.

7.2. Home Page

We'll prove that when an unauthenticated user attempts to access the home page, they'll be redirected to the login page for authentication:

@Test
public void whenUserIsUnauthenticated_thenTheyAreRedirectedToLoginPage() {
    ResponseEntity<Object> response = restTemplate.getForEntity(basePath, Object.class);
    assertThat(response.getStatusCode()).isEqualTo(HttpStatus.FOUND);
    assertThat(response.getBody()).isNull();
    URI redirectLocation = response.getHeaders().getLocation();
    assertThat(redirectLocation).isNotNull();
    assertThat(redirectLocation.toString()).isEqualTo(basePath + "login");
}

7.3. Login Page

Let's verify that accessing the login page will lead to the authorization path being returned:

@Test
public void whenUserAttemptsToLogin_thenAuthorizationPathIsReturned() {
    ResponseEntity response = restTemplate.getForEntity(basePath + "login", String.class);
    assertThat(response.getHeaders().getContentType()).isEqualTo(TEXT_HTML);
    assertThat(response.getBody()).isEqualTo("Log in with GitHub");
}

7.4. Authorization Endpoint

Finally, when sending a request to the authorization endpoint, the browser will redirect to the OAuth2 provider's authorize page with appropriate parameters:

@Test
public void whenUserAccessesAuthorizationEndpoint_thenTheyAresRedirectedToProvider() {
    ResponseEntity response = restTemplate.getForEntity(basePath + "oauth2/authorization/github", String.class);
    assertThat(response.getStatusCode()).isEqualTo(HttpStatus.FOUND);
    assertThat(response.getBody()).isNull();
    URI redirectLocation = response.getHeaders().getLocation();
    assertThat(redirectLocation).isNotNull();
    assertThat(redirectLocation.getHost()).isEqualTo("github.com");
    assertThat(redirectLocation.getPath()).isEqualTo("/login/oauth/authorize");
    String redirectionQuery = redirectLocation.getQuery();
    assertThat(redirectionQuery.contains("response_type=code"));
    assertThat(redirectionQuery.contains("client_id=test-id"));
    assertThat(redirectionQuery.contains("scope=read:user"));
}

8. Conclusion

In this tutorial, we have set up Spring Social Login with a Jersey application. The tutorial also included steps for registering an application with the GitHub OAuth2 provider.

The complete source code can be found over on GitHub.

The post Social Login with Spring Security in a Jersey Application first appeared on Baeldung.

        
Viewing all 4703 articles
Browse latest View live


<script src="https://jsc.adskeeper.com/r/s/rssing.com.1596347.js" async> </script>