![Contact Us Featured]()
1. Overview
Automated visual regression testing over a scalable cloud grid offers a powerful solution for ensuring web applications’ visual integrity and consistency across various browsers, devices, and screen resolutions. By leveraging the capabilities of cloud-based infrastructure, teams can efficiently execute visual regression tests in parallel, allowing for comprehensive coverage and faster feedback cycles.
This approach enhances the accuracy of detecting visual discrepancies and streamlines the automation testing process by eliminating the need for manual intervention. As a result, organizations can achieve greater confidence in their releases while optimizing resources and accelerating time-to-market.
In this article, we’ll learn how to automate visual regression testing over a scalable cloud grid such as LambdaTest.
2. What Is Visual Regression Testing?
Regression testing is a type of testing that ensures the latest changes to the code don’t break the existing functionality.
Visual regression testing involves checking whether the application’s user interface aligns with the overall expectations and monitoring the layout and the application’s visual elements. Its primary objective is to ensure that User Experience (UX) is visually superlative by preventing visual and usability issues before they arise.
Examples of visual validations performed by visual regression testing include:
- The location of the web elements
- Brightness
- Contrast
- Color of the buttons
- Menu options
- Components
- Text and their respective alignments
Visual regression testing is important for the following reasons:
- It helps the software team and the stakeholders understand the working aspects of a user interface for a better end-user experience.
- Maintaining an intuitive UI can serve as a better guide to the end users.
2.1. Example of Visual Bug
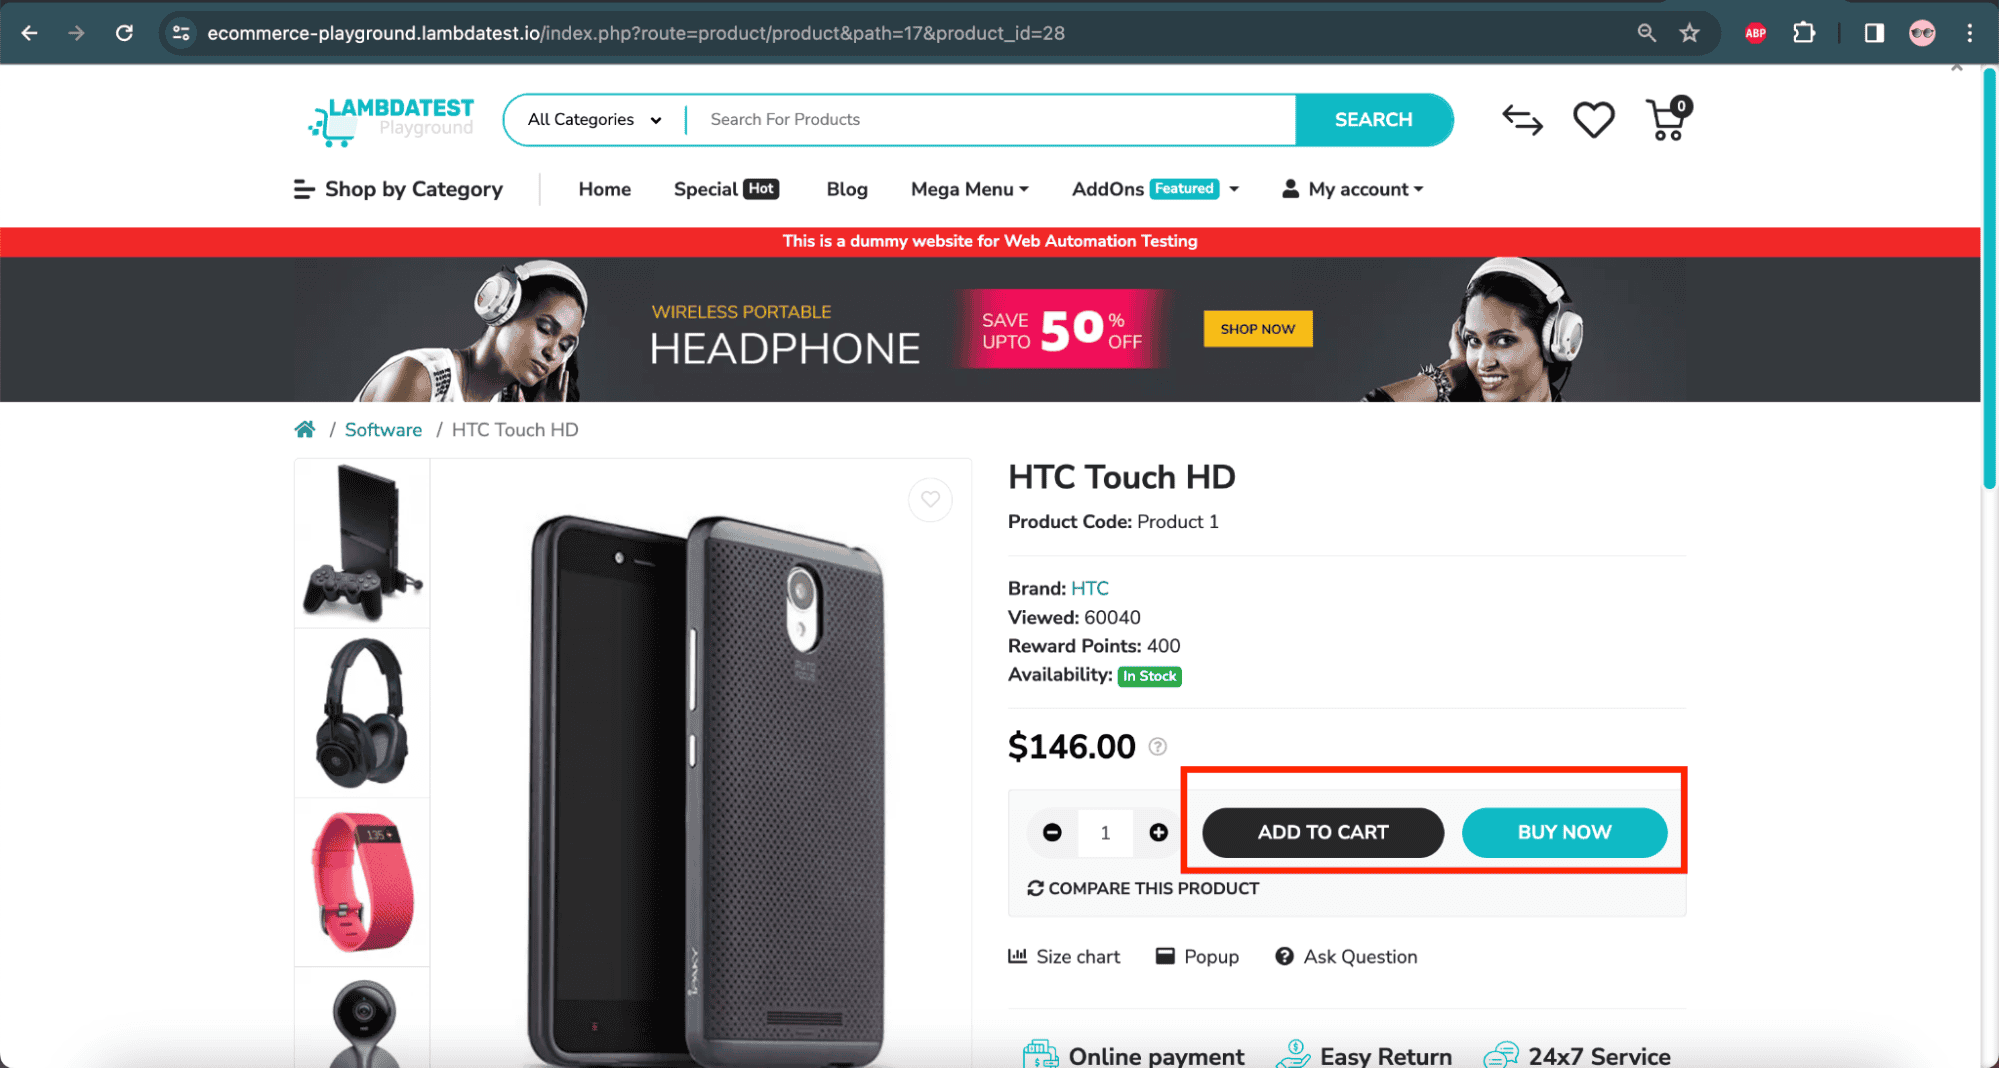
To showcase the importance of visual regression testing, let’s imagine we encounter a bug on the LambdaTest eCommerce playground demo website. The issues here are:
- The button captions are misaligned and displayed on the right side.
- The font size of the buttons is not as per standard. Font sizes are smaller and aren’t visible at first glance.
![Example of shopping cart visual bug on LambdaTest]()
These bugs have nothing to do with the functional part of the system. However, users might face difficulty adding the product to the cart due to visual issues. These bugs might lead the end users to exit the website due to a bad experience with the user interface.
Let’s take a second screenshot after we apply the fix in the code:
![Example of shopping cart visual bug fix on LambdaTest]()
As we can see, the text on the button is visible again, and the usability issue is resolved.
Visual regression testing is a process that compares two screenshots of the same application. The first screenshot is taken from a stable application version before the code changes, and the second screenshot is captured after the new release.
The tester checks any differences between the screenshots using either a manual or automated approach.
There are multiple testing techniques available for performing visual regression testing. Let’s explore some of the major ones in the following sections.
3.1. Manual Visual Testing
In this technique, the visual regression testing is done manually without any tools. The designers, developers, and testers perform the tests by looking at what the application looks like after a code change and comparing it with the mock screens or older build versions.
Manual visual regression tests must often be repeated on multiple devices with different screen resolutions to get accurate results. It’s a tedious, time-consuming, and slow process highly prone to human error. Crucially, it does not require any upfront cost in purchasing or building automated visual testing software and is, therefore, suitable in the initial stages of development and for exploratory user interface testing. However, as the project evolves, the amount of hours required for manual testing increases exponentially.
A test script, which is often a simple spreadsheet, can be used to keep track of test scenarios and outcomes.
Since every business wants its product to be released to the market quickly, other ways to perform visual regression testing are recommended. Frequent changes in the application, which occur in young projects, make the task of comparing the images manually a tedious one.
3.2. Pixel-by-Pixel Comparison
In Pixel-by-Pixel comparison, two screenshots of the application are compared and analyzed using automated image comparison tools or frameworks. The first screenshot is of the Baseline image (a reference image of the application), and the other screenshot is of another release. These are compared pixel-by-pixel, and the results highlight the UI differences and overall aesthetics (font style, design, background color, etc.)
The Pixel-by-Pixel approach is superior to manual comparison in the case of large and fast-moving projects. However, comparison tools and frameworks come with the extra costs typical to any software: capital, compute resources, maintenance, and scalability.
The Pixel-by-Pixel comparison tools use the threshold percentage to filter the results, which refers to the acceptable level of similarity or non-similarity between two images and helps analyze the pixel resolution’s granularity.
However, visual testing itself cannot suffice to provide a guarantee of the application’s usability.
3.3. Comparison Using Visual AI
The Visual AI-based tests use AI and ML to highlight the user interface bugs. They are based on computer vision to “see” the visual elements of the website or mobile application and compare them to the baseline version image. A well-trained AI saves testers time, and results in more accurate results, by highlighting only the relevant changes.
AI-based tests also leverage the ability to test dynamic content and highlight the issues only in the areas where changes are not expected.
3.4. DOM-based Tests
This technique uses the Document Object Model (DOM) to highlight issues related to the user interface. The snapshot of the DOM is taken as a baseline and compared with the new version release. DOM-based tests only verify that the correct styles are applied to our elements.
DOM-based comparison is not truly a visual comparison. False positives/negatives are produced on a large scale in DOM-based tests when the UI changes, but the code does not, for example, when adding dynamic content.
High-speed DOM-based tests are often flaky, and results should be carefully reviewed to check for visual bugs. There is a chance that identical DOMs may render differently, and different DOMs may render similarly. Hence, it should be noted that the DOM-based tests may miss some UI elements and do not guarantee accurate results.
Let’s explore some widely used automated visual regression tools.
4.1. SmartUI From LambdaTest
SmartUI from LambdaTest can perform visual regression testing of web and mobile applications. It allows for the Pixel-by-Pixel comparison of two images. It supports visual element comparison across multiple browsers, screen sizes, and resolutions, as well as the Baseline image.
We can integrate SmartUI with the automated tests using webhook configurations. It also supports project collaboration by adding up to five approvers/tags to a project for easy integration between the testers. Communication platforms like Slack foster collaboration where real-time notifications about the test statuses can aid in quickly resolving visual bugs.
4.2. WebdriverIO Image Comparison Service
WebdriverIO’s wdio-image-comparison-service is a lightweight service that compares images across different screen sizes, browsers, elements, and more. It is a framework-agnostic service and supports all the frameworks, such as Mocha and Jasmine, that WebdriverIO supports.
The captured images on the same platform are compared using Pixel-by-Pixel comparison. For example, we can compare screenshots taken on the Windows platform with the other screenshots taken on Windows. However, we cannot compare screenshots taken from Windows machines with images taken from Mac or Linux.
4.3. Appium Mobile Automation Framework
Appium mobile automation framework can perform visual regression testing of the mobile applications. It supports taking screenshots and comparing them Pixel-by-Pixel using the OpenCV cross-platform library, which is a collection of image-processing tools that we can use directly without having to understand their implementation in detail.
5. How to Automate Visual Regression Testing on the Cloud?
Next, let’s look at how to perform visual regression testing using SmartUI from LambdaTest, which is an AI-powered test orchestration and execution platform. It allows developers and testers to run manual and automated tests over 3000+ browsers, browser versions, and operating systems combinations.
SmartUI supports test automation frameworks such as Selenium and Cypress for visual testing. The following test scenarios will demonstrate visual regression testing using Selenium on SmartUI.
Test scenario 1:
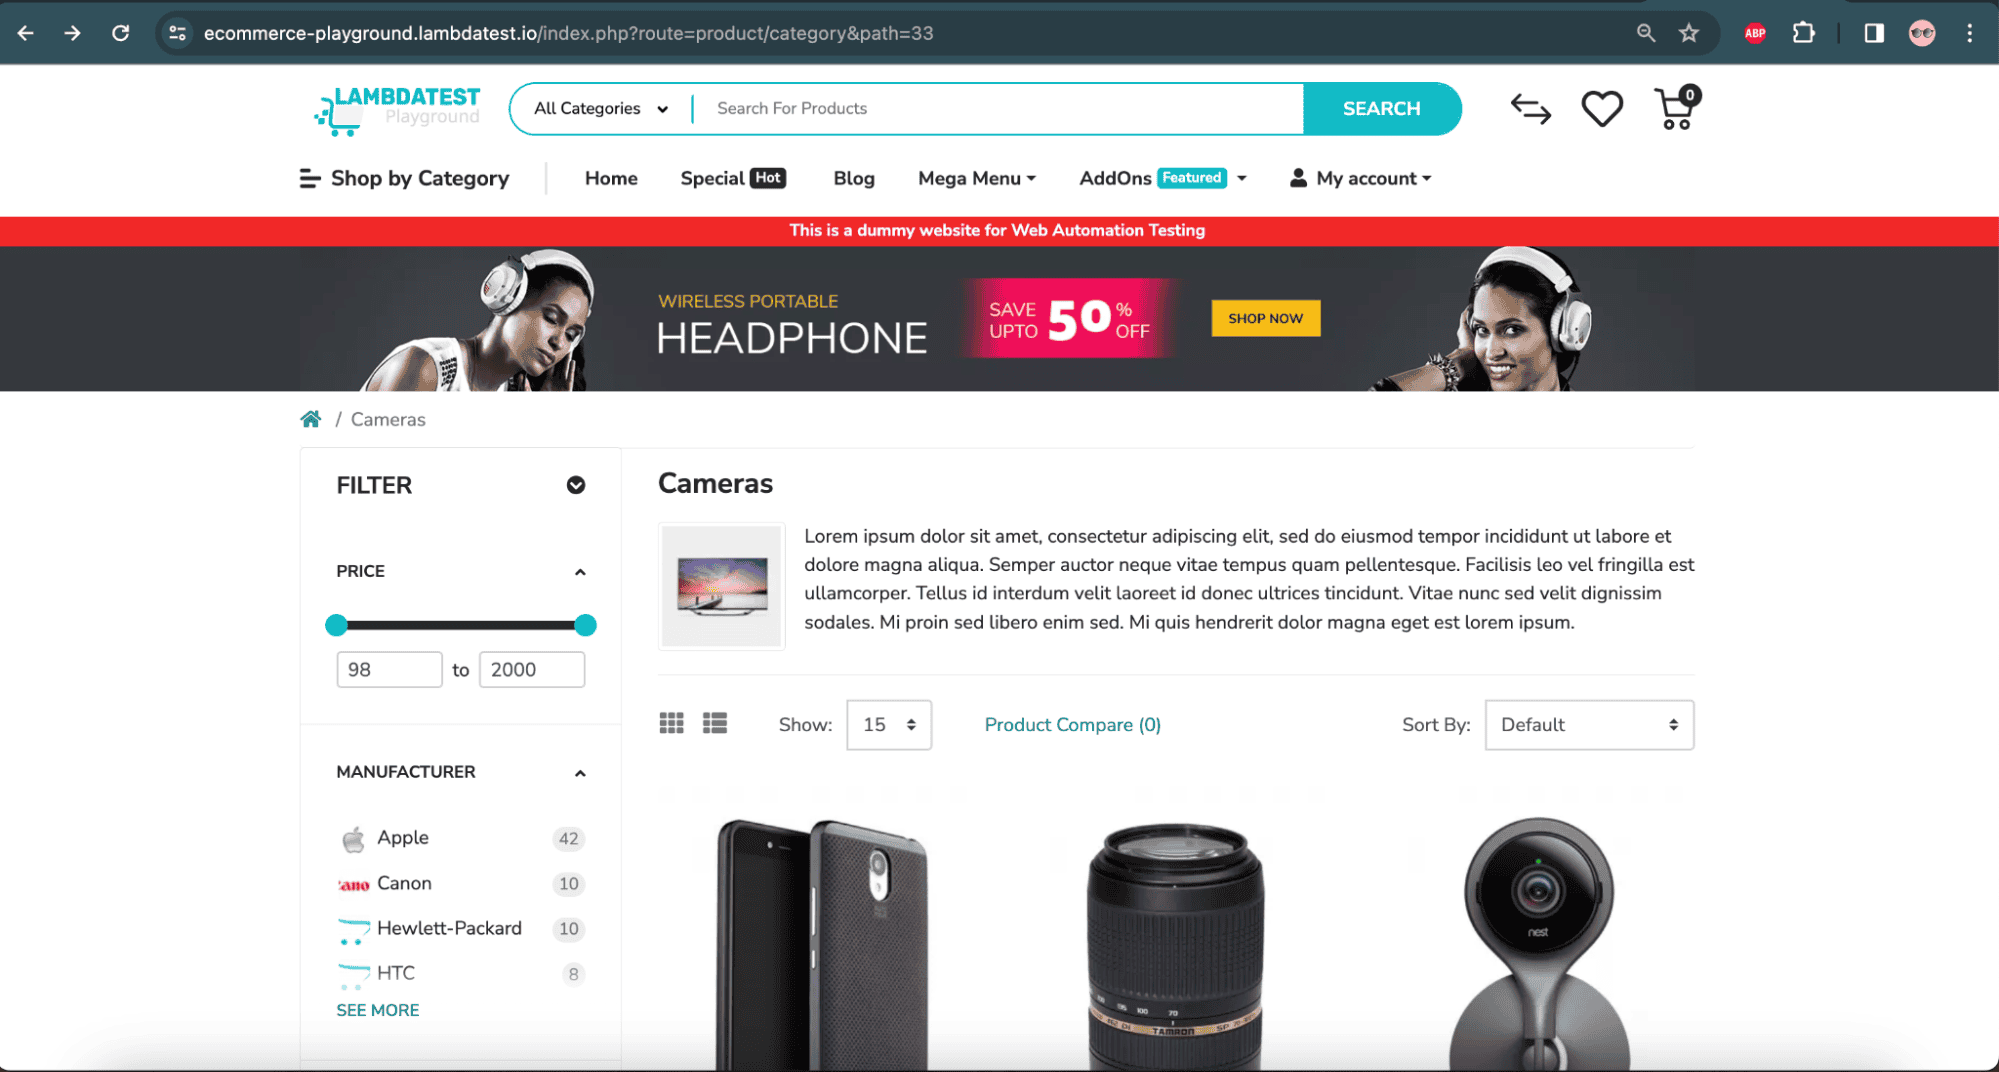
- Navigate to the LambdaTest eCommerce playground website’s Camera product page.
- Set the Camera product page image as the Baseline image using the automation code.
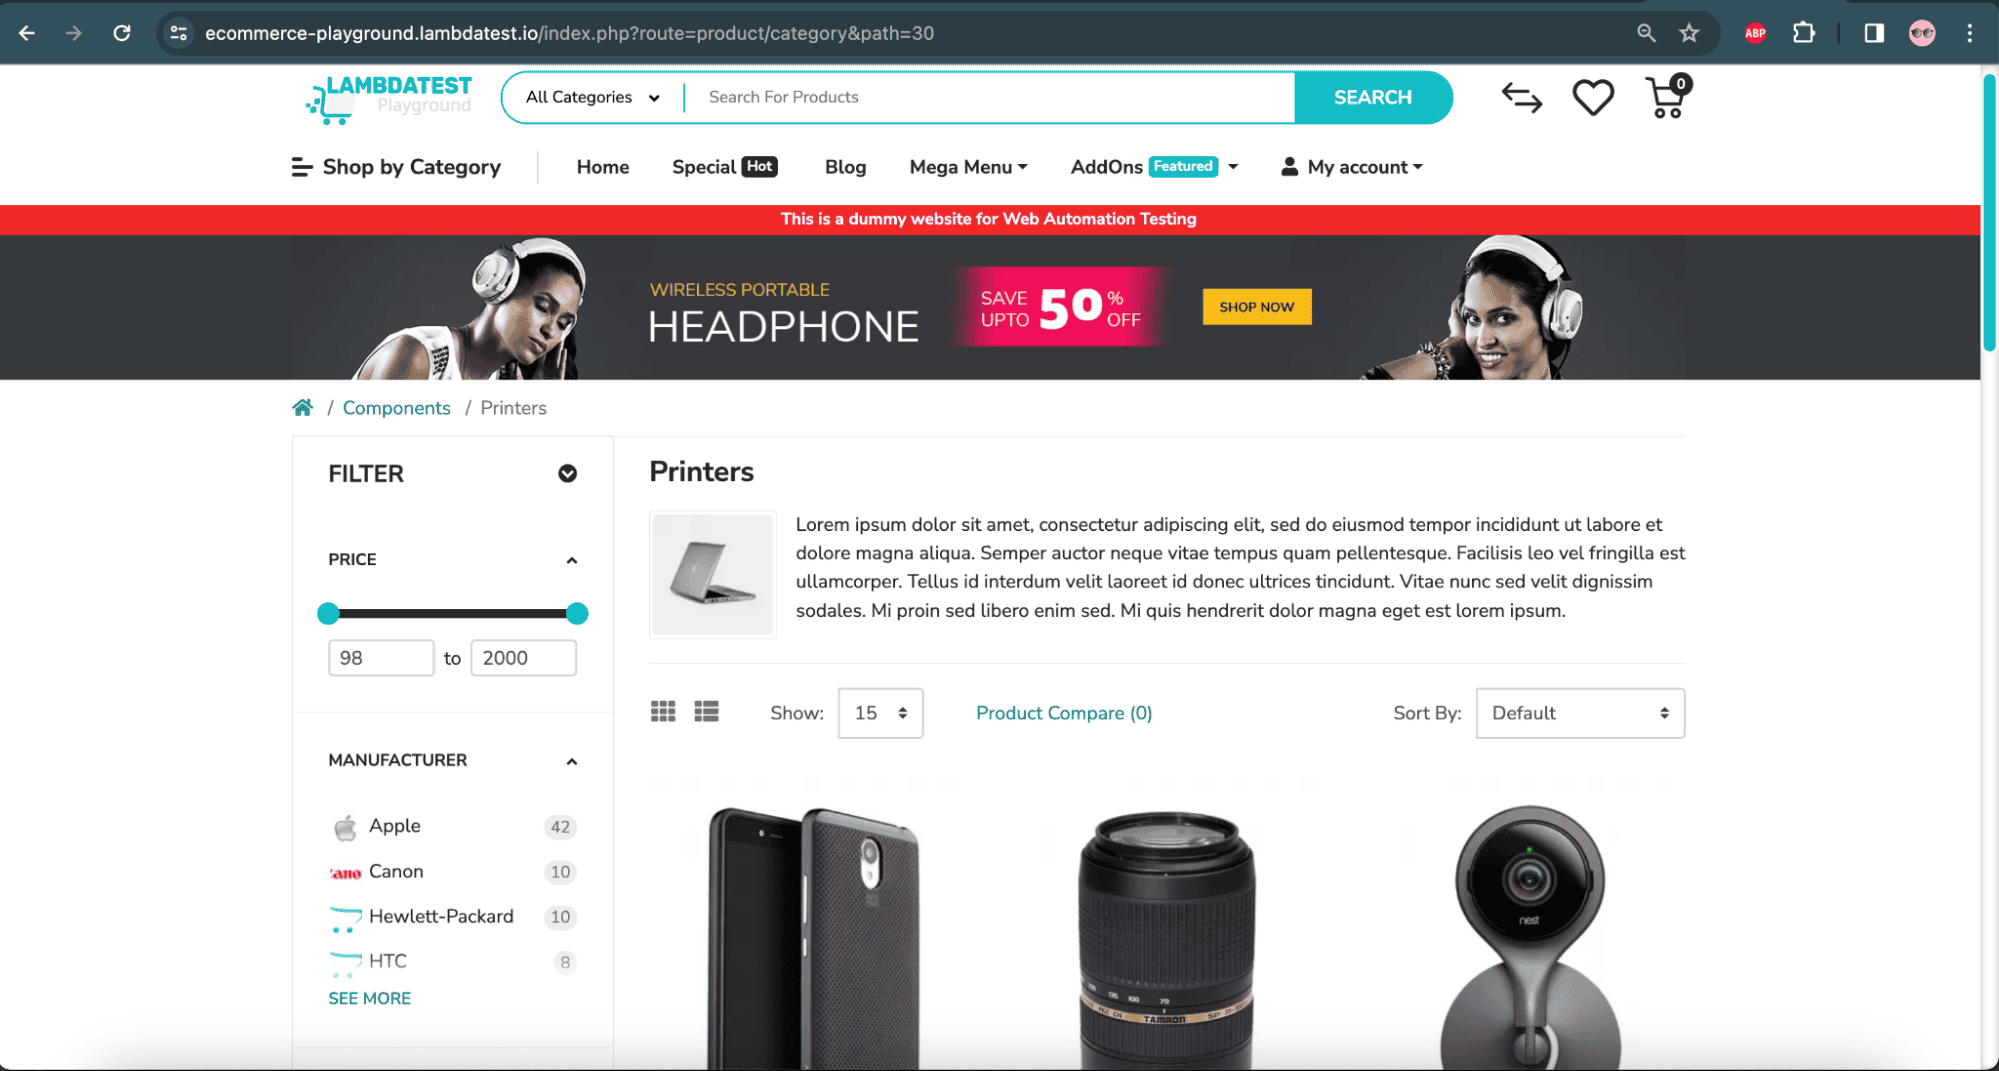
- Navigate to the LambdaTest eCommerce playground website’s Printer product page.
- Compare the Camera product page with the Printer product page using the visual regression on SmartUI.
- Check the differences in SmartUI from LambdaTest.
|
![Camera product image on LambdaTest]()
Camera product page – LambdaTest eCommerce website
![Printer product image on LambdaTest]()
Printer product page – LambdaTest eCommerce website
Test scenario 2:
- Navigate to the LambdaTest eCommerce playground website’s Camera product page.
- Set the Camera product page image as the Baseline image using the automation code.
- Navigate to the LambdaTest eCommerce playground website’s Camera product page.
- Compare the Camera product page with the Baseline image set for the Camera product page using the visual regression on SmartUI.
- No difference should be shown in the comparison.
|
![Test scenario on LambdaTest]()
Camera product page – LambdaTest eCommerce website
The first step in starting with the visual regression testing using SmartUI is to register with LambdaTest.
5.1 Getting Started With LambdaTest SmartUI Testing
Once the access is granted after registration, let’s navigate to the LambdaTest Dashboard screen and perform the following steps:
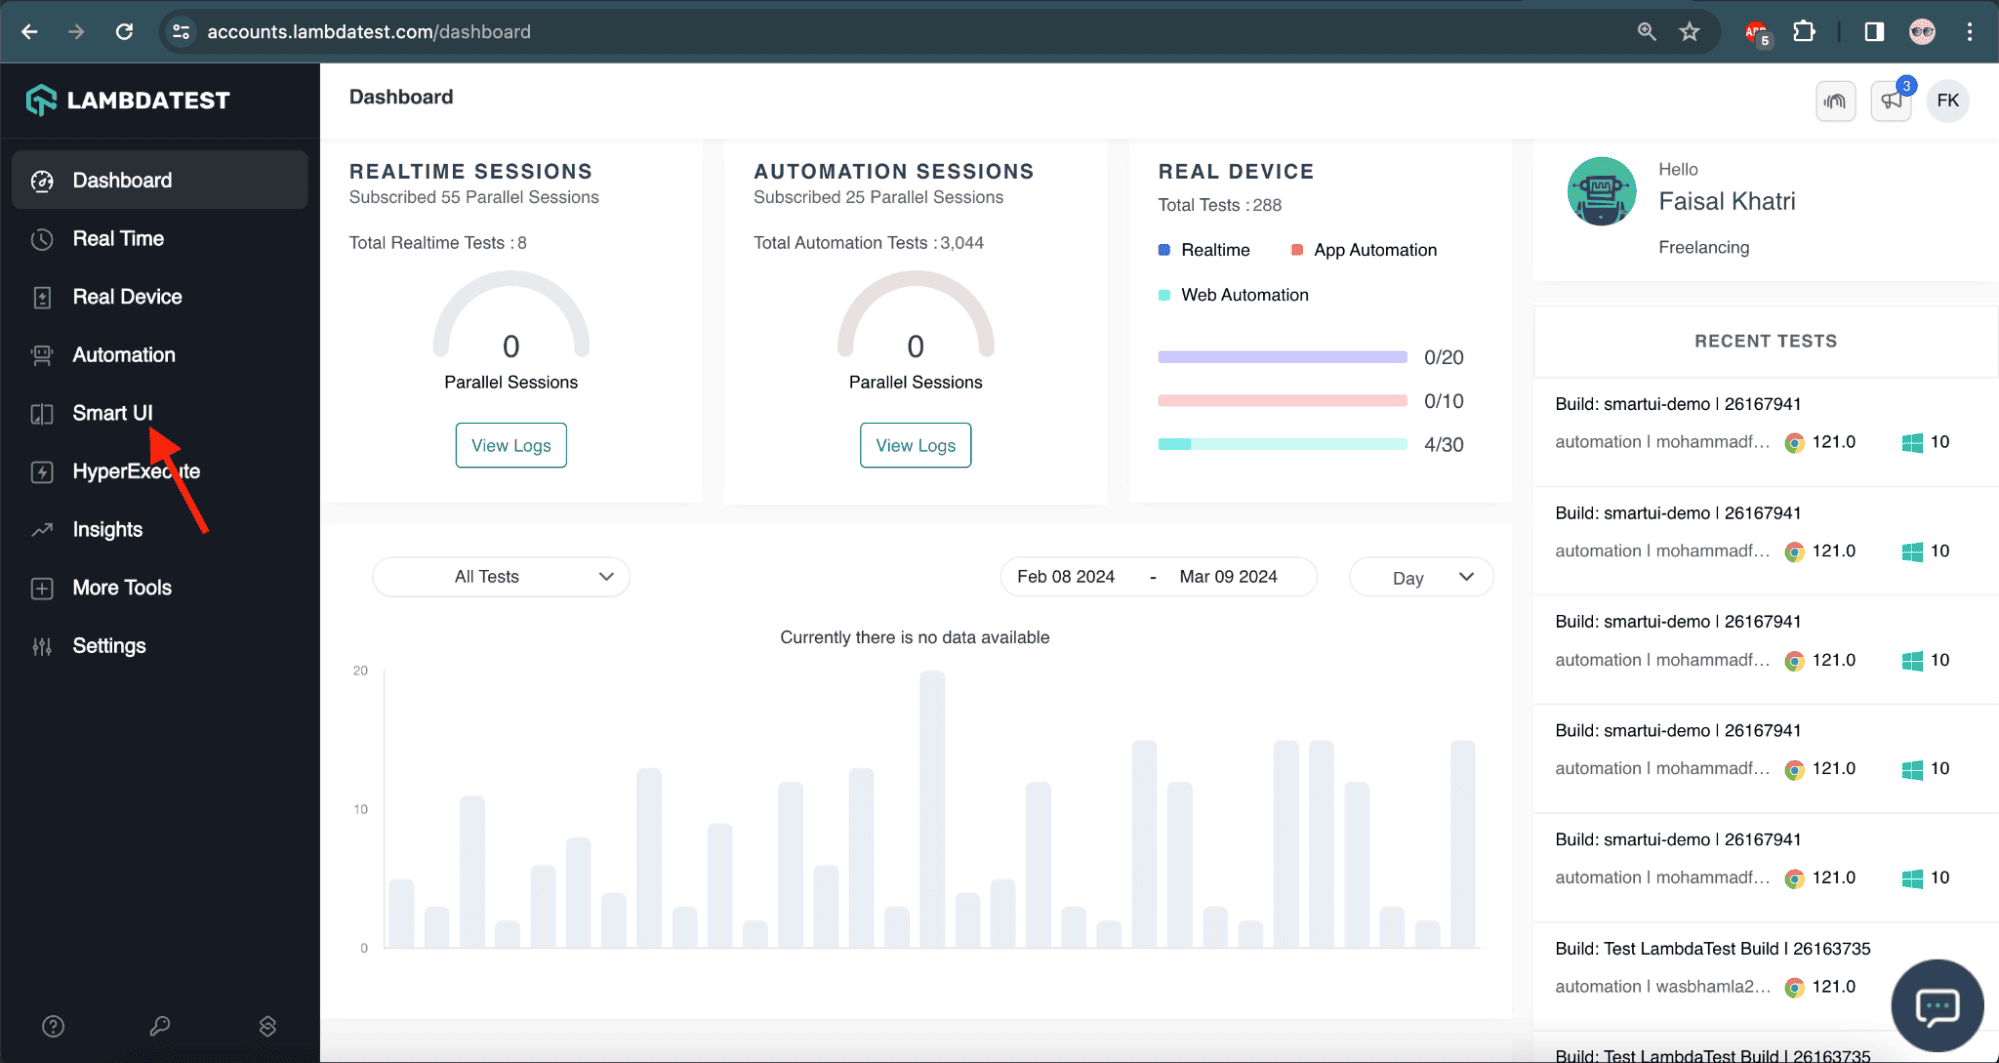
1: From the left-hand menu, let’s select SmartUI.
![SmartUI menu on LambdaTest]()
2: Let’s click the New Project button.
![New project on LambdaTest]()
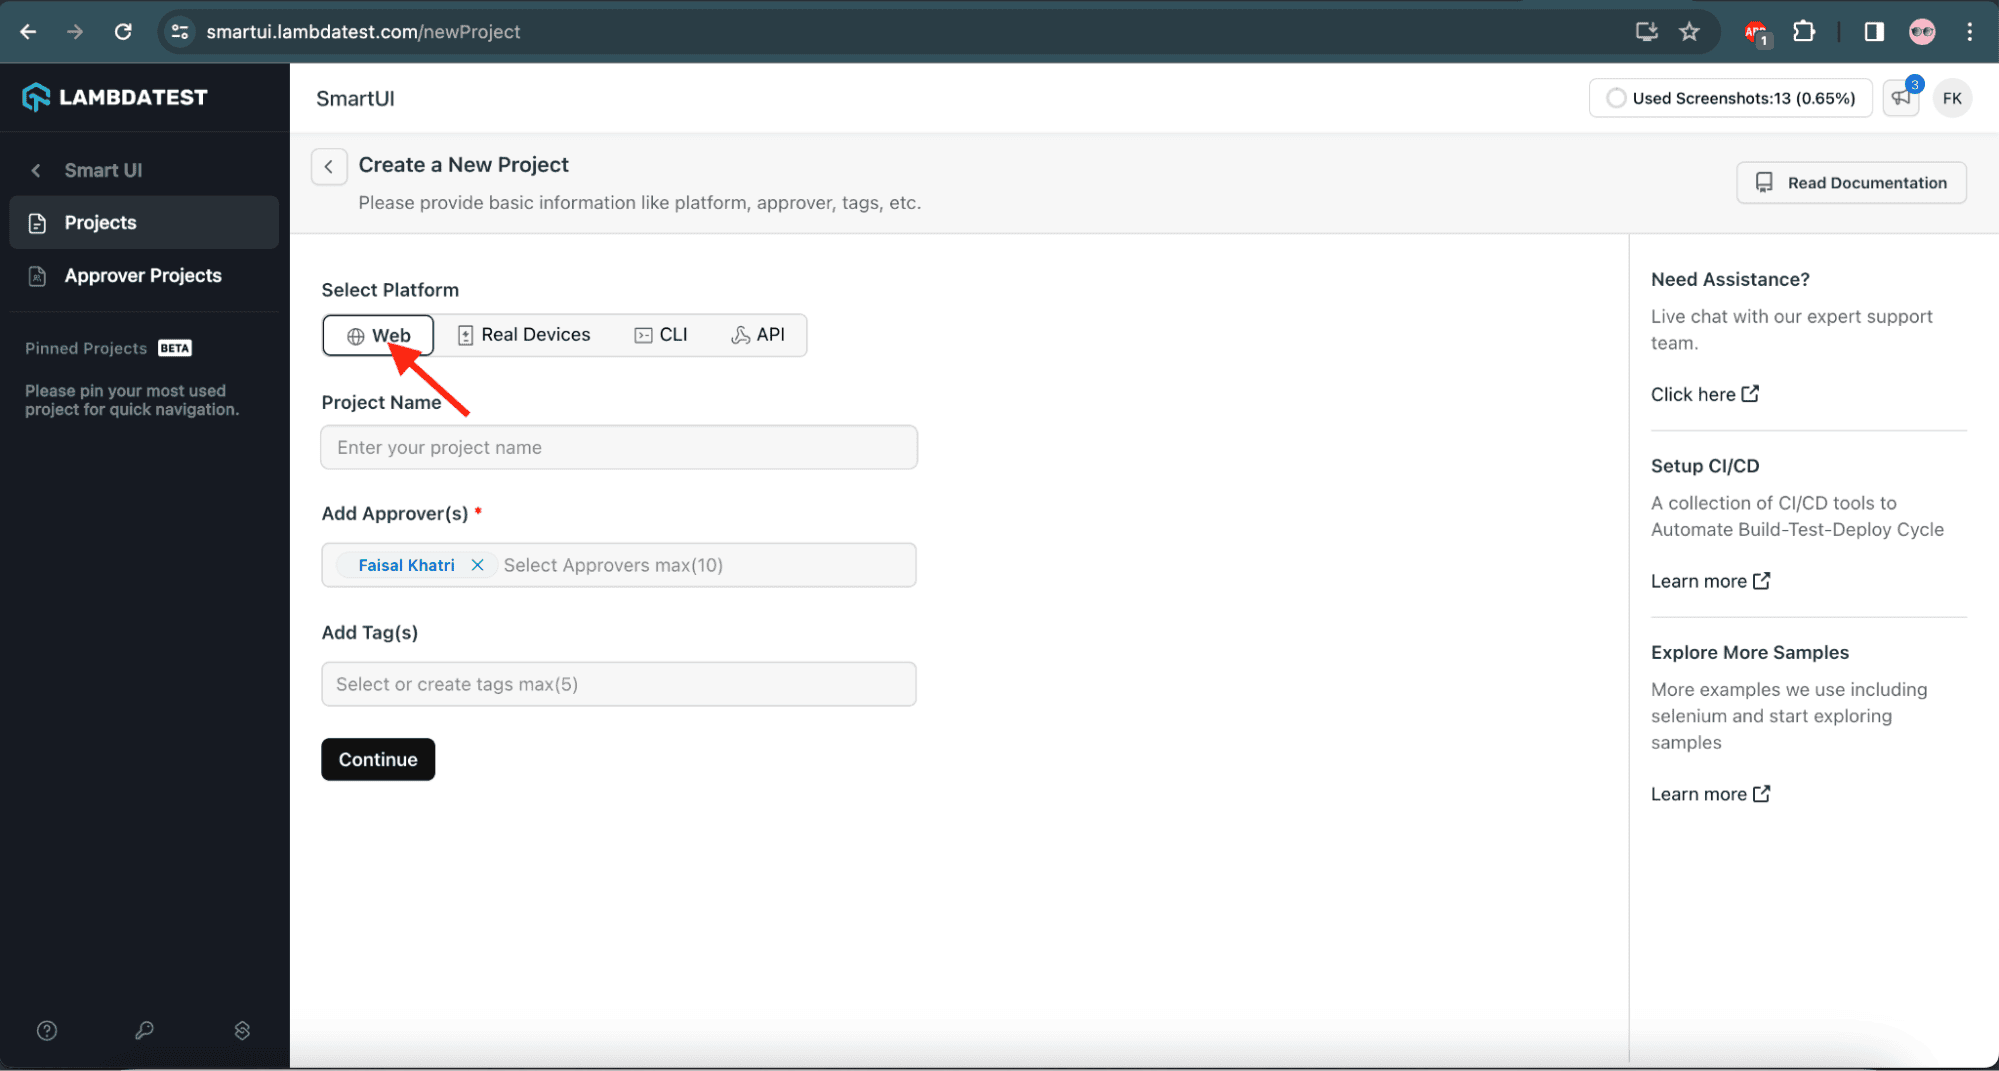
3: In the next screen, let’s provide the basic details, such as the platform, project name, approvers, and tags. As the Selenium visual regression testing will be performed on desktop browsers, let’s select the platform as “Web”.
![Select web on LambdaTest]()
4: Let’s provide the project name and select our name in the Approver Name field. An Approver is the person who approves the builds, deciding whether they have passed or failed.
If we need to choose someone other than the default Approver for the organization’s account, we can specify their name from within the organization in the box that says Add Approver(s).
Tag Name is an optional field that we can use to identify builds.
Once all the mandatory details are entered, let’s click the Continue button to move to the next page.
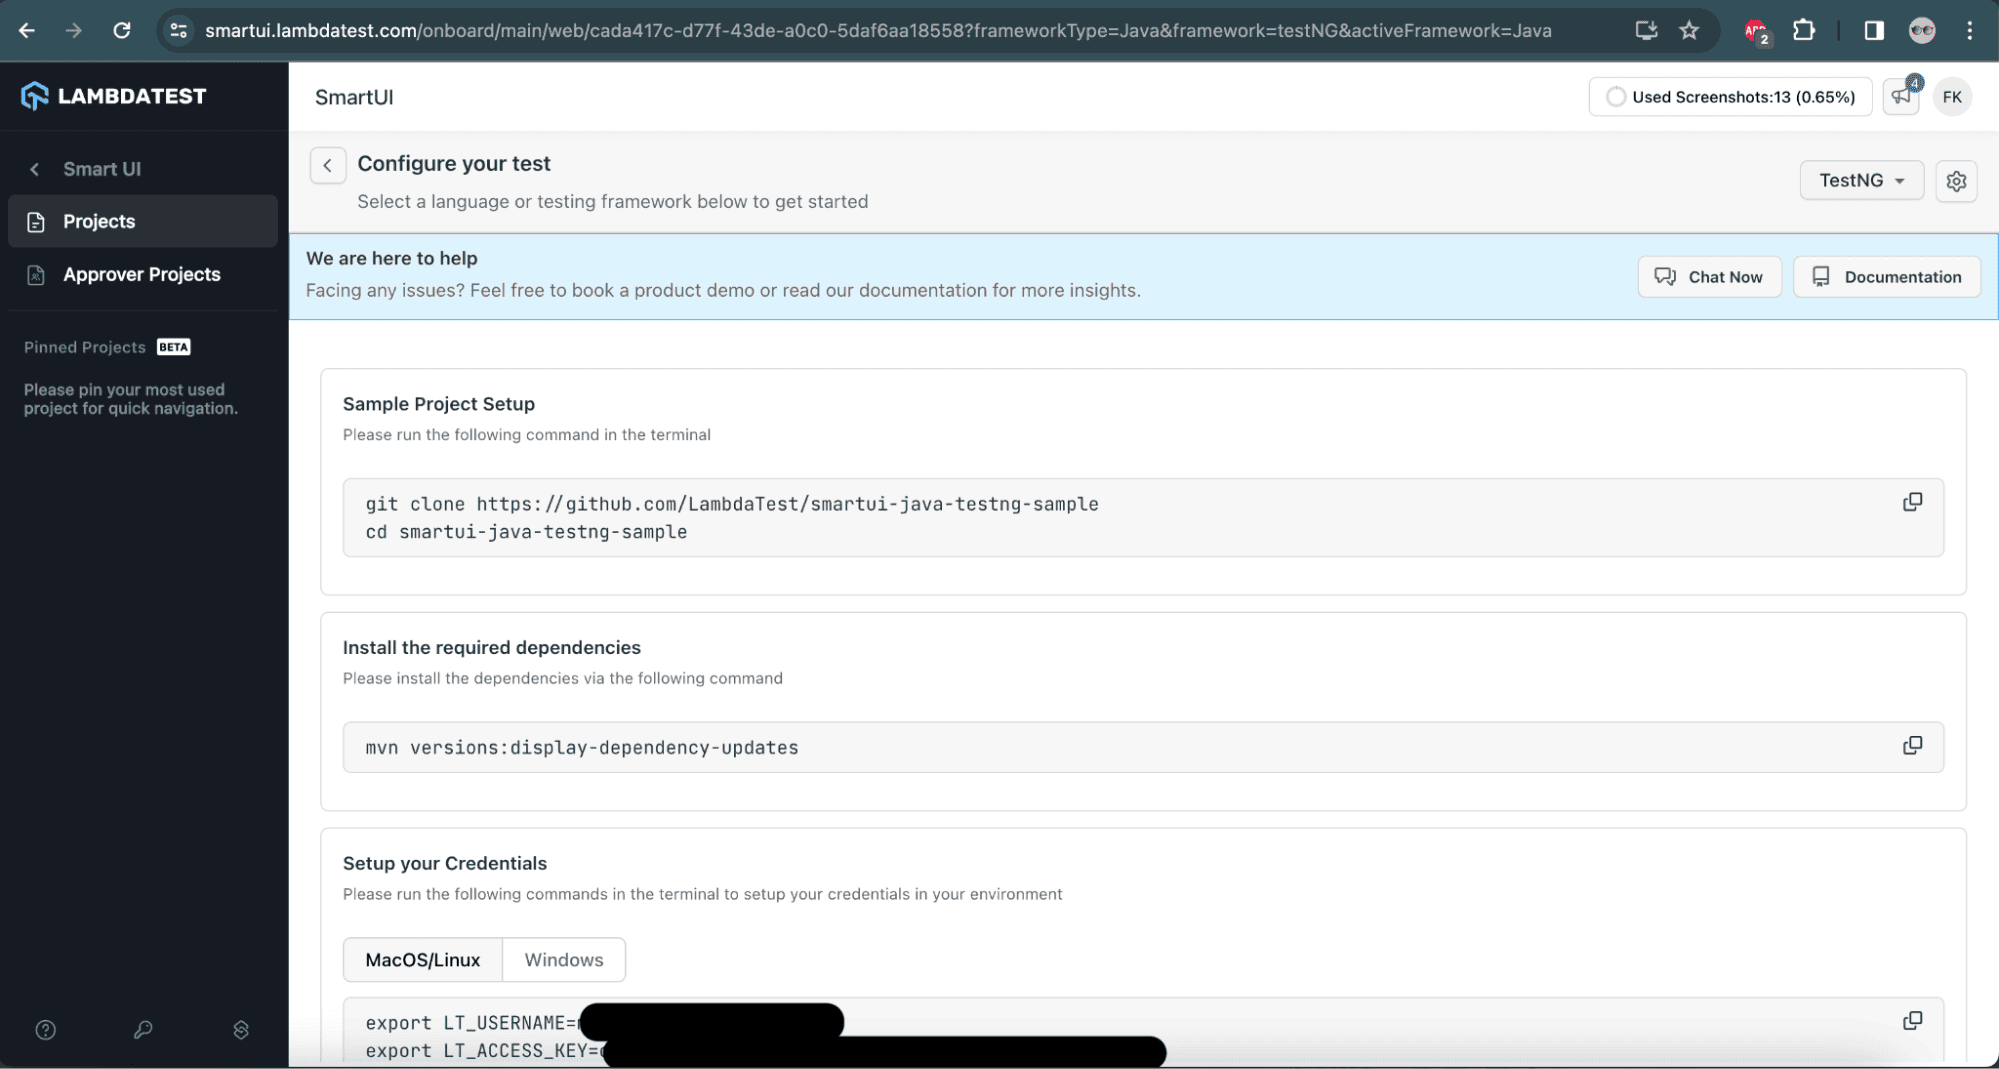
5: Let’s select the language or testing framework displayed on the configuration screen. We’ll select Java and TestNG. Note that SmartUI supports all the Selenium-supported programming languages.
![Select testing language on LambdaTest]()
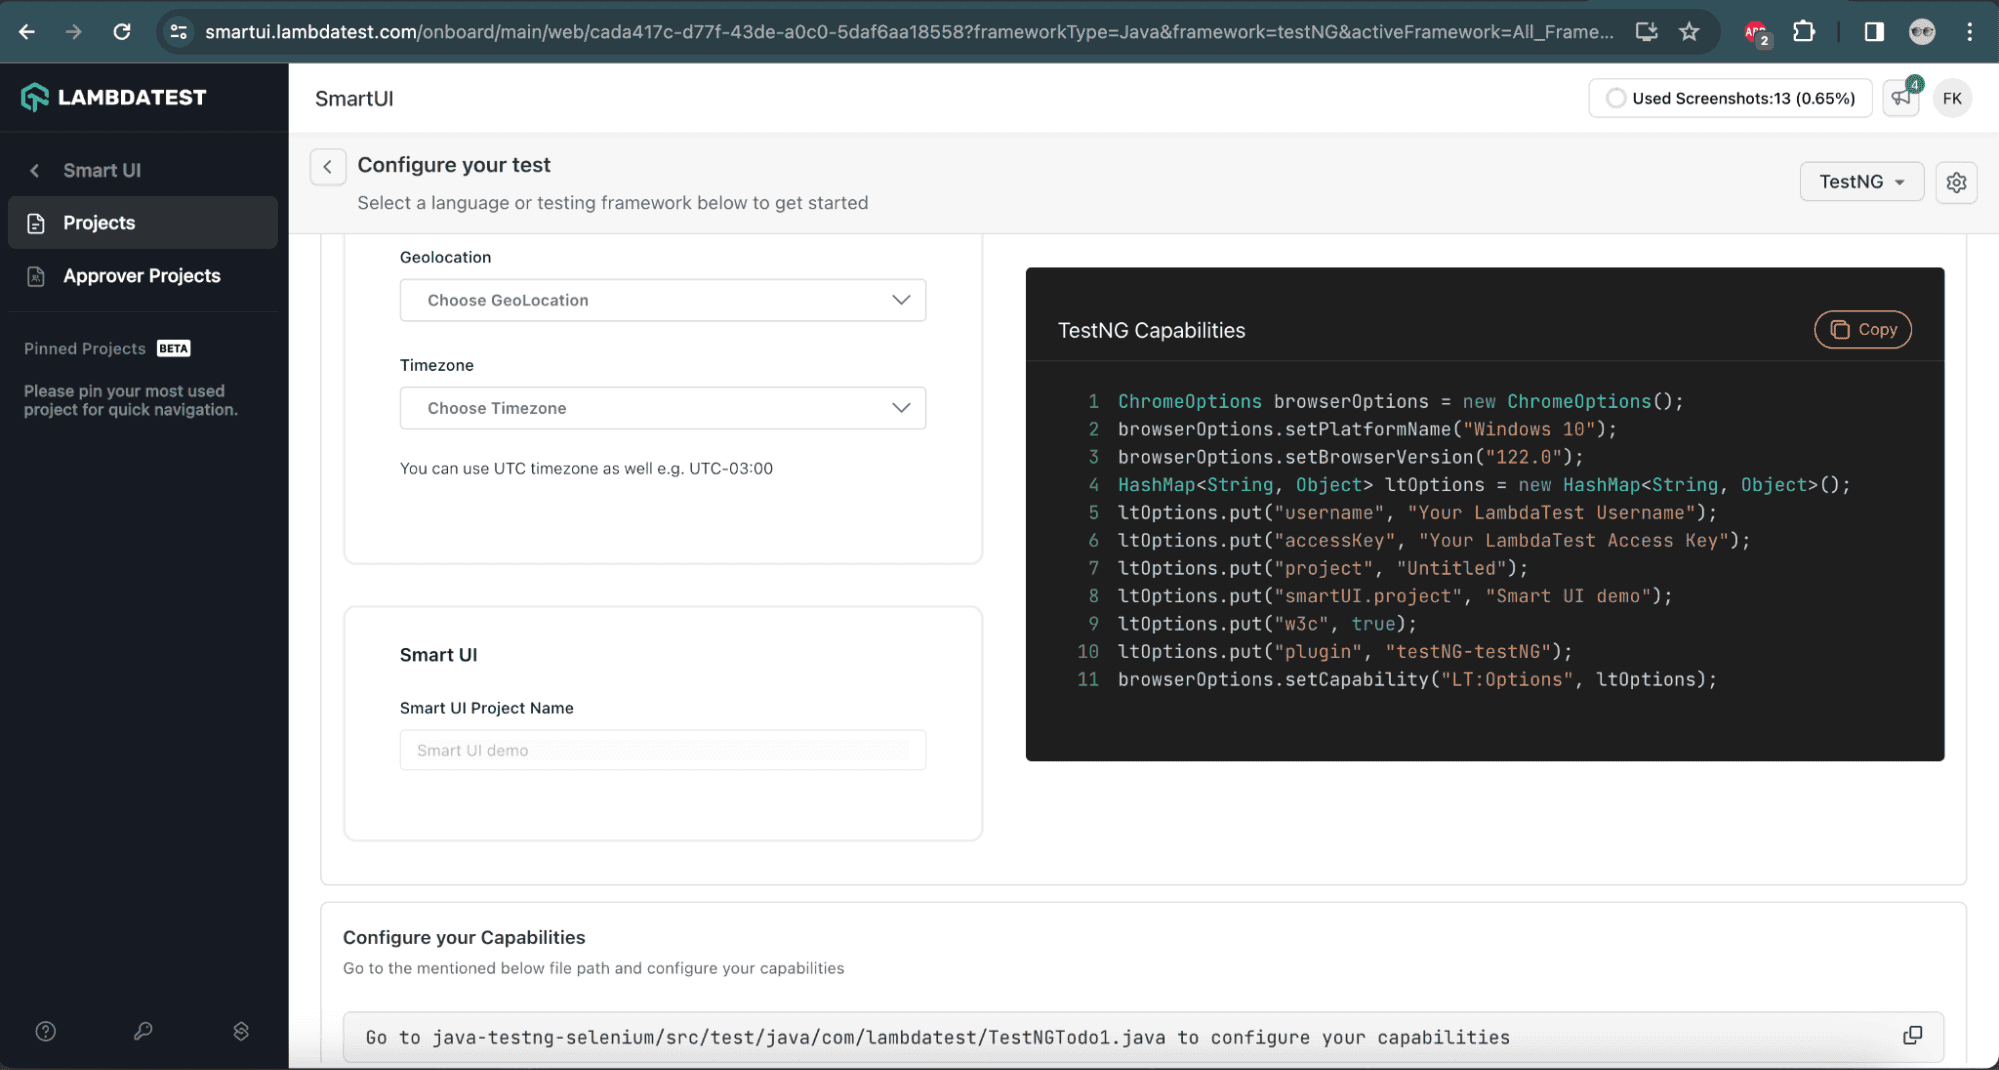
6: After selecting the framework and language configuration, the following screen will allow us to choose the configuration for the tests. Let’s select the capabilities to enable us to run the tests on the LambdaTest cloud platform.
![Select capabilities on LambdaTest]()
SmartUI Project Capability name is a mandatory field for Selenium visual regression testing. After updating the capabilities, they can be copied and pasted into the test automation project to run the tests.
![Copy capabilities on LambdaTest]()
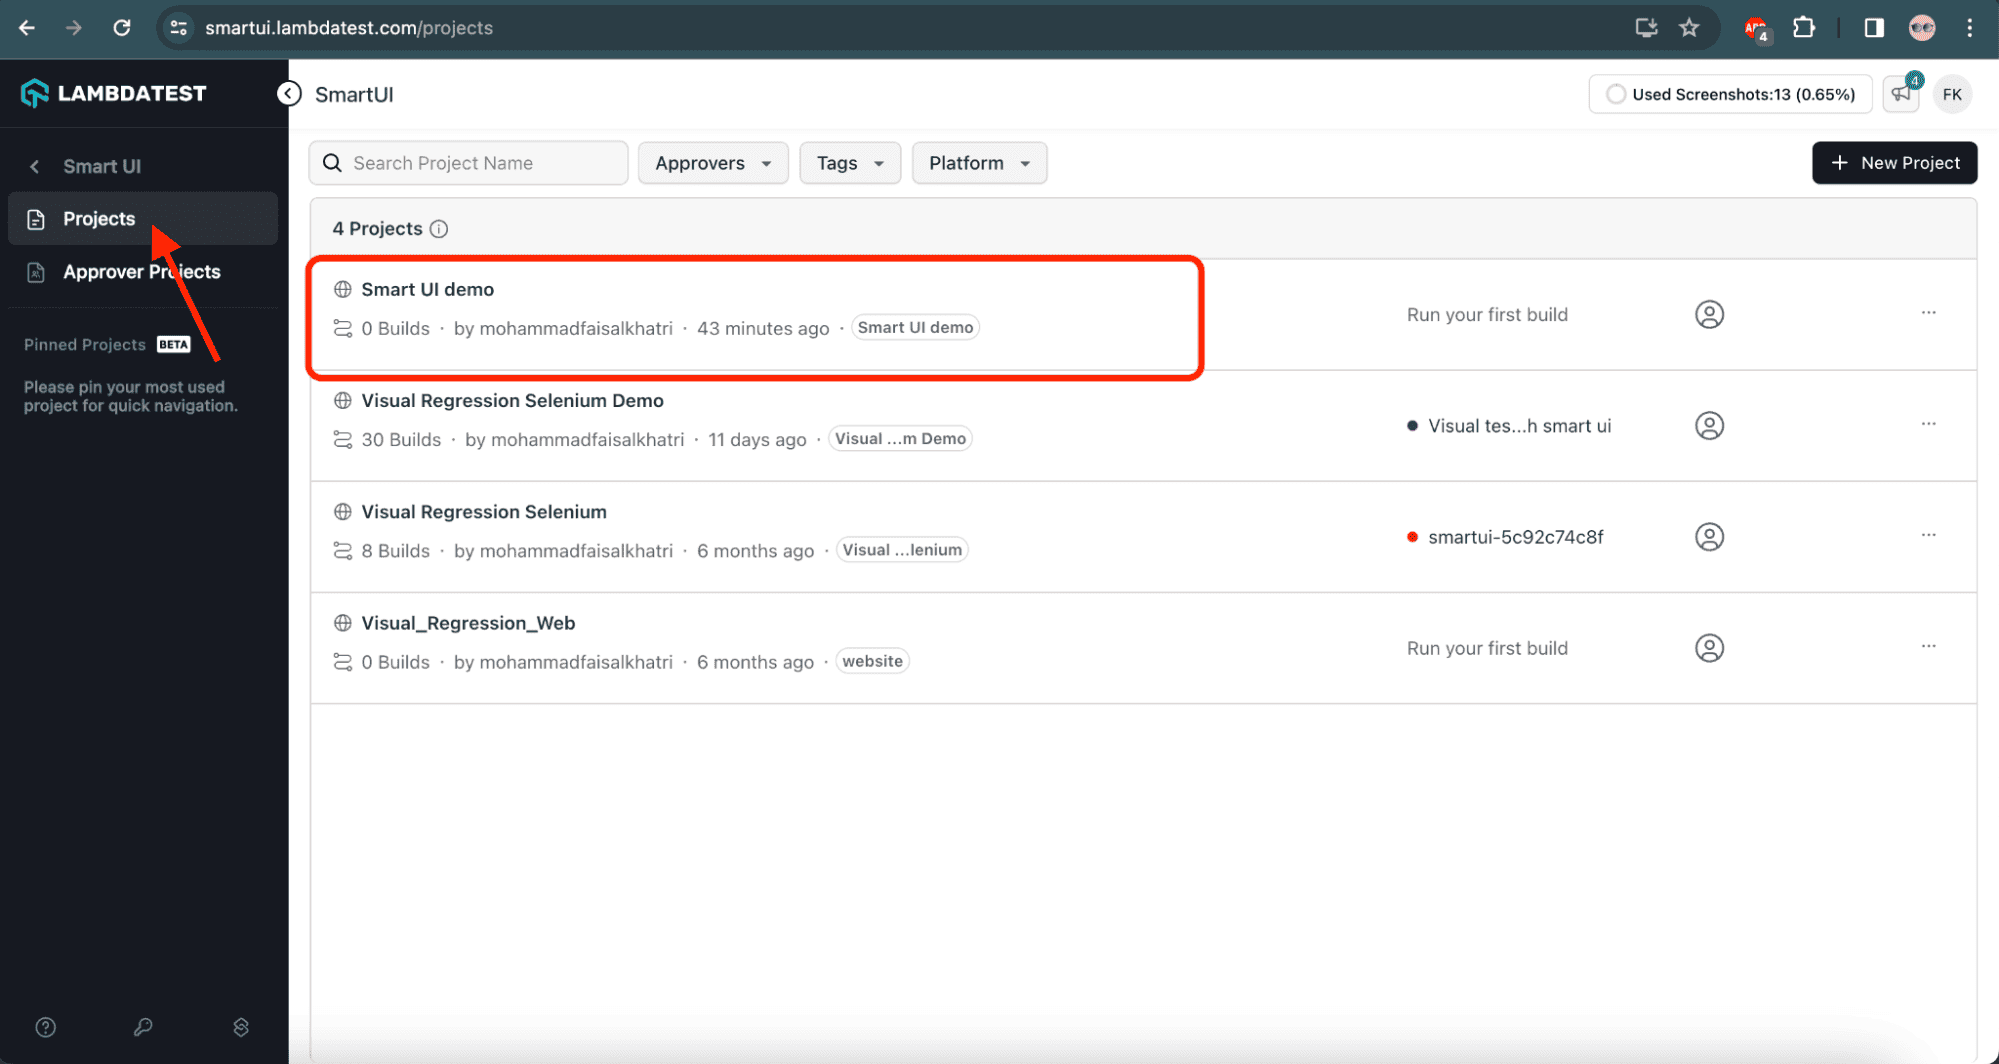
7: Let’s navigate to the Project Screen to check if the project was created successfully.
![Project creation success on LambdaTest]()
5.2. Setting the Baseline Image
The Baseline image can be uploaded to the SmartUI project on the LambdaTest cloud platform after the test automation project is set up using Selenium WebDriver.
5.3. Maven Dependency
In the pom.xml file, let’s add the following dependency:
<dependency>
    <groupId>org.seleniumhq.selenium</groupId>
    <artifactId>selenium-java</artifactId>
    <version>4.21.0</version>
</dependency>
The latest version can be found in the Maven Central Repository.
5.4. Selenium and SmartUI Configurations
Let’s first create a new Java class file named DriverManager.java. This class will help configure the Selenium WebDriver on the LambdaTest cloud. We’ll also be providing the required SmartUI capabilities in this class:
public class DriverManager {

    private WebDriver driver;
    //...
}
The method getLambdaTestOptions() created inside the DriverManager class has all the capabilities and configurations required for setting up the Selenium WebDriver on the cloud. These are the same capabilities that were copied from the earlier step.
The ltOptions HashMap has all the capabilities for Selenium and SmartUI, and the smartOptions HashMap has all the capabilities related to the SmartUI:
private static HashMap<String, Object> getLambdaTestOptions() {
    HashMap<String, Object> ltOptions = new HashMap<>();
    ltOptions.put("resolution", "2560x1440");
    ltOptions.put("video", true);
    ltOptions.put("build", "smartui-demo");
    ltOptions.put("name", "visual regression with smartui");
    ltOptions.put("smartUI.project", "Visual Regression Selenium Demo");
    ltOptions.put("smartUI.baseline", true);
    ltOptions.put("w3c", true);
    ltOptions.put("plugin", "java-testNG");
    var smartOptions = new HashMap<String, Object>();
    smartOptions.put("largeImageThreshold", 1200);
    smartOptions.put("transparency", 0.3);
    smartOptions.put("errorType", "movement");
    ltOptions.put("smartUI.options", smartOptions);
    return ltOptions;
}
5.5. Specify SmartUI Capability
For running the visual regression tests using SmartUI, we need the following capability:
- SmartUI Project Name – This specifies the value for this capability using the key “smartUI.project” in the code.
We can use the following SmartUI options to configure Pixel-by-Pixel comparisons and add these configurations in the code.
| OPTION NAME |
DESCRIPTION |
| largeImageThreshold |
It will set the pixel granularity at the rate at which the pixel blocks are created. The minimum value allowed is 100, and the maximum is 1200. |
| errorType |
It will show the differences in the output screen by identifying the pixel change type and capturing the intended view. Supported values are “movement” and “flat”. |
| ignore |
It removes the pixel-to-pixel false-positive rate when identifying screenshots. The values supported for this option are – “antiliasing”, “alpha”, “colors”, “nothing”. |
| Transparency |
It helps in adjusting test transparency settings and strikes a balance between highlighting and visual screening. The values supported for this option are 0 and 1. Values can also be supplied in one decimal between 0.1 to 0.9. |
| boundingBoxes: [box1, box2] |
The comparison area can be narrowed by specifying a bounding box measured in pixels from the top left. |
| ignoredBoxes: [box1, box2] |
A part of the image can be excluded from comparison by specifying a bounding box measured in pixels from the top left. |
| ignoreAreasColoredWith |
By specifying an RGBA color, the colored areas of the image can be excluded from comparison. |
We can find out the Comparison Settings for the SmartUI page to learn more about the SmartUI capabilities.
5.6. Add Baseline Image
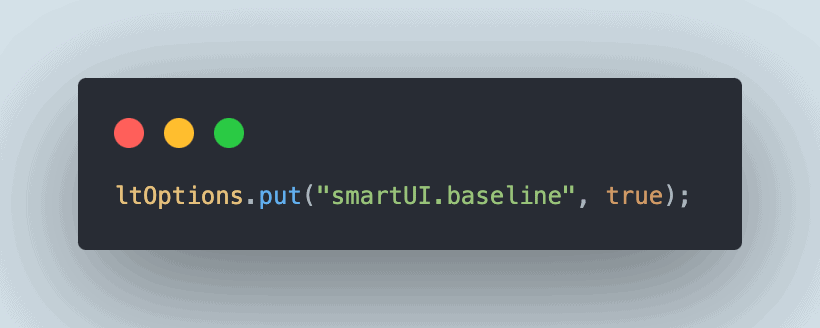
Next, let’s add the Baseline image using the code to use the following SmartUI capability:
![Add SmartUI baseline image]()
Let’s now initialize the WebDriver, so it starts the Chrome browser in the cloud and helps us run the visual regression tests:
public void startChromeInCloud() {
    String ltUserName = System.getenv("LT_USERNAME");
    String ltAccessKey = System.getenv("LT_ACCESS_KEY");
    String gridUrl = "@hub.lambdatest.com/wd/hub";
    ChromeOptions browserOptions = new ChromeOptions();
    browserOptions.setPlatformName("Windows 10");
    browserOptions.setBrowserVersion("latest");
    browserOptions.setPageLoadStrategy(PageLoadStrategy.NORMAL);
    HashMap<String, Object> ltOptions = getLambdaTestOptions();
    browserOptions.setCapability("LT:Options", ltOptions);
    try {
      this.driver = new RemoteWebDriver(
        new URL(format("https://{0}:{1}{2}", ltUserName, ltAccessKey, gridUrl)),browserOptions);
    } catch (MalformedURLException e) {
      throw new Error("Error in setting RemoteDriver's URL!");
    }
    this.driver.manage().timeouts().implicitlyWait(Duration.ofSeconds(20));
}
We need the LambdaTest UserName and Access Key values to run the tests on the LambdaTest cloud platform. Through environment variables, let’s specify the values for these variables. Since these are secret values, it’s recommended to avoid hardcoding them.
Next, using the ChromeOptions class, the platform name will be “Windows 10”, and browser versions will be set as “latest”, which will run the latest stable version of Chrome available on the LambdaTest platform. The getLambdaTestOptions() that returns the HashMap with all the LambdaTest capabilities will set the browser’s capabilities.
Finally, the RemoteWebDriver class of Selenium is instantiated to run the Selenium tests on the cloud. We’ll also set an implicit wait of 20 seconds for all the WebElements on the page to appear.
6. Writing the Tests
Let’s create a test named SeleniumVisualRegressionLiveTest class, which will contain the visual regression tests:
public class SeleniumVisualRegressionLiveTest {

    private DriverManager driverManager;
    private CameraProductPage cameraProductPage;
    //...
}
This class also has the testSetup() method that will instantiate the configuration class DriverManager and allow the Chrome browser to launch in the cloud:
@BeforeClass(alwaysRun = true)
public void testSetup() {
    this.driverManager = new DriverManager();
    this.driverManager.startChromeInCloud();
    this.cameraProductPage =
    new CameraProductPage(this.driverManager.getDriver());
}
@AfterClass(alwaysRun = true)
public void tearDown() {
    this.driverManager.quitDriver();
}
The tearDown() method will close the WebDriver session gracefully.
We’ll use the Page Object Model as it helps in code maintenance and readability. Hence, another class named CameraProductPage was created to help us take screenshots of the Camera product page:
public class CameraProductPage {
    private static String SCREEN_NAME = "Camera-Product-Page";
    private WebDriver driver;
    public CameraProductPage(WebDriver driver) {
    this.driver = driver;
}
public void checkVisual() {
    ((JavascriptExecutor) this.driver)
      .executeScript(MessageFormat.format("smartui.takeScreenshot={0}", SCREEN_NAME));
    }
}
The checkVisual() method will take a screenshot and name it “Camera-Product-Page”. This screenshot will be used to compare and perform visual regression testing.
This CameraProductPage class is instantiated in the SeleniumVisualRegressionLiveTest class:
public class SeleniumVisualRegressionLiveTest {
    private CameraProductPage cameraProductPage;
    @BeforeClass
    public void setup() {
        cameraProductPage = new CameraProductPage(this.driverManager.getDriver());
    }
}
6.1. Test Implementation 1
The first test, whenActualImageIsDifferentFromBaseline_thenItShouldShowDifference(), will navigate to the Printers Product page on the LambdaTest eCommerce Playground website. Next, it will perform the visual regression by comparing the Baseline image (Camera product page) with the screenshot of the Printers product page and show the difference:
@Test
public void whenActualImageIsDifferentFromBaseline_thenItShouldShowDifference() {
    this.driverManager.getDriver().get(
      "https://ecommerce-playground.lambdatest.io/index.php?route=product/category&path=30");
    this.cameraProductPage.checkVisual();
}
The first test, whenActualImageIsDifferentFromBaseline_thenItShouldShowDifference() will navigate to the Printers Product page on the LambdaTest eCommerce Playground website.
Then, it will perform the visual regression by comparing the Baseline image (Camera Product Page) with the screenshot of the Printers Product Page and show the difference.
6.2. Test Implementation 2
The second test, whenActualImageIsSameAsBaseline_thenItShouldNotShowAnyDifference(), navigates to the Camera product page on the LambdaTest eCommerce Playground website.
Then, it will perform visual regression by comparing the screenshot of the Camera product page with the Baseline image (Camera product page). It should not show any difference as both the pages are identical:
@Test
public void whenActualImageIsSameAsBaseline_thenItShouldNotShowAnyDifference() {
    this.driverManager.getDriver().get(
      "https://ecommerce-playground.lambdatest.io/index.php?route=product/category&path=33");
    this.cameraProductPage.checkVisual();
}
7. Test Execution
The following testng.xml file will help us run the tests:
<?xml version="1.0" encoding="UTF-8"?>
<!DOCTYPE suite SYSTEM "http://testng.org/testng-1.0.dtd">
<suite name="Visual regression test suite ">
    <test name="Visual Regression Test using Smart UI from LambdaTest">
    <classes>
    <class name="com.baeldung.selenium.visualregression.tests.SeleniumVisualRegressionLiveTest">
    <methods>
    <include name="whenActualImageIsDifferentFromBaseline_thenItShouldShowDifference"/>
    <exclude name="whenActualImageIsSameAsBaseline_thenItShouldNotShowAnyDifference"/>
    </methods>
    </class>
    </classes>
    </test>
</suite>
We’ll be running the whenActualImageIsSameAsBaseline_thenItShouldNotShowAnyDifference first, as we need to set the Baseline image from the test automation code. Hence, it excludes the first test in the testng.xml file.
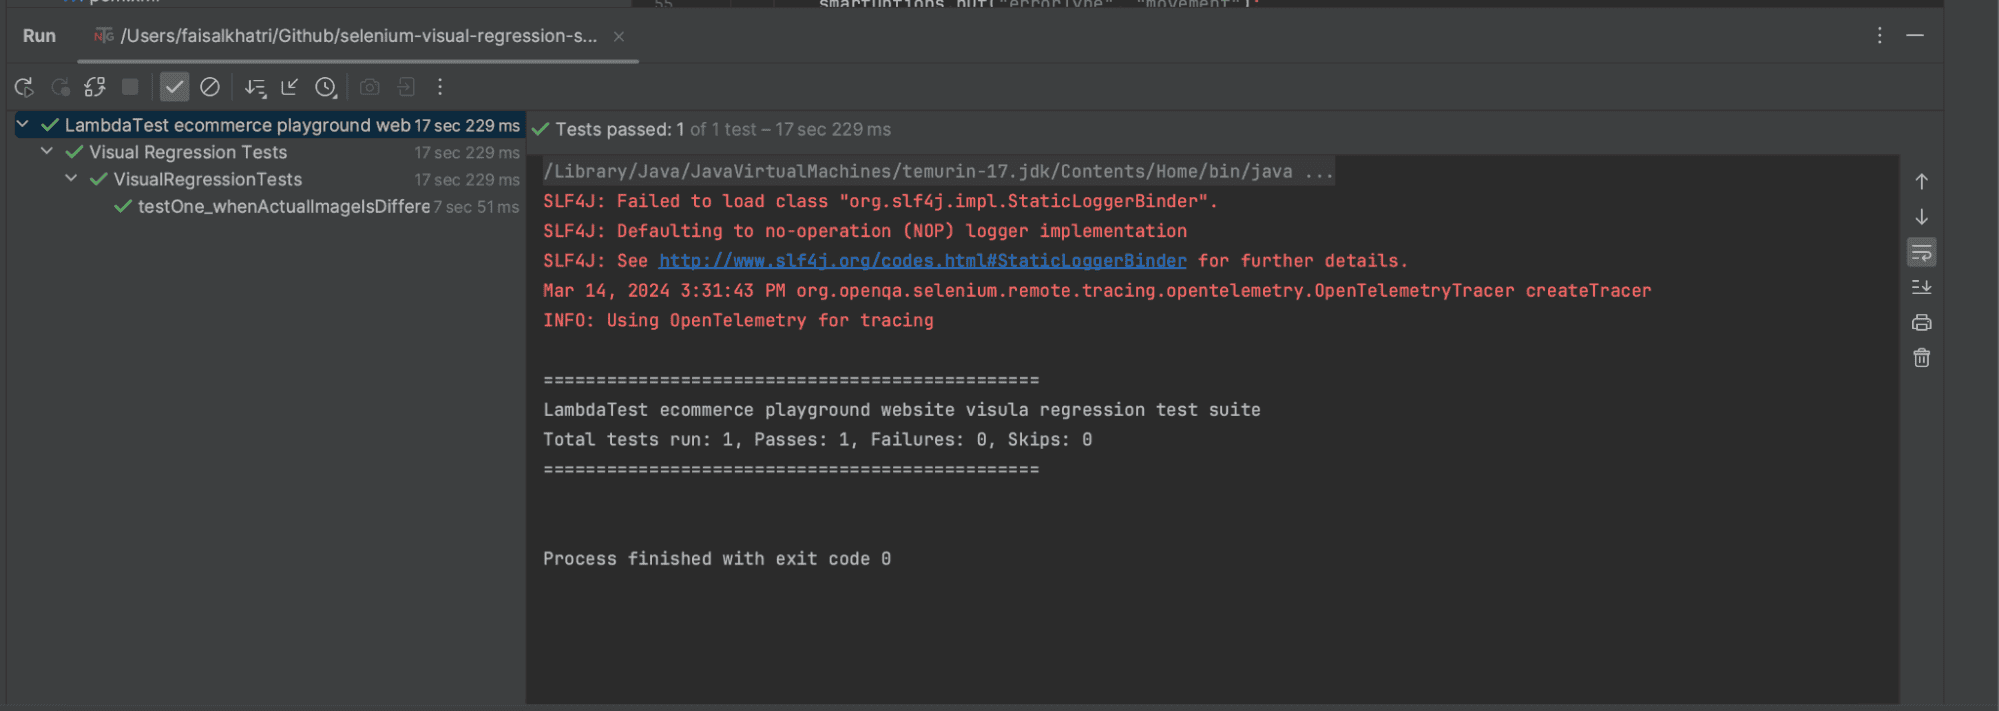
Screenshot of the test executed using IntelliJ:
![IntelliJ test execution]()
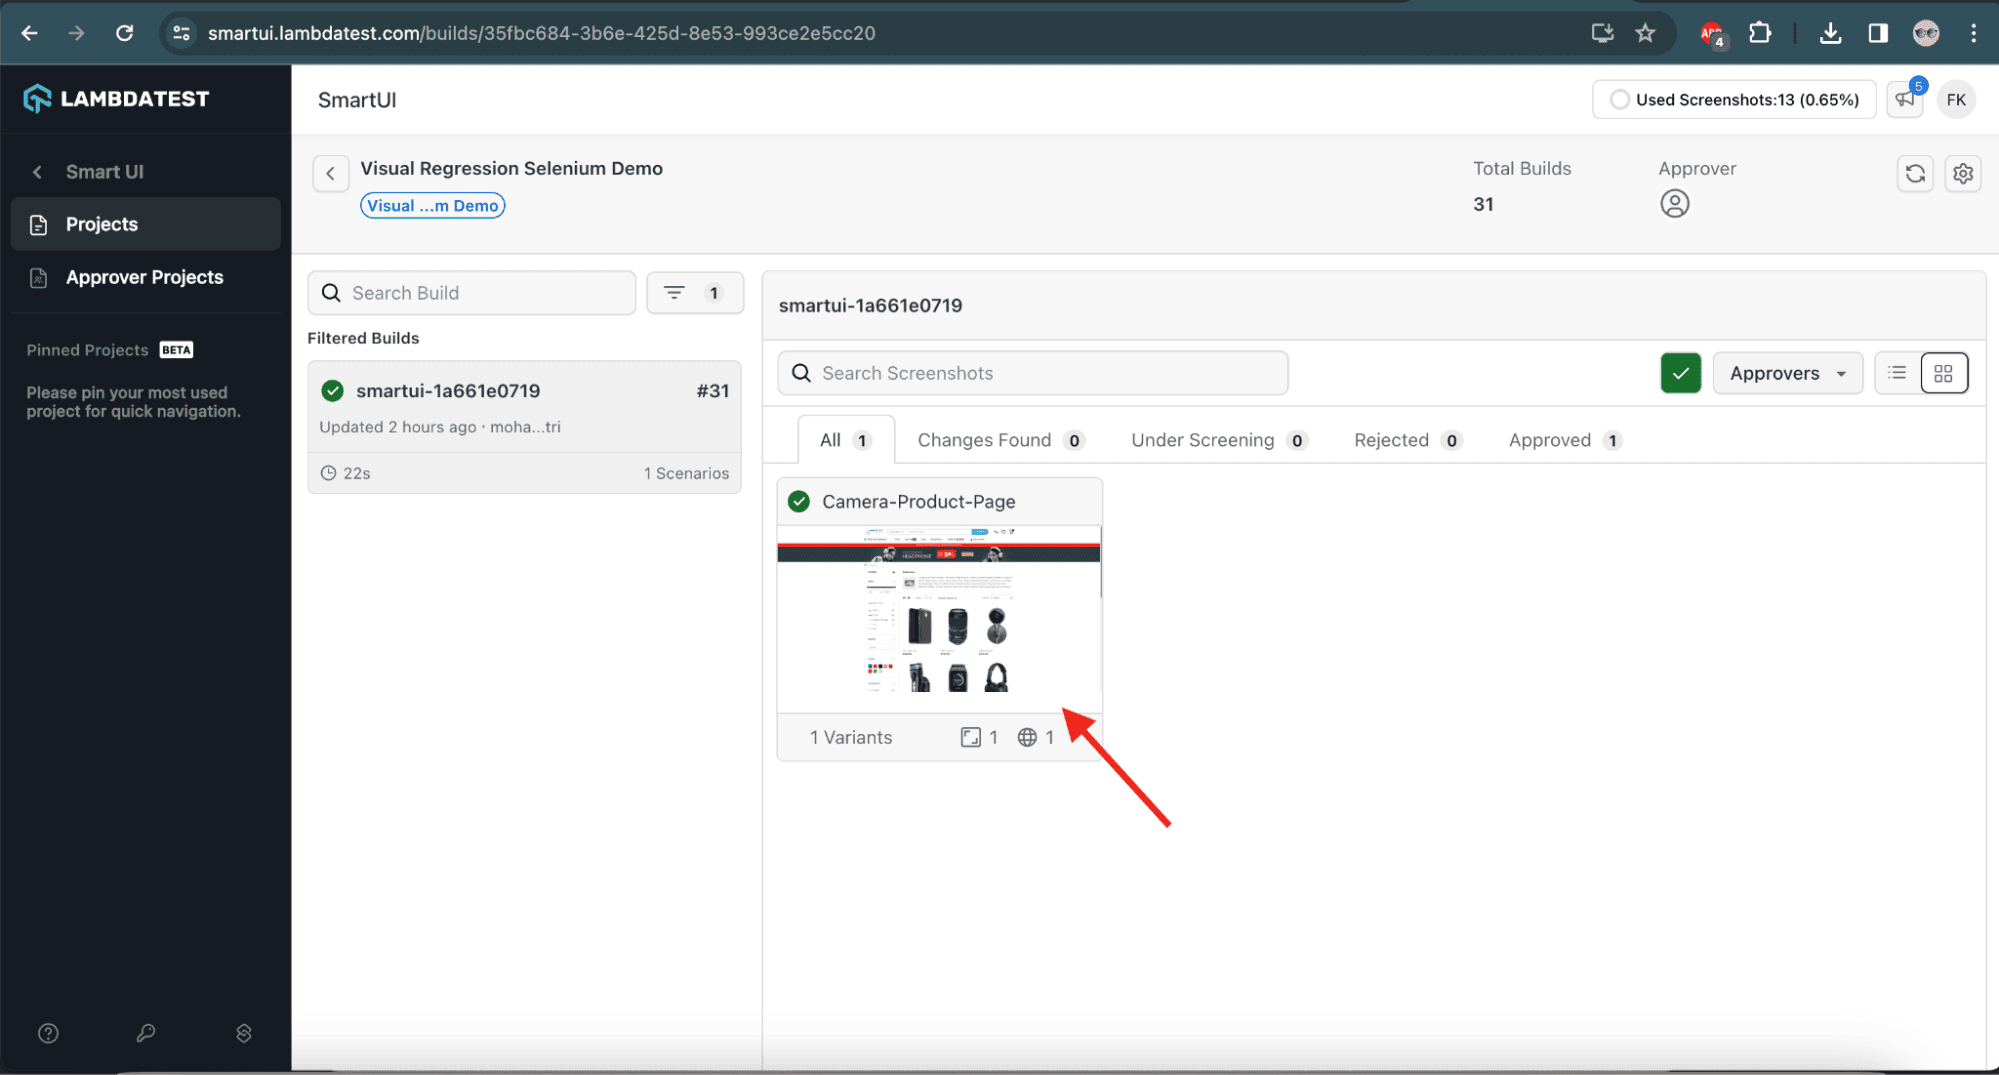
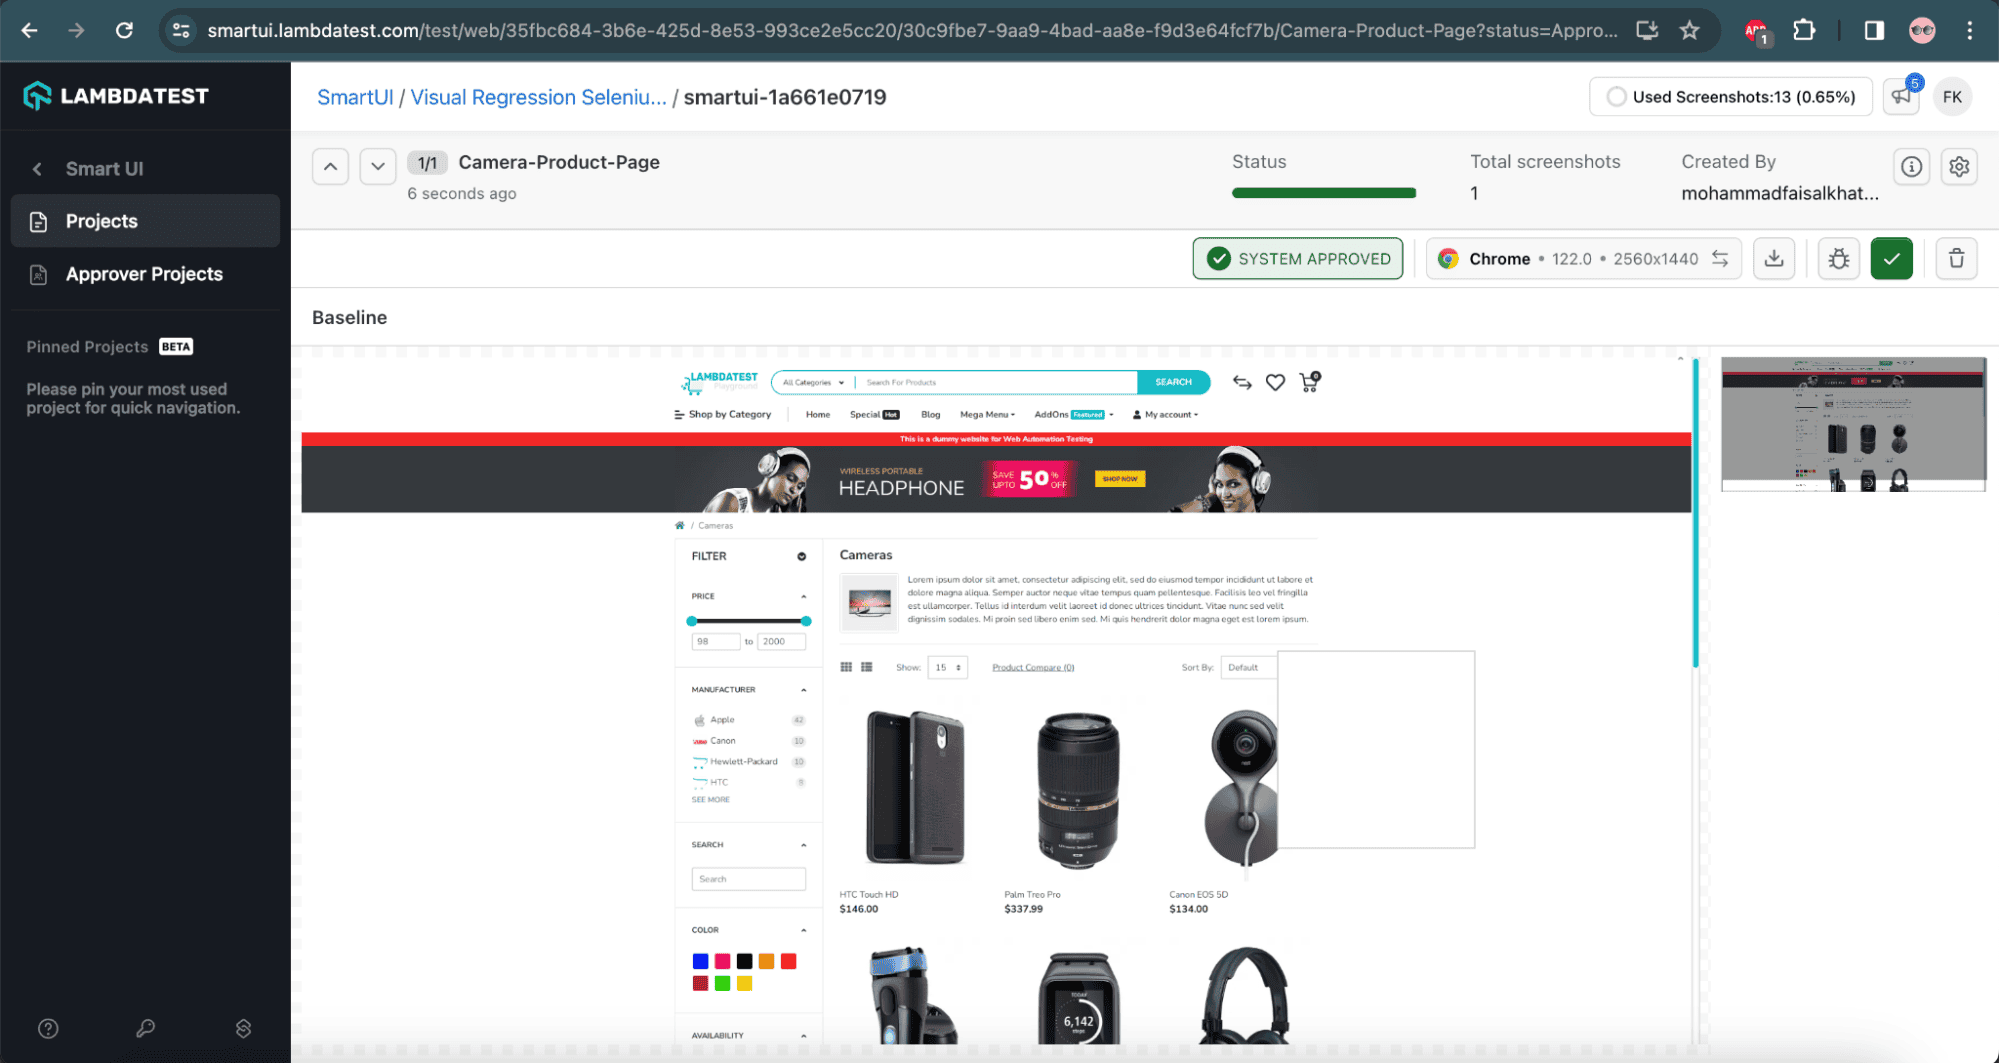
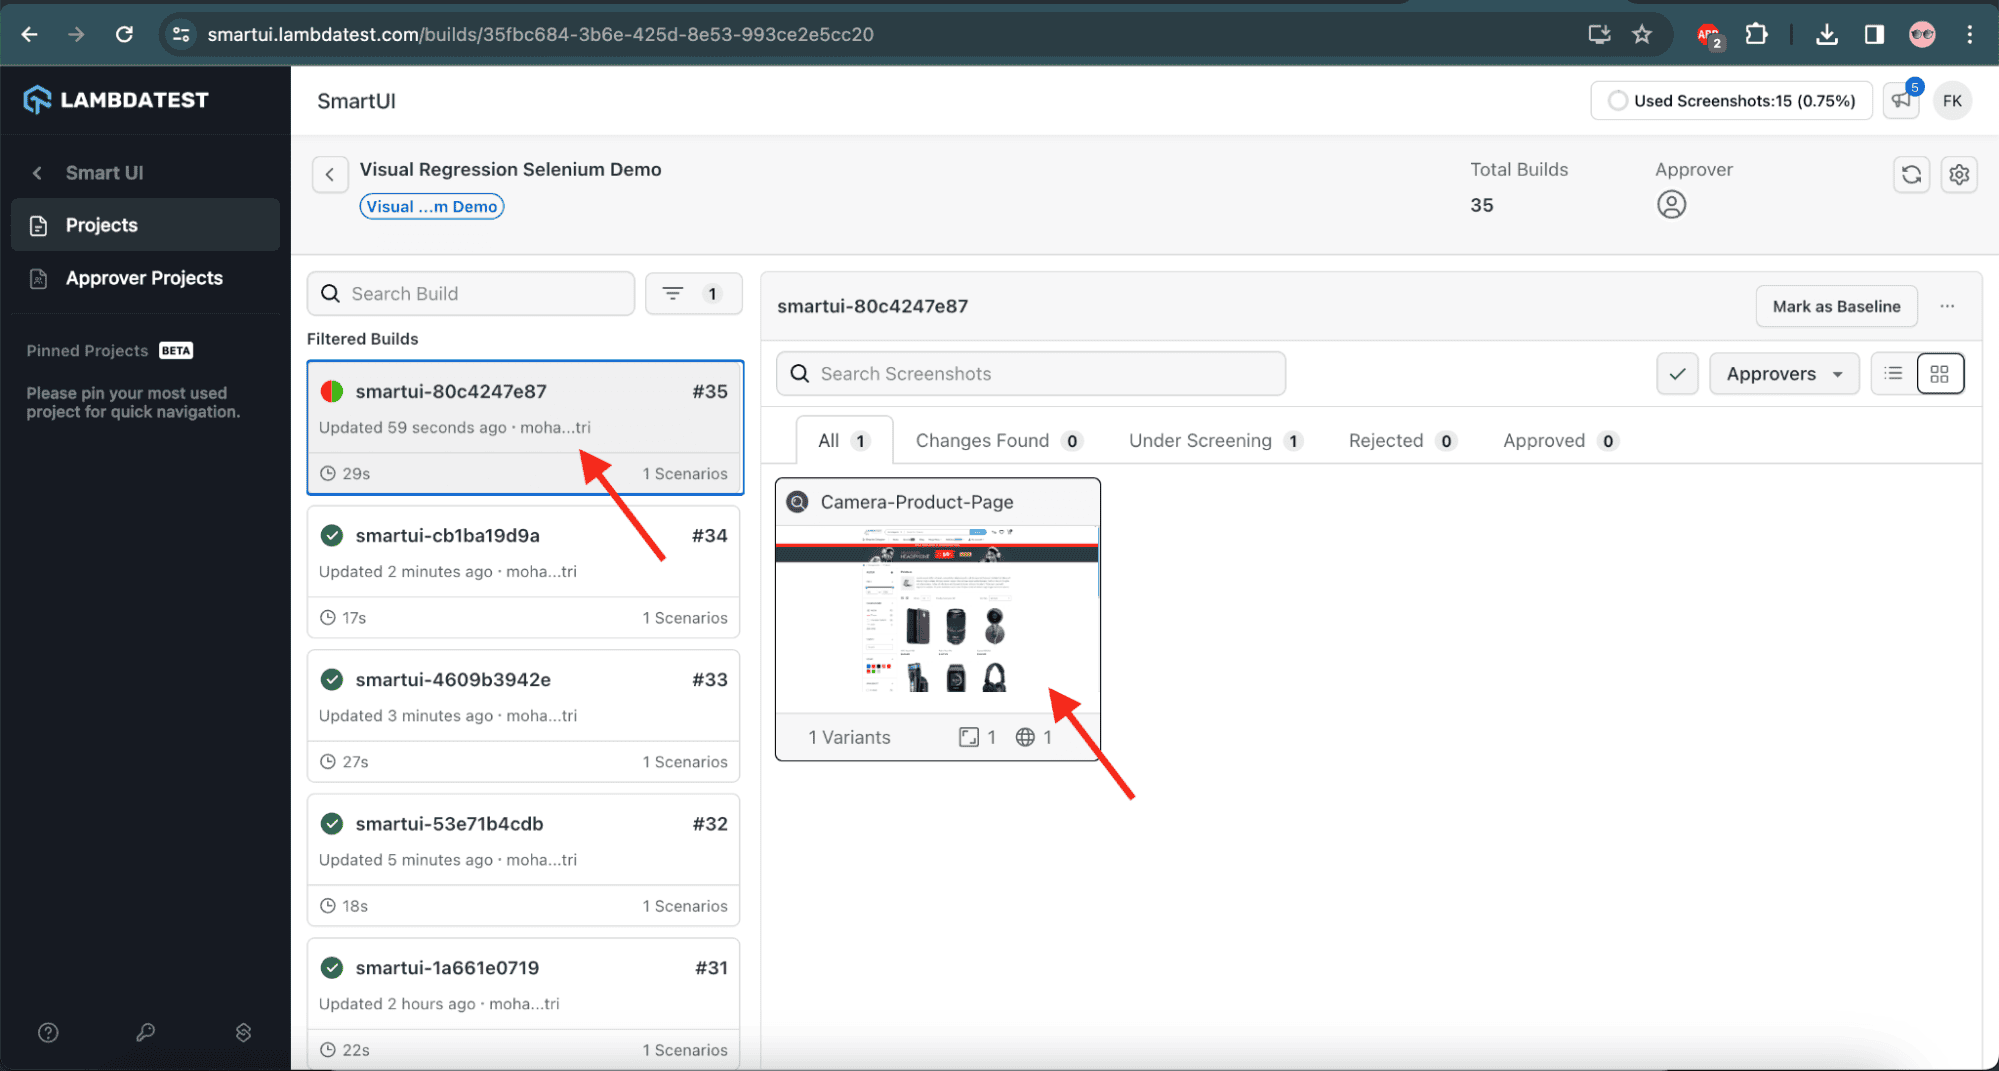
After the test execution, the Baseline image will be set in the SmartUI on the LambdaTest cloud platform:
![Baseline image dashboard on LambdaTest]()
![Set baseline image dashboard on LambdaTest]()
The Baseline image is now set. Let’s now run the visual regression tests by executing the whenActualImageIsDifferentFromBaseline_thenItShouldShowDifference, where we’ll be comparing the Printers product page with the Camera product page (Baseline image).
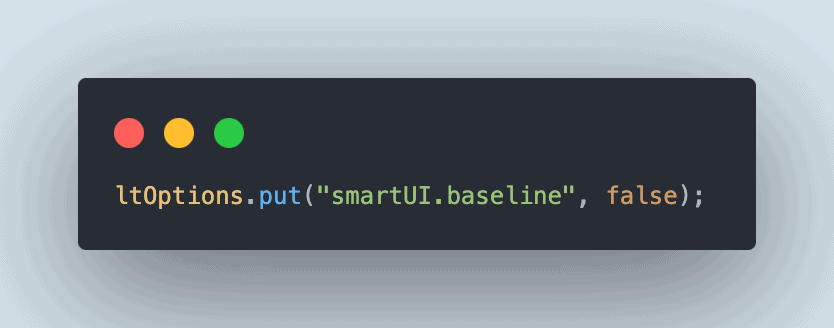
As we’ve already set the Baseline image in the previous test, we should ensure that before we run the test, we update the capability smartUI.baseline to false in the DriverManager class:
![Set SmartUI baseline image]()
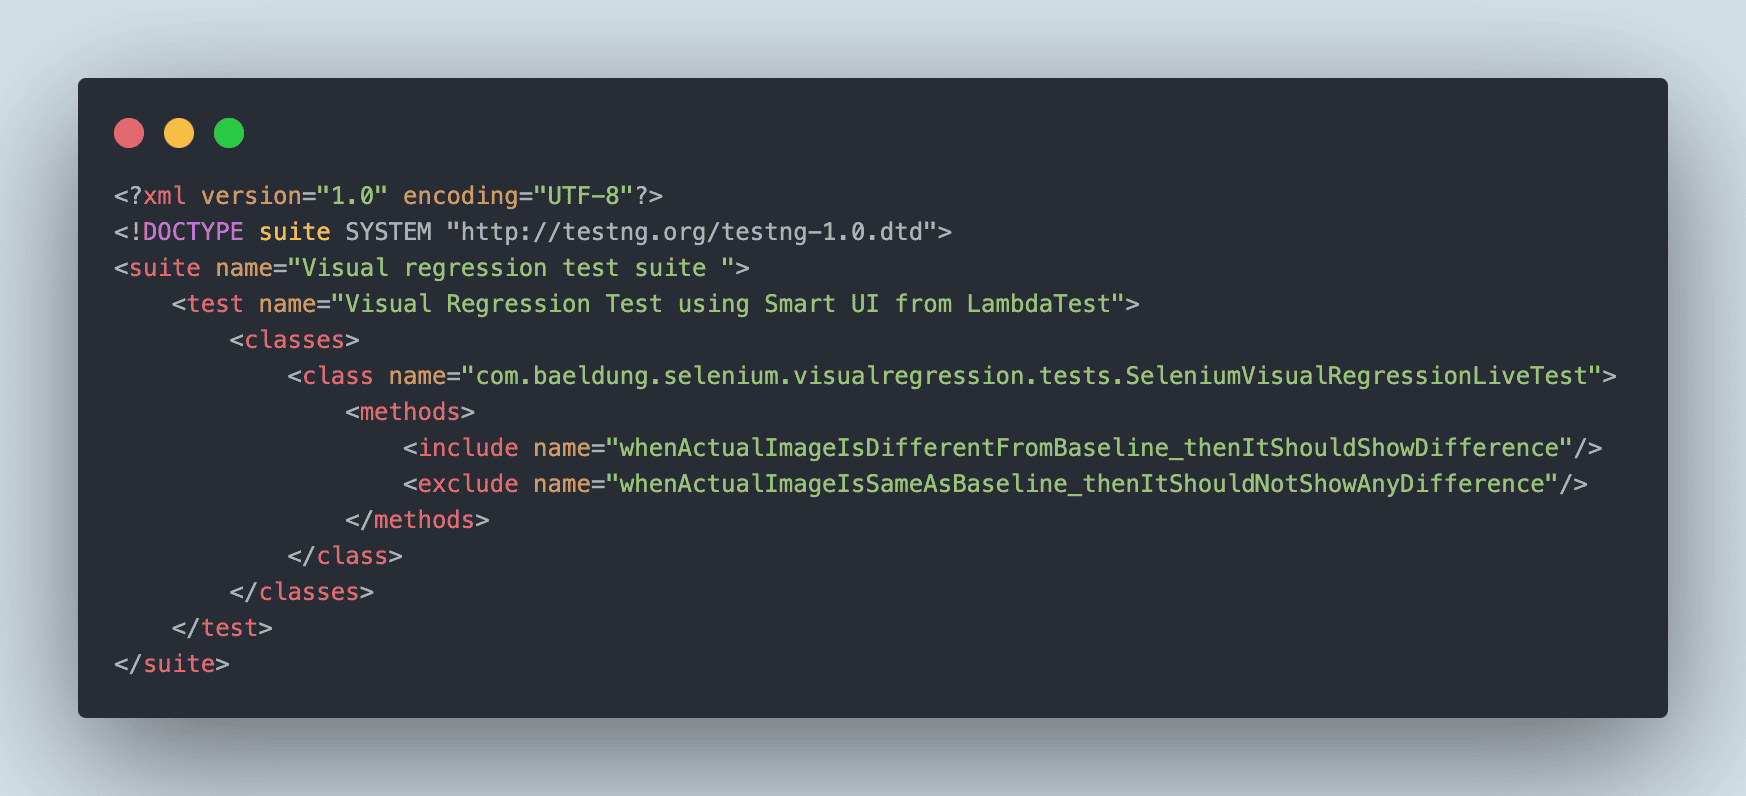
Next, let’s update the testng.xml file to include the whenActualImageIsDifferentFromBaseline_thenItShouldShowDifference method and exclude the whenActualImageIsSameAsBaseline_thenItShouldNotShowAnyDifference test method:
![TestNG configuration]()
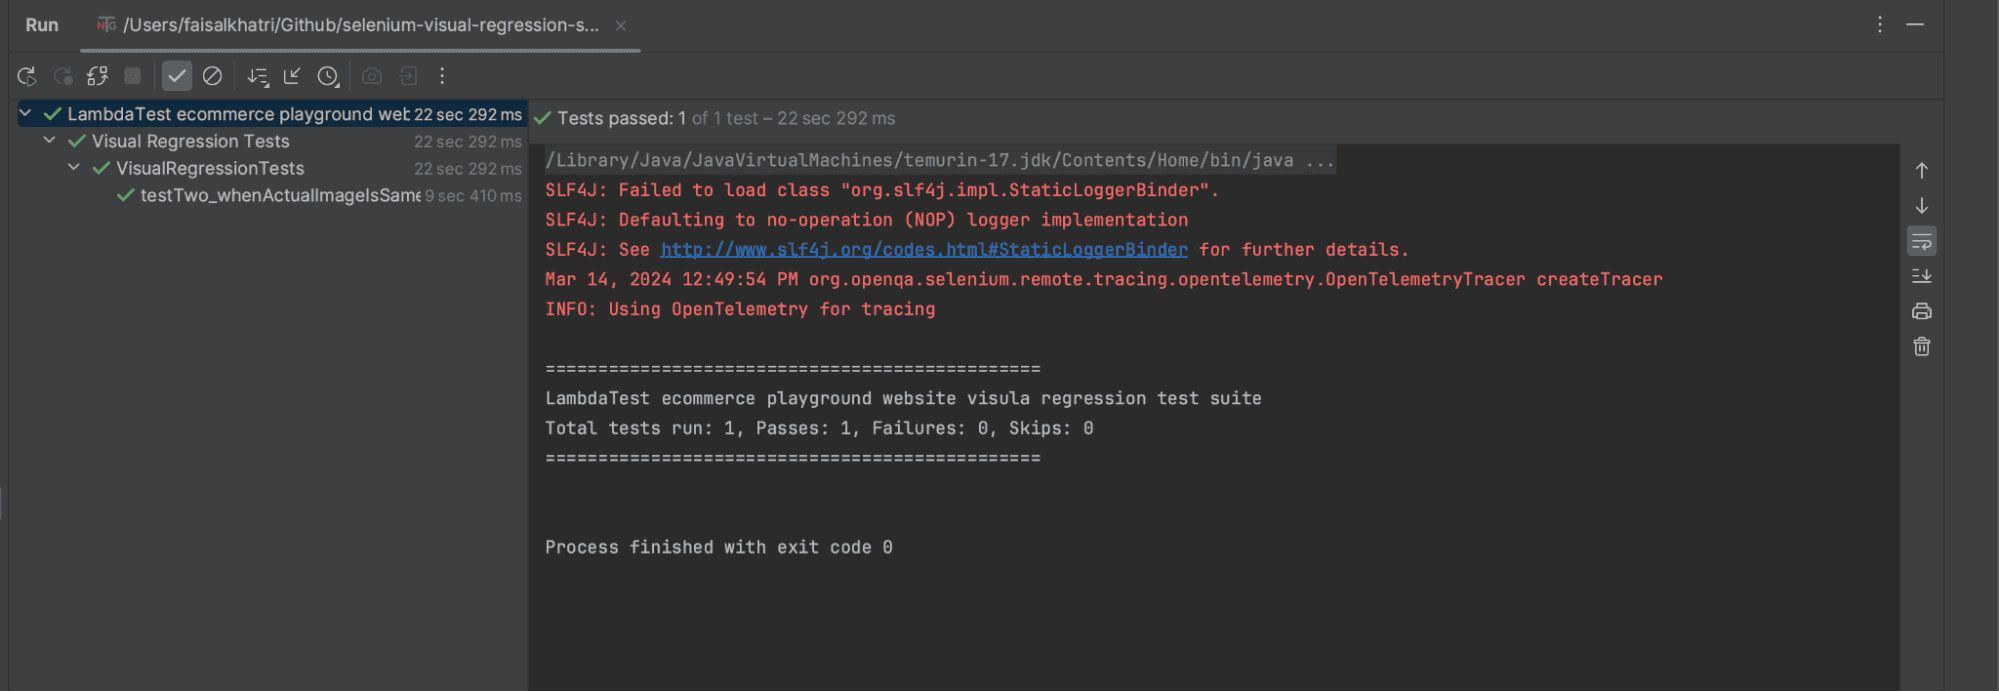
The IntelliJ test execution will look like the following:
![IntelliJ test execution]()
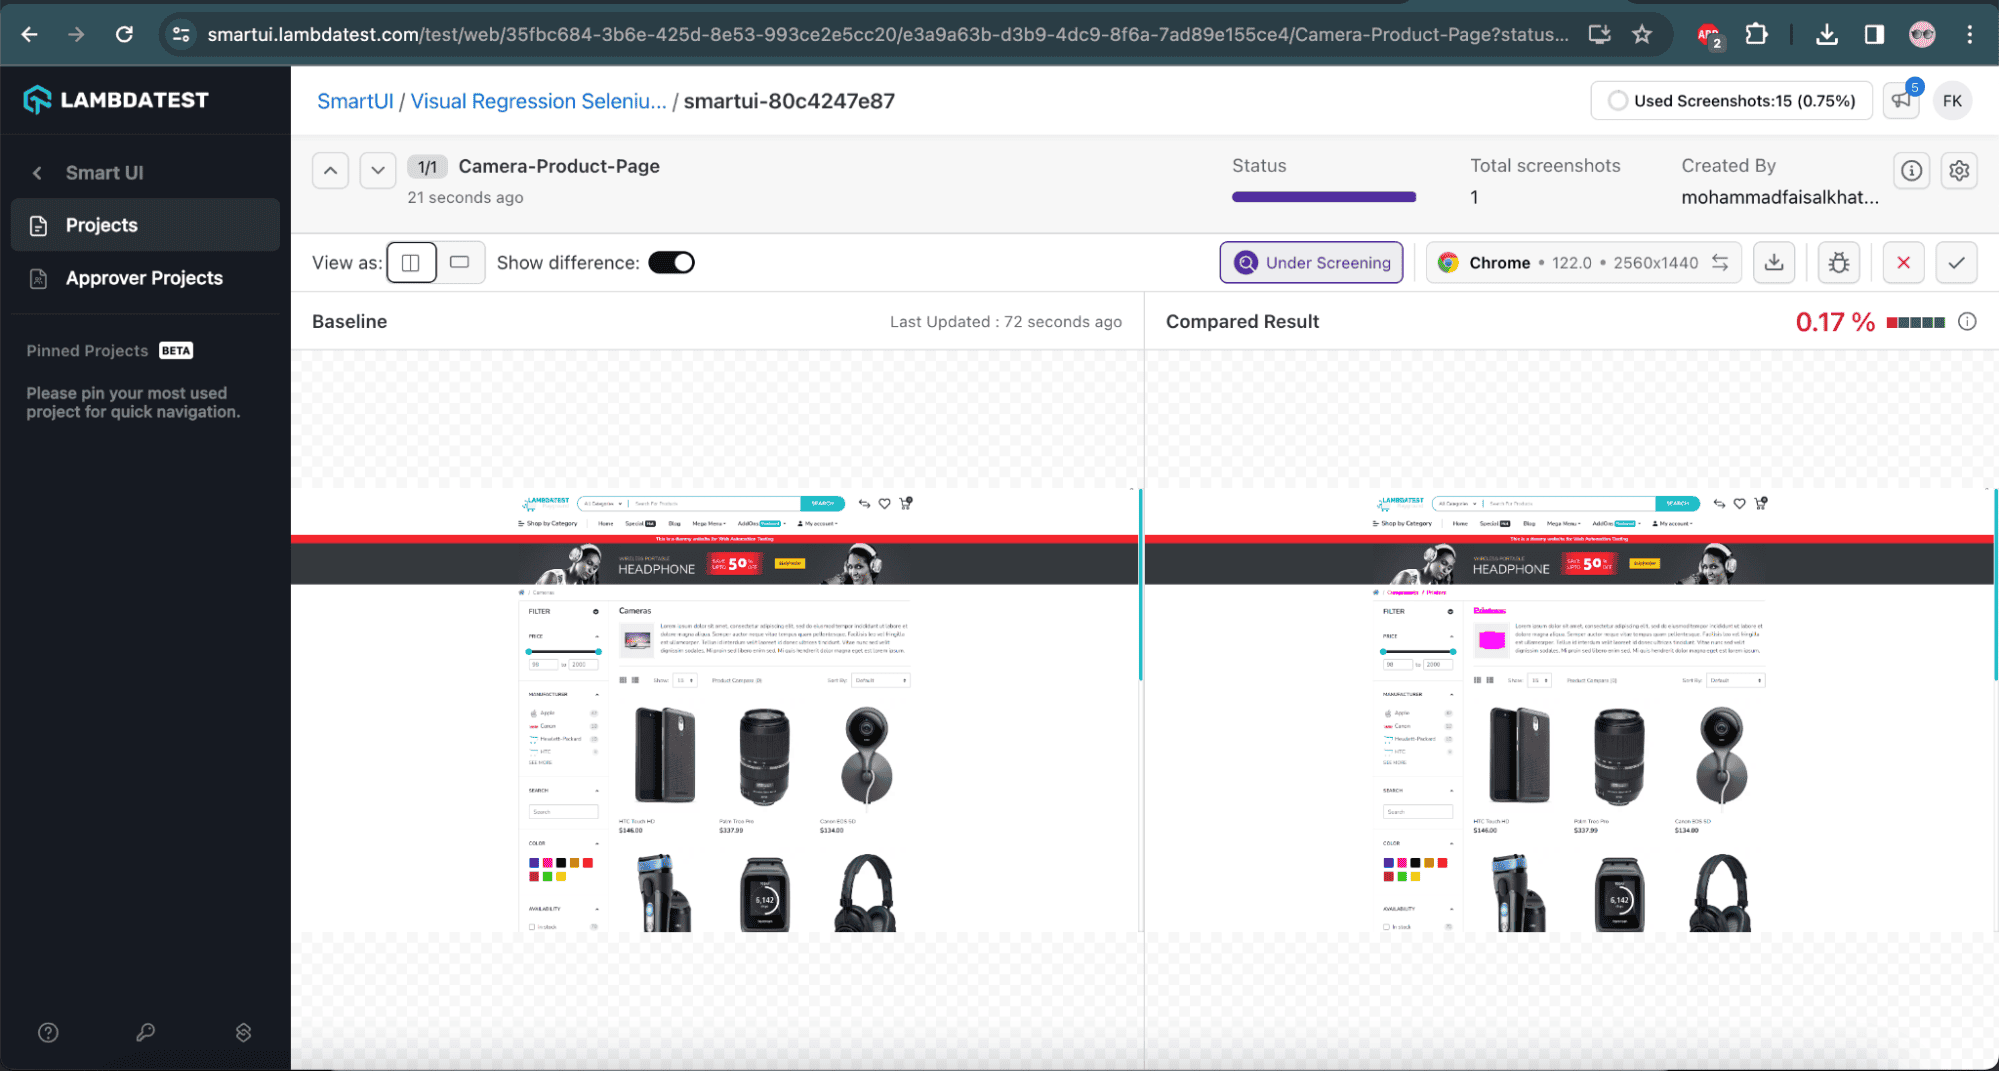
We can see the visual difference in the screenshot in the SmartUI on LambdaTest:
![Visual differences on LambdaTest]()
![Visual differences on LambdaTest]()
In the above screenshot, we can see the detailed insight of the visual regression testing. It shows the Baseline image, the current image, and their respective differences. We’ll notice that LambdaTest SmartUI provides a mismatch percentage of 0.17% by comparing both screenshots minutely using Pixel-to-Pixel comparison.
LambdaTest SmartUI highlights the differences between both screenshots in the current image itself. So, we can either approve or reject by clicking on the respective button above the Mismatch %.
While comparing, we need to consider the following SmartUI options:
| SmartUI Options |
Values |
| largeImageThreshold |
1200 |
| transparency |
0.3 |
| errorType |
movement |
As we’ve provided the maximum value for the largeImageThreshold option, we can accurately compare the image Pixel-by-Pixel. The errorType is set as “movement”, which specifies the pixel movements. It helps highlight the pixel distribution for the Baseline image to the Comparison image. Considering the transparency option, the comparison view image is transparent to the Approver for easy identification.
As shown, SmartUI from LambdaTest can help us perform the visual regression testing Pixel-by-Pixel and provide efficient results that can help us ship quality builds to the users.
8. Conclusion
In this article, we performed visual regression testing using LambdaTest’s SmartUI and Selenium WebDriver with Java. Visual regression testing safeguards web applications’ visual consistency and user experience. By leveraging innovative tools and methodologies, teams can proactively identify and mitigate visual defects, enhance product quality, reduce regression risks, and deliver superior digital experiences to end users.
The source code used in this article is available over on GitHub.
![]()




 is represented by the code point U+1F600.

