1. Overview
In previous articles, we’ve covered the basics of JHipster and how to use it to generate a microservices-based application.
In this tutorial, we’ll explore JHipster’s User Account and Authorization service — UAA for short — and how to use it to secure a fully fledged JHispter-based microservice application. Even better, all this can be achieved without writing a single line of code!
2. UAA Core Features
An important feature of the applications we’ve built in our previous articles is that user accounts were an integral part of them. Now, this is fine when we have a single application, but what if we want to share user accounts between multiple JHipster-generated applications? This is where JHipster’s UAA comes in.
JHipster’s UAA is a microservice that is built, deployed, and run independently of other services in our application. It serves as:
- An OAuth2 Authorization Server, based on Spring Boot’s implementation
- An Identity Management Server, exposing a user account CRUD API
JHipster UAA also supports typical login features like self-registration and “remember me”. And of course, it fully integrates with other JHipster services.
3. Development Environment Setup
Before starting any development, we must first be sure our environment has all its prerequisites set up. Besides all of the tools described in our Intro To JHipster article, we’ll need a running JHipster Registry. Just as a quick recap, the registry service allows the different services that we’ll create to find and talk to each other.
The full procedure for generating and running the registry is described in section 4.1 of our JHipster with a Microservice Architecture article so we won’t repeat it here. A Docker image is also available and can be used as an alternative.
4. Generating a New JHipster UAA Service
Let’s generate our UAA service using the JHipster command line utility:
$ mkdir uaa
$ cd uaa
$ jhipster
The first question we have to answer is which type of application we want to generate. Using the arrow keys, we’ll select the “JHipster UAA (for microservice OAuth2 authentication)” option:

Next, we’ll be prompted for a few of questions regarding specific details regarding the generated service, such as application name, server port and service discovery:

For the most part, the default answers are fine. As for the application’s base name, which affects many of the generated artifacts, we’ve chosen “uaa” (lowercase) — a sensible name. We can play around with the other values if we want, but it won’t change the main features of the generated project.
After answering these questions, JHipster will create all project files and install npm package dependencies (which are not really used in this case).
We can now use the local Maven script to build and run our UAA service:
$ ./mvnw
... build messages omitted
2018-10-14 14:07:17.995  INFO 18052 --- [  restartedMain] com.baeldung.jhipster.uaa.UaaApp         :
----------------------------------------------------------
        Application 'uaa' is running! Access URLs:
        Local:          http://localhost:9999/
        External:       http://192.168.99.1:9999/
        Profile(s):     [dev, swagger]
----------------------------------------------------------
2018-10-14 14:07:18.000  INFO 18052 --- [  restartedMain] com.baeldung.jhipster.uaa.UaaApp         :
----------------------------------------------------------
        Config Server:  Connected to the JHipster Registry config server!
----------------------------------------------------------
The key message to pay attention to here is the one stating that UAA is connected to the JHipster Registry. This message indicates that UAA was able to register itself and will be available for discovery by other microservices and gateways.
5. Testing the UAA Service
Since the generated UAA service has no UI by itself, we must use direct API calls to test if it is working as expected.
There are two functionalities that we must make sure are working before using it with other parts or our system: OAuth2 token generation and account retrieval.
First, let’s get a new token from our UAA’s OAuth endpoint, using a simple curl command:
$ curl -X POST --data \
 "username=user&password=user&grant_type=password&scope=openid" \
 http://web_app:changeit@localhost:9999/oauth/token
Here, we’ve used the password grant flow, using two pairs of credentials. In this kind of flow, we send client credentials using basic HTTP authentication, which we encode directly in the URL.
The end user credentials are sent as part of the body, using the standard username and password parameters. We’re also using the user account named “user”, which is available by default in the test profile.
Assuming we’ve provided all details correctly, we’ll get an answer containing an access token and a refresh token:
{
  "access_token" : "eyJh...(token omitted)",
  "token_type" : "bearer",
  "refresh_token" : "eyJ...(token omitted)",
  "expires_in" : 299,
  "scope" : "openid",
  "iat" : 1539650162,
  "jti" : "8066ab12-6e5e-4330-82d5-f51df16cd70f"
}
We can now use the returned access_token to get information for the associated account using the account resource, which is available in the UAA service:
$ curl -H "Authorization: Bearer eyJh...(access token omitted)" \
 http://localhost:9999/api/account
{
  "id" : 4,
  "login" : "user",
  "firstName" : "User",
  "lastName" : "User",
  "email" : "user@localhost",
  "imageUrl" : "",
  "activated" : true,
  "langKey" : "en",
  "createdBy" : "system",
  "createdDate" : "2018-10-14T17:07:01.336Z",
  "lastModifiedBy" : "system",
  "lastModifiedDate" : null,
  "authorities" : [ "ROLE_USER" ]
}
Please notice that we must issue this command before the access token expires. By default, the UAA service issues tokens valid for five minutes, which is a sensible value for production.
We can easily change the lifespan of valid tokens by editing the application-<profile>.yml file corresponding to the profile we’re running the app under and setting the uaa.web-client-configuration.access-token-validity-in-seconds key. The settings files reside in the src/main/resources/config directory of our UAA project.
6. Generating the UAA-Enabled Gateway
Now that we’re confident our UAA service and service registry are working, let’s create an ecosystem for these to interact with. By the end, we’ll have added:
- An Angular-based front-end
- A microservice back-end
- An API Gateway that fronts both of these
Let’s actually begin with the gateway, as it will be the service that will negotiate with UAA for authentication. It’s going to host our front-end application and route API requests to other microservices.
Once again, we’ll use the JHipster command-line tool inside a newly created directory:
$ mkdir gateway
$ cd gateway
$ jhipster
As before, we have to answer a few questions in order to generate the project. The important ones are the following:
- Application type: must be “Microservices gateway”
- Application name: We’ll use “gateway” this time
- Service discovery: Select “JHipster registry”
- Authentication type: We must select the “Authentication with JHipster UAA server” option here
- UI Framework: Let’s pick “Angular 6”
Once JHipster generates all its artifacts, we can build and run the gateway with the provided Maven wrapper script:
$ ./mwnw
... many messages omitted
----------------------------------------------------------
        Application 'gateway' is running! Access URLs:
        Local:          http://localhost:8080/
        External:       http://192.168.99.1:8080/
        Profile(s):     [dev, swagger]
----------------------------------------------------------
2018-10-15 23:46:43.011  INFO 21668 --- [  restartedMain] c.baeldung.jhipster.gateway.GatewayApp   :
----------------------------------------------------------
        Config Server:  Connected to the JHipster Registry config server!
----------------------------------------------------------
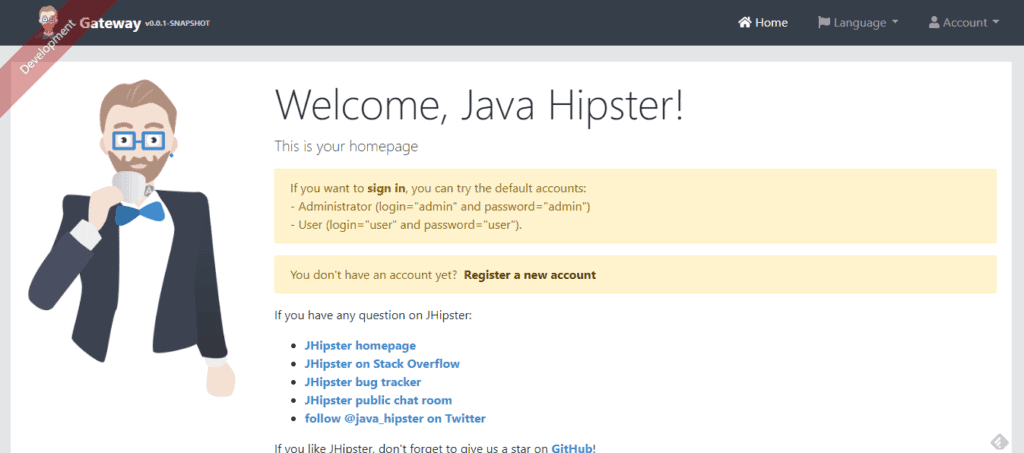
With the above message, we can access our application by pointing our browser to http://localhost:8080, which should display the default generated homepage:

Let’s go ahead and log into our application, by navigating to the Account > Login menu item. We’ll use admin/admin as credentials, which JHipster creates automatically by default. All going well, the welcome page will display a message confirming a successful logon:

Let’s recap what happened to get us here: First, the gateway sent our credentials to UAA’s OAuth2 token endpoint, which validated them and generated a response containing an access and a refresh JWT token. The gateway then took those tokens and sent them back to the browser as cookies.
Next, the Angular front-end called the /uaa/api/account API, which once again the gateway forwarded to UAA. In this process, the gateway takes the cookie containing the access token and use its value to add an authorization header to the request.
If needed, we can see all this flow in great detail by checking both UAA and Gateway’s logs. We can also get full wire-level data by setting the org.apache.http.wire logger level to DEBUG.
7. Generating a UAA-Enabled Microservice
Now that our application environment is up and running, it’s time to add a simple microservice to it. We’ll create a “quotes” microservice, which will expose a full REST API that allows us to create, query, modify, and delete a set of stock quotes. Each quote will have only three properties:
- The quote’s trade symbol
- Its price, and
- The last trade’s timestamp
Let’s go back to our terminal and use JHipster’s command-line tool to generate our project:
$ mkdir quotes
$ cd quotes
$ jhipster
This time, we’ll ask JHipster to generate a Microservice application, which we’ll call “quotes”. The questions are similar to the ones we’ve answered before. We can keep the defaults for most of them, except for these three:
- Service Discovery: Select “JHipster Registry” since we’re already using it in our architecture
- Path to the UAA application: Since we’re keeping all projects directories under the same folder, this will be ../uaa (unless we’ve changed it, of course)
- Authentication Type: Select “JHipster UAA server”
Here’s what a typical sequence of answers will look like in our case:

Once JHipster finishes generating the project, we can go ahead and build it:
$ mvnw
... many, many messages omitted
----------------------------------------------------------
        Application 'quotes' is running! Access URLs:
        Local:          http://localhost:8081/
        External:       http://192.168.99.1:8081/
        Profile(s):     [dev, swagger]
----------------------------------------------------------
2018-10-19 00:16:05.581  INFO 16092 --- [  restartedMain] com.baeldung.jhipster.quotes.QuotesApp   :
----------------------------------------------------------
        Config Server:  Connected to the JHipster Registry config server!
----------------------------------------------------------
... more messages omitted
The message “Connected to the JHipster Registry config server!” is what we’re looking for here. Its presence tells us that the microservice registered itself with the registry and, because of this, the gateway will be able to route requests to our “quotes” resource and display it on a nice UI, once we’ve created it. Since we’re using a microservice architecture, we split this task into two parts:
- Create the “quotes” resource back-end service
- Create the “quotes” UI in the front-end (part of the gateway project)
7.1. Adding the Quotes Resource
First, we need to make sure the that the quotes microservice application is stopped — we can hit CTRL-C on the same console window that we previously used to run it.
Now, let’s add an entity to the project using JHipster’s tool. This time we’ll use the import-jdl command, which will save us from the tedious and error-prone process of supplying all details individually. For additional information about the JDL format, please refer to the full JDL reference.
Next, we create a text file called quotes.jh containing our Quote entity definition, along with some code generation directives:
entity Quote {
  symbol String required unique,
  price BigDecimal required,
  lastTrade ZonedDateTime required
}
dto Quote with mapstruct
paginate Quote with pagination
service Quote with serviceImpl
microservice Quote with quotes
filter Quote
clientRootFolder Quote with quotes
We can now import this entity definition to our project:
$ jhipster import-jdl quotes.jh
Note: during the import, JHipster will complain about a conflict while applying changes to the master.xml file. We can safely choose the overwrite option in this case.
We can now build and run our microservice again using mvnw. Once it’s up, we can verify that the gateway picks up the new route accessing the Gateway view, available from the Administration menu. This time, we can see that there’s an entry for the “/quotes/**” route, which shows that the backend is ready to be used by the UI.
7.2. Adding the Quotes UI
Finally, let’s generate the CRUD UI in the gateway project that we’ll use to access our quotes. We’ll use the same JDL file from the “quotes” microservice project to generate the UI components, and we’ll import it using JHipster’s import-jdl command:
$ jhipster import-jdl ../jhipster-quotes/quotes.jh
...messages omitted
? Overwrite webpack\webpack.dev.js? <b>y</b>
... messages omitted
Congratulations, JHipster execution is complete!
During the import, JHipster will prompt a few times for the action it should take regarding conflicting files. In our case, we can simply overwrite existing resources, since we haven’t done any customization.
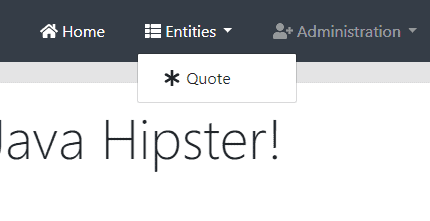
Now we can restart the gateway and see what we’ve accomplished. Let’s point our browser to the gateway at http://localhost:8080, making sure we refresh its contents. The Entities menu should now have a new entry for the Quotes resource:

Clicking on this menu option brings up the Quotes listing screen:

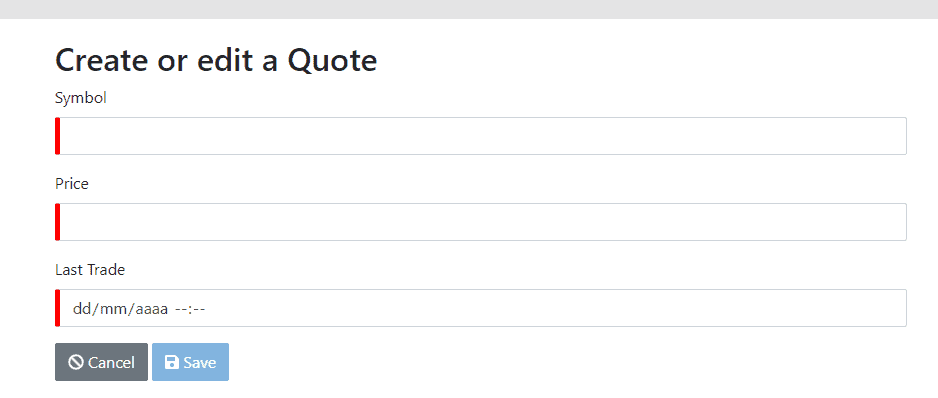
As expected, the listing is empty — we haven’t added any quotes yet! Let’s try to add one by clicking the “Create New Quote Button” on the top right of this screen, which brings us to the create/edit form:

We can see that the generated form has all expected features:
- Required fields are marked with a red indicator, which turns green once filled
- Date/Time and numeric fields use native components to help with data entry
- We can cancel this activity, which will leave data unchanged, or save our new or modified entity
After filling this form and hitting Save, we’ll see the results on the listing screen. We can now see the new Quotes instance in the data grid:

As an admin, we also have access to the API menu item, which takes us to the standard Swagger API Developer Portal. In this screen, we can select one of the available APIs to exercise:
- default: Gateway’s own API that displays available routes
- uaa: Account and User APIs
- quotes: Quotes API
8. Next Steps
The application we’ve built so far works as expected and provides a solid base for further development. We’ll most definitely also need to write some (or a lot of) custom code, depending on the complexity of our requirements. Some areas that are likely to need some work are:
- UI look and feel customization: This is usually quite easy due to the way the front-end application is structured — we can go a long way simply by fiddling with CSS and adding some images
- User repository changes: Some organizations already have some sort of internal user repository (e.g. an LDAP directory) — this will require changes on the UAA, but the nice part is that we only need to change it once
- Finer grained authorization on entities: The standard security model used by the generated entity back-end does not have any kind of instance-level and/or field-level security — it’s up to the developer to add those restrictions at the appropriate level (API or service, depending on the case)
Even with those remarks, using a tool like JHispter can help a lot when developing a new application. It will bring with it a solid foundation and can keep a good level of consistency in our code base as the system — and developers — evolve.
9. Conclusion
In this article, we’ve shown how to use JHispter to create a working application based on a microservices architecture and JHipster’s UAA server. We achieved that without writing a single line of Java code, which is quite impressive.
As usual, the full code for the projects presented in this article is available in our GitHub repository.