
1. Overview
Providing a smooth log-in experience for a website requires a delicate balance. On one hand, we want users with various levels of computer savviness to be able to go through the log-in as quickly as possible. On the other hand, we need to ensure the identity of the person accessing our system – or risk a potentially disastrous security incident.
In this tutorial, we’ll show how to use one-time token logins in Spring Boot-based applications. This mechanism strikes a good balance between easy-of-use and security characteristics, and, as of Spring Boot version 3.4, is supported out-of-the-box when using Spring Security 6.4 or later.
2. What Is a One-Time Token Login?
The traditional way to identify a user in computer applications is to provide a form where he or she provides a username and password. Now, what if the user forgets his/her password? The common approach is to provide a “Forgot Password” button.
When the user clicks on this button, the backend sends a message to the user, which includes a time-limited token that allows the user to redefine his/her password.
However, for a range of applications, users are not expected to go to the site often and/or bother to save their passwords. In those cases, users tend to constantly use the reset password functionality, which generates frustration and, in some cases, angry customer support calls. Here are some applications that fall into this category:
- Community sites (clubs, schools, churches, gaming)
- Document distribution/signing services
- Pop-up marketing sites
Instead, this is how the One-Time Token Login (or OTT, for short) mechanism works:
- The user informs his/her username, which usually corresponds to his/her email address
- The system generates a time-limited token and sends it using an out-of-band mechanism, which can be an email, SMS message, mobile notification, or similar
- The user opens the message in his email/messaging application and clicks on the link provided, which includes the one-time token
- The user’s device browser opens the link, which leads him back to the system’s OTT login location
- The system checks the token value embedded in the link. If it’s a valid one, access is granted, and the user can proceed. Alternatively, display a token submit form which, when submitted, completes the login process
3. When Should We Use OTT?
Before considering the One-Time Login mechanism for a given application, it’s a good idea to see its pros and cons:
| Pros | Cons |
|---|---|
| No need to manage user passwords, which also removes a security risk | Single-factor-based authentication, at least from the application’s endpoint |
| Simple to use and understand even by non-tech-savvy users | Vulnerable to man-in-the-middle attacks |
We may now be thinking: why not use social logins? From a technical perspective, social logins, usually based on OAuth2/OIDC, are more secure than OTT.
However, enabling it requires more operational effort (e.g., requesting and maintaining client IDs for each provider) and may lead to decreased engagement, given the increased awareness regarding sharing personal data.
4. Implementing OTT With Spring Boot and Spring Security
Let’s create a simple Spring Boot application that uses the OTT support that has been available since version 3.4. As usual, we’ll start by adding the required Maven dependencies:
<dependency>
    <groupId>org.springframework.boot</groupId>
    <artifactId>spring-boot-starter-web</artifactId>
    <version>3.4.1<version>
</dependency>
<dependency>
    <groupId>org.springframework.boot</groupId>
    <artifactId>spring-boot-starter-security</artifactId>
    <version>3.4.1<version>
</dependency>
The latest versions of these dependencies are available on Maven Central:
5. OTT Configuration
In the current version, enabling OTT for an application requires us to provide a SecurityFilterChain bean:
@Bean
SecurityFilterChain ottSecurityFilterChain(HttpSecurity http) throws Exception {
    return http
      .authorizeHttpRequests(ht -> ht.anyRequest().authenticated())
      .formLogin(withDefaults())
      .oneTimeTokenLogin(withDefaults())
      .build();
}
Here, the key point is the use of the new oneTimeTokenLogin() method that was introduced in version 6.4 as part of the DSL configuration. As usual, this method allows us to customize all aspects of the mechanism. In our case, however, we just use Customizer.withDefaults() to accept the default values.
Also, notice that we’ve added a formLogin() to the configuration. Without it, Spring Security will default to using Basic authentication, which does not play well with OTT.
Finally, in the authorizeHttpRequests() section, we’ve just added a configuration requiring authentication for all requests.
6. Sending the Token
The OTT mechanism has no built-in method that implements the actual token delivery to users. As explained in the documentation, this is a deliberate design decision since there are simply too many ways to implement this functionality.
Instead, OTT delegates this responsibility to the application code, which must expose a bean implementing the OneTimeTokenGenerationSuccessHandler interface. Alternatively, we can pass an implementation of this interface directly through the configuration DSL.
This interface has a single method, handle(), which takes the current servlet request, response, and, most importantly, a OneTimeToken object. The latter has the following attributes:
- tokenValue: The generated token that we need to send to the user
- username: The informed username
- expiresAt: The Instant at which the generated token will expire
A typical implementation would go through the following steps:
- Use the supplied username as a key to look up the required delivery details. For instance, those details could include an email address or a phone number and the user’s locale settings
- Construct a URL that takes the user to the OTT login page
- Prepare and send a message with the OTT link to the user
- Send a redirect response to the client, which sends the browser to the OTT login page
In our implementation, we’ve opted to split the responsibilities related to steps 1 to 3 to a dedicated OttSenderService.
For step 4, we delegate the redirection details to Spring Security’s RedirectOneTimeTokenGenerationSuccessHandler. This is the resulting implementation:
public class OttLoginLinkSuccessHandler implements OneTimeTokenGenerationSuccessHandler {
    private final OttSenderService senderService;
    private final OneTimeTokenGenerationSuccessHandler redirectHandler = new RedirectOneTimeTokenGenerationSuccessHandler("/login/ott");
    // ... constructor omitted
    @Override
    public void handle(HttpServletRequest request, HttpServletResponse response,
      OneTimeToken oneTimeToken) throws IOException, ServletException {
        senderService.sendTokenToUser(oneTimeToken.getUsername(),
          oneTimeToken.getTokenValue(), oneTimeToken.getExpiresAt());
        redirectHandler.handle(request, response, oneTimeToken);
    }
}
Notice the “/login/ott” constructor argument passed to RedirectOneTimeTokenGenerationSuccessHandler. This corresponds to the default location for the token submission form and can be configured to a different location using the OTT DSL.
As for the OttSenderService, we’ll use a fake sender implementation that stores the token in a Map indexed by the username and logs its value:
public class FakeOttSenderService implements OttSenderService {
    private final Map<String,String> lastTokenByUser = new HashMap<>();
    @Override
    public void sendTokenToUser(String username, String token, Instant expiresAt) {
        lastTokenByUser.put(username, token);
        log.info("Sending token to username '{}'. token={}, expiresAt={}", username,token,expiresAt);
    }
    @Override
    public Optional<String> getLastTokenForUser(String username) {
        return Optional.ofNullable(lastTokenByUser.get(username));
    }
}
Notice that the OttSenderService has an optional method that allows us to recover the token for a username. The main purpose of this method is to simplify the implementation of unit tests, as we’ll see in the Automated Tests section.
7. Manual Testing
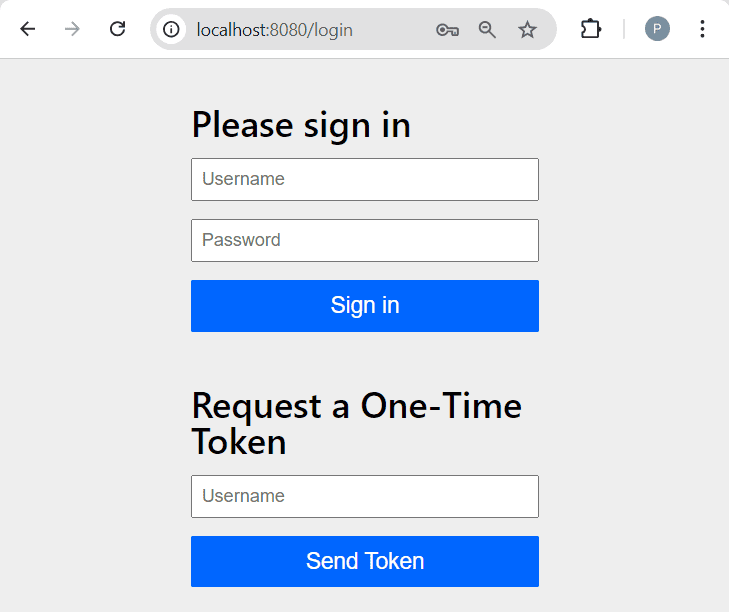
Let’s check the behavior of our application with the OTT mechanism with a simple navigation test. Once we’ve started it through the IDE or using mvn spring-boot:run, use your browser of choice and navigate to http://localhost:8080. The application will show in return a login page that contains both the standard form accepting username/password and the OTT form:
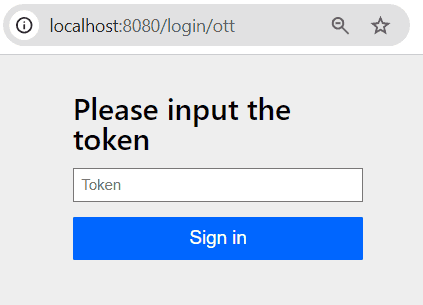
Since we didn’t provide any UserDetailsService, Spring Boot’s auto-configuration creates a default one with a single user named “user”. Once we type it into the OTT’s form username field and click on the Send Token button, we should land on the token submission form:
Now, if we take a look at the application logs, we’ll see a message like this:
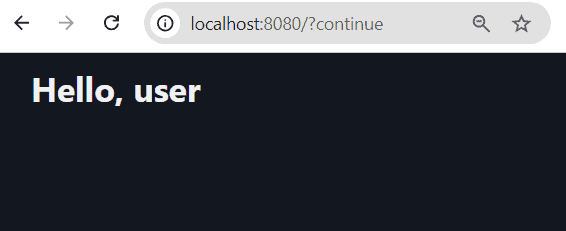
c.b.s.ott.service.FakeOttSenderService : Sending token to username 'user'. token=a0e3af73-0366-4e26-b68e-0fdeb23b9bb2, expiresAt=...To complete the login process, just copy and paste the token value into the form and click on the Sign In button. As a result, we’ll get a welcome page which displays the current username:
8. Automated Tests
Testing an OTT login flow requires navigating a sequence of pages, so we’ll use the Jsoup library to help us.
The full code, available online, goes through the same steps we’ve gone through in the manual test and adds checks along the way.
The only tricky part is getting access to the generated token. This is where the lookup method available on the OttSenderService interface comes in handy. Since we’re leveraging Spring Boot’s test infrastructure, we can simply inject the service into our test class and use it to query the token:
@Test
void whenLoginWithOtt_thenSuccess() throws Exception {
    // ... Jsoup setup and initial navigation omitted
    var optToken = this.ottSenderService.getLastTokenForUser("user");
    assertTrue(optToken.isPresent());
    var homePage = conn.newRequest(baseUrl + tokenSubmitAction)
      .data("token", optToken.get())
      .data("_csrf",csrfToken)
      .post();
    var username = requireNonNull(homePage.selectFirst("span#current-username")).text();
    assertEquals("user",username);
}
9. Conclusion
In this tutorial, we’ve described the One-Time Token Login mechanism and how to add it to a Spring Boot-based application.
As usual, all code is available over on GitHub.
The post A Guide to One-Time Token Login in Spring Security first appeared on Baeldung.


