Quantcast
Channel: Baeldung
Viewing all 4717 articles
Browse latest View live

Trampoline – Managing Spring Boot Applications Locally

$
0
0

1. Trampoline Overview

Historically, a simple way to run understand the state of our system at runtime was to that manually in a terminal. Best case scenario, we’d automatize everything using scripts.

Of course, the DevOps movement changed all of that, and, fortunately, our industry has moved well past that approach. Trampoline is one of the solutions that solve this problem (for Unix and Windows users) in the Java ecosystem.

The tool is built on top of Spring Boot and aims to help Spring Cloud developers in their daily development routine thanks to a clean and fresh User Interface.

Here are some of its capabilities:

  • Start instances using Gradle or Maven as a Build Tool
  • Manage Spring Boot instances
  • Configure VM arguments during launching phase
  • Monitor deployed instances: Memory usage, Logs, and Traces
  • Provide feedback to authors

In this quite article, we’ll review the problem Trampoline aspires to solve, as well as have a look at it in practice. We’ll go on a guided tour that covers registering a new service and starting one instance of that service.

2. Microservices: Single Deployment Dead

As we discussed, the times when applications were deployed using a single deployment unit – are gone.

This has positive consequences and, unfortunately, negative ones as well. Although Spring Boot and Spring Cloud help in this transition, there are side effects we need to take care of.

The journey from monoliths to microservices has introduced a huge improvement to the way developers structure their applications.

As we all know, it is not the same to open a project with a set of 30 classes, well structured among packages and with its corresponding units tests, as opening a monster codebase with a huge number of classes, where things easily get complicated.

Not only that – reusability, decoupling, and separation of concerns have benefited from this evolution. Although the benefits are well-known, let’s list some of them:

  • Single Responsibility Principle – important in terms of maintainability and testing
  • Resiliency – failure in one service does not impact other services
  • High scalability – demanding services can be deployed in multiple instances

But, we have to face some trade off when using microservice architecture, especially regarding network overhead and deployments.

However, focusing on deployment, we lost one of the monolith’s advantages – the single deployment. To solve it in a production environment, we’ve got a whole set of CD tools which will help and will make our lives easier there.

3. Trampoline: Setting up the First Service

In this section, we’ll register a service in Trampoline and we’ll show all available features.

3.1. Download Latest Release

Going to Trampoline Repository, in the releases section, we’ll be able to download the latest published release.

Then, start Trampoline, for instance using mvn spring-boot:run or ./gradlew (or gradle.bat) bootRun.

Finally, the UI can be accessed at http://localhost:8080.

3.2. Registering Services

Once we have Trampoline up and running, let’s go to Settings section where we’ll be able to register our first service. We’ll find two examples of microservices in the Trampoline source code: microservice-example-gradle and microservice-example-maven. 

To register a service, the following information is needed: name*, default port*, pom or build location*, build tool*, actuator prefix and VM default arguments.

If we decide to use Maven as a build tool, first we’ll have to set our Maven location. If we decide, however, to use a Gradle wrapper, it must be placed in our microservices folder. Nothing else will be required.

In this example,  we’ll set up both:


At any time, we’ll be able to review the service information by clicking on the info button or delete it clicking on the trash button.

Finally, to be able to enjoy all these features, the only requirement is to include actuator starter (see the snippet for an example) in our Spring Boot projects, as well as /logfile endpoint through well-known logging properties:

<dependency>
    <groupId>org.springframework.boot</groupId>
    <artifactId>spring-boot-starter-actuator</artifactId>
</dependency>

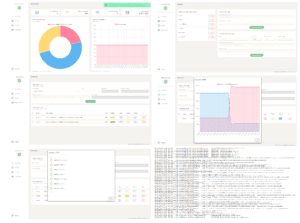
3.3. Managing Service Instances

Now, we’re ready to move to Instances section. Here, we’ll be able to start and stop service instances and also monitor their statuses, traces, logs and memory consumption.

For this tutorial, we start one instance of each service registered previously:

3.4. Dashboard

Finally, let’s have a quick overview of the Dashboard section. Here, we can visualize some statistics, such as memory usage from our computer or services registered or launched.

We’ll also be able to watch whether required Maven information has been introduced or not in the settings section:

3.5. Feedback

And last but not least, we can find a Feedback button which redirects to the GitHub repo where it’s possible to create issues or raise questions and enhancements.

4. Conclusion

During the course of this tutorial, we discussed the problem Trampoline aims to solve.

We’ve also shown an overview of its functionalities, as well as a short tutorial on how to register a service and how to monitor it.

Finally, note that this is an open source project and you are welcome to contribute.


Kotlin-allopen and Spring

$
0
0

1. Overview

In Kotlin, all classes are final by default which, beyond its clear advantages, can be problematic in Spring applications. Simply put, some areas in Spring only work with non-final classes.

The natural solution is to manually open Kotlin classes using the open keyword or to use the kotlin-allopen plugin – which automatically opens all classes that are necessary for Spring to work.

2. Maven Dependencies

Let’s start by adding the Kotlin-Allopen dependency:

<dependency>
    <groupId>org.jetbrains.kotlin</groupId>
    <artifactId>kotlin-maven-allopen</artifactId>
    <version>1.1.4-3</version>
</dependency>

To enable the plugin, we need to configure the kotlin-allopen in the build section:

<build>
   ...
  <plugins>
        ...
        <plugin>
            <artifactId>kotlin-maven-plugin</artifactId>
            <groupId>org.jetbrains.kotlin</groupId>
            <version>1.1.4-3</version>
            <configuration>
                <compilerPlugins>
                    <plugin>spring</plugin>
                </compilerPlugins>
                <jvmTarget>1.8</jvmTarget>
            </configuration>
            <executions>
                <execution>
                    <id>compile</id>
                    <phase>compile</phase>
                    <goals>
                        <goal>compile</goal>
                    </goals>
                </execution>
                <execution>
                    <id>test-compile</id>
                    <phase>test-compile</phase>
                    <goals>
                        <goal>test-compile</goal>
                    </goals>
                </execution>
            </executions>
            <dependencies>
                <dependency>
                    <groupId>org.jetbrains.kotlin</groupId>
                    <artifactId>kotlin-maven-allopen</artifactId>
                    <version>1.1.4-3</version>
                </dependency>
            </dependencies>
        </plugin>
    </plugins>
</build>

3. Setup

Now let’s consider SimpleConfiguration.kt, a simple configuration class:

@Configuration
class SimpleConfiguration {
}

4. Without Kotlin-Allopen

If we build our project without the plugin, we’ll see get the following error message:

org.springframework.beans.factory.parsing.BeanDefinitionParsingException: 
  Configuration problem: @Configuration class 'SimpleConfiguration' may not be final. 
  Remove the final modifier to continue.

The only way to solve it is to open it manually:

@Configuration
open class SimpleConfiguration {
}

5. Including Kotlin-Allopen

Opening all classes for Spring is not very handy. If we use the plugin, all necessary classes will be open.

We can clearly see that if we look at the compiled class:

@Configuration
public open class SimpleConfiguration public constructor() {
}

6. Conclusion

In this quick article, we’ve seen how to solve the “class may not be final” problem in Spring and Kotlin.

Source code for this article can be found over on GitHub.

Number of Digits in an Integer in Java

$
0
0

1. Introduction

In this quick tutorial, we’ll explore different ways of getting the number of digits in an Integer in Java.

We’ll also analyze those different methods and will figure out which algorithm would best fit in our situation.

2. Number of Digits in an Integer

For the methods discussed here, we’re only considering positive integers. If we’re expecting any negative input, then we can first make use of Math.abs(number) before using any of these methods.

2.1. String-Based Solution

Perhaps the easiest way of getting the number of digits in an Integer is by converting it to String, and calling the length() method. This will return the length of the String representation of our number:

int length = String.valueOf(number).length();

But, this may be a sub-optimal approach, as this statement involves memory allocation for a String, for each evaluation. The JVM must first parse our number and copy its digits into a separate String and perform a number of different operations as well (like keeping temporary copies, handle Unicode conversions etc).

If we only have a few numbers to evaluate, then we can clearly go with this solution – because the difference between this and any other approach will be neglectable even for large numbers.

2.2. Logarithmic Approach

For the numbers represented in decimal form, if we take their log in base 10 and round it up then we’ll get the number of digits in that number:

int length = (int) (Math.log10(number) + 1);

Note that log100 of any number is not defined. So if we’re expecting any input with value 0, then we can put a check for that as well.

The logarithmic approach is significantly faster than String based approach as it doesn’t have to go through the process of any data conversion. It just involves a simple, straightforward calculation without any extra object initialization or loops.

2.3. Repeated Multiplication

In this method, we’ll take a temporary variable (initialized to 1) and will continuously multiply it with 10 until it becomes greater to our number. During this process, we’ll also use a length variable which will keep a track of the number’s length:

int length = 0;
long temp = 1;
while (temp <= number) {
    length++;
    temp *= 10;
}
return length;

In this code, the line temp *= 10 is same as writing temp = (temp << 3) + (temp << 1). Since multiplication is usually costlier operation on some processors when compared to shift operators, the latter may be a bit more efficient.

2.4. Dividing with Powers of Two

If we know about the range of our number, then we can use a variation that will further reduce our comparisons. This method divides the number by powers of two (e.g. 1, 2, 4, 8 etc.):

This method divides the number by powers of two (e.g. 1, 2, 4, 8 etc.):

int length = 1;
if (number >= 100000000) {
    length += 8;
    number /= 100000000;
}
if (number >= 10000) {
    length += 4;
    number /= 10000;
}
if (number >= 100) {
    length += 2;
    number /= 100;
}
if (number >= 10) {
    length += 1;
}
return length;

It takes advantage of the fact that any number can be represented by the addition of powers of 2. For example, 15 can be represented as 8+4+2+1, which all are powers of 2.

For a 15 digit number, we would be doing 15 comparisons in our previous approach, which we have reduced to just 4 in this method.

2.5. Divide And Conquer

This is perhaps the bulkiest approach when compared to all other described here, but needless to say, this one is the fastest because we’re not performing any type of conversion, multiplication, addition or object initialization.

We get our answer in just three or four simple if statements:

if (number < 100000) {
    if (number < 100) {
        if (number < 10) {
            return 1;
        } else {
            return 2;
        }
    } else {
        if (number < 1000) {
            return 3;
        } else {
            if (number < 10000) {
                return 4;
            } else {
                return 5;
            }
        }
    }
} else {
    if (number < 10000000) {
        if (number < 1000000) {
            return 6;
        } else {
            return 7;
        }
    } else {
        if (number < 100000000) {
            return 8;
        } else {
            if (number < 1000000000) {
                return 9;
            } else {
                return 10;
            }
        }
    }
}

Similar to the previous approach, we can use this method only if we know about the range of our number.

3. Benchmarking

Now that we have a good understanding of the potential solutions, let’s now do some simple benchmarking of all our methods using the Java Microbenchmark Harness (JMH).

The following table shows the average processing time of each operation (in nanoseconds):

Benchmark                            Mode  Cnt   Score   Error  Units
Benchmarking.stringBasedSolution     avgt  200  32.736 ± 0.589  ns/op
Benchmarking.logarithmicApproach     avgt  200  26.123 ± 0.064  ns/op
Benchmarking.repeatedMultiplication  avgt  200   7.494 ± 0.207  ns/op
Benchmarking.dividingWithPowersOf2   avgt  200   1.264 ± 0.030  ns/op
Benchmarking.divideAndConquer        avgt  200   0.956 ± 0.011  ns/op

The String-based solution, which is the simplest, is also the most costly operation – as this is the only one which requires data conversion and initialization of new objects.

The logarithmic approach is significantly more efficient, compared to the previous solution – as it doesn’t involve any data conversion. And, being a single line solution, it can be a good alternative to String-based approach.

Repeated multiplication involves simple multiplication, proportionally with the number length; for example, if a number is fifteen digits long, then this method will involve fifteen multiplications.

However, the very next method takes advantage of the fact that every number can be represented by powers of two (the approach similar to BCD), and reduces the same to 4 division operations, so it’s even more efficient than the former.

Finally, as we can infer, the most efficient algorithm is the verbose Divide and Conquer implementation – which delivers the answer in just three or four simple if statements. We can use it if we have a large dataset of numbers we need to analyze.

4. Conclusion

In this brief article, we outlined some of the ways to find the number of digits in an Integer and we compared the efficiency of each approach.

And, as always, you can find the complete code over on GitHub.

Test a Linked List for Cyclicity

$
0
0

1. Introduction

A singly linked list is a sequence of connected nodes ending with a null reference. However, in some scenarios, the last node might point at a previous node – effectively creating a cycle.

In most cases, we want to be able to detect and be aware of these cycles; this article will focus on exactly that – detecting and potentially removing cycles.

2. Detecting a Cycle

Let’s now explore a couple of algorithms for detecting cycles in linked lists.

2.1. Brute Force – O(n^2) Time Complexity

With this algorithm, we traverse the list using two nested loops. In the outer loop, we traverse one-by-one. In the inner loop, we start from the head and traverse as many nodes as traversed by outer loop by that time.

If a node that is visited by the outer loop is visited twice by the inner loop, then a cycle has been detected. Conversely, if the outer loop reaches the end of the list, this implies an absence of cycles:

public static <T> boolean detectCycle(Node<T> head) {
    if (head == null) {
        return false;
    }

    Node<T> it1 = head;
    int nodesTraversedByOuter = 0;
    while (it1 != null && it1.next != null) {
        it1 = it1.next;
        nodesTraversedByOuter++;

        int x = nodesTraversedByOuter;
        Node<T> it2 = head;
        int noOfTimesCurrentNodeVisited = 0;

        while (x > 0) {
            it2 = it2.next;

            if (it2 == it1) {
                noOfTimesCurrentNodeVisited++;
            }

            if (noOfTimesCurrentNodeVisited == 2) {
                return true;
            }

            x--;
        }
    }

    return false;
}

The advantage of this approach is that it requires a constant amount of memory. The disadvantage is that the performance is very slow when large lists are provided as an input.

2.2. Hashing – O(n) Space Complexity

With this algorithm, we maintain a set of already visited nodes. For each node, we check if it exists in the set. If not, then we add it to the set. The existence of a node in the set means we have already visited the node and brings forward the presence of a cycle in the list.

When we encounter a node which already exists in the set, we’d have discovered the beginning of the cycle. After discovering this, we can easily break the cycle by setting the next field of the previous node to null, as demonstrated below:

public static <T> boolean detectCycle(Node<T> head) {
    if (head == null) {
        return false;
    }

    Set<Node<T>> set = new HashSet<>();
    Node<T> node = head;

    while (node != null) {
        if (set.contains(node)) {
            return true;
        }
        set.add(node);
        node = node.next;
    }

    return false;
}

In this solution, we visited and stored each node once. This amounts to O(n) time complexity and O(n) space complexity, which, on average, is not optimal for large lists.

2.3. Fast and Slow Pointers

The following algorithm for finding cycles can best be explained using a metaphor.

Consider a race track where two people are racing. Given that the speed of the second person is double that of the first person, the second person will go around the track twice as fast as the first and will meet the first person again at the beginning of the lap.

Here we use a similar approach by iterating through the list simultaneously with a slow iterator and a fast iterator (2x speed). Once both iterators have entered a loop, they will eventually meet at a point.

Hence, if the two iterators meet at any point, then we can conclude that we have stumbled upon a cycle:

public static <T> CycleDetectionResult<T> detectCycle(Node<T> head) {
    if (head == null) {
        return new CycleDetectionResult<>(false, null);
    }

    Node<T> slow = head;
    Node<T> fast = head;

    while (fast != null && fast.next != null) {
        slow = slow.next;
        fast = fast.next.next;

        if (slow == fast) {
            return new CycleDetectionResult<>(true, fast);
        }
    }

    return new CycleDetectionResult<>(false, null);
}

Where CycleDetectionResult is a convenience class to hold the result: a boolean variable which says whether cycle exists or not and if exists, then this also contains a reference to the meeting point inside the cycle:

public class CycleDetectionResult<T> {
    boolean cycleExists;
    Node<T> node;
}

This method is also known as the ‘The Tortoise and The Hare Algorithm’ or ‘Flyods Cycle-Finding Algorithm’.

3. Removal of Cycles from a List

Let’s have a look at a few methods for removing cycles. All these methods assume that the ‘Flyods Cycle-Finding Algorithm’ was used for cycle detection and build on top of it.

3.1. Brute Force

Once the fast and the slow iterators meet at a point in the cycle, we take one more iterator (say ptr) and point it to the head of the list. We start iterating the list with ptr. At each step, we check if ptr is reachable from the meeting point.

This terminates when ptr reaches the beginning of the loop because that is the first point when it enters the loop and becomes reachable from the meeting point.

Once the beginning of the loop (bg) is discovered, then it is trivial to find the end of the cycle (node whose next field points to bg). The next pointer of this end node is then set to null to remove the cycle:

public class CycleRemovalBruteForce {
    private static <T> void removeCycle(
      Node<T> loopNodeParam, Node<T> head) {
        Node<T> it = head;

        while (it != null) {
            if (isNodeReachableFromLoopNode(it, loopNodeParam)) {
                Node<T> loopStart = it;
                findEndNodeAndBreakCycle(loopStart);
                break;
            }
            it = it.next;
        }
    }

    private static <T> boolean isNodeReachableFromLoopNode(
      Node<T> it, Node<T> loopNodeParam) {
        Node<T> loopNode = loopNodeParam;

        do {
            if (it == loopNode) {
                return true;
            }
            loopNode = loopNode.next;
        } while (loopNode.next != loopNodeParam);

        return false;
    }

    private static <T> void findEndNodeAndBreakCycle(
      Node<T> loopStartParam) {
        Node<T> loopStart = loopStartParam;

        while (loopStart.next != loopStartParam) {
            loopStart = loopStart.next;
        }

        loopStart.next = null;
    }
}

Unfortunately, this algorithm also performs poorly in case of large lists and large cycles, because we’ve to traverse the cycle multiple times.

3.2. Optimized Solution – Counting the Loop Nodes

Let’s define a few variables first:

  • n = the size of the list
  • k = the distance from the head of the list to the start of the cycle
  • l = the size of the cycle

We have the following relationship between these variables:
k + l = n

We utilize this relationship in this approach. More particularly, when an iterator that begins from the start of the list, has already traveled l nodes, then it has to travel k more nodes to reach the end of the list.

Here’s the algorithm’s outline:

  1. Once fast and the slow iterators meet, find the length of the cycle. This can be done by keeping one of the iterators in place while continuing the other iterator (iterating at normal speed, one-by-one) till it reaches the first pointer, keeping the count of nodes visited. This counts as l
  2. Take two iterators (ptr1 and ptr2) at the beginning of the list. Move one of the iterator (ptr2) l steps
  3. Now iterate both the iterators until they meet at the start of the loop, subsequently, find the end of the cycle and point it to null

This works because ptr1 is k steps away from the loop, and ptr2, which is advanced by l steps,  also needs k steps to reach the end of the loop (n – l = k).

And here’s a simple, potential implementation:

public class CycleRemovalByCountingLoopNodes {
    private static <T> void removeCycle(
      Node<T> loopNodeParam, Node<T> head) {
        int cycleLength = calculateCycleLength(loopNodeParam);
        Node<T> cycleLengthAdvancedIterator = head;
        Node<T> it = head;

        for (int i = 0; i < cycleLength; i++) {
            cycleLengthAdvancedIterator 
              = cycleLengthAdvancedIterator.next;
        }

        while (it.next != cycleLengthAdvancedIterator.next) {
            it = it.next;
            cycleLengthAdvancedIterator 
              = cycleLengthAdvancedIterator.next;
        }

        cycleLengthAdvancedIterator.next = null;
    }

    private static <T> int calculateCycleLength(
      Node<T> loopNodeParam) {
        Node<T> loopNode = loopNodeParam;
        int length = 1;

        while (loopNode.next != loopNodeParam) {
            length++;
            loopNode = loopNode.next;
        }

        return length;
    }
}

Next, let’s focus on a method in which we can even eliminate the step of calculating the loop length.

3.3. Optimized Solution – Without Counting the Loop Nodes

Let’s compare the distances traveled by the fast and slow pointers mathematically.

For that, we need a few more variables:

  • y = distance of the point where the two iterators meet, as seen from the beginning of the cycle
  • z = distance of the point where the two iterators meet, as seen from the end of the cycle (this is also equal to l – y)
  • m = number of times the fast iterator completed the cycle before the slow iterator enters the cycle

Keeping the other variables same as defined in the previous section, the distance equations will be defined as:

  • Distance traveled by slow pointer = k (distance of cycle from head) + y (meeting point inside cycle)
  • Distance traveled by fast pointer = k (distance of cycle from head) + m (no of times fast pointer completed the cycle before slow pointer enters) * l (cycle length) + y (meeting point inside cycle)

We know that distance traveled by the fast pointer is twice that of the slow pointer, hence:

k + m * l + y = 2 * (k + y)

which evaluates to:

y = m * l – k

Subtracting both sides from l gives:

l – y = l – m * l + k

or equivalently:

k = (m – 1) * l + z    (where, l – y is z as defined above)

This leads to:

k = (m – 1) Full loop runs + An extra distance z

In other words, if we keep one iterator at the head of the list and one iterator at the meeting point, and move them at the same speed, then, the second iterator will complete m – 1 cycles around the loop and meet the first pointer at the beginning of the cycle. Using this insight we can formulate the algorithm:

  1. Use ‘Flyods Cycle-Finding Algorithm’ to detect the loop. If loop exists, this algorithm would end at a point inside the loop (call this the meeting point)
  2. Take two iterators, one at the head of the list (it1) and one at the meeting point (it2)
  3. Traverse both iterators at the same speed
  4. Since the distance of the loop from head is k (as defined above), the iterator started from head would reach the cycle after k steps
  5. In k steps, iterator it2 would traverse m – 1 cycles of the loop and an extra distance z. Since this pointer was already at a distance of z from the beginning of the cycle, traversing this extra distance z, would bring it also at the beginning of the cycle
  6. Both the iterators meet at the beginning of the cycle, subsequently, we can find the end of the cycle and point it to null

This can be implemented:

public class CycleRemovalWithoutCountingLoopNodes {
    private static <T> void removeCycle(
      Node<T> meetingPointParam, Node<T> head) {
        Node<T> loopNode = meetingPointParam;
        Node<T> it = head;

        while (loopNode.next != it.next) {
            it = it.next;
            loopNode = loopNode.next;
        }

        loopNode.next = null;
    }
}

This is the most optimized approach for detection and removal of cycles from a linked list.

4. Conclusion

In this article, we described various algorithms for detecting a cycle in a list. We looked into algorithms with different computing time and memory space requirements.

Finally, we also showed three methods to remove a cycle, once it is detected using the ‘Flyods Cycle-Finding Algorithm’.

The full code example is available over on Github.

Introduction to JCache

$
0
0

1. Overview

Simply put, JCache is the standard caching API for Java. In this tutorial, we’re going to see what JCache is and how we can use it.

2. Maven Dependencies

To use JCache, we need to add the following dependency to our pom.xml:

<dependency>
    <groupId>javax.cache</groupId>
    <artifactId>cache-api</artifactId>
    <version>1.0.0-PFD</version>
</dependency>

Note that we can find the latest version of the library in the Maven Central Repository.

We also need to add an implementation of the API to our pom.xml; we’ll use Hazelcast here:

<dependency>
    <groupId>com.hazelcast</groupId>
    <artifactId>hazelcast</artifactId>
    <version>3.9-EA</version>
</dependency>

We can also find the latest version of Hazelcast at its Maven Central Repository.

3. JCache Implementations

JCache is implemented by various caching solutions:

  • JCache Reference Implementation
  • Hazelcast
  • Oracle Coherence
  • Terracotta Ehcache
  • Infinispan

Note that, unlike other reference implementations, it’s not recommended to use JCache Reference Implementation in production since it causes some concurrency issues.

4. Main Components

4.1. Cache

The Cache interface has the following useful methods:

  • get() – takes the key of an element as a parameter and returns the value of the element; it returns null if the key does not exist in the Cache
  • getAll() – multiple keys can be passed to this method as a Set; the method returns the given keys and associated values as a Map
  • getAndRemove() – the method retrieves a value using its key and removes the element from the Cache
  • put() – inserts a new item in the Cache
  • clear() – removes all elements in the Cache
  • containsKey() – checks if a Cache contains a particular key

As we can see, the methods’ names are pretty much self-explanatory. For more information on these methods and other ones, visit the Javadoc.

4.2. CacheManager

CacheManager is one of the most important interfaces of the API. It enables us to establish, configure and close Caches.

4.3. CachingProvider

CachingProvider is an interface which allows us to create and manage the lifecycle of CacheManagers.

4.4. Configuration

Configuration is an interface that enables us to configure Caches. It has one concrete implementation – MutableConfiguration and a subinterface – CompleteConfiguration.

5. Creating a Cache

Let’s see how we can create a simple Cache:

CachingProvider cachingProvider = Caching.getCachingProvider();
CacheManager cacheManager = cachingProvider.getCacheManager();
MutableConfiguration<String, String> config
  = new MutableConfiguration<>();
Cache<String, String> cache = cacheManager
  .createCache("simpleCache", config);
cache.put("key1", "value1");
cache.put("key2", "value2");
cacheManager.close();

All we’re doing is:

  • Creating a CachingProvider object, which we are using to construct a CacheManager object
  • Creating a MutableConfiguration object, which is an implementation of the Configuration interface
  • Creating a Cache object using the CacheManager object we created earlier
  • Putting all the entries, we need to cache into our Cache object
  • Closing the CacheManager to release the resources used by the Cache

If we do not provide any implementation of JCache in our pom.xml, the following exception will be thrown:

javax.cache.CacheException: No CachingProviders have been configured

The reason for this is that the JVM could not find any concrete implementation of the getCacheManager() method.

6. EntryProcessor

EntryProcessor allows us to modify Cache entries using atomic operations without having to re-add them to the Cache. To use it, we need to implement the EntryProcessor interface:

public class SimpleEntryProcessor
  implements EntryProcessor<String, String, String>, Serializable {
    
    public String process(MutableEntry<String, String> entry, Object... args)
      throws EntryProcessorException {

        if (entry.exists()) {
            String current = entry.getValue();
            entry.setValue(current + " - modified");
            return current;
        }
        return null;
    }
}

Now, let’s use our EntryProcessor implementation:

@Test
public void whenModifyValue_thenCorrect() {
    this.cache.invoke("key", new SimpleEntryProcessor());
 
    assertEquals("value - modified", cache.get("key"));
}

7. Event Listeners

Event Listeners allow us to take actions upon triggering any of the event types defined in the EventType enum, which are:

  • CREATED
  • UPDATED
  • REMOVED
  • EXPIRED

First, we need to implement interfaces of the events we’re going to use.

For example, if we want to use the CREATED and the UPDATED event types, then we should implement the interfaces CacheEntryCreatedListener and CacheEntryUpdatedListener.

Let’s see an example:

public class SimpleCacheEntryListener implements
  CacheEntryCreatedListener<String, String>,
  CacheEntryUpdatedListener<String, String>,
  Serializable {
    
    private boolean updated;
    private boolean created;
    
    // standard getters
    
    public void onUpdated(
      Iterable<CacheEntryEvent<? extends String,
      ? extends String>> events) throws CacheEntryListenerException {
        this.updated = true;
    }
    
    public void onCreated(
      Iterable<CacheEntryEvent<? extends String,
      ? extends String>> events) throws CacheEntryListenerException {
        this.created = true;
    }
}

Now, let’s run our test:

@Test
public void whenRunEvent_thenCorrect() throws InterruptedException {
    this.listenerConfiguration
      = new MutableCacheEntryListenerConfiguration<String, String>(
        FactoryBuilder.factoryOf(this.listener), null, false, true);
    this.cache.registerCacheEntryListener(this.listenerConfiguration);
    
    assertEquals(false, this.listener.getCreated());
    
    this.cache.put("key", "value");
 
    assertEquals(true, this.listener.getCreated());
    assertEquals(false, this.listener.getUpdated());
    
    this.cache.put("key", "newValue");
 
    assertEquals(true, this.listener.getUpdated());
}

8. CacheLoader

CacheLoader allows us to use read-through mode to treat cache as the main data store and read data from it.

In a real-world scenario, we can have the cache read data from actual storage.

Let’s have a look at an example. First, we should implement the CacheLoader interface:

public class SimpleCacheLoader
  implements CacheLoader<Integer, String> {

    public String load(Integer key) throws CacheLoaderException {
        return "fromCache" + key;
    }
    
    public Map<Integer, String> loadAll(Iterable<? extends Integer> keys)
      throws CacheLoaderException {
        Map<Integer, String> data = new HashMap<>();
        for (int key : keys) {
            data.put(key, load(key));
        }
        return data;
    }
}

And now, let’s use our CacheLoader implementation:

public class CacheLoaderTest {
    
    private Cache<Integer, String> cache;
    
    @Before
    public void setup() {
        CachingProvider cachingProvider = Caching.getCachingProvider();
        CacheManager cacheManager = cachingProvider.getCacheManager();
        MutableConfiguration<Integer, String> config
          = new MutableConfiguration<>()
            .setReadThrough(true)
            .setCacheLoaderFactory(new FactoryBuilder.SingletonFactory<>(
              new SimpleCacheLoader()));
        this.cache = cacheManager.createCache("SimpleCache", config);
    }
    
    @Test
    public void whenReadingFromStorage_thenCorrect() {
        for (int i = 1; i < 4; i++) {
            String value = cache.get(i);
 
            assertEquals("fromCache" + i, value);
        }
    }
}

9. Conclusion

In this tutorial, we’ve seen what JCache is and explored some of its important features in a few practical scenarios.

As always, the full implementation of this tutorial can be found over on GitHub.

Introduction to RxJava

$
0
0

1. Overview

In this article, we’re going to focus on using Reactive Extensions (Rx) in Java to compose and consume sequences of data.

At a glance, the API may look similar to Java 8 Streams, but in fact, it is much more flexible and fluent, making it a powerful programming paradigm.

If you want to read more about RxJava, check out this writeup.

2. Setup

To use RxJava in our Maven project, we’ll need to add the following dependency to our pom.xml:

<dependency>
    <groupId>io.reactivex</groupId>
    <artifactId>rxjava</artifactId>
    <version>${rx.java.version}</version>
</dependency>

Or, for a Gradle project:

compile 'io.reactivex.rxjava:rxjava:x.y.z'

3. Functional Reactive Concepts

On one side, functional programming is the process of building software by composing pure functions, avoiding shared state, mutable data, and side-effects.

On the other side, reactive programming is an asynchronous programming paradigm concerned with data streams and the propagation of change.

Together, functional reactive programming forms a combination of functional and reactive techniques that can represent an elegant approach to event-driven programming – with values that change over time and where the consumer reacts to the data as it comes in.

This technology brings together different implementations of its core principles, some authors came up with a document that defines the common vocabulary for describing the new type of applications.

3.1. Reactive Manifesto

The Reactive Manifesto is an online document that lays out a high standard for applications within the software development industry. Simply put, reactive systems are:

  • Responsive – systems should respond in a timely manner
  • Message Driven – systems should use async message-passing between components to ensure loose coupling
  • Elastic – systems should stay responsive under high load
  • Resilient – systems should stay responsive when some components fail

4. Observables

There are two key types to understand when working with Rx:

  • Observable represents any object that can get data from a data source and whose state may be of interest in a way that other objects may register an interest
  • An observer is any object that wishes to be notified when the state of another object changes

An observer subscribes to an Observable sequence. The sequence sends items to the observer one at a time.

The observer handles each one before processing the next one. If many events come in asynchronously, they must be stored in a queue or dropped.

In Rx, an observer will never be called with an item out of order or called before the callback has returned for the previous item.

4.1. Types of Observable

There are two types:

  • Non-Blocking – asynchronous execution is supported and is allowed to unsubscribe at any point in the event stream. On this article, we’ll focus mostly on this kind of type
  • Blocking – all onNext observer calls will be synchronous, and it is not possible to unsubscribe in the middle of an event stream. We can always convert an Observable into a Blocking Observable, using the method toBlocking:
BlockingObservable<String> blockingObservable = observable.toBlocking();

4.2. Operators

An operator is a function that takes one Observable (the source) as its first argument and returns another Observable (the destination). Then for every item that the source observable emits, it will apply a function to that item, and then emit the result on the destination Observable.

Operators can be chained together to create complex data flows that filter event based on certain criteria. Multiple operators can be applied to the same observable.

It is not difficult to get into a situation in which an Observable is emitting items faster than an operator or observer can consume them. You can read more about back-pressure here.

4.3. Create Observable

The basic operator just produces an Observable that emits a single generic instance before completing, the String “Hello”. When we want to get information out of an Observable, we implement an observer interface and then call subscribe on the desired Observable:

Observable<String> observable = Observable.just("Hello");
observable.subscribe(s -> result = s);
 
assertTrue(result.equals("Hello"));

4.4. OnNext, OnError, and OnCompleted 

There are three methods on the observer interface that we want to know about:

  1. OnNext is called on our observer each time a new event is published to the attached Observable. This is the method where we’ll perform some action on each event
  2. OnCompleted is called when the sequence of events associated with an Observable is complete, indicating that we should not expect any more onNext calls on our observer
  3. OnError is called when an unhandled exception is thrown during the RxJava framework code or our event handling code

The return value for the Observables subscribe method is a subscribe interface:

String[] letters = {"a", "b", "c", "d", "e", "f", "g"};
Observable<String> observable = Observable.from(letters);
observable.subscribe(
  i -> result += i,  //OnNext
  Throwable::printStackTrace, //OnError
  () -> result += "_Completed" //OnCompleted
);
assertTrue(result.equals("abcdefg_Completed"));

5. Observable Transformations and Conditional Operators

5.1. Map

The map operator transforms items emitted by an Observable by applying a function to each item.

Let’s assume there is a declared array of strings that contains some letters from the alphabet and we want to print them in capital mode:

Observable.from(letters)
  .map(String::toUpperCase)
  .subscribe(letter -> result += letter);
assertTrue(result.equals("ABCDEFG"));

The flatMap can be used to flatten Observables whenever we end up with nested Observables.

More details about the difference between map and flatMap can be found here.

Assuming we have a method that returns an Observable<String> from a list of strings. Now we’ll be printing for each string from a new Observable the list of titles based on what Subscriber sees:

Observable<String> getTitle() {
    return Observable.from(titleList);
}
Observable.just("book1", "book2")
  .flatMap(s -> getTitle())
  .subscribe(l -> result += l);

assertTrue(result.equals("titletitle"));

5.2. Scan

The scan operator applies a function to each item emitted by an Observable sequentially and emits each successive value.

It allows us to carry forward state from event to event:

String[] letters = {"a", "b", "c"};
Observable.from(letters)
  .scan(new StringBuilder(), StringBuilder::append)
  .subscribe(total -> result += total.toString());
assertTrue(result.equals("aababc"));

5.3. GroupBy

Group by operator allows us to classify the events in the input Observable into output categories.

Let’s assume that we created an array of integers from 0 to 10, then apply group by that will divide them into the categories even and odd:

Observable.from(numbers)
  .groupBy(i -> 0 == (i % 2) ? "EVEN" : "ODD")
  .subscribe(group ->
    group.subscribe((number) -> {
        if (group.getKey().toString().equals("EVEN")) {
            EVEN[0] += number;
        } else {
            ODD[0] += number;
        }
    })
  );
assertTrue(EVEN[0].equals("0246810"));
assertTrue(ODD[0].equals("13579"));

5.4. Filter

The operator filter emits only those items from an observable that pass a predicate test.

So let’s filter in an integer array for the odd numbers:

Observable.from(numbers)
  .filter(i -> (i % 2 == 1))
  .subscribe(i -> result += i);
 
assertTrue(result.equals("13579"));

5.5. Conditional Operators

DefaultIfEmpty emits item from the source Observable, or a default item if the source Observable is empty:

Observable.empty()
  .defaultIfEmpty("Observable is empty")
  .subscribe(s -> result += s);
 
assertTrue(result.equals("Observable is empty"));

The following code emits the first letter of the alphabet ‘a’, because the array letters is not empty and this is what it contains in the first position:

Observable.from(letters)
  .defaultIfEmpty("Observable is empty")
  .first()
  .subscribe(s -> result += s);
 
assertTrue(result.equals("a"));

TakeWhile operator discards items emitted by an Observable after a specified condition becomes false:

Observable.from(numbers)
  .takeWhile(i -> i < 5)
  .subscribe(s -> sum[0] += s);
 
assertTrue(sum[0] == 10);

Of course, there more others operators that could cover our needs like Contain, SkipWhile, SkipUntil, TakeUntil, etc.

6. Connectable Observables

A ConnectableObservable resembles an ordinary Observable, except that it doesn’t begin emitting items when it is subscribed to, but only when the connect operator is applied to it.

In this way, we can wait for all intended observers to subscribe to the Observable before the Observable begins emitting items:

String[] result = {""};
ConnectableObservable<Long> connectable
  = Observable.interval(200, TimeUnit.MILLISECONDS).publish();
connectable.subscribe(i -> result[0] += i);
assertFalse(result[0].equals("01"));

connectable.connect();
Thread.sleep(500);
 
assertTrue(result[0].equals("01"));

7. Single

Single is like an Observable who, instead of emitting a series of values, emits one value or an error notification.

With this source of data, we can only use two methods to subscribe:

  • OnSuccess returns a Single that also calls a method we specify
  • OnError also returns a Single that immediately notifies subscribers of an error
String[] result = {""};
Single<String> single = Observable.just("Hello")
  .toSingle()
  .doOnSuccess(i -> result[0] += i)
  .doOnError(error -> {
      throw new RuntimeException(error.getMessage());
  });
single.subscribe();
 
assertTrue(result[0].equals("Hello"));

8. Subjects

Subject is simultaneously two elements, a subscriber and an observable. As a subscriber, a subject can be used to publish the events coming from more than one observable.

And because it’s also observable, the events from multiple subscribers can be reemitted as its events to anyone observing it.

In the next example, we’ll look at how the observers will be able to see the events that occur after they subscribe:

Integer subscriber1 = 0;
Integer subscriber2 = 0;
Observer<Integer> getFirstObserver() {
    return new Observer<Integer>() {
        @Override
        public void onNext(Integer value) {
           subscriber1 += value;
        }

        @Override
        public void onError(Throwable e) {
            System.out.println("error");
        }

        @Override
        public void onCompleted() {
            System.out.println("Subscriber1 completed");
        }
    };
}

Observer<Integer> getSecondObserver() {
    return new Observer<Integer>() {
        @Override
        public void onNext(Integer value) {
            subscriber2 += value;
        }

        @Override
        public void onError(Throwable e) {
            System.out.println("error");
        }

        @Override
        public void onCompleted() {
            System.out.println("Subscriber2 completed");
        }
    };
}

PublishSubject<Integer> subject = PublishSubject.create(); 
subject.subscribe(getFirstObserver()); 
subject.onNext(1); 
subject.onNext(2); 
subject.onNext(3); 
subject.subscribe(getSecondObserver()); 
subject.onNext(4); 
subject.onCompleted();
 
assertTrue(subscriber1 + subscriber2 == 14)

9. Resource Management

Using operation allows us to associate resources, such as a JDBC database connection, a network connection, or open files to our observables.

Here we’re presenting in commentaries the steps we need to do to achieve this goal and also an example of implementation:

String[] result = {""};
Observable<Character> values = Observable.using(
  () -> "MyResource",
  r -> {
      return Observable.create(o -> {
          for (Character c : r.toCharArray()) {
              o.onNext(c);
          }
          o.onCompleted();
      });
  },
  r -> System.out.println("Disposed: " + r)
);
values.subscribe(
  v -> result[0] += v,
  e -> result[0] += e
);
assertTrue(result[0].equals("MyResource"));

10. Conclusion

In this article, we have talked how to use RxJava library and also how to explore its most important features.

The full source code for the project including all the code samples used here can be found over on Github.

Introduction to Retrofit

$
0
0

1. Overview

Retrofit is a type-safe HTTP client for Android and Java – developed by Square (Dagger, Okhttp).

In this article, we’re going to explain how to use Retrofit, with a focus on its most interesting features. More notably we’ll discuss the synchronous and asynchronous API, how to use it with authentication, logging, and some good modeling practices.

2. Setting up the Example

We’ll start by adding the Retrofit library and the Gson converter:

<dependency>
    <groupId>com.squareup.retrofit2</groupId>
    <artifactId>retrofit</artifactId>
    <version>2.3.0</version>
</dependency>  
<dependency>  
    <groupId>com.squareup.retrofit2</groupId>
    <artifactId>converter-gson</artifactId>
    <version>2.3.0</version>
</dependency>

For the latest versions, have a look at Retrofit and converter-gson on Maven Central repository.

3. API Modeling

Retrofit models REST endpoints as Java interfaces, making them very simple to understand and consume.

We’ll model the user API from GitHub; this has a GET endpoint that returns this in JSON format:

{
  login: "mojombo",
  id: 1,
  url: "https://api.github.com/users/mojombo",
  ...
}

Retrofit works by modeling over a base URL and by making interfaces return the entities from the REST endpoint.

For simplicity purposes we’re going to take a small part of the JSON by modeling our User class that is going to take the values when we have received them:

public class User {
    private String login;
    private long id;
    private String url;
    // ...

    // standard getters an setters

}

We can see that we’re only taking a subset of properties for this example. Retrofit won’t complain about missing properties – since it only maps what we need, it won’t even complain if we were to add properties that are not in the JSON.

Now we can move to the interface modeling, and explain some of the Retrofit annotations:

public interface UserService {

    @GET("/users")
    public Call<List<User>> getUsers(
      @Query("per_page") int per_page, 
      @Query("page") int page);

    @GET("/users/{username}")
    public Call<User> getUser(@Path("username") String username);
}

The metadata provided with annotations is enough for the tool to generate working implementations.

The @GET annotation tells the client which HTTP method to use and on which resource, so for example, by providing a base URL of “https://api.github.com” it will send the request to “https://api.github.com/users”.

Note that the same rules of<a href=””> apply – the leading “/” on our relative URL tells Retrofit that it is an absolute path on the host.

Another thing to note is that we use completely optional @Query parameters, which can be passed as null if we don’t need them, the tool will take care of ignoring these parameters if they do not have values.

And last but not least, @Path lets we specify a path parameter that will be placed instead of the markup we used in the path.

4. Synchronous/Asynchronous API

To construct an HTTP request call, we need to build our Retrofit object first:

OkHttpClient.Builder httpClient = new OkHttpClient.Builder();
Retrofit retrofit = new Retrofit.Builder()
  .baseUrl("https://api.github.com/")
  .addConverterFactory(GsonConverterFactory.create())
  .client(httpClient.build())
  .build();

Retrofit provides a convenient builder for constructing our required object. It needs the base URL which is going to be used for every service call and a converter factory – which takes care of the parsing of data we’re sending and also the responses we get.

In this example, we’re going to use the GsonConverterFactory, which is going to map our JSON data to the User class we defined earlier.

It’s important to note that different factories serve different purposes, so keep in mind that we can also use factories for XML, proto-buffers or even create one for a custom protocol. For a list of already implemented factories, we can have a look here.

The last dependency is OKHttpClient – which is an HTTP & HTTP/2 client for Android and Java applications. This is going to take care of connecting to the server and the sending and retrieval of information. We could also add headers and interceptors for every call, which we’re going to see in our authentication section.

Now that we have our Retrofit object, we can construct our service call, let’s take a look at how to do this the synchronous way:

UserService service = retrofit.create(UserService.class);
Call<User> callSync = service.getUser("eugenp");

try {
    Response<User> response = callSync.execute();
    User user = response.body();
} catch (Exception ex) { ... }

Here, we can see how Retrofit takes care of the construction of our service interface by injecting the code necessary to make the request, based on our previous annotations.

After that, we get a Call<User> object which is the one used for executing the request to the GitHub API. The most important method here is execute, which is used to execute a call synchronously and will block the current thread while transferring the data.

After the call is executed successfully, we can retrieve the body of the response – already on a user object – thanks to our GsonConverterFactory.

Making a synchronous call is very easy, but usually, we use a non-blocking asynchronous request:

UserService service = retrofit.create(UserService.class);
Call<User> callAsync = service.getUser("eugenp");

callAsync.enqueue(new Callback<User>() {
    @Override
    public void onResponse(Call<User> call, Response<User> response) {
        User user = response.body();
    }

    @Override
    public void onFailure(Call<User> call, Throwable throwable) {
        System.out.println(throwable);
    }
});

Now instead of the execute method, we use the enqueue method – which takes a Callback<User>interface as a parameter to handle the success or failure of the request. Note that this will execute in a separate thread.

After the call finished successfully, we can retrieve the body the same way we did previously.

5. Making a Reusable ServiceGenerator Class

Now that we saw how to construct our Retrofit object and how to consume an API, we can see that we don’t want to keep writing the builder over and over again.

What we want is a reusable class that allows us to create this object once and reuse it for the lifetime of our application:

public class GitHubServiceGenerator {

    private static final String BASE_URL = "https://api.github.com/";

    private static Retrofit.Builder builder
      = new Retrofit.Builder()
        .baseUrl(BASE_URL)
        .addConverterFactory(GsonConverterFactory.create());

    private static Retrofit retrofit = builder.build();

    private static OkHttpClient.Builder httpClient
      = new OkHttpClient.Builder();

    public static <S> S createService(Class<S> serviceClass) {
        return retrofit.create(serviceClass);
    }
}

All the logic of creating the Retrofit object is now moved to this GitHubServiceGenerator class, this makes it a sustainable client class which stops the code from repeating.

Here’s a simple example of how to use it :

UserService service 
  = GitHubServiceGenerator.createService(UserService.class);

Now if we, for example, were to create a RepositoryService, we could reuse this class and simplify the creation.

In the next section, we’re going to extend it and add authentication capabilities.

6. Authentication

Most APIs have some authentication to secure access to it.

Taking into account our previous generator class, we’re going to add a create service method, that takes a JWT token with the Authorization header :

public static <S> S createService(Class<S> serviceClass, final String token ) {
   if ( token != null ) {
       httpClient.interceptors().clear();
       httpClient.addInterceptor( chain -> {
           Request original = chain.request();
           Request request = original.newBuilder()
             .header("Authorization", token)
             .build();
           return chain.proceed(request);
       });
       builder.client(httpClient.build());
       retrofit = builder.build();
   }
   return retrofit.create(serviceClass);
}

To add a header to our request, we need to use the interceptor capabilities of OkHttp; we do this by using our previously define builder and by reconstructing the Retrofit object.

Note that this a simple auth example, but with the use of interceptors we can use any authentication such as OAuth, user/password, etc.

7. Logging

In this section, we’re going to further extend our GitHubServiceGenerator for logging capabilities, which are very important for debugging purposes in every project.

We’re going to use our previous knowledge of interceptors, but we need an additional dependency, which is the HttpLoggingInterceptor from OkHttp, let us add it to our pom.xml:

<dependency>
    <groupId>com.squareup.okhttp3</groupId>
    <artifactId>logging-interceptor</artifactId>
    <version>3.9.0</version>
</dependency>

Now let us extend our GitHubServiceGenerator class :

public class GitHubServiceGenerator {

    private static final String BASE_URL = "https://api.github.com/";

    private static Retrofit.Builder builder
      = new Retrofit.Builder()
        .baseUrl(BASE_URL)
        .addConverterFactory(GsonConverterFactory.create());

    private static Retrofit retrofit = builder.build();

    private static OkHttpClient.Builder httpClient
      = new OkHttpClient.Builder();

    private static HttpLoggingInterceptor logging
      = new HttpLoggingInterceptor()
        .setLevel(HttpLoggingInterceptor.Level.BASIC);

    public static <S> S createService(Class<S> serviceClass) {
        if (!httpClient.interceptors().contains(logging)) {
            httpClient.addInterceptor(logging);
            builder.client(httpClient.build());
            retrofit = builder.build();
        }
        return retrofit.create(serviceClass);
    }

    public static <S> S createService(Class<S> serviceClass, final String token) {
        if (token != null) {
            httpClient.interceptors().clear();
            httpClient.addInterceptor( chain -> {
                Request original = chain.request();
                Request.Builder builder1 = original.newBuilder()
                  .header("Authorization", token);
                Request request = builder1.build();
                return chain.proceed(request);
            });
            builder.client(httpClient.build());
            retrofit = builder.build();
        }
        return retrofit.create(serviceClass);
    }
}

This is the final form of our class, we can see how we added the HttpLoggingInterceptor, and we set it for basic logging, which is going to log the time it took to make the request, the endpoint, status for every request, etc.

It’s important to take a look at how we check if the interceptor exists, so we don’t accidentally add it twice.

8. Conclusion

In this extensive guide, we took a look at the excellent Retrofit library by focusing on its Sync/Async API, some best practices of modeling, authentication, and logging.

The library can be used in very complex and useful ways; for an advanced use case with RxJava, please take a look at this tutorial.

And, as always, the source code can be found over on GitHub.

Generate Spring Boot Project with Swagger

$
0
0

1. Introduction

In this article, we’ll use the Swagger CodeGen project to generate a REST client from an OpenAPI/Swagger spec file.

Also, we’ll create a Spring Boot project, where we’ll use generated classes.

We’ll use the Swagger Petstore API example for everything.

2. Generate REST Client

Swagger provides a utility jar that allows us to generate REST clients for various programming languages and multiple frameworks.

2.1. Download Jar File

The code-gen_cli.jar can be downloaded from here.

For the newest version, please check the swagger-codegen-cli repository.

2.2. Generate Client

Let’s generate our client by executing the command java -jar swagger-code-gen-cli.jar generate:

java -jar swagger-codegen-cli.jar generate \
  -i http://petstore.swagger.io/v2/swagger.json \
  --api-package com.baeldung.petstore.client.api \
  --model-package com.baeldung.petstore.client.model \
  --invoker-package com.baeldung.petstore.client.invoker \
  --group-id com.baeldung \
  --artifact-id spring-swagger-codegen-api-client \
  --artifact-version 0.0.1-SNAPSHOT \
  -l java \
  --library resttemplate \
  -o spring-swagger-codegen-api-client

The provided arguments consist of:

  • A source swagger file URL or path – provided using the -i argument
  • Names of packages for generated classes – provided using –api-package–model-package–invoker-package
  • Generated Maven project properties –group-id–artifact-id–artifact-version
  • The programming language of the generated client – provided using -l
  • The implementation framework – provided using the –library
  • The output directory – provided using -o

To list all Java-related options, type the following command:

java -jar swagger-codegen-cli.jar config-help -l java

Swagger Codegen supports the following Java libraries (pairs of HTTP clients and JSON processing libraries):

  • jersey1 – Jersey1 + Jackson
  • jersey2 – Jersey2 + Jackson
  • feign – OpenFeign + Jackson
  • okhttp-gson – OkHttp + Gson
  • retrofit (Obsolete) – Retrofit1/OkHttp + Gson
  • retrofit2 – Retrofit2/OkHttp + Gson
  • rest-template – Spring RestTemplate + Jackson
  • rest-easy – Resteasy + Jackson

In this write-up, we chose rest-template as it’s a part of the Spring ecosystem.

3. Generate Spring Boot Project

Let’s now create a new Spring Boot project.

3.1. Maven Dependency

We’ll first add the dependency of the Generated API Client library – to our project pom.xml file:

<dependency>
    <groupId>com.baeldung</groupId>
    <artifactId>spring-swagger-codegen-api-client</artifactId>
    <version>0.0.1-SNAPSHOT</version>
</dependency>

3.2. Expose API Classes as Spring Beans

To access the generated classes, we need to configure them as beans:

@Configuration
public class PetStoreIntegrationConfig {

    @Bean
    public PetApi petApi() {
        return new PetApi(apiClient());
    }
    
    @Bean
    public ApiClient apiClient() {
        return new ApiClient();
    }
}

3.3. API Client Configuration

The ApiClient class is used for configuring authentication, the base path of the API, common headers, and it’s responsible for executing all API requests.

For example, if you’re working with OAuth:

@Bean
public ApiClient apiClient() {
    ApiClient apiClient = new ApiClient();

    OAuth petStoreAuth = (OAuth) apiClient.getAuthentication("petstore_auth");
    petStoreAuth.setAccessToken("special-key");

    return apiClient;
}

3.4. Spring Main Application

We need to import the newly created configuration:

@SpringBootApplication
@Import(PetStoreIntegrationConfig.class)
public class PetStoreApplication {
    public static void main(String[] args) throws Exception {
        SpringApplication.run(PetStoreApplication.class, args);
    }
}

3.5. API Usage

Since we configured our API classes as beans, we can freely inject them in our Spring-managed classes:

@Autowired
private PetApi petApi;

public List<Pet> findAvailablePets() {
    return petApi.findPetsByStatus(Arrays.asList("available"));
}

4. Alternative Solutions

There are other ways of generating a REST client other than executing Swagger Codegen CLI.

4.1. Maven Plugin

swagger-codegen Maven plugin that can be configured easily in your pom.xml allows generating the client with the same options as  Swagger Codegen CLI.

This is a basic code snippet that we can include in our project’s pom.xml to generate client automatically:

<plugin>
    <groupId>io.swagger</groupId>
    <artifactId>swagger-codegen-maven-plugin</artifactId>
    <version>2.2.2-SNAPSHOT</version>
    <executions>
        <execution>
            <goals>
                <goal>generate</goal>
            </goals>
            <configuration>
                <inputSpec>swagger.yaml</inputSpec>
                <language>java</language>
                <library>resttemplate</library>
            </configuration>
        </execution>
    </executions>
</plugin>

4.2. Online Generator API

An already published API that helps us with generating the client by sending a POST request to the URL http://generator.swagger.io/api/gen/clients/java passing the spec URL alongside with other options in the request body.

Let’s do an example using a simple curl command:

curl -X POST -H "content-type:application/json" \
-d '{"swaggerUrl":"http://petstore.swagger.io/v2/swagger.json"}' \
http://generator.swagger.io/api/gen/clients/java

The response would be JSON format that contains a downloadable link that contains the generated client code in zip format. You may pass the same options used in the Swaager Codegen CLI to customize the output client.

https://generator.swagger.io contains a Swagger documentation for the API where we can check its documentation and try it.

5. Conclusion

Swagger Codegen enables you to generate REST clients quickly for you API with many languages and with the library of your choice. We can generate the client library using CLI tool, Maven plugin or Online API.

The implementation of this example can be found in this GitHub project. This is a Maven based project that contains two Maven modules, the generated API client, and the Spring Boot application.


The RequestBody and ResponseBody Annotations in Spring

$
0
0

1. Introduction

In this quick article, we provide a concise overview of the Spring @RequestBody and @ResponseBody annotations.

2. @RequestBody

Simply put, the @RequestBody annotation maps the HttpRequest body to a transfer or domain object, enabling automatic deserialization of the inbound HttpRequest body onto a Java object.

First, let’s have a look at a Spring controller method:

@PostMapping("/request")
public ResponseEntity postController(
  @RequestBody LoginForm loginForm) {
 
    exampleService.fakeAuthenticate(loginForm);
    return ResponseEntity.ok(HttpStatus.OK);
}

Spring automatically deserializes the JSON into a Java type assuming an appropriate one is specified. By default, the type we annotate with the @RequestBody annotation must correspond to the JSON sent from our client-side controller:

public class LoginForm {
    private String username;
    private String password;
    // ...
}

Here, the object we use to represent the HttpRequest body maps to our LoginForm object.

Let’s test this using CURL:

curl -i \
-H "Accept: application/json" \
-H "Content-Type:application/json" \
-X POST --data '{"username": "johnny", "password": "password"}' "https://localhost:8080/.../request"

This is all that is needed for a Spring REST API and an Angular client using the @RequestBody annotation!

3. @ResponseBody

The @ResponseBody annotation tells a controller that the object returned is automatically serialized into JSON and passed back into the HttpResponse object.

Suppose we have a custom Response object:

public class ResponseTransfer {
    private String text; 
    
    // standard getters/setters
}

Next, the associated controller can be implemented:

@Controller
@RequestMapping("/post")
public class ExamplePostController {

    @Autowired
    ExampleService exampleService;

    @PostMapping("/response")
    @ResponseBody
    public ResponseTransfer postResponseController(
      @RequestBody LoginForm loginForm) {
        return new ResponseTransfer("Thanks For Posting!!!");
     }
}

In the developer console of our browser or using a tool like Postman, we can see the following response:

{"text":"Thanks For Posting!!!"}

Remember, we don’t need to annotate the @RestController-annotated controllers with the @ResponseBody annotation since it’s done by default here.

4. Conclusion

We’ve built a simple Angular client for the Spring app that demonstrates how to use the @RestController and @ResponseBody annotations.

As always code samples are available over on GitHub.

Compact Strings in Java 9

$
0
0

1. Overview

Strings in Java are internally represented by a char[] containing the characters of the String. And, every char is made up of 2 bytes because Java internally uses UTF-16.

For instance, if a String contains a word in the English language, the leading 8 bits will all be 0 for every char, as an ASCII character can be represented using a single byte.

Many characters require 16 bits to represent them but statistically most require only 8 bits — LATIN-1 character representation. So, there is a scope to improve the memory consumption and performance.

What’s also important is that Strings typically usually occupy a large proportion of the JVM heap space. And, because of the way they’re stored by the JVM, in most cases, a String instance can take up double the space it actually needs.

In this article, we’ll discuss the Compressed String option, introduced in JDK6 and the new Compact String, recently introduced with JDK9. Both of these were designed to optimize memory consumption of Strings on the JMV.

2. Compressed String – Java 6

The JDK 6 update 21 Performance Release, introduced a new VM option:

-XX:+UseCompressedStrings

When this option is enabled, Strings are stored as byte[], instead of char[] – thus, saving a lot of memory. However, this option was eventually removed in JDK 7, mainly because it had some unintended performance consequences.

3. Compact String – Java 9

Java 9 has brought the concept of compact Strings back.

This means that whenever we create a String if all the characters of the String can be represented using a byte — LATIN-1 representation, a byte array will be used internally, such that one byte is given for one character.

In other cases, if any character requires more than 8-bits to represent it, all the characters are stored using two bytes for each — UTF-16 representation.

So basically, whenever possible, it’ll just use a single byte for each character.

Now, the question is – how will all the String operations work? How will it distinguish between the LATIN-1 and UTF-16 representations?

Well, to tackle this issue, another change is made to the internal implementation of the String. We have a final field coder, that preserves this information.

3.1. String Implementation in Java 9

Until now, the String was stored as a char[]:

private final char[] value;

From now on, it’ll be a byte[]:

private final byte[] value;

The variable coder:

private final byte coder;

Where the coder can be:

static final byte LATIN1 = 0;
static final byte UTF16 = 1;

Most of the String operations now check the coder and dispatch to the  specific implementation:

public int indexOf(int ch, int fromIndex) {
    return isLatin1() 
      ? StringLatin1.indexOf(value, ch, fromIndex) 
      : StringUTF16.indexOf(value, ch, fromIndex);
}  

private boolean isLatin1() {
    return COMPACT_STRINGS && coder == LATIN1;
}

With all the info the JVM needs ready and available, the CompactString VM option is enabled by default. To disable it, we can use:

+XX:-CompactStrings

3.2. How coder Works

In Java 9 String class implementation, the length is calculated as:

public int length() {
    return value.length >> coder;
}

If the String contains only LATIN-1, the value of the coder will be 0 so the length of the String will be the same as the length of the byte array.

In other cases, if the String is in UTF-16 representation, the value of coder will be 1, and hence the length will be half the size of the actual byte array.

Note that all the changes made for Compact String, are in the internal implementation of the String class and are fully transparent for developers using String users.

4. Compact Strings vs. Compressed Strings

In case of JDK 6 Compressed Strings, a major problem faced was that the String constructor accepted only char[] as an argument. In addition to this, many String operations depended on char[] representation and not a byte array. Due to this, a lot of unpacking had to be done, which affected the performance.

Whereas in case of Compact String, maintaining the extra field “coder” can also increase the overhead. To mitigate the cost of the coder and the unpacking of bytes to chars (in case of UTF-16 representation), some of the methods are intrinsified and the ASM code generated by the JIT compiler has also been improved.

This change resulted in some counter intuitive results. The LATIN-1 indexOf(String) calls an intrinsic method, whereas the indexOf(char) does not. In case of UTF-16, both of these methods call an intrinsic method. This issue affects only the LATIN-1 String and will be fixed in future releases.

Thus, Compact Strings are better than the Compressed Strings in terms of performance.

To find out how much memory is saved using the Compact Strings, various Java application heap dumps were analyzed. And, while results were heavily dependent on the specific applications, the overall improvements were almost always considerable.

4.1. Difference in Performance

Let’s see a very simple example of the performance difference between enabling and disabling Compact Strings:

long startTime = System.currentTimeMillis();
 
List strings = IntStream.rangeClosed(1, 10_000_000)
  .mapToObj(Integer::toString) 
  .collect(toList());
 
long totalTime = System.currentTimeMillis() - startTime;
System.out.println(
  "Generated " + strings.size() + " strings in " + totalTime + " ms.");

startTime = System.currentTimeMillis();
 
String appended = (String) strings.stream()
  .limit(100_000)
  .reduce("", (l, r) -> l.toString() + r.toString());
 
totalTime = System.currentTimeMillis() - startTime;
System.out.println("Created string of length " + appended.length() 
  + " in " + totalTime + " ms.");

Here, we are creating 10 million Strings and then appending them in a naive manner. When we run this code (Compact Strings are enabled by default), we get the output:

Generated 10000000 strings in 854 ms.
Created string of length 488895 in 5130 ms.

Similarly, if we run it by disabling the Compact Strings using: -XX:-CompactStrings option, the output is:

Generated 10000000 strings in 936 ms.
Created string of length 488895 in 9727 ms.

Clearly, this is a surface level test, and it can’t be highly representative – it’s only a snapshot of what the new option may do to improve performance in this particular scenario.

5. Conclusion

In this tutorial, we saw the attempts to optimize the performance and memory consumption on the JVM – by storing Strings in a memory efficient way.

As always, the entire code is available over on Github.

RxJava and Error Handling

$
0
0

1. Introduction

In this article, we’ll take a look at how to handle exceptions and errors using RxJava.

First, keep in mind that the Observable typically does not throw exceptions. Instead, by default, Observable invokes its Observer’s onError() method, notifying the observer that an unrecoverable error just occurred, and then quits without invoking any more of its Observer’s methods.

The error handling operators we are about to introduce change the default behavior by resuming or retrying the Observable sequence.

2. Maven Dependencies

First, let’s add the RxJava in the pom.xml:

<dependency>
    <groupId>io.reactivex.rxjava2</groupId>
    <artifactId>rxjava</artifactId>
    <version>2.1.3</version>
</dependency>

The latest version of the artifact can be found here.

3. Error Handling

When an error occurs, we usually need to handle it in some way. For example, alter related external states, resuming the sequence with default results, or simply leave it be so that the error could propagate.

3.1. Action on Error

With doOnError, we can invoke whatever action that is needed when there is an error:

@Test
public void whenChangeStateOnError_thenErrorThrown() {
    TestObserver testObserver = new TestObserver();
    AtomicBoolean state = new AtomicBoolean(false);
    Observable
      .error(UNKNOWN_ERROR)
      .doOnError(throwable -> state.set(true))
      .subscribe(testObserver);

    testObserver.assertError(UNKNOWN_ERROR);
    testObserver.assertNotComplete();
    testObserver.assertNoValues();
 
    assertTrue("state should be changed", state.get());
}

In case of an exception being thrown while performing the action, RxJava wraps the exception in a CompositeException:

@Test
public void whenExceptionOccurOnError_thenCompositeExceptionThrown() {
    TestObserver testObserver = new TestObserver();
    Observable
      .error(UNKNOWN_ERROR)
      .doOnError(throwable -> {
          throw new RuntimeException("unexcepted");
      })
      .subscribe(testObserver);

    testObserver.assertError(CompositeException.class);
    testObserver.assertNotComplete();
    testObserver.assertNoValues();
}

3.2. Resume with Default Items

Though we can invoke actions with doOnError, but the error still breaks the standard sequence flow. Sometimes we want to resume the sequence with a default option, that’s what onErrorReturnItem does:

@Test
public void whenHandleOnErrorResumeItem_thenResumed(){
    TestObserver testObserver = new TestObserver();
    Observable
      .error(UNKNOWN_ERROR)
      .onErrorReturnItem("singleValue")
      .subscribe(testObserver);
 
    testObserver.assertNoErrors();
    testObserver.assertComplete();
    testObserver.assertValueCount(1);
    testObserver.assertValue("singleValue");
}

If a dynamic default item supplier is preferred, we can use the onErrorReturn:

@Test
public void whenHandleOnErrorReturn_thenResumed() {
    TestObserver testObserver = new TestObserver();
    Observable
      .error(UNKNOWN_ERROR)
      .onErrorReturn(Throwable::getMessage)
      .subscribe(testObserver);

    testObserver.assertNoErrors();
    testObserver.assertComplete();
    testObserver.assertValueCount(1);
    testObserver.assertValue("unknown error");
}

3.3. Resume with Another Sequence

Instead of falling back to a single item, we may supply fallback data sequence using onErrorResumeNext when encountering errors. This would help prevent error propagation:

@Test
public void whenHandleOnErrorResume_thenResumed() {
    TestObserver testObserver = new TestObserver();
    Observable
      .error(UNKNOWN_ERROR)
      .onErrorResumeNext(Observable.just("one", "two"))
      .subscribe(testObserver);

    testObserver.assertNoErrors();
    testObserver.assertComplete();
    testObserver.assertValueCount(2);
    testObserver.assertValues("one", "two");
}

If the fallback sequence differs according to the specific exception types, or the sequence needs to be generated by a function, we can pass the function to the onErrorResumeNext:

@Test
public void whenHandleOnErrorResumeFunc_thenResumed() {
    TestObserver testObserver = new TestObserver();
    Observable
      .error(UNKNOWN_ERROR)
      .onErrorResumeNext(throwable -> Observable
        .just(throwable.getMessage(), "nextValue"))
      .subscribe(testObserver);

    testObserver.assertNoErrors();
    testObserver.assertComplete();
    testObserver.assertValueCount(2);
    testObserver.assertValues("unknown error", "nextValue");
}

3.4. Handle Exception Only

RxJava also provides a fallback method that allows continuing the sequence with a provided Observable when an exception (but no error) is raised:

@Test
public void whenHandleOnException_thenResumed() {
    TestObserver testObserver = new TestObserver();
    Observable
      .error(UNKNOWN_EXCEPTION)
      .onExceptionResumeNext(Observable.just("exceptionResumed"))
      .subscribe(testObserver);

    testObserver.assertNoErrors();
    testObserver.assertComplete();
    testObserver.assertValueCount(1);
    testObserver.assertValue("exceptionResumed");
}

@Test
public void whenHandleOnException_thenNotResumed() {
    TestObserver testObserver = new TestObserver();
    Observable
      .error(UNKNOWN_ERROR)
      .onExceptionResumeNext(Observable.just("exceptionResumed"))
      .subscribe(testObserver);

    testObserver.assertError(UNKNOWN_ERROR);
    testObserver.assertNotComplete();
}

As the code above shows, when an error does occur, the onExceptionResumeNext won’t kick in to resume the sequence.

4. Retry on Error

The normal sequence may be broken by a temporary system failure or backend error. In these situations, we want to retry and wait until the sequence is fixed.

Luckily, RxJava gives us options to perform exactly that.

4.1. Retry

By using retry, the Observable will be re-subscribed infinite times until when there’s no error. But most of the time we would prefer a fixed amount of retries:

@Test
public void whenRetryOnError_thenRetryConfirmed() {
    TestObserver testObserver = new TestObserver();
    AtomicInteger atomicCounter = new AtomicInteger(0);
    Observable
      .error(() -> {
          atomicCounter.incrementAndGet();
          return UNKNOWN_ERROR;
      })
      .retry(1)
      .subscribe(testObserver);

    testObserver.assertError(UNKNOWN_ERROR);
    testObserver.assertNotComplete();
    testObserver.assertNoValues();
    assertTrue("should try twice", atomicCounter.get() == 2);
}

4.2. Retry on Condition

Conditional retry is also feasible in RxJava, using retry with predicates or using retryUntil:

@Test
public void whenRetryConditionallyOnError_thenRetryConfirmed() {
    TestObserver testObserver = new TestObserver();
    AtomicInteger atomicCounter = new AtomicInteger(0);
    Observable
      .error(() -> {
          atomicCounter.incrementAndGet();
          return UNKNOWN_ERROR;
      })
      .retry((integer, throwable) -> integer < 4)
      .subscribe(testObserver);

    testObserver.assertError(UNKNOWN_ERROR);
    testObserver.assertNotComplete();
    testObserver.assertNoValues();
    assertTrue("should call 4 times", atomicCounter.get() == 4);
}

@Test
public void whenRetryUntilOnError_thenRetryConfirmed() {
    TestObserver testObserver = new TestObserver();
    AtomicInteger atomicCounter = new AtomicInteger(0);
    Observable
      .error(UNKNOWN_ERROR)
      .retryUntil(() -> atomicCounter.incrementAndGet() > 3)
      .subscribe(testObserver);
    testObserver.assertError(UNKNOWN_ERROR);
    testObserver.assertNotComplete();
    testObserver.assertNoValues();
    assertTrue("should call 4 times", atomicCounter.get() == 4);
}

4.3. RetryWhen

Beyond these basics options, there’s also an interesting retry method: retryWhen.

This returns an Observable, say “NewO”, that emits the same values as the source ObservableSource, say “OldO”, but if the returned Observable “NewO” calls onComplete or onError, the subscriber’s onComplete or onError will be invoked.

And if “NewO” emits any item, a re-subscription to the source ObservableSource “OldO” will be triggered.

The tests below shows how this works:

@Test
public void whenRetryWhenOnError_thenRetryConfirmed() {
    TestObserver testObserver = new TestObserver();
    Exception noretryException = new Exception("don't retry");
    Observable
      .error(UNKNOWN_ERROR)
      .retryWhen(throwableObservable -> Observable.error(noretryException))
      .subscribe(testObserver);

    testObserver.assertError(noretryException);
    testObserver.assertNotComplete();
    testObserver.assertNoValues();
}

@Test
public void whenRetryWhenOnError_thenCompleted() {
    TestObserver testObserver = new TestObserver();
    AtomicInteger atomicCounter = new AtomicInteger(0);
    Observable
      .error(() -> {
        atomicCounter.incrementAndGet();
        return UNKNOWN_ERROR;
      })
      .retryWhen(throwableObservable -> Observable.empty())
      .subscribe(testObserver);

    testObserver.assertNoErrors();
    testObserver.assertComplete();
    testObserver.assertNoValues();
    assertTrue("should not retry", atomicCounter.get()==0);
}

@Test
public void whenRetryWhenOnError_thenResubscribed() {
    TestObserver testObserver = new TestObserver();
    AtomicInteger atomicCounter = new AtomicInteger(0);
    Observable
      .error(() -> {
        atomicCounter.incrementAndGet();
        return UNKNOWN_ERROR;
      })
      .retryWhen(throwableObservable -> Observable.just("anything"))
      .subscribe(testObserver);

    testObserver.assertNoErrors();
    testObserver.assertComplete();
    testObserver.assertNoValues();
    assertTrue("should retry once", atomicCounter.get()==1);
}

A typical usage of retryWhen is limited retries with variable delays:

@Test
public void whenRetryWhenForMultipleTimesOnError_thenResumed() {
    TestObserver testObserver = new TestObserver();
    long before = System.currentTimeMillis();
    Observable
      .error(UNKNOWN_ERROR)
      .retryWhen(throwableObservable -> throwableObservable
        .zipWith(Observable.range(1, 3), (throwable, integer) -> integer)
        .flatMap(integer -> Observable.timer(integer, TimeUnit.SECONDS)))
      .blockingSubscribe(testObserver);

    testObserver.assertNoErrors();
    testObserver.assertComplete();
    testObserver.assertNoValues();
    long secondsElapsed = (System.currentTimeMillis() - before)/1000;
    assertTrue("6 seconds should elapse",secondsElapsed == 6 );
}

Notice how this logic retries three times and incrementally delays each retry.

5. Summary

In this article, we introduced a number of ways of handling errors and exceptions in RxJava.

There are also several RxJava-specific exceptions relating to error handling – have a look at the official wiki for more details.

As always, the full implementation can be found over on Github.

Apache Commons IO

$
0
0

1. Overview

The Apache Commons project was created to provide developers with a set of common libraries that they can use in their day-to-day code.

In this tutorial, we’ll explore some of the key utility classes of the Commons IO module and their most well-known functions.

2. Maven Dependency

To use the library, let’s include the following Maven dependency in the pom.xml:

<dependency>
    <groupId>commons-io</groupId>
    <artifactId>commons-io</artifactId>
    <version>2.5</version>
</dependency>

The latest versions of the library can be found in Maven Central.

3. Utility Classes

Simply put, utility classes provide sets of static methods that can be used to perform common tasks on files.

3.1. FileUtils

This class provides different operations on files, such as opening, reading, copying, and moving.

Let’s look at how to read or copy files using FileUtils:

File file = FileUtils.getFile(getClass().getClassLoader()
  .getResource("fileTest.txt")
  .getPath());
File tempDir = FileUtils.getTempDirectory();
FileUtils.copyFileToDirectory(file, tempDir);
File newTempFile = FileUtils.getFile(tempDir, file.getName());
String data = FileUtils.readFileToString(newTempFile,
  Charset.defaultCharset());

3.2. FilenameUtils

This utility provides an operating-system-agnostic way of executing common functions on file names. Let’s see some of the different methods we can utilize:

String fullPath = FilenameUtils.getFullPath(path);
String extension = FilenameUtils.getExtension(path);
String baseName = FilenameUtils.getBaseName(path);

3.3. FileSystemUtils

We can use FileSystemUtils to check the free space on a given volume or drive:

long freeSpace = FileSystemUtils.freeSpaceKb("/");

4. Input and Output

This package provides several implementations for working with input and output streams.

We’ll focus on TeeInputStream and TeeOutputSteam. The word “Tee” (derived from letter “T“) is normally used to describe that a single input is to be split into two different outputs.

Let’s look at an example that demonstrates how we can write a single input stream to two different output streams:

String str = "Hello World.";
ByteArrayInputStream inputStream = new ByteArrayInputStream(str.getBytes());
ByteArrayOutputStream outputStream1 = new ByteArrayOutputStream();
ByteArrayOutputStream outputStream2 = new ByteArrayOutputStream();

FilterOutputStream teeOutputStream
  = new TeeOutputStream(outputStream1, outputStream2);
new TeeInputStream(inputStream, teeOutputStream, true)
  .read(new byte[str.length()]);

assertEquals(str, String.valueOf(outputStream1));
assertEquals(str, String.valueOf(outputStream2));

5. Filters

Commons IO includes a list of useful file filters. These can come in handy when a developer wants to narrow down to a specific desired list of files from a heterogeneous list of files.

The library also supports AND and OR logic operations on a given file list. Therefore, we can mix and match these filters to get the desired outcome.

Let’s see an example that makes use of WildcardFileFilter and SuffixFileFilter to retrieve files which have “ple” in their names with a “txt” suffix. Note that we wrap above filters using ANDFileFilter: 

@Test
public void whenGetFilewith_ANDFileFilter_thenFind_sample_txt()
  throws IOException {

    String path = getClass().getClassLoader()
      .getResource("fileTest.txt")
      .getPath();
    File dir = FileUtils.getFile(FilenameUtils.getFullPath(path));

    assertEquals("sample.txt",
      dir.list(new AndFileFilter(
        new WildcardFileFilter("*ple*", IOCase.INSENSITIVE),
        new SuffixFileFilter("txt")))[0]);
}

6. Comparators

The Comparator package provides different types of comparisons on files. We’ll explore two different comparators here.

6.1. PathFileComparator

The PathFileComparator class can be used to sort lists or arrays of files by their path either in a case-sensitive, case-insensitive, or system-dependent case-sensitive way. Let’s see how to sort file paths in the resources directory using this utility:

@Test
public void whenSortDirWithPathFileComparator_thenFirstFile_aaatxt() 
  throws IOException {
    
    PathFileComparator pathFileComparator = new PathFileComparator(
      IOCase.INSENSITIVE);
    String path = FilenameUtils.getFullPath(getClass()
      .getClassLoader()
      .getResource("fileTest.txt")
      .getPath());
    File dir = new File(path);
    File[] files = dir.listFiles();

    pathFileComparator.sort(files);

    assertEquals("aaa.txt", files[0].getName());
}

Note that we have used the IOCase.INSENSITIVE configuration. PathFileComparator also provides a number of singleton instances that have different case-sensitivity and reverse-sorting options.

These static fields include PATH_COMPARATOR, PATH_INSENSITIVE_COMPARATOR, PATH_INSENSITIVE_REVERSE, PATH_SYSTEM_COMPARATOR, to name few.

6.2. SizeFileComparator

SizeFileComparator is, as its name suggests, used to compare the sizes (lengths) of two files. It returns a negative integer value if the first file’s size is less than that of the second file. It returns zero if the file sizes are equal and a positive value if the first file’s size is greater than the second file’s size.

Let’s write a unit test demonstrating a comparison of file sizes:

@Test
public void whenSizeFileComparator_thenLargerFile_large()
  throws IOException {

    SizeFileComparator sizeFileComparator = new SizeFileComparator();
    File largerFile = FileUtils.getFile(getClass().getClassLoader()
      .getResource("fileTest.txt")
      .getPath());
    File smallerFile = FileUtils.getFile(getClass().getClassLoader()
      .getResource("sample.txt")
      .getPath());

    int i = sizeFileComparator.compare(largerFile, smallerFile);

    Assert.assertTrue(i > 0);
}

7. File Monitor

The Commons IO monitor package provides the capability to track changes to a file or directory. Let’s see a quick example of how FileAlterationMonitor can be used together with FileAlterationObserver and FileAlterationListener to monitor a file or folder.

When FileAlterationMonitor starts, we’ll start receiving notifications for file changes on the directory that is being monitored:

FileAlterationObserver observer = new FileAlterationObserver(folder);
FileAlterationMonitor monitor = new FileAlterationMonitor(5000);

FileAlterationListener fal = new FileAlterationListenerAdaptor() {

    @Override
    public void onFileCreate(File file) {
        // on create action
    }

    @Override
    public void onFileDelete(File file) {
        // on delete action
    }
};

observer.addListener(fal);
monitor.addObserver(observer);
monitor.start();

8. Conclusion

This article covered some of the commonly used components of Commons IO package. However, the package does come with many other capabilities as well. Please refer to API documentation for more details.

The code used in this example can be found in the GitHub project.

Using Pairs in Java

$
0
0

1. Overview

In this quick article, we discuss the highly useful programming concept known as a PairPairs provide a convenient way of handling simple key to value association and are particularly useful when we want to return two values from a method.

A simple implementation of a Pair is available in the core Java libraries. Beyond that, certain third party libraries such as Apache Commons and Vavr have exposed this functionality in their respective APIs.

2. Core Java Implementation

The Pair class can be found in the javafx.util package. The constructor of this class takes two arguments, a key and its corresponding value:

Pair<Integer, String> pair = new Pair<>(1, "One");
Integer key = pair.getKey();
String value = pair.getValue();

This example illustrates a simple Integer to String mapping using the Pair concept.

As shown, the key in the pair object is retrieved by invoking a getKey() method while the value is retrieved by calling getValue().

3. Apache Commons

In the Apache Commons library, we can find the Pair class in the org.apache.commons.lang3.tuple package. This is an abstract class, so it cannot be instantiated directly.

We can find here, two subclasses – representing immutable and mutable pairs: ImmutablePair and MutablePair.

Both implementations have access to key/value getter/setter methods:

ImmutablePair<Integer, String> pair = new ImmutablePair<>(2, "Two");
Integer key = pair.getKey();
String value = pair.getValue();

Unsurprisingly, an attempt to invoke setValue() on the ImmutablePair results in an UnsupportedOperationException.

But the operation is entirely valid for a mutable implementation:

Pair<Integer, String> pair = new MutablePair<>(3, "Three");
pair.setValue("New Three");

4. Vavr

In the Vavr library, the pair functionality is provided by the immutable Tuple2 class:

Tuple2<Integer, String> pair = new Tuple2<>(4, "Four");
Integer key = pair._1();
String value = pair._2();

In this implementation, we can’t modify the object after creation, so mutating methods are returning a new instance that includes the provided change:

tuplePair = pair.update2("New Four");

5. Alternative I – Simple Container Class

Either by user preference or in the absence of any of the aforementioned libraries, a standard workaround for the pair functionality is creating a simple container class that wraps desired return values.

The biggest advantage here is an ability to provide our name which helps in avoiding having the same class representing different domain objects:

public class CustomPair {
    private String key;
    private String value;

    // standard getters and setters
}

6. Alternative II – Arrays

Another common workaround is by using a simple array with two elements to achieve similar results:

private Object[] getPair() {
    // ...
    return new Object[] {key, value};
}

Typically, the key is located at index zero of the array while its corresponding value is located at index one.

7. Conclusion

In this tutorial, we have discussed the concept of Pairs in Java and the different implementations available in core Java as well as other third-party libraries.

As always, you can find the code backing this tutorial on Github.

Java Weekly, Issue 194

$
0
0

Lots of interesting writeups on Java 9 this week.

Here we go…

1. Spring and Java

>> Five Command Line Options To Hack The Java 9 Module System [blog.codefx.org]

Java 9 will be out in a week – this is the right time to get to know the JPMS better.

>> Flavors of Spring application context configuration [blog.frankel.ch]

There multiple ways of configuring a Spring context – some can (maybe even should) involve Groovy and Kotlin.

>> JUnit 5 Tutorial: Writing Our First Test Class [petrikainulainen.net]

JUnit 5 has just been released – time to start putting it to work.

>> Fixed-rate vs. fixed-delay – RxJava FAQ [nurkiewicz.com]

A very interesting write-up about simulating scheduleAtFixedRate and scheduleWithFixedDelay with RxJava.

>> Code Smells: If Statements [blog.jetbrains.com]

Using an if statement can be both good practice – as well as a code smell – it’s important to know when to use it.

>> Lombok – You Should Definitely Give It A Try [blog.codeleak.pl]

Lombok is a great tool that can bring some fresh breath to Java and make some boilerplate go away.

>> Idiomatic concurrency: flatMap() vs. parallel() – RxJava FAQ [nurkiewicz.com]

It’s important to know the semantics of tools we’re using – otherwise, for example, we might end up with unintentional sequential processing where parallel was expected.

Also worth reading:

Webinars and presentations:

Time to upgrade:

2. Technical

>> NoSQL Options for Java Developers [developer.okta.com]

A comprehensive guide to NoSQL from the non-technical viewpoint 🙂

>> Traefik – The modern reverse proxy [blog.codecentric.de]

A cool proxy solution I didn’t know about until this writeup.

Also worth reading:

3. Musings

>> What Problems Do Microservices Solve? [daedtech.com]

Microservices are not silver bullets – they should be used when you need them and not because you want them. 

Also worth reading:

4. Comics

And some cool Dilberts of the week:

>> A New Employee [dilbert.com]

>> All Robots Quit [dilbert.com]

>> Pat Yourself On The Head [dilbert.com]

5. Pick of the Week

>> Understanding, Accepting and Leveraging Optional in Java [stackify.com]

Introduction to EGit

$
0
0

1. Overview

In this article, we’re going to explore EGit – an evolution of the JGit library for Eclipse.

2. EGit Setup

During the article, we’ll use the following tools:

  • Eclipse Neon.3 version 4.6.3
  • EGit plugin version 4.8

2.1. Installing EGit in Eclipse

Starting with Eclipse Juno, EGit is included with the Eclipse itself.

For older versions of Eclipse, we can install the plugin through Help -> Install New Software and providing the URL http://download.eclipse.org/egit/updates:

2.2. Identifying a Commiter

Git needs to keep track of the user behind a commit, therefore we should provide our identity when we make commits via EGit.

This is done through Preferences -> Team -> Git -> Configuration and clicking on Add Entry to include information for user.name and user.email:

3. Repositories

3.1. Repositories View

EGit comes with the Repositories view that allows us to:

  • Browse our local repository
  • Add and initialize local repositories
  • Remove repositories
  • Clone remote repositories
  • Check out projects
  • Manage branches

To open the Repositories view, click Window -> Show View -> Other -> Git -> Git Repositories:

3.2. Creating a New Repository

We need to create a project and right-click on it to choose Team -> Share Project, and Create.

From here, we select the repository directory and click Finish:

3.3. Cloning a Repository

We can clone a repository from a remote git server to our local file system.

Let’s go to File -> Import… -> Git -> Projects from Git -> Next -> Clone URI -> Next, then the following window will be shown:

We can also open the same window from the Clone Remote Repository toolbar button in the Repositories view tab.

Git supports several protocols such as https, ssh, git, and etc. If we paste the remote repository’s URI, other entries will be filled automatically.

4. Branches

There are two types of branches we’ll deal with:

  • Local branch
  • Remote tracking branch

4.1. Creating Local Branch

We can create a new local branch by clicking Team -> Repository -> Switch to -> New Branch:

We can choose the remote tracking branch from which to base our local branch. Adding upstream configuration to our new local branches will simplify synchronizing the local changes with the remote ones.

It’s recommended to check the option in the dialog Configure upstream for push and pull.

Another method to open the new branch dialog by right-clicking on branches in the Repositories view -> Switch To -> New Branch

4.2. Checking Out the Branch

From the Repositories view, right click on the branch name and click Check Out:

Or right-click on the project and select Team -> Switch To -> select the branch name:

5. Tracking Files with Git

5.1. Tracking Changes

Question mark signs appear on files which are not yet under Git’s control. We can track these new files by right-clicking on them and selecting Team -> Add to Index.

From here the decorator should change to (+) sign.

5.2. Committing Changes

We want to commit changes to a tracked files. This is done by right-clicking on these files and choosing Team -> Commit:

By default, the author and committer are taken from the .gitconfig file in our home directory.

We can enter a commit message to explain the changes. In addition, by clicking on Add Signed-off-by icon in the top right corner, we can add a Signed-off-by tag.

5.3. Inspecting History

We can check the history of a file by right-clicking on it and choosing Team -> Show in History. 

A history dialog will show all the committed changes of the inspected file:

We can open the last committed changes in the compare view by clicking on the compare mode icon in the top right corner in the history tab and then double-clicking on the file name (here’s an example: HelloEgit/src/HelloEgitClass.java) in file list:

5.4. Pushing Changes to the Remote Repository

To push our changes we need to have a remote Git repository.

From Team -> Remote -> Push we can enter the https URL of the new Git remote repository in a wizard:

Next steps are to:

  • Choose the Add All Branches Spec to map local branch names to the same branch names in the destination repository
  • Push the confirmation button – the wizard will show a preview of changed files
  • Finally, we click Finish to push our repository to the remote location.

If we have set up the Upstream Configuration from section 4.1, this configuration dialog will not be shown and the push will be much easier.

5.5. Fetching from Upstream

If we are working with a local branch that is based on a remote tracking branch, we can now fetch changes from the upstream.

In order to fetch from the upstream, we right click on the project and select Team -> Fetch from Upstream (or by right-clicking on the repository on the Repositories View and selecting Fetch from Upstream).

This fetch can be configured by right-clicking on the project and selecting Team -> Remote -> Configure Fetch from Upstream:

5.6. Comparing & Synchronizing

If we want to see the changes between the local working directory and a committed change, we can right click on the resource and choose Compare With. This opens the Synchronize View to allow us to browse the changes:

By double-clicking on the changed file, the compare editor will be opened, allowing us to compare the changes.

If we want to compare two commits, we need to select Team -> Show in History.

From the history view, we’ll highlight the two commits that we want to compare and select the Compare with Each Other option:

If we want to compare between the working directory and a branch, we can use Team -> Synchronize

5.7. Merging

Merging incorporates changes from one branch or tag into the currently checked out branch.

We can merge by clicking Team -> Merge or by right-clicking on the repository name in the repositories view and select Merge:

Now we can select the branch or tag that we want to merge with the currently checked out branch.

6. Conclusion

In this tutorial, we introduced the EGit plugin for eclipse, how to install and configure it and how to use in our daily development.

For more details on EGit, check out its official documentation here.


Guide to Mustache with Spring Boot

$
0
0

1. Overview

In this article, we’ll focus on using Mustache templates for producing HTML content in Spring Boot applications.

It’s a logic-less template engine for creating dynamic content, which is popular due to its simplicity.

If you want to discover the basics, check our introduction to Mustache article.

2. Maven Dependency

To be able to use Mustache along with Spring Boot, we need to add the dedicated Spring Boot starter to our pom.xml:

<dependency>			
    <groupId>org.springframework.boot</groupId>
    <artifactId>spring-boot-starter-mustache</artifactId>
</dependency>

The latest version can be found here.

3. Creating Templates

Let’s show an example and create a simple MVC application using Spring-Boot that will serve articles on a web page.

Let’s write the first template for the article contents:

<div class="starter-template">
    {{#articles}}
    <h1>{{title}}</h1>
    <h3>{{publishDate}}</h3>
    <h3>{{author}}</h3>
    <p>{{body}}</p>
    {{/articles}}
</div>

We’ll save this HTML file, say article.html, and refer it in our index.html:

<div class="container">
    {{>layout/article}}
</div>

Here, the layout is a sub-directory, and the article is the file name for the template file.

4. Controller

Now let’s write the controller for serving articles:

@GetMapping("/article")
public ModelAndView displayArticle(Map<String, Object> model) {

    List<Article> articles = IntStream.range(0, 10)
      .mapToObj(i -> generateArticle("Article Title " + i))
      .collect(Collectors.toList());

    model.put("articles", articles);

    return new ModelAndView("index", model);
}

The controller returns a list of articles to be rendered on the page. In the article template, the tag articles starting with # and ending in /, takes care of the list.

This will iterate over the model passed and render each element separately just like in an HTML table:

 {{#articles}}...{{/articles}}

The generateArticle() method creates an Article instance with some random data.

Note that the keys in the Article Model, returned by the controller, should be same as that of the article template tags.

Now, let’s test our application:

@Test
public void givenIndexPage_whenContainsArticle_thenTrue() {

    ResponseEntity<String> entity 
      = this.restTemplate.getForEntity("/article", String.class);
 
    assertTrue(entity.getStatusCode()
      .equals(HttpStatus.OK));
    assertTrue(entity.getBody()
      .contains("Article Title 0"));
}

We can also test the application by deploying it with:

mvn spring-boot:run

Once deployed, we can hit localhost:8080/article, and we’ll get our articles listed:

5. Handling Default Values

In a Mustache environment, if we do not provide a value for a placeholder, the MustacheException will be thrown with a message “No method or field with name ”variable-name …”. 

In order to avoid such errors it’s better to provide a default global value to all placeholders:

@Bean
public Mustache.Compiler mustacheCompiler(
  Mustache.TemplateLoader templateLoader, 
  Environment environment) {

    MustacheEnvironmentCollector collector
      = new MustacheEnvironmentCollector();
    collector.setEnvironment(environment);

    return Mustache.compiler()
      .defaultValue("Some Default Value")
      .withLoader(templateLoader)
      .withCollector(collector);
}

6. Mustache with Spring MVC

Now, let’s discuss how to integrate with Spring MVC if we decide not to use Spring Boot. First, let’s add the dependency:

<dependency>
    <groupId>com.github.sps.mustache</groupId>
    <artifactId>mustache-spring-view</artifactId>
    <version>1.4</version>
</dependency>

The latest could be found here.

Next, we need to configure MustacheViewResolver instead of Spring’s InternalResourceViewResolver:

@Bean
public ViewResolver getViewResolver(ResourceLoader resourceLoader) {
    MustacheViewResolver mustacheViewResolver
      = new MustacheViewResolver();
    mustacheViewResolver.setPrefix("/WEB-INF/views/");
    mustacheViewResolver.setSuffix("..mustache");
    mustacheViewResolver.setCache(false);
    MustacheTemplateLoader mustacheTemplateLoader 
      = new MustacheTemplateLoader();
    mustacheTemplateLoader.setResourceLoader(resourceLoader);
    mustacheViewResolver.setTemplateLoader(mustacheTemplateLoader);
    return mustacheViewResolver;
}

We just need to configure the suffix, where our templates are stored, prefix the extension of our templates, and the templateLoader, which will be responsible for loading templates.

7. Conclusion

In this quick tutorial, we looked at using Mustache templates with Spring Boot, rendering a collection of elements in the UI and also providing default values to variables to avoid errors.

Finally, we discussed how to integrate it with Spring, using MustacheViewResolver.

As always the source code is available over on GitHub.

Binary Search Algorithm in Java

$
0
0

1. Overview

In this article, we’ll cover advantages of a binary search over a simple linear search and walk through its implementation in Java.

2. Need for Efficient Search

Let’s say we’re in the wine-selling business and millions of buyers are visiting our application every day.

Through our app, a customer can filter out items which have a price below n dollars, select a bottle from the search results, and add them to his cart. We have millions of users seeking wines with a price limit every second. The results need to be fast.

On the backend, our algorithm runs a linear search through the entire list of wines comparing the price limit entered by the customer with the price of every wine bottle in the list.

Then, it returns items which have a price less than or equal to the price limit. This linear search has a time complexity of O(n).

This means the bigger the number of wine bottles in our system, the more time it will take. The search time increases proportionately to the number of new items introduced.

If we start saving items in sorted order and search for items using the binary search, we can achieve a complexity of O(log n).

With binary search, the time taken by the search results naturally increases with the size of the dataset, but not proportionately.

3. Binary Search

Simply put, the algorithm compares the key value with the middle element of the array; if they are unequal, the half in which the key cannot be part of is eliminated, and the search continues for the remaining half until it succeeds.

Remember – the key aspect here is that the array is already sorted.

If the search ends with the remaining half being empty, the key is not in the array.

3.1. Iterative Impl

public int runBinarySearchIteratively(
  int[] sortedArray, int key, int low, int high) {
    int index = Integer.MAX_VALUE;
    
    while (low <= high) {
        int mid = (low + high) / 2;
        if (sortedArray[mid] < key) {
            low = mid + 1;
        } else if (sortedArray[mid] > key) {
            high = mid - 1;
        } else if (sortedArray[mid] == key) {
            index = mid;
            break;
        }
    }
    return index;
}

The runBinarySearchIteratively method takes a sortedArray, key & the low & high indexes of the sortedArray as arguments. When the method runs for the first time the low, the first index of the sortedArray, is 0, while the high, the last index of the sortedArray, is equal to its length – 1.

The middle is the middle index of the sortedArray. Now the algorithm runs a while loop comparing the key with the array value of the middle index of the sortedArray.

3.2. Recursive Impl

Now, let’s have a look at a simple, recursive implementation as well:

public int runBinarySearchRecursively(
  int[] sortedArray, int key, int low, int high) {
    int middle = (low + high) / 2;
        
    if (high < low) {
        return -1;
    }

    if (key == sortedArray[middle]) {
        return middle;
    } else if (key < sortedArray[middle]) {
        return runBinarySearchRecursively(
          sortedArray, key, low, middle - 1);
    } else {
        return runBinarySearchRecursively(
          sortedArray, key, middle + 1, high);
    }
}

The runBinarySearchRecursively method accepts a sortedArray, key, the low and high indexes of the sortedArray.

3.3. Using Arrays.binarySearch() 

int index = Arrays.binarySearch(sortedArray, key);

A sortedArray and an int key, which is to be searched in the array of integers, are passed as arguments to the binarySearch method of the Java Arrays class.

3.4. Using Collections.binarySearch()

int index = Collections.binarySearch(sortedList, key);

A sortedList & an Integer key, which is to be searched in the list of Integer objects, are passed as arguments to the binarySearch method of the Java Collections class.

3.5. Performance

Whether to use a recursive or an iterative approach for writing the algorithm is mostly a matter of personal preference. But still here are a few points we should be aware of:

1. Recursion can be slower due to the overhead of maintaining a stack and usually takes up more memory
2. Recursion is not stack-friendly. It may cause StackOverflowException when processing big data sets
3. Recursion adds clarity to the code as it makes it shorter in comparison to the iterative approach

Ideally, a binary search will perform less number of comparisons in contrast to a linear search for large values of n. For smaller values of n, the linear search could perform better than a binary search.

One should know that this analysis is theoretical and might vary depending on the context.

Also, the binary search algorithm needs a sorted data set which has its costs too. If we use a merge sort algorithm for sorting the data, an additional complexity of n log n is added to our code.

So first we need to analyze our requirements well and then take a decision on which search algorithm would suit our requirements best.

4. Conclusion

This tutorial demonstrated a binary search algorithm implementation and a scenario where it would be preferable to use it instead of a linear search.

Please find the code for the tutorial over on GitHub.

“Stream has already been operated upon or closed” Exception in Java

$
0
0

1. Overview

In this brief article, we’re going to discuss a common Exception that we may encounter when working with the Stream class in Java 8:

IllegalStateException: stream has already been operated upon or closed.

We’ll discover the scenarios when this exception occurs, and the possible ways of avoiding it, all along with practical examples.

2. The Cause

In Java 8, each Stream class represents a single-use sequence of data and supports several I/O operations.

A Stream should be operated on (invoking an intermediate or terminal stream operation) only once. A Stream implementation may throw IllegalStateException if it detects that the Stream is being reused.

Whenever a terminal operation is called on a Stream object, the instance gets consumed and closed.

Therefore, we’re only allowed to perform a single operation that consumes a Stream, otherwise, we’ll get an exception that states that the Stream has already been operated upon or closed.

Let’s see how this can be translated to a practical example:

Stream<String> stringStream = Stream.of("A", "B", "C", "D");
Optional<String> result1 = stringStream.findAny(); 
System.out.println(result1.get()); 
Optional<String> result2 = stringStream.findFirst();

As a result:

A
Exception in thread "main" java.lang.IllegalStateException: 
  stream has already been operated upon or closed

After the #findAny() method is invoked, the stringStream is closed, therefore, any further operation on the Stream will throw the IllegalStateException, and that’s what happened after invoking the #findFirst() method.

3. The Solution

Simply put, the solution consists of creating a new Stream each time we need one.

We can, of course, do that manually, but that’s where the Supplier functional interface becomes really handy:

Supplier<Stream<String>> streamSupplier 
  = () -> Stream.of("A", "B", "C", "D");
Optional<String> result1 = streamSupplier.get().findAny();
System.out.println(result1.get());
Optional<String> result2 = streamSupplier.get().findFirst();
System.out.println(result2.get());

As a result:

A
A

We’ve defined the streamSupplier object with the type Stream<String>, which is exactly the same type which the #get() method returns. The Supplier is based on a lambda expression that takes no input and returns a new Stream.

Invoking the functional method get() on the Supplier returns a freshly created Stream object, on which we can safely perform another Stream operation.

5. Conclusion

In this quick tutorial, we’ve seen how to perform terminal operations on a Stream multiple times, while avoiding the famous IllegalStateException that is thrown when the Stream is already closed or operated upon.

You can find the complete source code and all code snippets for this article over on GitHub.

Vavr Tutorial

$
0
0

Vavr is a functional library for Java 8+ that provides immutable data types and functional control structures.

Functional programming is not only a new set of tools to get accustomed with but also a new paradigm to understand.

>> Introduction to Vavr

Starting at the top – this is the high-level overview of the whole library and tools we can find there.

>> Guide to the Persistent Collections API

Vavr’s Collections API its one of its biggest advantages – collections are not only immutable but also persistent.

>> Guide to Try

Here, we dive deep into one of the Vavr’s monadic tools for exception handling – Try.

>> Guide to Either

Either is a tool that enables us to represent values that can be one of two different types. Either can be used for exception handling or simply for business logic that diverges in certain scenarios.

>> Introduction to Pattern Matching

Pattern Matching is a tool present in almost all functional programming languages. It’s a highly advanced form of a classical switch-case.

>> Introduction to Validation API

We can ease validating our objects by leveraging applicative functors and Validation API.

>> Handling Exceptions in Lambda Expressions

We can also use Vavr’s tools for dealing with an aching problem of checked exceptions in lambda expressions.

>> Property Testing

Property Testing is an approach that allows us to specify the high-level behavior of a program and not bother with creating individual test cases manually.

>> Spring Data Support of Vavr’s Tools

Additionally, Vavr’s tools are now supported by Spring Data.

Guide to the Diamond Operator in Java

$
0
0

1. Overview

In this article, we’ll look at the diamond operator in Java and how generics and the Collections API influenced its evolution.

2. Raw Types

Prior to Java 1.5, the Collections API supported only raw types – there was no way for type arguments to be parameterized when constructing a collection:

List cars = new ArrayList();
cars.add(new Object());
cars.add("car");
cars.add(new Integer(1));

This allowed any type to be added and led to potential casting exceptions at runtime.

3. Generics

In Java 1.5, Generics were introduced – which allowed us to parameterize the type arguments for classes, including those in the Collections API – when declaring and constructing objects:

List<String> cars = new ArrayList<String>();

At this point, we have to specify the parameterized type in the constructor, which can be somewhat unreadable:

Map<String, List<Map<String, Map<String, Integer>>>> cars 
 = new HashMap<String, List<Map<String, Map<String, Integer>>>>();

The reason for this approach is that raw types still exist for the sake of backward compatibility, so the compiler needs to differentiate between these raw types and generics:

List<String> generics = new ArrayList<String>();
List<String> raws = new ArrayList();

Even though the compiler still allows us to use raw types in the constructor, it will prompt us with a warning message:

ArrayList is a raw type. References to generic type ArrayList<E> should be parameterized

4. Diamond Operator

The diamond operator – introduced in Java 1.7 – adds type inference and reduces the verbosity in the assignments – when using generics:

List<String> cars = new ArrayList<>();

The Java 1.7 compiler’s type inference feature determines the most suitable constructor declaration that matches the invocation.

Consider the following interface and class hierarchy for working with vehicles and engines:

public interface Engine { }
public class Diesel implements Engine { }
public interface Vehicle<T extends Engine> { }
public class Car<T extends Engine> implements Vehicle<T> { }

Let’s create a new instance of a Car using the diamond operator:

Car<Diesel> myCar = new Car<>();

Internally, the compiler knows that Diesel implements the Engine interface and then is able to determine a suitable constructor by inferring the type.

5. Conclusion

Simply put, the diamond operator adds the type inference feature to the compiler and reduces the verbosity in the assignments introduced with generics.

Some examples of this tutorial can be found on the GitHub project, so feel free to download it and play with it.

Viewing all 4717 articles
Browse latest View live


<script src="https://jsc.adskeeper.com/r/s/rssing.com.1596347.js" async> </script>