Quantcast
Channel: Baeldung
Viewing all 4458 articles
Browse latest View live

Spring Boot: Customize the Jackson ObjectMapper

$
0
0

1. Overview

When using JSON format, Spring Boot will use an ObjectMapper instance to serialize responses and deserialize requests. In this tutorial, we'll take a look at the most common ways to configure the serialization and deserialization options.

To learn more about Jackson, be sure to check out our Jackson tutorial.

2. Default Configuration

By default, the Spring Boot configuration will:

  • Disable MapperFeature.DEFAULT_VIEW_INCLUSION
  • Disable DeserializationFeature.FAIL_ON_UNKNOWN_PROPERTIES
  • Disable SerializationFeature.WRITE_DATES_AS_TIMESTAMPS

Let's start with a quick example:

  • The client will send a GET request to our /coffee?name=Lavazza
  • The controller will return a new Coffee object
  • Spring will use ObjectMapper to serialize our POJO to JSON

We'll exemplify the customization options by using String and LocalDateTime objects:

public class Coffee {
    private String name;
    private String brand;
    private LocalDateTime date;
   //getters and setters
}

We'll also define a simple REST controller to demonstrate the serialization:

@GetMapping("/coffee")
public Coffee getCoffee(
        @RequestParam(required = false) String brand,
        @RequestParam(required = false) String name) {
    return new Coffee()
      .setBrand(brand)
      .setDate(FIXED_DATE)
      .setName(name);
}

By default, the response when calling GET http://lolcahost:8080/coffee?brand=Lavazza will be:

{
  "name": null,
  "brand": "Lavazza",
  "date": "2020-11-16T10:21:35.974"
}

We would like to exclude null values and to have a custom date format (dd-MM-yyyy HH:mm). The final response will be:

{
  "brand": "Lavazza",
  "date": "04-11-2020 10:34"
}

When using Spring Boot, we have the option to customize the default ObjectMapper or to override it. We'll cover both of these options in the next sections.

3. Customizing the Default ObjectMapper

In this section, we'll see how to customize the default ObjectMapper that Spring Boot uses.

3.1. Application Properties and Custom Jackson Module

The simplest way to configure the mapper is via application properties. The general structure of the configuration is:

spring.jackson.<category_name>.<feature_name>=true,false

As an example, if we want to disable SerializationFeature.WRITE_DATES_AS_TIMESTAMPS, we'll add:

spring.jackson.serialization.write-dates-as-timestamps=false

Besides the mentioned feature categories, we can also configure property inclusion:

spring.jackson.default-property-inclusion=always, non_null, non_absent, non_default, non_empty

Configuring the environment variables is the simplest approach. The downside of this approach is that we can't customize advanced options like having a custom date format for LocalDateTime. At this point, we'll obtain the result:

{
  "brand": "Lavazza",
  "date": "2020-11-16T10:35:34.593"
}

In order to achieve our goal, we'll register a new JavaTimeModule with our custom date format:

@Configuration
@PropertySource("classpath:coffee.properties")
public class CoffeeRegisterModuleConfig {
    @Bean
    public Module javaTimeModule() {
        JavaTimeModule module = new JavaTimeModule();
        module.addSerializer(LOCAL_DATETIME_SERIALIZER);
        return module;
    }
}

Also, the configuration properties file coffee.properties will contain:

spring.jackson.default-property-inclusion=non_null

Spring Boot will automatically register any bean of type com.fasterxml.jackson.databind.Module. The final result will be:

{
  "brand": "Lavazza",
  "date": "16-11-2020 10:43"
}

3.2. Jackson2ObjectMapperBuilderCustomizer

The purpose of this functional interface is to allow us to create configuration beans. They will be applied to the default ObjectMapper created via Jackson2ObjectMapperBuilder:

@Bean
public Jackson2ObjectMapperBuilderCustomizer jsonCustomizer() {
    return builder -> builder.serializationInclusion(JsonInclude.Include.NON_NULL)
      .serializers(LOCAL_DATETIME_SERIALIZER);
}

The configuration beans are applied in a specific order, which we can control using the @Order annotation. This elegant approach is suitable if we want to configure the ObjectMapper from different configurations or modules.

4. Overriding the Default Configuration

If we want to have full control over the configuration, there are several options that will disable the auto-configuration and allow only our custom configuration to be applied. Let's take a close look at these options.

4.1. ObjectMapper

The simplest way to override the default configuration is to define an ObjectMapper bean and to mark it as @Primary:

@Bean
@Primary
public ObjectMapper objectMapper() {
    JavaTimeModule module = new JavaTimeModule();
    module.addSerializer(LOCAL_DATETIME_SERIALIZER);
    return new ObjectMapper()
      .setSerializationInclusion(JsonInclude.Include.NON_NULL)
      .registerModule(module);
}

We should use this approach when we want to have full control over the serialization process and we don't want to allow external configuration.

4.2. Jackson2ObjectMapperBuilder

Another clean approach is to define a Jackson2ObjectMapperBuilder bean. Actually, Spring Boot is using this builder by default when building the ObjectMapper and will automatically pick up the defined one:

@Bean
public Jackson2ObjectMapperBuilder jackson2ObjectMapperBuilder() {
    return new Jackson2ObjectMapperBuilder().serializers(LOCAL_DATETIME_SERIALIZER)
      .serializationInclusion(JsonInclude.Include.NON_NULL);
}

It will configure two options by default:

  • Disable MapperFeature.DEFAULT_VIEW_INCLUSION
  • Disable DeserializationFeature.FAIL_ON_UNKNOWN_PROPERTIES

According to the Jackson2ObjectMapperBuilder documentation, it will also register some modules if they're present on the classpath:

  • jackson-datatype-jdk8: support for other Java 8 types like Optional
  • jackson-datatype-jsr310: support for Java 8 Date and Time API types
  • jackson-datatype-joda: support for Joda-Time types
  • jackson-module-kotlin: support for Kotlin classes and data classes

The advantage of this approach is that the Jackson2ObjectMapperBuilder offers a simple and intuitive way to build an ObjectMapper.

4.3. MappingJackson2HttpMessageConverter

We can just define a bean with type MappingJackson2HttpMessageConverter, and Spring Boot will automatically use it:

@Bean
public MappingJackson2HttpMessageConverter mappingJackson2HttpMessageConverter() {
    Jackson2ObjectMapperBuilder builder = new Jackson2ObjectMapperBuilder().serializers(LOCAL_DATETIME_SERIALIZER)
      .serializationInclusion(JsonInclude.Include.NON_NULL);
    return new MappingJackson2HttpMessageConverter(builder.build());
}

Be sure to check out our Spring Http Message Converters article to learn more.

5. Testing the Configuration

To test our configuration, we'll use TestRestTemplate and serialize the objects as String. In this way, we can validate that our Coffee object is serialized without null values and with the custom date format:

@Test
public void whenGetCoffee_thenSerializedWithDateAndNonNull() {
    String formattedDate = DateTimeFormatter.ofPattern(CoffeeConstants.dateTimeFormat).format(FIXED_DATE);
    String brand = "Lavazza";
    String url = "/coffee?brand=" + brand;
    
    String response = restTemplate.getForObject(url, String.class);
    
    assertThat(response).isEqualTo("{\"brand\":\"" + brand + "\",\"date\":\"" + formattedDate + "\"}");
}

6. Conclusion

In this tutorial, we took a look at several methods to configure the JSON serialization options when using Spring Boot.

We saw two different approaches: configuring the default options or overriding the default configuration.

As always, the full source code of the article is available over on GitHub.

The post Spring Boot: Customize the Jackson ObjectMapper first appeared on Baeldung.


Collections.synchronizedMap vs. ConcurrentHashMap

$
0
0

1. Overview

In this tutorial, we'll discuss the differences between Collections.synchronizedMap() and ConcurrentHashMap.

Additionally, we'll look at the performance outputs of the read and write operations for each.

2. The Differences

Collections.synchronizedMap() and ConcurrentHashMap both provide thread-safe operations on collections of data.

The Collections utility class provides polymorphic algorithms that operate on collections and return wrapped collections. Its synchronizedMap() method provides thread-safe functionality.

As the name implies, synchronizedMap() returns a synchronized Map backed by the Map that we provide in the parameter. To provide thread-safety, synchronizedMap() allows all accesses to the backing Map via the returned Map.

ConcurrentHashMap was introduced in JDK 1.5 as an enhancement of HashMap that supports high concurrency for retrievals as well as updates. HashMap isn't thread-safe, so it might lead to incorrect results during thread contention.

The ConcurrentHashMap class is thread-safe. Therefore, multiple threads can operate on a single object with no complications.

In ConcurrentHashMap, read operations are non-blocking, whereas write operations take a lock on a particular segment or bucket. The default bucket or concurrency level is 16, which means 16 threads can write at any instant after taking a lock on a segment or bucket.

2.1. ConcurrentModificationException

For objects like HashMap, performing concurrent operations is not allowed. Therefore, if we try to update a HashMap while iterating over it, we will receive a ConcurrentModificationException. This will also occur when using synchronizedMap():

@Test(expected = ConcurrentModificationException.class)
public void whenRemoveAndAddOnHashMap_thenConcurrentModificationError() {
    Map<Integer, String> map = new HashMap<>();
    map.put(1, "baeldung");
    map.put(2, "HashMap");
    Map<Integer, String> synchronizedMap = Collections.synchronizedMap(map);
    Iterator<Entry<Integer, String>> iterator = synchronizedMap.entrySet().iterator();
    while (iterator.hasNext()) {
        synchronizedMap.put(3, "Modification");
        iterator.next();
    }
}

However, this is not the case with ConcurrentHashMap:

Map<Integer, String> map = new ConcurrentHashMap<>();
map.put(1, "baeldung");
map.put(2, "HashMap");
 
Iterator<Entry<Integer, String>> iterator = map.entrySet().iterator();
while (iterator.hasNext()) {
    synchronizedMap.put(3, "Modification");
    iterator.next()
}
 
Assert.assertEquals(3, map.size());

2.2. null Support

Collections.synchronizedMap() and ConcurrentHashMap handle null keys and values differently.

ConcurrentHashMap doesn't allow null in keys or values:

@Test(expected = NullPointerException.class)
public void allowNullKey_In_ConcurrentHasMap() {
    Map<String, Integer> map = new ConcurrentHashMap<>();
    map.put(null, 1);
}

However, when using Collections.synchronizedMap(), null support depends on the input Map. We can have one null as a key and any number of null values when Collections.synchronizedMap() is backed by HashMap or LinkedHashMap, whereas if we're using TreeMap, we can have null values but not null keys.

Let's assert that we can use a null key for Collections.synchronizedMap() backed by a HashMap:

Map<String, Integer> map = Collections
  .synchronizedMap(new HashMap<String, Integer>());
map.put(null, 1);
Assert.assertTrue(map.get(null).equals(1));

Similarly, we can validate null support in values for both Collections.synchronizedMap() and ConcurrentHashMap.

3. Performance Comparison

Let's compare the performances of ConcurrentHashMap versus Collections.synchronizedMap(). In this case, we're using the open-source framework Java Microbenchmark Harness (JMH) to compare the performances of the methods in nanoseconds.

We ran the comparison for random read and write operations on these maps. Let's take a quick look at our JMH benchmark code:

@Benchmark
public void randomReadAndWriteSynchronizedMap() {
    Map<String, Integer> map = Collections.synchronizedMap(new HashMap<String, Integer>());
    performReadAndWriteTest(map);
}
@Benchmark
public void randomReadAndWriteConcurrentHashMap() {
    Map<String, Integer> map = new ConcurrentHashMap<>();
    performReadAndWriteTest(map);
}
private void performReadAndWriteTest(final Map<String, Integer> map) {
    for (int i = 0; i < TEST_NO_ITEMS; i++) {
        Integer randNumber = (int) Math.ceil(Math.random() * TEST_NO_ITEMS);
        map.get(String.valueOf(randNumber));
        map.put(String.valueOf(randNumber), randNumber);
    }
}

We ran our performance benchmarks using 5 iterations with 10 threads for 1,000 items. Let's see the benchmark results:

Benchmark                                                     Mode  Cnt        Score        Error  Units
MapPerformanceComparison.randomReadAndWriteConcurrentHashMap  avgt  100  3061555.822 ±  84058.268  ns/op
MapPerformanceComparison.randomReadAndWriteSynchronizedMap    avgt  100  3234465.857 ±  60884.889  ns/op
MapPerformanceComparison.randomReadConcurrentHashMap          avgt  100  2728614.243 ± 148477.676  ns/op
MapPerformanceComparison.randomReadSynchronizedMap            avgt  100  3471147.160 ± 174361.431  ns/op
MapPerformanceComparison.randomWriteConcurrentHashMap         avgt  100  3081447.009 ±  69533.465  ns/op
MapPerformanceComparison.randomWriteSynchronizedMap           avgt  100  3385768.422 ± 141412.744  ns/op

The above results show that ConcurrentHashMap performs better than Collections.synchronizedMap().

4. When to Use

We should favor Collections.synchronizedMap() when data consistency is of utmost importance, and we should choose ConcurrentHashMap for performance-critical applications where there are far more write operations than there are read operations.

5. Conclusion

In this article, we've demonstrated the differences between ConcurrentHashMap and Collections.synchronizedMap(). We've also shown the performances of both of them using a simple JMH benchmark.

As always, the code samples are available over on GitHub.

The post Collections.synchronizedMap vs. ConcurrentHashMap first appeared on Baeldung.


Java Weekly, Issue 365

$
0
0

1. Spring and Java

>> Troubleshooting Native Memory Leaks in Java Applications [blogs.oracle.com]

Native out of memory error – different approaches to identify the native memory leaks and diagnosing them in JVM.

>> Helidon 2.2.0 Released [medium.com]

Integration with Project Loom, GraphQL, Micronaut, and extended GraalVM support, all in a new Helidon version.

>> Implementing a Circuit Breaker with Resilience4j [reflectoring.io]

Resilient integration with remote services – a practical guide on how to use Circuit Breakers for more reliable remote calls. 

Also worth reading:

Webinars and presentations:

Time to upgrade:

2. Technical

>> Infinite Precision [alidg.me]

All benchmarks are wrong, but some are useful  how measurement uncertainties might affect our benchmarks!

Also worth reading: 

3. Musings

>> From Schooling to Space: Eight Predictions on How Technology Will Continue to Change Our Lives in the Coming Year [allthingsdistributed.com]

The future is here: ubiquitous could, internet of machine learning, remote learning, quantum computing, and many more transformations!

Also worth reading:

4. Comics

And my favorite Dilberts of the week:

>> Wally Does Three Jobs [dilbert.com]

>> Ethics Class [dilbert.com]

>> Bad Attitude [dilbert.com]

5. Pick of the Week

And, an interesting read about pricing and company financials:

>> Kung Fu [asmartbear.com]

The post Java Weekly, Issue 365 first appeared on Baeldung.


Integration Tests With Spring Cloud Netflix and Feign

$
0
0

1. Overview

In this article, we're going to explore the integration testing of a Feign Client.

We'll create a basic Open Feign Client for which we'll write a simple integration test with the help of WireMock.

After that, we'll add a Ribbon configuration to our client and also build an integration test for it. And finally, we'll configure a Eureka test container and test this setup to make sure our entire configuration works as expected.

2. The Feign Client

To set up our Feign Client, we should first add the Spring Cloud OpenFeign Maven dependency:

<dependency>
    <groupId>org.springframework.cloud</groupId>
    <artifactId>spring-cloud-starter-openfeign</artifactId>
</dependency>

After that, let's create a Book class for our model:

public class Book {
    private String title;
    private String author;
}

And finally, let's create our Feign Client interface:

@FeignClient(value="simple-books-client", url="${book.service.url}")
public interface BooksClient {
    @RequestMapping("/books")
    List<Book> getBooks();
}

Now, we have a Feign Client that retrieves a list of Books from a REST service. Now, let's move forward and write some integration tests.

3. WireMock

3.1. Setting up the WireMock Server

If we want to test our BooksClient, we need a mock service that provides the /books endpoint. Our client will make calls against this mock service. For this purpose, we'll use WireMock.

So, let's add the WireMock Maven dependency:

<dependency>
    <groupId>com.github.tomakehurst</groupId>
    <artifactId>wiremock</artifactId>
    <scope>test</scope>
</dependency>

and configure the mock server:

@TestConfiguration
public class WireMockConfig {
    @Autowired
    private WireMockServer wireMockServer;
    @Bean(initMethod = "start", destroyMethod = "stop")
    public WireMockServer mockBooksService() {
        return new WireMockServer(9561);
    }
}

We now have a running mock server accepting connections on port 9651.

3.2. Setting up the Mock

Let's add the property book.service.url to our application-test.yml pointing to the WireMockServer port:

book:
  service:
    url: http://localhost:9561

And let's also prepare a mock response get-books-response.json for the /books endpoint:

[
  {
    "title": "Dune",
    "author": "Frank Herbert"
  },
  {
    "title": "Foundation",
    "author": "Isaac Asimov"
  }
]

Let's now configure the mock response for a GET request on the /books endpoint:

public class BookMocks {
    public static void setupMockBooksResponse(WireMockServer mockService) throws IOException {
        mockService.stubFor(WireMock.get(WireMock.urlEqualTo("/books"))
          .willReturn(WireMock.aResponse()
            .withStatus(HttpStatus.OK.value())
            .withHeader("Content-Type", MediaType.APPLICATION_JSON_VALUE)
            .withBody(
              copyToString(
                BookMocks.class.getClassLoader().getResourceAsStream("payload/get-books-response.json"),
                defaultCharset()))));
    }
}

At this point, all the required configuration is in place. Let's go ahead and write our first test.

4. Our First Integration Test

Let's create an integration test BooksClientIntegrationTest:

@SpringBootTest
@ActiveProfiles("test")
@EnableConfigurationProperties
@ExtendWith(SpringExtension.class)
@ContextConfiguration(classes = { WireMockConfig.class })
class BooksClientIntegrationTest {
    @Autowired
    private WireMockServer mockBooksService;
    @Autowired
    private BooksClient booksClient;
    @BeforeEach
    void setUp() throws IOException {
        BookMocks.setupMockBooksResponse(mockBooksService);
    }
    // ...
}

At this point, we have a SpringBootTest configured with a WireMockServer ready to return a predefined list of Books when the /books endpoint is invoked by the BooksClient.

And finally, let's add our test methods:

@Test
public void whenGetBooks_thenBooksShouldBeReturned() {
    assertFalse(booksClient.getBooks().isEmpty());
}
@Test
public void whenGetBooks_thenTheCorrectBooksShouldBeReturned() {
    assertTrue(booksClient.getBooks()
      .containsAll(asList(
        new Book("Dune", "Frank Herbert"),
        new Book("Foundation", "Isaac Asimov"))));
}

5. Integrating with Ribbon

Now let's improve our client by adding the load-balancing capabilities provided by Ribbon.

All we need to do in the client interface is to remove the hard-coded service URL and instead refer to the service by the service name book-service:

@FeignClient("books-service")
public interface BooksClient {
...

Next, add the Netflix Ribbon Maven dependency:

<dependency>
    <groupId>org.springframework.cloud</groupId>
    <artifactId>spring-cloud-starter-netflix-ribbon</artifactId>
</dependency>

And finally, in the application-test.yml file, we should now remove the book.service.url and instead define the Ribbon listOfServers:

books-service:
  ribbon:
    listOfServers: http://localhost:9561

Let's now run the BooksClientIntegrationTest again. It should pass, confirming the new setup works as expected.

5.1. Dynamic Port Configuration

If we don't want to hard-code the server's port, we can configure WireMock to use a dynamic port at startup.

For this, let's create another test configuration, RibbonTestConfig:

@TestConfiguration
@ActiveProfiles("ribbon-test")
public class RibbonTestConfig {
    @Autowired
    private WireMockServer mockBooksService;
    @Autowired
    private WireMockServer secondMockBooksService;
    @Bean(initMethod = "start", destroyMethod = "stop")
    public WireMockServer mockBooksService() {
        return new WireMockServer(options().dynamicPort());
    }
    @Bean(name="secondMockBooksService", initMethod = "start", destroyMethod = "stop")
    public WireMockServer secondBooksMockService() {
        return new WireMockServer(options().dynamicPort());
    }
    @Bean
    public ServerList ribbonServerList() {
        return new StaticServerList<>(
          new Server("localhost", mockBooksService.port()),
          new Server("localhost", secondMockBooksService.port()));
    }
}

This configuration sets up two WireMock servers, each running on a different port dynamically assigned at runtime. Moreover, it also configures the Ribbon server list with the two mock servers.

5.2. Load Balancing Testing

Now that we have our Ribbon load balancer configured, let's make sure our BooksClient correctly alternates between the two mock servers:

@SpringBootTest
@ActiveProfiles("ribbon-test")
@EnableConfigurationProperties
@ExtendWith(SpringExtension.class)
@ContextConfiguration(classes = { RibbonTestConfig.class })
class LoadBalancerBooksClientIntegrationTest {
    @Autowired
    private WireMockServer mockBooksService;
    @Autowired
    private WireMockServer secondMockBooksService;
    @Autowired
    private BooksClient booksClient;
    @BeforeEach
    void setUp() throws IOException {
        setupMockBooksResponse(mockBooksService);
        setupMockBooksResponse(secondMockBooksService);
    }
    @Test
    void whenGetBooks_thenRequestsAreLoadBalanced() {
        for (int k = 0; k < 10; k++) {
            booksClient.getBooks();
        }
        mockBooksService.verify(
          moreThan(0), getRequestedFor(WireMock.urlEqualTo("/books")));
        secondMockBooksService.verify(
          moreThan(0), getRequestedFor(WireMock.urlEqualTo("/books")));
    }
    @Test
    public void whenGetBooks_thenTheCorrectBooksShouldBeReturned() {
        assertTrue(booksClient.getBooks()
          .containsAll(asList(
            new Book("Dune", "Frank Herbert"),
            new Book("Foundation", "Isaac Asimov"))));
    }
}

6. Eureka Integration

We have seen, so far, how to test a client that uses Ribbon for load balancing. But what if our setup uses a service discovery system like Eureka. We should write an integration test that makes sure that our BooksClient works as expected in such a context also.

For this purpose, we'll run a Eureka server as a test container. Then we startup and register a mock book-service with our Eureka container. And finally, once this installation is up, we can run our test against it.

Before moving further, let's add the Testcontainers and Netflix Eureka Client Maven dependencies:

<dependency>
    <groupId>org.springframework.cloud</groupId>
    <artifactId>spring-cloud-starter-netflix-eureka-client</artifactId>
</dependency>
<dependency>
    <groupId>org.testcontainers</groupId>
    <artifactId>testcontainers</artifactId>
    <scope>test</scope>
</dependency>

6.1. TestContainer Setup

Let's create a TestContainer configuration that will spin up our Eureka server:

public class EurekaContainerConfig {
    public static class Initializer implements ApplicationContextInitializer {
        public static GenericContainer eurekaServer = 
          new GenericContainer("springcloud/eureka").withExposedPorts(8761);
        @Override
        public void initialize(@NotNull ConfigurableApplicationContext configurableApplicationContext) {
            Startables.deepStart(Stream.of(eurekaServer)).join();
            TestPropertyValues
              .of("eureka.client.serviceUrl.defaultZone=http://localhost:" 
                + eurekaServer.getFirstMappedPort().toString() 
                + "/eureka")
              .applyTo(configurableApplicationContext);
        }
    }
}

As we can see, the initializer above starts the container. Then it exposes port 8761, on which the Eureka server is listening.

And finally, after the Eureka service has started, we need to update the eureka.client.serviceUrl.defaultZone property. This defines the address of the Eureka server used for service discovery.

6.2. Register Mock Server

Now that our Eureka server is up and running we need to register a mock books-service. We do this by simply creating a RestController:

@Configuration
@RestController
@ActiveProfiles("eureka-test")
public class MockBookServiceConfig {
    @RequestMapping("/books")
    public List getBooks() {
        return Collections.singletonList(new Book("Hitchhiker's Guide to the Galaxy", "Douglas Adams"));
    }
}

All we have to do now, in order to register this controller, is to make sure the spring.application.name property in our application-eureka-test.yml is books-service, the same as the service name used in the BooksClient interface.

Note: Now that the netflix-eureka-client library is in our list of dependencies, Eureka will be used by default for service discovery. So, if we want our previous tests, that don't use Eureka, to keep passing, we'll need to manually set eureka.client.enabled to false. In that way, even if the library is on the path, the BooksClient will not try to use Eureka for locating the service, but instead use the Ribbon configuration.

6.3. Integration Test

Once again, we have all the needed configuration pieces, so let's put them all together in a test:

@ActiveProfiles("eureka-test")
@EnableConfigurationProperties
@ExtendWith(SpringExtension.class)
@SpringBootTest(classes = Application.class, webEnvironment =  SpringBootTest.WebEnvironment.RANDOM_PORT)
@ContextConfiguration(classes = { MockBookServiceConfig.class }, 
  initializers = { EurekaContainerConfig.Initializer.class })
class ServiceDiscoveryBooksClientIntegrationTest {
    @Autowired
    private BooksClient booksClient;
    @Lazy
    @Autowired
    private EurekaClient eurekaClient;
    @BeforeEach
    void setUp() {
        await().atMost(60, SECONDS).until(() -> eurekaClient.getApplications().size() > 0);
    }
    @Test
    public void whenGetBooks_thenTheCorrectBooksAreReturned() {
        List books = booksClient.getBooks();
        assertEquals(1, books.size());
        assertEquals(
          new Book("Hitchhiker's guide to the galaxy", "Douglas Adams"), 
          books.stream().findFirst().get());
    }
}

There are a few things happening in this test. Let's look at them one by one.

Firstly, the context initializer inside EurekaContainerConfig starts the Eureka service.

Then, the SpringBootTest starts the books-service application that exposes the controller defined in MockBookServiceConfig.

Because the startup of the Eureka container and the web application can take a few seconds, we need to wait until the books-service gets registered. This happens in the setUp of the test.

And finally, the tests method verifies that the BooksClient indeed works correctly in combination with the Eureka configuration.

7. Conclusion

In this article, we've explored the different ways we can write integration tests for a Spring Cloud Feign Client. We started with a basic client which we tested with the help of WireMock. After that, we moved on to adding load balancing with Ribbon. We wrote an integration test and made sure our Feign Client works correctly with the client-side load balancing provided by Ribbon. And finally, we added Eureka service discovery to the mix. And again, we made sure our client still works as expected.

As always, the complete code is available over on GitHub.

The post Integration Tests With Spring Cloud Netflix and Feign first appeared on Baeldung.


Character#isAlphabetic vs. Character#isLetter

$
0
0

1. Overview

In this tutorial, we'll start by briefly going through some general category types for every defined Unicode code point or character range to understand the difference between letters and alphabetic characters.

Further, we'll look at the isAlphabetic() and isLetter() methods of the Character class in Java. Finally, we'll cover the similarities and distinctions between these methods.

2. General Category Types of Unicode Characters

The Unicode Character Set (UCS) contains 1,114,112 code points: U+0000—U+10FFFF. Characters and code point ranges are grouped by categories.

The Character class provides two overloaded versions of the getType() method that returns a value indicating the character's general category type.

Let's look at the signature of the first method:

public static int getType(char ch)

This method cannot handle supplementary characters. To handle all Unicode characters, including supplementary characters, Java's Character class provides an overloaded getType method which has the following signature:

public static int getType(int codePoint)

Next, let's start looking at some general category types.

2.1. UPPERCASE_LETTER

The UPPERCASE_LETTER general category type represents upper-case letters.

When we call the Character#getType method on an upper-case letter, for example, ‘U‘, the method returns the value 1, which is equivalent to the UPPERCASE_LETTER enum value:

assertEquals(Character.UPPERCASE_LETTER, Character.getType('U'));

2.2. LOWERCASE_LETTER

The LOWERCASE_LETTER general category type is associated with lower-case letters.

When calling the Character#getType method on a lower-case letter, for instance, ‘u‘, the method will return the value 2, which is the same as the enum value of LOWERCASE_LETTER:

assertEquals(Character.LOWERCASE_LETTER, Character.getType('u'));

2.3. TITLECASE_LETTER

Next, the TITLECASE_LETTER general category represents title case characters.

Some characters look like pairs of Latin letters. When we call the Character#getType method on such Unicode characters, this will return the value 3, which is equal to the TITLECASE_LETTER enum value:

assertEquals(Character.TITLECASE_LETTER, Character.getType('\u01f2'));

Here, the Unicode character ‘\u01f2‘ represents the Latin capital letter ‘D‘ followed by a small ‘Z‘ with a caron.

2.4. MODIFIER_LETTER

A modifier letter, in the Unicode Standard, is “a letter or symbol typically written next to another letter that it modifies in some way”.

The MODIFIER_LETTER general category type represents such modifier letters.

For example, the modifier letter small H, ‘ʰ‘, when passed to Character#getType method returns the value of 4, which is the same as the enum value of MODIFIER_LETTER:

assertEquals(Character.MODIFIER_LETTER, Character.getType('\u02b0'));

The Unicode character ‘\u020b‘ represents the modifier letter small H.

2.5. OTHER_LETTER

The OTHER_LETTER general category type represents an ideograph or a letter in a unicase alphabet. An ideograph is a graphic symbol representing an idea or a concept, independent of any particular language.

A unicase alphabet has just one case for its letters. For example, Hebrew is a unicase writing system.

Let's look at an example of a Hebrew letter Alef, ‘א‘, when we pass it to the Character#getType method, it returns the value of 5, which is equal to the enum value of OTHER_LETTER:

assertEquals(Character.OTHER_LETTER, Character.getType('\u05d0'));

The Unicode character ‘\u05d0‘ represents the Hebrew letter Alef.

2.6. LETTER_NUMBER

Finally, the LETTER_NUMBER category is associated with numerals composed of letters or letterlike symbols.

For example, the Roman numerals come under LETTER_NUMBER general category. When we call the Character#getType method with Roman Numeral Five, ‘Ⅴ', it returns the value 10, which is equal to the enum LETTER_NUMBER value:

assertEquals(Character.LETTER_NUMBER, Character.getType('\u2164'));

The Unicode character ‘\u2164‘ represents the Roman Numeral Five.

Next, let's look at the Character#isAlphabetic method.

3. Character#isAlphabetic

First, let's look at the signature of the isAlphabetic method:

public static boolean isAlphabetic(int codePoint)

This takes the Unicode code point as the input parameter and returns true if the specified Unicode code point is alphabetic and false otherwise.

A character is alphabetic if its general category type is any of the following:

  • UPPERCASE_LETTER
  • LOWERCASE_LETTER
  • TITLECASE_LETTER
  • MODIFIER_LETTER
  • OTHER_LETTER
  • LETTER_NUMBER

Additionally, a character is alphabetic if it has contributory property Other_Alphabetic as defined by the Unicode Standard.

Let's look at a few examples of characters that are alphabets:

assertTrue(Character.isAlphabetic('A'));
assertTrue(Character.isAlphabetic('\u01f2'));

In the above examples, we pass the UPPERCASE_LETTER ‘A' and TITLECASE_LETTER ‘\u01f2' which represents the Latin capital letter ‘D‘ followed by a small ‘Z‘ with a caron to the isAlphabetic method and it returns true.

4. Character#isLetter

Java's Character class provides the isLetter() method to determine if a specified character is a letter. Let's look at the method signature:

public static boolean isLetter(char ch)

It takes a character as an input parameter and returns true if the specified character is a letter and false otherwise.

A character is considered to be a letter if its general category type, provided by Character#getType method, is any of the following:

  • UPPERCASE_LETTER
  • LOWERCASE_LETTER
  • TITLECASE_LETTER
  • MODIFIER_LETTER
  • OTHER_LETTER

However, this method cannot handle supplementary characters. To handle all Unicode characters, including supplementary characters, Java's Character class provides an overloaded version of the isLetter() method:

public static boolean isLetter(int codePoint)

This method can handle all the Unicode characters as it takes a Unicode code point as the input parameter. Furthermore, it returns true if the specified Unicode code point is a letter as we defined earlier.

Let's look at a few examples of characters that are letters:

assertTrue(Character.isAlphabetic('a'));
assertTrue(Character.isAlphabetic('\u02b0'));

In the above examples, we input the LOWERCASE_LETTER ‘a' and MODIFIER_LETTER ‘\u02b0' which represents the modifier letter small H to the isLetter method and it returns true.

5. Compare and Contrast

Finally, we can see that all letters are alphabetic characters, but not all alphabetic characters are letters.

In other words, the isAlphabetic method returns true if a character is a letter or has the general category LETTER_NUMBER. Besides, it also returns true if the character has the Other_Alphabetic property defined by the Unicode Standard.

First, let's look at an example of a character which is a letter as well as an alphabet —  character ‘a‘:

assertTrue(Character.isLetter('a')); 
assertTrue(Character.isAlphabetic('a'));

The character ‘a‘, when passed to both isLetter() as well as isAlphabetic() methods as an input parameter, returns true.

Next, let's look at an example of a character that is an alphabet but not a letter. In this case, we'll use the Unicode character ‘\u2164‘, which represents the Roman Numeral Five:

assertFalse(Character.isLetter('\u2164'));
assertTrue(Character.isAlphabetic('\u2164'));

The Unicode character ‘\u2164‘ when passed to the isLetter() method returns false. On the other hand, when passed to the isAlphabetic() method, it returns true.

Certainly, for the English language, the distinction makes no difference. Since all the letters of the English language come under the category of alphabets. On the other hand, some characters in other languages might have a distinction.

6. Conclusion

In this article, we learned about the different general categories of the Unicode code point. Moreover, we covered the similarities and differences between the isAlphabetic() and isLetter() methods.

As always, all these code samples are available over on GitHub.

The post Character#isAlphabetic vs. Character#isLetter first appeared on Baeldung.


Java Weekly, Issue 366

$
0
0

1. Spring and Java

>> Do Loom’s Claims Stack Up? Part 1: Millions of Threads? [webtide.com]

Gym membership and millions of loom virtual threads – evaluating the effect of GC and deep stacks on virtual threads!

>> Do Looms Claims Stack Up? Part 2: Thread Pools? [webtide.com]

Cheap threads causing expensive things: should we still use thread pools for better resource management?

>> What's New in MicroProfile 4.0 [infoq.com]

Configuration properties, more fault-tolerant, readiness probes, more metrics, and many more, all in a new MicroProfile version!

Also worth reading:

Webinars and presentations:

Time to upgrade:

2. Technical

>> Don't use Protobuf for Telemetry [richardstartin.github.io]

Protocol buffer, Java, and low-overhead serializations – why Protobuf isn't a great fit for tracers and telemetry!

Also worth reading:

3. Musings

>> Musings around a Dockerfile for Jekyll [blog.frankel.ch]

Static site generation on Docker – dockerizing Jekyll, image size reduction, and image squashing!

Also worth reading:

4. Comics

And my favorite Dilberts of the week:

>> Can't Tell When He Is Joking [dilbert.com]

>> Dogbert The Watcher [dilbert.com]

>> Important Context [dilbert.com]

5. Pick of the Week

>> Shields Down [randsinrepose.com]

The post Java Weekly, Issue 366 first appeared on Baeldung.
        

Difference Between spring-boot:repackage and Maven package

$
0
0

1. Overview

Apache Maven is a widely used project dependency management tool and project building tool.

Over the last few years, Spring Boot has become a quite popular framework to build applications. There is also the Spring Boot Maven Plugin providing Spring Boot support in Apache Maven.

We know when we want to package our application in a JAR or WAR artifact using Maven, we can use mvn package. However, the Spring Boot Maven Plugin ships with a repackage goal, and it's called in an mvn command as well.

Sometimes, the two mvn commands are confusing. In this tutorial, we'll discuss the difference between mvn package and spring-boot:repackage.

2. A Spring Boot Application Example

First of all, we'll create a straightforward Spring Boot application as an example:

@SpringBootApplication
public class DemoApplication {
    public static void main(String[] args) {
        SpringApplication.run(DemoApplication.class, args);
    }
}

To verify if our application is up and running, let's create a simple REST endpoint:

@RestController
public class DemoRestController {
    @GetMapping(value = "/welcome")
    public ResponseEntity welcomeEndpoint() {
        return ResponseEntity.ok("Welcome to Baeldung Spring Boot Demo!");
    }
}

3. Maven's package Goal

We only need the spring-boot-starter-web dependency to build our Spring Boot application:

<artifactId>spring-boot-artifacts-2</artifactId>
<packaging>jar</packaging>
...
<dependency>
    <groupId>org.springframework.boot</groupId>
    <artifactId>spring-boot-starter-web</artifactId>
</dependency>
...

Maven's package goal will take the compiled code and package it in its distributable format, which in this case is the JAR format:

$ mvn package
[INFO] Scanning for projects...
[INFO] ------< com.baeldung.spring-boot-modules:spring-boot-artifacts-2 >------
[INFO] Building spring-boot-artifacts-2 1.0.0-SNAPSHOT
[INFO] --------------------------------[ jar ]---------------------------------
 ... 
[INFO] --- maven-jar-plugin:2.4:jar (default-jar) @ spring-boot-artifacts-2 ---
[INFO] Building jar: /home/kent ... /target/spring-boot-artifacts-2.jar
[INFO] ------------------------------------------------------------------------
[INFO] BUILD SUCCESS
[INFO] ------------------------------------------------------------------------
 ...

After executing the mvn package command, we can find the built JAR file spring-boot-artifacts-2.jar under the target directory. Let's check the content of the created JAR file:

$ jar tf target/spring-boot-artifacts-2.jar
META-INF/
META-INF/MANIFEST.MF
com/
com/baeldung/
com/baeldung/demo/
application.yml
com/baeldung/demo/DemoApplication.class
com/baeldung/demo/DemoRestController.class
META-INF/maven/...

As we can see in the output above, the JAR file created by the mvn package command contains only the resources and compiled Java classes from our project's source.

We can use this JAR file as a dependency in another project. However, we cannot execute the JAR file using java -jar JAR_FILE even if it's a Spring Boot application. This is because the runtime dependencies are not bunded. For example, we don't have a servlet container to start the web context.

To start our Spring Boot application using the simple java -jar command, we need to build a fat JAR. The Spring Boot Maven Plugin can help us with that.

4. The Spring Boot Maven Plugin's repackage Goal

Now, let's figure out what spring-boot:repackage does.

4.1. Adding Spring Boot Maven Plugin

To execute the repackage goal, we need to add the Spring Boot Maven Plugin in our pom.xml:

<build>
    <finalName>${project.artifactId}</finalName>
    <plugins>
        <plugin>
            <groupId>org.springframework.boot</groupId>
            <artifactId>spring-boot-maven-plugin</artifactId>
        </plugin>
    </plugins>
</build>

4.2. Executing the spring-boot:repackage Goal

Now, let's clean the previously built JAR file and give spring-boot:repackage a try:

$ mvn clean spring-boot:repackage     
 ...
[INFO] --- spring-boot-maven-plugin:2.3.3.RELEASE:repackage (default-cli) @ spring-boot-artifacts-2 ---
[INFO] ------------------------------------------------------------------------
[INFO] BUILD FAILURE
[INFO] ------------------------------------------------------------------------
...
[ERROR] Failed to execute goal org.springframework.boot:spring-boot-maven-plugin:2.3.3.RELEASE:repackage (default-cli) 
on project spring-boot-artifacts-2: Execution default-cli of goal 
org.springframework.boot:spring-boot-maven-plugin:2.3.3.RELEASE:repackage failed: Source file must not be null -> [Help 1]
...

Oops, it doesn't work. This is because the spring-boot:repackage goal takes the existing JAR or WAR archive as the source and repackages all the project runtime dependencies inside the final artifact together with project classes. In this way, the repackaged artifact is executable using the command line java -jar JAR_FILE.jar.

Therefore, we need to first build the JAR file before executing the spring-boot:repackage goal:

$ mvn clean package spring-boot:repackage
 ...
[INFO] Building spring-boot-artifacts-2 1.0.0-SNAPSHOT
[INFO] --------------------------------[ jar ]---------------------------------
 ...
[INFO] --- maven-jar-plugin:2.4:jar (default-jar) @ spring-boot-artifacts-2 ---
[INFO] Building jar: /home/kent/.../target/spring-boot-artifacts-2.jar
[INFO] 
[INFO] --- spring-boot-maven-plugin:2.3.3.RELEASE:repackage (default-cli) @ spring-boot-artifacts-2 ---
[INFO] Replacing main artifact with repackaged archive
[INFO] ------------------------------------------------------------------------
[INFO] BUILD SUCCESS
 ...

4.3. The Content of the Repackaged JAR File

Now, if we check the target directory, we'll see the repackaged JAR file and the original JAR file:

$ ls -1 target/*jar*
target/spring-boot-artifacts-2.jar
target/spring-boot-artifacts-2.jar.original

Let's check the content of the repackaged JAR file:

$ jar tf target/spring-boot-artifacts-2.jar 
META-INF/
META-INF/MANIFEST.MF
 ...
org/springframework/boot/loader/JarLauncher.class
 ...
BOOT-INF/classes/com/baeldung/demo/
BOOT-INF/classes/application.yml
BOOT-INF/classes/com/baeldung/demo/DemoApplication.class
BOOT-INF/classes/com/baeldung/demo/DemoRestController.class
META-INF/maven/com.baeldung.spring-boot-modules/spring-boot-artifacts-2/pom.xml
META-INF/maven/com.baeldung.spring-boot-modules/spring-boot-artifacts-2/pom.properties
BOOT-INF/lib/
BOOT-INF/lib/spring-boot-starter-web-2.3.3.RELEASE.jar
...
BOOT-INF/lib/spring-boot-starter-tomcat-2.3.3.RELEASE.jar
BOOT-INF/lib/tomcat-embed-core-9.0.37.jar
BOOT-INF/lib/jakarta.el-3.0.3.jar
BOOT-INF/lib/tomcat-embed-websocket-9.0.37.jar
BOOT-INF/lib/spring-web-5.2.8.RELEASE.jar
...
BOOT-INF/lib/httpclient-4.5.12.jar
...

If we check the output above, it's much longer than the JAR file built by the mvn package command.

Here, in the repackaged JAR file, we have not only the compiled Java classes from our project but also all the runtime libraries that are needed to start our Spring Boot application. For example, an embedded tomcat library is packaged into the BOOT-INF/lib directory.

Next, let's start our application and check if it works:

$ java -jar target/spring-boot-artifacts-2.jar 
  .   ____          _            __ _ _
 /\\ / ___'_ __ _ _(_)_ __  __ _ \ \ \ \
( ( )\___ | '_ | '_| | '_ \/ _` | \ \ \ \
 \\/  ___)| |_)| | | | | || (_| |  ) ) ) )
  '  |____| .__|_| |_|_| |_\__, | / / / /
 =========|_|==============|___/=/_/_/_/
2020-12-22 23:36:32.704  INFO 115154 [main] com.baeldung.demo.DemoApplication      : Starting DemoApplication on YK-Arch with PID 11515...
...
2020-12-22 23:36:34.070  INFO 115154 [main] o.s.b.w.embedded.tomcat.TomcatWebServer: Tomcat started on port(s): 8080 (http) ...
2020-12-22 23:36:34.078  INFO 115154 [main] com.baeldung.demo.DemoApplication      : Started DemoApplication in 1.766 seconds ...

Our Spring Boot application is up and running. Now, let's verify it by calling our /welcome endpoint:

$ curl http://localhost:8080/welcome
Welcome to Baeldung Spring Boot Demo!

Great! We've got the expected response. Our application is running properly.

4.4. Executing spring-boot:repackage Goal During Maven's package Lifecycle

We can configure the Spring Boot Maven Plugin in our pom.xml to repackage the artifact during the package phase of the Maven lifecycle. In other words, when we execute mvn package, the spring-boot:repackage will be automatically executed.

The configuration is pretty straightforward. We just add the repackage goal to an execution element:

<build>
    <finalName>${project.artifactId}</finalName>
    <plugins>
        <plugin>
            <groupId>org.springframework.boot</groupId>
            <artifactId>spring-boot-maven-plugin</artifactId>
            <executions>
                <execution>
                    <goals>
                        <goal>repackage</goal>
                    </goals>
                </execution>
            </executions>
        </plugin>
    </plugins>
</build>

Now, let's run mvn clean package once again:

$ mvn clean package
 ...
[INFO] Building spring-boot-artifacts-2 1.0.0-SNAPSHOT
[INFO] --------------------------------[ jar ]---------------------------------
...
[INFO] --- spring-boot-maven-plugin:2.3.3.RELEASE:repackage (default) @ spring-boot-artifacts-2 ---
[INFO] Replacing main artifact with repackaged archive
[INFO] ------------------------------------------------------------------------
[INFO] BUILD SUCCESS
 ...

The output shows the repackage goal has been executed. If we check the file system, we'll find the repackaged JAR file is created:

$ ls -lh target/*jar*
-rw-r--r-- 1 kent kent  29M Dec 22 23:56 target/spring-boot-artifacts-2.jar
-rw-r--r-- 1 kent kent 3.6K Dec 22 23:56 target/spring-boot-artifacts-2.jar.original

5. Conclusion

In this article, we've discussed the difference between mvn package and spring-boot:repackage.

Also, we've learned how to execute spring-boot:repackage during the package phase of the Maven lifecycle.

As always, the code in this write-up is all available over on GitHub.

The post Difference Between spring-boot:repackage and Maven package first appeared on Baeldung.
        

New Features in Java 11

$
0
0

1. Overview

Oracle released Java 11 in September 2018, only 6 months after its predecessor, version 10.

Java 11 is the first long-term support (LTS) release after Java 8. Oracle also stopped supporting Java 8 in January 2019. As a consequence, a lot of us will upgrade to Java 11.

In this tutorial, we'll take a look at our options for choosing a Java 11 JDK. Then, we'll explore new features, removed features, and performance enhancements introduced in Java 11.

2. Oracle vs. Open JDK

Java 10 was the last free Oracle JDK release that we could use commercially without a license. Starting with Java 11, there's no free long-term support (LTS) from Oracle.

Thankfully, Oracle continues to provide Open JDK releases, which we can download and use without charge.

Besides Oracle, there are other Open JDK providers that we may consider.

3. Developer Features

Let's take a look at changes to the common APIs, as well as a few other features useful for developers.

3.1. New String Methods

Java 11 adds a few new methods to the String class: isBlank, lines, strip, stripLeading, stripTrailing, and repeat.

Let's check how we can make use of the new methods to extract non-blank, stripped lines from a multiline string:

String multilineString = "Baeldung helps \n \n developers \n explore Java.";
List<String> lines = multilineString.lines()
  .filter(line -> !line.isBlank())
  .map(String::strip)
  .collect(Collectors.toList());
assertThat(lines).containsExactly("Baeldung helps", "developers", "explore Java.");

These methods can reduce the amount of boilerplate involved in manipulating string objects, and save us having to import libraries.

In the case of the strip methods, they provide similar functionality to the more familiar trim method. However, with finer control and Unicode support.

3.2. New File Methods

It's now easier to read and write Strings from files.

We can use the new readString and writeString static methods from the Files class:

Path filePath = Files.writeString(Files.createTempFile(tempDir, "demo", ".txt"), "Sample text");
String fileContent = Files.readString(filePath);
assertThat(fileContent).isEqualTo("Sample text");

3.3. Collection to an Array

The java.util.Collection interface contains a new default toArray method which take an IntFunction argument.

This makes it easier to create an array of the right type from a collection:

List sampleList = Arrays.asList("Java", "Kotlin");
String[] sampleArray = sampleList.toArray(String[]::new);
assertThat(sampleArray).containsExactly("Java", "Kotlin");

3.4. The Not Predicate Method

A static not method has been added to the Predicate interface. We can use it to negate an existing predicate, much like the negate method:

List<String> sampleList = Arrays.asList("Java", "\n \n", "Kotlin", " ");
List withoutBlanks = sampleList.stream()
  .filter(Predicate.not(String::isBlank))
  .collect(Collectors.toList());
assertThat(withoutBlanks).containsExactly("Java", "Kotlin");

While not(isBlank) reads more naturally than isBlank.negate(), the big advantage is that we can also use not with method references, like not(String:isBlank).

3.5. Local-Variable Syntax for Lambda

Support for using the local variable syntax (var keyword) in lambda parameters was added in Java 11.

We can make use of this feature to apply modifiers to our local variables, like defining a type annotation:

List<String> sampleList = Arrays.asList("Java", "Kotlin");
String resultString = sampleList.stream()
  .map((@Nonnull var x) -> x.toUpperCase())
  .collect(Collectors.joining(", "));
assertThat(resultString).isEqualTo("JAVA, KOTLIN");

3.6. HTTP Client

The new HTTP client from the java.net.http package was introduced in Java 9. It has now become a standard feature in Java 11.

The new HTTP API improves overall performance and provides support for both HTTP/1.1 and HTTP/2:

HttpClient httpClient = HttpClient.newBuilder()
  .version(HttpClient.Version.HTTP_2)
  .connectTimeout(Duration.ofSeconds(20))
  .build();
HttpRequest httpRequest = HttpRequest.newBuilder()
  .GET()
  .uri(URI.create("http://localhost:" + port))
  .build();
HttpResponse httpResponse = httpClient.send(httpRequest, HttpResponse.BodyHandlers.ofString());
assertThat(httpResponse.body()).isEqualTo("Hello from the server!");

3.7. Nest Based Access Control

Java 11 introduces the notion of nestmates and the associated access rules within the JVM.

A nest of classes in Java implies both the outer/main class and all its nested classes:

assertThat(MainClass.class.isNestmateOf(MainClass.NestedClass.class)).isTrue();

Nested classes are linked to the NestMembers attribute, while the outer class is linked to the NestHost attribute:

assertThat(MainClass.NestedClass.class.getNestHost()).isEqualTo(MainClass.class);

JVM access rules allow access to private members between nestmates. However, in previous Java versions, the reflection API denied the same access.

Java 11 fixes this issue and provides means to query the new class file attributes using the reflection API:

Set<String> nestedMembers = Arrays.stream(MainClass.NestedClass.class.getNestMembers())
  .map(Class::getName)
  .collect(Collectors.toSet());
assertThat(nestedMembers).contains(MainClass.class.getName(), MainClass.NestedClass.class.getName());

3.8. Running Java Files

A major change in this version is that we don't need to compile the Java source files with javac explicitly anymore:

$ javac HelloWorld.java
$ java HelloWorld 
Hello Java 8!

Instead, we can directly run the file using the java command:

$ java HelloWorld.java
Hello Java 11!

4. Performance Enhancements

Let's now take a look at a couple of new features whose main purpose is improving performance.

4.1. Dynamic Class-File Constants

Java class-file format is extended to support a new constant-pool form, named CONSTANT_Dynamic.

Loading the new constant-pool will delegate creation to a bootstrap method, just as linking an invokedynamic call site delegates linkage to a bootstrap method.

This feature enhances performances and targets language designers and compiler implementors.

4.2. Improved Aarch64 Intrinsics

Java 11 optimizes the existing string and array intrinsics on ARM64 or AArch64 processors. Also, new intrinsics are implemented for sin, cos, and log methods of java.lang.Math.

We use an intrinsic function like any other. However, the intrinsic function gets handled in a special way by the compiler. It leverages CPU architecture-specific assembly code to boost performance.

4.3. A No-Op Garbage Collector

A new garbage collector called Epsilon is available for use in Java 11 as an experimental feature.

It's called a No-Op (no operations) because it allocates memory but does not actually collect any garbage. Thus, Epsilon is applicable for simulating out of memory errors.

Obviously, Epsilon won't be suitable for a typical production Java application. However, there are a few specific use-cases where it could be useful:

  • Performance testing
  • Memory pressure testing
  • VM interface testing and
  • Extremely short-lived jobs

In order to enable it, use the -XX:+UnlockExperimentalVMOptions -XX:+UseEpsilonGC flag.

4.4. Flight Recorder

Java Flight Recorder (JFR) is now open-source in Open JDK, where it used to be a commercial product in Oracle JDK. JFR is a profiling tool that we can use to gather diagnostics and profiling data from a running Java application.

To start a 120 seconds JFR recording, we can use the following parameter:

-XX:StartFlightRecording=duration=120s,settings=profile,filename=java-demo-app.jfr

We can use JFR in production since its performance overhead is usually below 1%. Once the time elapses, we can access the recorded data saved in a JFR file.

However, in order to analyze and visualize the data, we need to make use of another tool called JDK Mission Control (JMC).

5. Removed and Deprecated Modules

As Java evolves, we can no longer use any of its removed features, and should stop using any deprecated features. Let's take a quick look at the most notable ones.

5.1. Java EE and CORBA

Standalone versions of the Java EE technologies are available on third-party sites. Therefore, there is no need for Java SE to include them.

Java 9 already deprecated selected Java EE and CORBA modules. In release 11, it has now completely removed:

  • Java API for XML-Based Web Services (java.xml.ws)
  • Java Architecture for XML Binding (java.xml.bind)
  • JavaBeans Activation Framework (java.activation)
  • Common Annotations (java.xml.ws.annotation)
  • Common Object Request Broker Architecture (java.corba)
  • JavaTransaction API (java.transaction)

5.2. JMC and JavaFX

JDK Mission Control (JMC) is no longer included in the JDK. A standalone version of JMC is now available as a separate download.

The same is true for JavaFX modules. JavaFX will be available as a separate set of modules outside of the JDK.

5.3. Deprecated Modules

Furthermore, Java 11 deprecated the following modules:

  • Nashorn JavaScript engine, including the JJS tool
  • Pack200 compression scheme for JAR files

6. Miscellaneous Changes

Java 11 introduced a few more changes which are important to mention:

  • New ChaCha20 and ChaCha20-Poly1305 cipher implementations replace the insecure RC4 stream cipher
  • Support for cryptographic key agreement with Curve25519 and Curve448 replace the existing ECDH scheme
  • Upgraded Transport Layer Security (TLS) to version 1.3 brings security and performance improvements
  • Introduced a low latency garbage collector ZGC, as an experimental feature with low pause times
  • Support for Unicode 10 brings more characters, symbols, and emojis

7. Conclusion

In this article, we explored some new features of Java 11.

We covered the differences between Oracle and Open JDK. Also, we reviewed API changes, as well as other useful development features, performance enhancements, and removed or deprecated modules.

As always, the source code is available over on GitHub.

The post New Features in Java 11 first appeared on Baeldung.
        

Data Modeling with Apache Kafka

$
0
0

1. Overview

In this tutorial, we'll venture into the realm of data modeling for event-driven architecture using Apache Kafka.

2. Setup

A Kafka cluster consists of multiple Kafka brokers that are registered with a Zookeeper cluster. To keep things simple, we'll use ready-made Docker images and docker-compose configurations published by Confluent.

First, let's download the docker-compose.yml for a 3-node Kafka cluster:

$ BASE_URL="https://raw.githubusercontent.com/confluentinc/cp-docker-images/5.3.3-post/examples/kafka-cluster"
$ curl -Os "$BASE_URL"/docker-compose.yml

Next, let's spin-up the Zookeeper and Kafka broker nodes:

$ docker-compose up -d

Finally, we can verify that all the Kafka brokers are up:

$ docker-compose logs kafka-1 kafka-2 kafka-3 | grep started
kafka-1_1      | [2020-12-27 10:15:03,783] INFO [KafkaServer id=1] started (kafka.server.KafkaServer)
kafka-2_1      | [2020-12-27 10:15:04,134] INFO [KafkaServer id=2] started (kafka.server.KafkaServer)
kafka-3_1      | [2020-12-27 10:15:03,853] INFO [KafkaServer id=3] started (kafka.server.KafkaServer)

3. Event Basics

Before we take up the task of data modeling for event-driven systems, we need to understand a few concepts such as events, event-stream, producer-consumer, and topic.

3.1. Event

An event in the Kafka-world is an information log of something that happened in the domain-world. It does it by recording the information as a key-value pair message along with few other attributes such as the timestamp, meta information, and headers.

Let's assume that we're modeling a game of chess; then an event could be a move:

We can notice that event holds the key information of the actor, action, and time of its occurrence. In this case, Player1 is the actor, and the action is moving of rook from cell a1 to a5 at 12/2020/25 00:08:30.

3.2. Message Stream

Apache Kafka is a stream processing system that captures events as a message stream. In our game of chess, we can think of the event stream as a log of moves played by the players.

At the occurrence of each event, a snapshot of the board would represent its state. It's usually common to store the latest static state of an object using a traditional table schema.

On the other hand, the event stream can help us capture the dynamic change between two consecutive states in the form of events. If we play a series of these immutable events, we can transition from one state to another. Such is the relationship between an event stream and a traditional table, often known as stream table duality.

Let's visualize an event stream on the chessboard with just two consecutive events:

4. Topics

In this section, we'll learn how to categorize messages routed through Apache Kafka.

4.1. Categorization

In a messaging system such as Apache Kafka, anything that produces the event is commonly called a producer. While the ones reading and consuming those messages are called consumers.

In a real-world scenario, each producer can generate events of different types, so it'd be a lot of wasted effort by the consumers if we expect them to filter the messages relevant to them and ignore the rest.

To solve this basic problem, Apache Kafka uses topics that are essentially groups of messages that belong together. As a result, consumers can be more productive while consuming the event messages.

In our chessboard example, a topic could be used to group all the moves under the chess-moves topic:

$ docker run \
  --net=host --rm confluentinc/cp-kafka:5.0.0 \
  kafka-topics --create --topic chess-moves \
  --if-not-exists 
  --zookeeper localhost:32181
Created topic "chess-moves".

4.2. Producer-Consumer

Now, let's see how producers and consumers use Kafka's topics for message processing. We'll use kafka-console-producer and kafka-console-consumer utilities shipped with Kafka distribution to demonstrate this.

Let's spin up a container named kafka-producer wherein we'll invoke the producer utility:

$ docker run \
--net=host \
--name=kafka-producer \
-it --rm \
confluentinc/cp-kafka:5.0.0 /bin/bash
# kafka-console-producer --broker-list localhost:19092,localhost:29092,localhost:39092 \
--topic chess-moves \
--property parse.key=true --property key.separator=:

Simultaneously, we can spin up a container named kafka-consumer wherein we'll invoke the consumer utility:

$ docker run \
--net=host \
--name=kafka-consumer \
-it --rm \
confluentinc/cp-kafka:5.0.0 /bin/bash
# kafka-console-consumer --bootstrap-server localhost:19092,localhost:29092,localhost:39092 \
--topic chess-moves --from-beginning \
--property print.key=true --property print.value=true --property key.separator=:

Now, let's record some game moves through the producer:

>{Player1 : Rook, a1->a5}

As the consumer is active, it'll pick up this message with key as Player1:

{Player1 : Rook, a1->a5}

5. Partitions

Next, let's see how we can create further categorization of messages using partitions and boost the performance of the entire system.

5.1. Concurrency

We can divide a topic into multiple partitions and invoke multiple consumers to consume messages from different partitions. By enabling such concurrency behavior, the overall performance of the system can thereby be improved.

By default, Kafka would create a single partition of a topic unless explicitly specified at the time of topic creation. However, for a pre-existing topic, we can increase the number of partitions. Let's set partition number to 3 for the chess-moves topic:

$ docker run \
--net=host \
--rm confluentinc/cp-kafka:5.0.0 \
bash -c "kafka-topics --alter --zookeeper localhost:32181 --topic chess-moves --partitions 3"
WARNING: If partitions are increased for a topic that has a key, the partition logic or ordering of the messages will be affected
Adding partitions succeeded!

5.2. Partition Key

Within a topic, Kafka processes messages across multiple partitions using a partition key. At one end, producers use it implicitly to route a message to one of the partitions. On the other end, each consumer can read messages from a specific partition.

By default, the producer would generate a hash value of the key followed by a modulus with the number of partitions. Then, it'd send the message to the partition identified by the calculated identifier.

Let's create new event messages with the kafka-console-producer utility, but this time we'll record moves by both the players:

# kafka-console-producer --broker-list localhost:19092,localhost:29092,localhost:39092 \
--topic chess-moves \
--property parse.key=true --property key.separator=:
>{Player1: Rook, a1 -> a5}
>{Player2: Bishop, g3 -> h4}
>{Player1: Rook, a5 -> e5}
>{Player2: Bishop, h4 -> g3}

Now, we can have two consumers, one reading from partition-1 and the other reading from partition-2:

# kafka-console-consumer --bootstrap-server localhost:19092,localhost:29092,localhost:39092 \
--topic chess-moves --from-beginning \
--property print.key=true --property print.value=true \
--property key.separator=: \
--partition 1
{Player2: Bishop, g3 -> h4}
{Player2: Bishop, h4 -> g3}

We can see that all moves by Player2 are being recorded into partition-1. In the same manner, we can check that moves by Player1 are being recorded into partition-0.

6. Scaling

How we conceptualize topics and partitions is crucial to horizontal scaling. On the one hand, a topic is more of a pre-defined categorization of data. On the other hand, a partition is a dynamic categorization of data that happens on the fly.

Further, there're practical limits on how many partitions we can configure within a topic. That's because each partition is mapped to a directory in the file system of the broker node. When we increase the number of partitions, we also increase the number of open file handles on our operating system.

As a rule of thumb, experts at Confluent recommend limiting the number of partitions per broker to 100 x b x r, where b is the number of brokers in a Kafka cluster, and r is the replication factor.

7. Conclusion

In this article, we used a Docker environment to cover the fundamentals of data modeling for a system that uses Apache Kafka for message processing. With a basic understanding of events, topics, and partitions, we're now ready to conceptualize event streaming and further use this architecture paradigm.

The post Data Modeling with Apache Kafka first appeared on Baeldung.
        

Java 12 New Features

$
0
0

1. Introduction

In this tutorial, we'll have a quick, high-level overview of some of the new features that came with Java 12. A full list of all new features is available in the official documentation.

2. Language Changes and Features

Java 12 introduces a lot of new language features. In this section, we'll discuss a few most interesting ones with code examples for better understanding.

2.1. String Class New Methods

Java 12 comes with two new methods in the String class.

The first one – indent adjusts the indentation of each line based on the integer parameter. If the parameter is greater than zero, new spaces will be inserted at the beginning of each line. On the other hand, if the parameter is less than zero, it removes spaces from the begging of each line. If a given line does not contain sufficient white space, then all leading white space characters are removed.

Now, let's take a look at a basic example. Firstly, we'll indent the text with four spaces, and then we'll remove the whole indentation:

String text = "Hello Baeldung!\nThis is Java 12 article.";
text = text.indent(4);
System.out.println(text);
text = text.indent(-10);
System.out.println(text);

The output looks like the following:

    Hello Baeldung!
    This is Java 12 article.
Hello Baeldung!
This is Java 12 article.

Note that even if we passed value -10, which exceeds our indent count, only the spaces were affected. Other characters are left intact.

The second new method is transform. It accepts a single argument function as a parameter that will be applied to the string.

As an example, let's use the transform method to revert the string:

@Test
public void givenString_thenRevertValue() {
    String text = "Baeldung";
    String transformed = text.transform(value ->
      new StringBuilder(value).reverse().toString()
    );
    assertEquals("gnudleaB", transformed);
}

2.2. File::mismatch Method

Java 12 introduced a new mismatch method in the nio.file.Files utility class:

public static long mismatch(Path path, Path path2) throws IOException

The method is used to compare two files and find the position of the first mismatched byte in their contents.

The return value will be in the inclusive range of 0L up to the byte size of the smaller file or -1L if the files are identical.

Now let's take a look at two examples. In the first one, we'll create two identical files and try to find a mismatch. The return value should be -1L:

@Test
public void givenIdenticalFiles_thenShouldNotFindMismatch() {
    Path filePath1 = Files.createTempFile("file1", ".txt");
    Path filePath2 = Files.createTempFile("file2", ".txt");
    Files.writeString(filePath1, "Java 12 Article");
    Files.writeString(filePath2, "Java 12 Article");
    long mismatch = Files.mismatch(filePath1, filePath2);
    assertEquals(-1, mismatch);
}

In the second example, we'll create two files with “Java 12 Article” and “Java 12 Tutorial” contents. The mismatch method should return 8L as it's the first different bite:

@Test
public void givenDifferentFiles_thenShouldFindMismatch() {
    Path filePath3 = Files.createTempFile("file3", ".txt");
    Path filePath4 = Files.createTempFile("file4", ".txt");
    Files.writeString(filePath3, "Java 12 Article");
    Files.writeString(filePath4, "Java 12 Tutorial");
    long mismatch = Files.mismatch(filePath3, filePath4);
    assertEquals(8, mismatch);
}

2.3. Teeing Collector

A new teeing collector was introduced in Java 12 as an addition to the Collectors class:

Collector<T, ?, R> teeing(Collector<? super T, ?, R1> downstream1,
  Collector<? super T, ?, R2> downstream2, BiFunction<? super R1, ? super R2, R> merger)

It is a composite of two downstream collectors. Every element is processed by both downstream collectors. Then their results are passed to the merge function and transformed into the final result.

The example usage of teeing collector is counting an average from a set of numbers. The first collector parameter will sum up the values, and the second one will give us the count of all numbers. The merge function will take these results and count the average:

@Test
public void givenSetOfNumbers_thenCalculateAverage() {
    double mean = Stream.of(1, 2, 3, 4, 5)
      .collect(Collectors.teeing(Collectors.summingDouble(i -> i), 
        Collectors.counting(), (sum, count) -> sum / count));
    assertEquals(3.0, mean);
}

2.4. Compact Number Formatting

Java 12 comes with a new number formatter – the CompactNumberFormat. It's designed to represent a number in a shorter form, based on the patterns provided by a given locale.

We can get its instance via the getCompactNumberInstance method in NumberFormat class:

public static NumberFormat getCompactNumberInstance(Locale locale, NumberFormat.Style formatStyle)

As mentioned before, the locale parameter is responsible for providing proper format patterns. The format style can be either SHORT or LONG. For a better understanding of the format styles, let's consider number 1000 in the US locale. The SHORT style would format it as “10K”, and the LONG one would do it as “10 thousand”.

Now let's take a look at an example that'll take the numbers of likes under this article and compact it with two different styles:

@Test
public void givenNumber_thenCompactValues() {
    NumberFormat likesShort = 
      NumberFormat.getCompactNumberInstance(new Locale("en", "US"), NumberFormat.Style.SHORT);
    likesShort.setMaximumFractionDigits(2);
    assertEquals("2.59K", likesShort.format(2592));
    NumberFormat likesLong = 
      NumberFormat.getCompactNumberInstance(new Locale("en", "US"), NumberFormat.Style.LONG);
    likesLong.setMaximumFractionDigits(2);
    assertEquals("2.59 thousand", likesShort.format(2592));
}

3. Preview Changes

Some of the new features are available only as a preview. To enable them, we need to switch proper settings in the IDE or explicitly tell the compiler to use preview features:

javac -Xlint:preview --enable-preview -source 12 src/main/java/File.java

3.1. Switch Expressions (Preview)

The most popular feature introduced in Java 12 is the Switch Expressions.

As a demonstration, let's compare the old and new switch statements. We'll use them to distinguish working days from weekend days based on the DayOfWeek enum from the LocalDate instance.

Firstly, let's look and at the old syntax:

DayOfWeek dayOfWeek = LocalDate.now().getDayOfWeek();
String typeOfDay = "";
switch (dayOfWeek) {
    case MONDAY:
    case TUESDAY:
    case WEDNESDAY:
    case THURSDAY:
    case FRIDAY:
        typeOfDay = "Working Day";
        break;
    case SATURDAY:
    case SUNDAY:
        typeOfDay = "Day Off";
}

And now, let's see the same logic witch switch expressions:

typeOfDay = switch (dayOfWeek) {
    case MONDAY, TUESDAY, WEDNESDAY, THURSDAY, FRIDAY -> "Working Day";
    case SATURDAY, SUNDAY -> "Day Off";
};

New switch statements are not only more compact and readable. They also remove the need for break statements. The code execution will not fall through after the first match.

Another notable difference is that we can assign a switch statement directly to the variable. It was not possible previously.

It's also possible to execute code in switch expressions without returning any value:

switch (dayOfWeek) {
    case MONDAY, TUESDAY, WEDNESDAY, THURSDAY, FRIDAY -> System.out.println("Working Day");
    case SATURDAY, SUNDAY -> System.out.println("Day Off");
}

More complex logic should be wrapped with curly braces:

case MONDAY, TUESDAY, WEDNESDAY, THURSDAY, FRIDAY -> {
    // more logic
    System.out.println("Working Day")
}

Note that we can choose between the old and new syntax. Java 12 switch expressions are only an extension, not a replacement.

3.2. Pattern Matching for instanceof (Preview)

Another preview feature introduced in Java 12 is pattern matching for instanceof.

In previous Java versions, when using, for example, if statements together with instanceof, we would have to explicitly typecast the object to access its features:

Object obj = "Hello World!";
if (obj instanceof String) {
    String s = (String) obj;
    int length = s.length();
}

With Java 12, we can declare the new typecasted variable directly in the statement:

if (obj instanceof String s) {
    int length = s.length();
}

The compiler will automatically inject the typecasted String s variable for us.

4. JVM Changes

Java 12 comes with several JVM enhancements. In this section, we'll have a quick look at a few most important ones.

4.1. Shenandoah: A low-pause-time Garbage Collector

Shenandoah is an experimental garbage collection (GC) algorithm, for now not included in the default Java 12 builds.

It reduces the GC pause times by doing evacuation work simultaneously with the running Java threads. This means that with Shenandoah, pause times are not dependent on the heap’s size and should be consistent. Garbage collecting a 200 GB heap or a 2 GB heap should have a similar low pause behavior.

Shenandoah will become part of mainline JDK builds since version 15.

4.2. Microbenchmark Suite

Java 12 introduces a suite of around 100 microbenchmark tests to the JDK source code.

These tests will allow for continuous performance testing on a JVM and will become useful for every developer wishing to work on the JVM itself or create a new microbenchmark.

4.3. Default CDS Archives

The Class Data Sharing (CDS) feature helps reduce the startup time and memory footprint between multiple Java Virtual Machines. It uses a built-time generated default class list that contains the selected core library classes.

The change that came with Java 12 is that the CDS archive is enabled by default. To run programs with CDS turned off we need to set the Xshare flag to off:

java -Xshare:off HelloWorld.java

Note, that this could delay the startup time of the program.

5. Conclusion

In this article, we saw most of the new features implemented in Java 12. We also listed down some other notable additions and deletions. As usual, source code is available over on GitHub.

The post Java 12 New Features first appeared on Baeldung.
        

Learn JPA & Hibernate

$
0
0

Object-Relational Mapping (ORM) is the process of converting Java objects to database tables. In other words, this allows us to interact with a relational database without any SQL. The Java Persistence API (JPA) is a specification that defines how to persist data in Java applications. The primary focus of JPA is the ORM layer.


Hibernate is one of the most popular Java ORM frameworks in use today. Its first release was almost twenty years ago, and still has excellent community support and regular releases. Additionally, Hibernate is a standard implementation of the JPA specification, with a few additional features that are specific to Hibernate. Let's take a look at some core features of JPA and Hibernate.

The post Learn JPA & Hibernate first appeared on Baeldung.
        

Difference Between JSF, Servlet, and JSP

$
0
0

1. Introduction

When developing any application, the selection of the right technology plays a significant role. However, the decision isn't always straightforward.

In this article, we'll provide a comparative view of three popular technologies of Java. Before jumping into comparison, we'll start by exploring the purpose of each technology and its lifecycle. Then, we'll see what their prominent features are and compare them on the basis of several features.

2. JSF

Jakarta Server Faces, formerly known as JavaServer Faces, is a web framework to build component-based user interfaces for Java applications. Like many others, it also follows an MVC approach. The “View” of MVC simplifies the creation of user interfaces with the help of reusable UI components.

JSF has a wide range of standard UI components and also provides the flexibility to define a new one through an external API.

The lifecycle of any application refers to various stages from its initiation to conclusion. Similarly, the lifecycle of the JSF application starts when a client makes an HTTP request and ends when the server responds with a response. The JSF lifecycle is a request-response lifecycle and handles two kinds of requests: initial requests and postback.

The lifecycle of a JSF application consists of two major phases: execute and render.

The execute phase is further divided into six phases:

  • Restore View: Starts when the JSF receives a request
  • Apply Request Values: Restoration of the component tree during a postback request
  • Process Validations: Process all the validators registered on the component tree
  • Update Model Values: Traverses the component tree and sets the corresponding server-side object properties
  • Invoke Application: Handles application-level events such as submitting a form
  • Render Response: Builds the view and renders pages

In the render phase, the system renders the requested resource as a response to the client browser.

JSF 2.0 was a major release that included Facelets, composite components, AJAX, and resource libraries.

Before Facelets, JSP was the default templating engine for JSF applications. With older releases of JSF 2.x, many new features were introduced to make the framework more robust and efficient. These features include support for annotations, HTML5, Restful, and stateless JSF, among others.

3. Servlet

Jakarta Servlets, formerly known as Java Servlets, extend the capability of a server. Usually, servlets interact with web clients using a request/response mechanism implemented by a container.

A servlet container is an important part of a web server. It manages servlets and creates dynamic content according to user requests. Whenever a web server receives a request, it directs the request to a registered servlet.

The lifecycle consists of only three phases. First, the init() method is invoked to initiate the servlet. Then, the container sends incoming requests to the service() method that performs all the tasks. Lastly, the destroy() method cleans up a few things and tears down the servlet.

Servlets have many important features, including native support for Java and its libraries, a standard API for web servers, and the powers of HTTP/2. Additionally, they allow asynchronous requests and create separate threads for each request.

4. JSP

Jakarta Server Pages, formerly known as JavaServer Pages, enable us to inject dynamic content into a static page. JSPs are the high-level abstraction of servlets because they are converted into servlets before execution begins.

The common tasks such as variable declaration and printing values, looping, conditional formatting, and exception handling are performed through the JSTL library.

The lifecycle of a JSP is similar to the servlet with one additional step — the compilation step. When a browser asks for a page, the JSP engine first checks whether it needs to compile the page or not. The compilation step consists of three phases.

Initially, the engine parses the page. Then, it converts the page into a servlet. Lastly, the generated servlet compiles into a Java class.

JSPs have many notable features such as tracking the session, good form controls, and sending/receiving data to/from the server. Because the JSP is built on top of the servlet, it has access to all important Java APIs such as JDBC, JNDI, and EJB.

5. Key Differences

Servlet technology is the foundation of web application development in J2EE. However, it doesn't come with a view technology, and the developer has to mix markup tags in with Java code. Additionally, it lacks the utilities for common tasks like building the markup, validating the requests, and enabling the security features.

JSPs fill the markup gap for the servlet. With the help of JSTL and EL, we can define any custom HTML tag to build a good UI. Unfortunately, JSPs are slow to compile, hard to debug, leave basic form validation and type conversion to the developer, and lack support for security.

JSF is a proper framework that connects a data source with a reuseable UI component, provides support for multiple libraries, and decreases the effort to build and manage applications. Being component-based, JSF always has a good security advantage over JSP. Despite all of its benefits, JSF is complex and has a steep learning curve.

In light of the MVC design pattern, the servlet acts as a controller and JSP as a view, whereas JSF is a complete MVC.

As we already know, the servlet will need manual HTML tags in Java code. For the same purpose, JSP uses HTML and JSF uses Facelets. Additionally, both provide support for custom tags, too.

There's no default support for error handling in servlet and JSP. In contrast, JSF provides a bunch of predefined validators.

Security has always been a concern in applications that transmit data over the web. JSPs that support only role-based and form-based authentication are lacking in this aspect.

Speaking about the protocols, JSP only accepts HTTP, whereas servlet and JSF support several protocols, including HTTP/HTTPS, SMTP, and SIP. All of these technologies advocate multithreading and necessitate a web container to run.

6. Conclusion

In this tutorial, we compared three popular technologies in the Java world: JSF, Servlet, and JSP. First, we saw what each technology represents and how its lifecycle progress. Then, we discussed the main features and limitations of each technology. Finally, we compared them on the basis of several features.

What technology should be chosen over the other totally depends on the context. The nature of the application should be the deciding factor.

The post Difference Between JSF, Servlet, and JSP first appeared on Baeldung.
        

Java File Separator vs File Path Separator

$
0
0

1. Overview

Different operating systems use different characters as file and path separators. When our application has to run on multiple platforms, we need to handle these correctly.

Java helps us to pick an appropriate separator and provides functions to help us create paths that work on the host's operating system.

In this short tutorial, we'll understand how to write code to use the correct file and path separators.

2. File Separator

The file separator is the character used to separate the directory names that make up the path to a specific location.

2.1. Get the File Separator

There are several ways to get the file separator in Java.

We can get the separator as a String using File.separator:

String fileSeparator = File.separator;

We can also get this separator as a char with File.separatorChar:

char fileSeparatorChar = File.separatorChar;

Since Java 7, we've also been able to use FileSystems:

String fileSeparator = FileSystems.getDefault().getSeparator();

The output will depend on the host operating system. The file separator is \ on Windows and / on macOS and Unix-based operating systems.

2.2. Construct a File Path

Java provides a couple of methods for constructing a file path from its list of directories.

Here, we're using the Paths class:

Path path = Paths.get("dir1", "dir2");

Let's test it on Microsoft Windows:

assertEquals("dir1\\dir2", path.toString());

Similarly, we can test it on Linux or Mac:

assertEquals("dir1/dir2", path.toString());

We can also use the File Class:

File file = new File("file1", "file2");

Let's test it on Microsoft Windows:

assertEquals("file1\\file2", file.toString());

Similarly, we can test it on Linux or Mac:

assertEquals("file1/file2", file.toString());

As we see, we can just provide path strings to construct a file path — we don't need to include a file separator explicitly.

3. Path Separator

The path separator is a character commonly used by the operating system to separate individual paths in a list of paths.

3.1. Get the Path Separator

We can get the path separator as a String using File.pathSeparator:

String pathSeparator = File.pathSeparator;

We can also get the path separator as a char:

char pathSeparatorChar = File.pathSeparatorChar;

Both examples return the path separator. It is a semicolon (;) on Windows and colon (:) on Mac and Unix-based operating systems.

3.2. Construct a File Path

We can construct a file path as a String using the separator character as a delimiter.

Let's try the String.join method:

String[] pathNames = { "path1", "path2", "path3" };
String path = String.join(File.pathSeparator, pathNames);

Here we test our code on Windows:

assertEquals("path1;path2;path3", path);

And file path will look different on Linux or Mac:

assertEquals("path1:path2:path3", path);

Similarly, we can use the StringJoiner class:

public static StringJoiner buildPathUsingStringJoiner(String path1, String path2) {
    StringJoiner joiner = new StringJoiner(File.pathSeparator);
    joiner.add(path1);
    joiner.add(path2);
    return joiner;
}

Let's test our code on Microsoft Windows:

assertEquals("path1;path2", buildPathUsingStringJoiner("path1", "path2"));

And it will behave differently on Mac or Unix:

assertEquals("path1:path2", buildPathUsingStringJoiner("path1", "path2"));

4. Conclusion

In this short article, we learned how to construct paths using system-specific file separators so our code can work on multiple operating systems.

We saw how to use the built-in classes Path and File to construct file paths, and we saw how to get the necessary separator to use with String concatenation utilities.

As always, the example code is available over on GitHub.

The post Java File Separator vs File Path Separator first appeared on Baeldung.
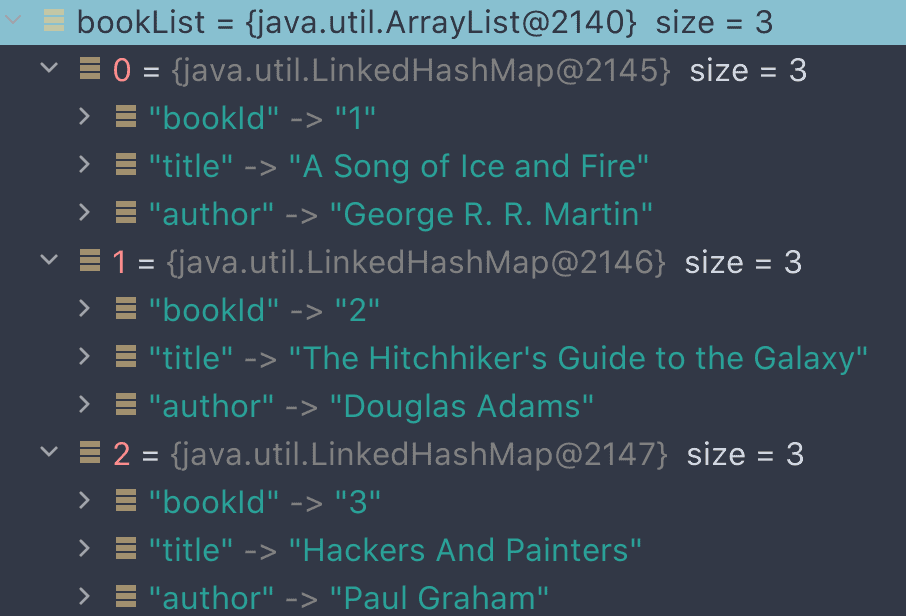
        

Java Weekly, Issue 367

$
0
0

1. Spring and Java

>> AdoptOpenJDK Welcomes Dragonwell [infoq.com]

Dragonwell joins AdoptOpenJDK – an OpenJDK distribution supporting coroutines and pre-warmup!

>> Pattern Matching for Arrays and Varargs [mail.openjdk.java.net]

Another enhancement from Amber – supporting pattern matching for Arrays and Varargs!

>> Investigating MD5 overheads [cl4es.github.io]

Investigating a possible performance improvement: analysis, profiling,  compiler optimizations, and much more!

Also worth reading:

Webinars and presentations:

Time to upgrade:

2. Technical

>> Consistent Core [martinfowler.com]

Patterns of distributed systems: leader election, membership information, and metadata management using consistent core!

Also worth reading:

3. Musings

>> Maximizing Developer Effectiveness [martinfowler.com]

Embracing micro-feedback loops to achieve a more effective developer experience.

Also worth reading:

4. Comics

And my favorite Dilberts of the week:

>> Increasing Training Budget [dilbert.com]

>> Audit Blackmail [dilbert.com]

5. Pick of the Week

>> The Builder’s High [randsinrepose.com]

The post Java Weekly, Issue 367 first appeared on Baeldung.
        

Jackson: java.util.LinkedHashMap cannot be cast to X

$
0
0

1. Overview

Jackson is a widely used Java library, which allows us to serialize/deserialize JSON or XML conveniently.

Sometimes, we may encounter “java.lang.ClassCastException: java.util.LinkedHashMap cannot be cast to X” when we try to deserialize JSON or XML into a collection of objects.

In this tutorial, we'll discuss why the mentioned exception can occur and how to solve the problem.

2. Understanding the Problem

Let's create a simple Java application to reproduce this exception to understand when the exception will occur.

2.1. Creating a POJO Class

Let's start with a simple POJO class:

public class Book {
    private Integer bookId;
    private String title;
    private String author;
    //getters, setters, constructors, equals and hashcode omitted
}

Now, suppose we have the books.json file consisting of a JSON array that contains three books:

[ {
    "bookId" : 1,
    "title" : "A Song of Ice and Fire",
    "author" : "George R. R. Martin"
}, {
    "bookId" : 2,
    "title" : "The Hitchhiker's Guide to the Galaxy",
    "author" : "Douglas Adams"
}, {
    "bookId" : 3,
    "title" : "Hackers And Painters",
    "author" : "Paul Graham"
} ]

Next, we'll see what happens when we try to deserialize our JSON example to List<Book>:

2.2. Deserializing JSON to List<Book>

Let's see if we can reproduce the class casting problem by deserializing this JSON file to a List<Book> object and reading the elements from it:

@Test
void givenJsonString_whenDeserializingToList_thenThrowingClassCastException() 
  throws JsonProcessingException {
    String jsonString = readFile("/to-java-collection/books.json");
    List<Book> bookList = objectMapper.readValue(jsonString, ArrayList.class);
    assertThat(bookList).size().isEqualTo(3);
    assertThatExceptionOfType(ClassCastException.class)
      .isThrownBy(() -> bookList.get(0).getBookId())
      .withMessageMatching(".*java.util.LinkedHashMap cannot be cast to .*com.baeldung.jackson.tocollection.Book.*");
}

We've used the AssertJ library to verify that the expected exception is thrown when we call bookList.get(0).getBookId() and that its message matches the one noted in our problem statement.

The test passes, meaning that we've reproduced the problem successfully.

2.3. Why the Exception Is Thrown

Now, if we take a closer look at the exception message: “class java.util.LinkedHashMap cannot be cast to class … Book“, a couple of questions may come up.

We've declared the variable bookList with the type List<Book>, but why does Jackson try to cast the LinkedHashMap type to our Book class? Furthermore, where does the LinkedHashMap come from?

First, indeed we declared bookList with the type List<Book>. However, when we called the objectMapper.readValue() method, we passed ArrayList.class as the Class object. Therefore, Jackson will deserialize the JSON content to an ArrayList object, but it has no idea what type of elements should be in the ArrayList object.

Second, when Jackson attempts to deserialize an object in JSON, but no target type information is given, it'll use the default type: LinkedHashMap. In other words, after the deserialization, we'll get an ArrayList<LinkedHashMap> object. In the Map, the keys are the names of the properties — for example, “bookId“, “title“, and so on. The values are the values of the corresponding properties:

Now that we understand the cause of the problem, let's discuss how to solve it.

3. Passing TypeReference to objectMapper.readValue()

To solve the problem, we need to somehow let Jackson know the type of the element. However, the compiler doesn't allow us to do something like objectMapper.readValue(jsonString, ArrayList<Book>.class).

Instead, we can pass a TypeReference object to the objectMapper.readValue(String content, TypeReference valueTypeRef) method. In this case, we just need to pass new TypeReference<List<Book>>() {} as the second parameter:

@Test
void givenJsonString_whenDeserializingWithTypeReference_thenGetExpectedList() 
  throws JsonProcessingException {
    String jsonString = readFile("/to-java-collection/books.json");
    List<Book> bookList = objectMapper.readValue(jsonString, new TypeReference<List<Book>>() {});
    assertThat(bookList.get(0)).isInstanceOf(Book.class);
    assertThat(bookList).isEqualTo(expectedBookList);
}

If we run the test, it'll pass. So, passing a TypeReference object solves our problem.

4. Passing JavaType to objectMapper.readValue()

In the previous section, we talked about passing a Class object or a TypeReference object as the second parameter to call the objectMapper.readValue() method.

The objectMapper.readValue() method still accepts a JavaType object as the second parameter. The JavaType is the base class of type-token classes. It'll be used by the deserializer so that the deserializer knows what the target type is during the deserialization. 

We can construct a JavaType object through a TypeFactory instance, and we can retrieve the TypeFactory object from objectMapper.getTypeFactory().

Let's come back to our book example. In this example, the target type we want to have is ArrayList<Book>. Therefore, we can construct a CollectionType with this requirement:

objectMapper.getTypeFactory().constructCollectionType(ArrayList.class, Book.class);

Now, let's write a unit test to see if passing a JavaType to the readValue() method will solve our problem:

@Test
void givenJsonString_whenDeserializingWithJavaType_thenGetExpectedList() 
  throws JsonProcessingException {
    String jsonString = readFile("/to-java-collection/books.json");
    CollectionType listType = 
      objectMapper.getTypeFactory().constructCollectionType(ArrayList.class, Book.class);
    List<Book> bookList = objectMapper.readValue(jsonString, listType);
    assertThat(bookList.get(0)).isInstanceOf(Book.class);
    assertThat(bookList).isEqualTo(expectedBookList);
}

The test passes if we run it. Therefore, the problem can be solved in this way, as well.

5. Using the JsonNode Object and the objectMapper.convertValue() Method

We've seen the solution of passing a TypeReference or JavaType object to the objectMapper.readValue() method.

Alternatively, we can work with tree model nodes in Jackson and then convert the JsonNode object into the desired type by calling the objectMapper.convertValue() method.

Similarly, we can pass an object of TypeReference or JavaType to the objectMapper.convertValue() method.

Let's see each approach in action.

First, let's create a test method using a TypeReference object and the objectMapper.convertValue() method:

@Test
void givenJsonString_whenDeserializingWithConvertValueAndTypeReference_thenGetExpectedList() 
  throws JsonProcessingException {
    String jsonString = readFile("/to-java-collection/books.json");
    JsonNode jsonNode = objectMapper.readTree(jsonString);
    List<Book> bookList = objectMapper.convertValue(jsonNode, new TypeReference<List<Book>>() {});
    assertThat(bookList.get(0)).isInstanceOf(Book.class);
    assertThat(bookList).isEqualTo(expectedBookList);
}

Now, let's see what happens when we pass a JavaType object to the objectMapper.convertValue() method:

@Test
void givenJsonString_whenDeserializingWithConvertValueAndJavaType_thenGetExpectedList() 
  throws JsonProcessingException {
    String jsonString = readFile("/to-java-collection/books.json");
    JsonNode jsonNode = objectMapper.readTree(jsonString);
    List<Book> bookList = objectMapper.convertValue(jsonNode, 
      objectMapper.getTypeFactory().constructCollectionType(ArrayList.class, Book.class));
    assertThat(bookList.get(0)).isInstanceOf(Book.class);
    assertThat(bookList).isEqualTo(expectedBookList);
}

If we run the two tests, both of them will pass. Therefore, using the objectMapper.convertValue() method is an alternative way to solve the problem.

6. Creating a Generic Deserialization Method

So far, we've addressed how to solve the class casting problem when we deserialize JSON array to Java collections. In the real world, we may want to create a generic method to handle different element types.

It won't be a hard job for us now. We can pass a JavaType object when calling the objectMapper.readValue() method:

public static <T> List<T> jsonArrayToList(String json, Class<T> elementClass) throws IOException {
    ObjectMapper objectMapper = new ObjectMapper();
    CollectionType listType = 
      objectMapper.getTypeFactory().constructCollectionType(ArrayList.class, elementClass);
    return objectMapper.readValue(json, listType);
}

Next, let's create a unit-test method to verify if it works as we expect:

@Test
void givenJsonString_whenCalljsonArrayToList_thenGetExpectedList() throws IOException {
    String jsonString = readFile("/to-java-collection/books.json");
    List<Book> bookList = JsonToCollectionUtil.jsonArrayToList(jsonString, Book.class);
    assertThat(bookList.get(0)).isInstanceOf(Book.class);
    assertThat(bookList).isEqualTo(expectedBookList);
}

The test will pass if we run it.

Why not use the TypeReference approach to build the generic method since it looks more compact?

Now, let's create a generic utility method and pass the corresponding TypeReference object to the objectMapper.readValue() method:

public static <T> List<T> jsonArrayToList(String json, Class<T> elementClass) throws IOException {
    return new ObjectMapper().readValue(json, new TypeReference<List<T>>() {});
}

The method looks straightforward. If we run the test method once again, we'll get:

java.lang.ClassCastException: class java.util.LinkedHashMap cannot be cast to class com.baeldung...Book ...

Oops, an exception occurred!

We've passed a TypeReference object to the readValue() method, and we've previously seen that this way will solve the class casting problem. So, why are we seeing the same exception in this case?

It's because our method is generic. The type parameter T cannot be reified at runtime, even if we pass a TypeReference instance with the type parameter T.

7. XML Deserialization With Jackson

Apart from JSON serialization/deserialization, the Jackson library can be used to serialize/deserialize XML as well.

Let's make a quick example to check if the same problem can happen when deserializing XML to Java collections.

First, let's create an XML file books.xml:

<ArrayList>
    <item>
        <bookId>1</bookId>
        <title>A Song of Ice and Fire</title>
        <author>George R. R. Martin</author>
    </item>
    <item>
        <bookId>2</bookId>
        <title>The Hitchhiker's Guide to the Galaxy</title>
        <author>Douglas Adams</author>
    </item>
    <item>
        <bookId>3</bookId>
        <title>Hackers And Painters</title>
        <author>Paul Graham</author>
    </item>
</ArrayList>

Next, as what we've done with the JSON file, we create another unit-test method to verify if the class casting exception will be thrown:

@Test
void givenXml_whenDeserializingToList_thenThrowingClassCastException() 
  throws JsonProcessingException {
    String xml = readFile("/to-java-collection/books.xml");
    List<Book> bookList = xmlMapper.readValue(xml, ArrayList.class);
    assertThat(bookList).size().isEqualTo(3);
    assertThatExceptionOfType(ClassCastException.class)
      .isThrownBy(() -> bookList.get(0).getBookId())
      .withMessageMatching(".*java.util.LinkedHashMap cannot be cast to .*com.baeldung.jackson.tocollection.Book.*");
}

Our test will pass if we give it a run. That is to say, the same problem occurs in XML deserialization as well.

However, if we know how to solve JSON deserialization, it's pretty simple to fix it in XML deserialization.

Since XmlMapper is a subclass of ObjectMapper, all the solutions we've addressed for JSON deserialization also work for XML deserialization.

For example, we can pass a TypeReference object to the xmlMapper.readValue() method to solve the problem:

@Test
void givenXml_whenDeserializingWithTypeReference_thenGetExpectedList() 
  throws JsonProcessingException {
    String xml = readFile("/to-java-collection/books.xml");
    List<Book> bookList = xmlMapper.readValue(xml, new TypeReference<List<Book>>() {});
    assertThat(bookList.get(0)).isInstanceOf(Book.class);
    assertThat(bookList).isEqualTo(expectedBookList);
}

8. Conclusion

In this article, we've discussed why we may get “java.util.LinkedHashMap cannot be cast to X” exception when we use Jackson to deserialize JSON or XML.

After that, we've addressed different ways to solve the problem through examples.

As always, the code in this write-up is all available over on GitHub.

The post Jackson: java.util.LinkedHashMap cannot be cast to X first appeared on Baeldung.
        

Binary Semaphore vs Reentrant Lock

$
0
0

1. Overview

In this tutorial, we'll explore binary semaphores and reentrant locks. Also, we'll compare them against each other to see which one is best suited in common situations.

2. What Is a Binary Semaphore?

A binary semaphore provides a signaling mechanism over the access of a single resource. In other words, a binary semaphore provides a mutual exclusion that allows only one thread to access a critical section at a time.

For that, it keeps only one permit available for access. Hence, a binary semaphore has only two states: one permit available or zero permits available.

Let's discuss a simple implementation of a binary semaphore using the Semaphore class available in Java:

Semaphore binarySemaphore = new Semaphore(1);
try {
    binarySemaphore.acquire();
    assertEquals(0, binarySemaphore.availablePermits());
} catch (InterruptedException e) {
    e.printStackTrace();
} finally {
    binarySemaphore.release();
    assertEquals(1, binarySemaphore.availablePermits());
}

Here, we can observe that the acquire method decreases the available permits by one. Similarly, the release method increases the available permits by one.

Additionally, the Semaphore class provides the fairness parameter. When set to true, the fairness parameter ensures the order in which the requesting threads acquire permits (based on their waiting time):

Semaphore binarySemaphore = new Semaphore(1, true);

3. What Is a Reentrant Lock?

A reentrant lock is a mutual exclusion mechanism that allows threads to reenter into a lock on a resource (multiple times) without a deadlock situation.

A thread entering into the lock increases the hold count by one every time. Similarly, the hold count decreases when unlock is requested. Therefore, a resource is locked until the counter returns to zero.

For instance, let's look at a simple implementation using the ReentrantLock class available in Java:

ReentrantLock reentrantLock = new ReentrantLock();
try {
    reentrantLock.lock();
    assertEquals(1, reentrantLock.getHoldCount());
    assertEquals(true, reentrantLock.isLocked());
} finally {
    reentrantLock.unlock();
    assertEquals(0, reentrantLock.getHoldCount());
    assertEquals(false, reentrantLock.isLocked());
}

Here, the lock method increases the hold count by one and locks the resource. Similarly, the unlock method decreases the hold count and unlocks a resource if the hold count is zero.

When a thread reenters the lock, it has to request for the unlock the same number of times to release the resource:

reentrantLock.lock();
assertEquals(2, reentrantLock.getHoldCount());
assertEquals(true, reentrantLock.isLocked());
reentrantLock.unlock();
assertEquals(1, reentrantLock.getHoldCount());
assertEquals(true, reentrantLock.isLocked());
reentrantLock.unlock();
assertEquals(0, reentrantLock.getHoldCount());
assertEquals(false, reentrantLock.isLocked());

Similar to the Semaphore class, the ReentrantLock class also supports the fairness parameter:

ReentrantLock reentrantLock = new ReentrantLock(true);

4. Binary Semaphore vs. Reentrant Lock

4.1. Mechanism

A binary semaphore is a type of signaling mechanism, whereas a reentrant lock is a locking mechanism.

4.2. Ownership

No thread is the owner of a binary semaphore. However, the last thread that successfully locked a resource is the owner of a reentrant lock.

4.3. Nature

Binary semaphores are non-reentrant by nature, implying that the same thread can't re-acquire a critical section, else it will lead to a deadlock situation.

On the other side, a reentrant lock, by nature, allows reentering a lock by the same thread multiple times.

4.4. Flexibility

A binary semaphore provides a higher-level synchronization mechanism by allowing a custom implementation of a locking mechanism and deadlock recovery. Thus, it gives more control to the developers.

However, the reentrant lock is a low-level synchronization with a fixed locking mechanism.

4.5. Modification

Binary semaphores support operations like wait and signal (acquire and release in the case of Java's Semaphore class) to allow modification of the available permits by any process.

On the other hand, only the same thread that locked/unlocked a resource can modify a reentrant lock.

4.6. Deadlock Recovery

Binary semaphores provide a non-ownership release mechanism. Therefore, any thread can release the permit for a deadlock recovery of a binary semaphore.

On the contrary, deadlock recovery is difficult to achieve in the case of a reentrant lock. For instance, if the owner thread of a reentrant lock goes into sleep or infinite wait, it won't be possible to release the resource, and a deadlock situation will result.

5. Conclusion

In this short article, we've explored binary semaphore and reentrant locks.

First, we discussed the basic definition of a binary semaphore and a reentrant lock, along with a basic implementation in Java. Then, we compared them against each other based on a few parameters like mechanism, ownership, and flexibility.

We can certainly conclude that a binary semaphore provides a non-ownership-based signaling mechanism for mutual exclusion. At the same time, it can be further extended to provide locking capabilities with easy deadlock recovery.

On the other hand, a reentrant lock provides a reentrant mutual exclusion with owner-based locking capabilities and is useful as a simple mutex.

As usual, the source code is available over on GitHub.

The post Binary Semaphore vs Reentrant Lock first appeared on Baeldung.
        

Difference Between REST and HTTP

$
0
0

1. Introduction

Often times the terms REST and HTTP are used interchangeably. In this article, we'll look at what each term really means and why they are two different things.

2. What is REST?

REST stands for Representational State Transfer. It was first described in Roy Fielding's now-famous dissertation. In this paper, Fielding laid out his vision of an ideal software architecture for the World Wide Web.

REST is not a standard or a specification. Instead, Fielding described REST as an architectural style for distributed hypermedia systems. He believed there are several attributes of a RESTful architecture that would make it ideal for large interconnected systems such as the internet.

Next, we'll look at the attributes that define RESTful systems.

2.1. Resources and Representations

The core building blocks of RESTful systems are resources. A resource can be a web page, a video stream, or an image, for example. A resource can even be an abstract concept, such as the list of all users in a database or the weather forecast for a particular location. The only real constraint is that every resource in a system is uniquely identifiable.

Additionally, resources may be available in multiple representations. In a client-server model, the server is responsible for managing the state of the resource, but a client can choose which representation they prefer to interact with.

2.2. Uniform Interface

The uniform interface is one of the distinctive attributes of RESTful systems. It requires clients to access all resources using the same set of standard operations.

The benefits of a uniform interface are the ease of creating implementations that are decoupled from the services they provide. This allows services to evolve without impacting clients. The trade-off is that a uniform interface may impose unnecessary restrictions on some systems or require servers to perform less efficiently than they could with specialized operations.

2.3. Stateless

All operations in a RESTful system should be stateless. This means each call from the client to the server must not rely on any shared state. It also implies that every request to the server must include all required data for the server to fulfill the request.

The stateless requirement in REST gives way to several key properties:

  • Visibility: Each request can be analyzed in isolation to monitor system health and responsiveness
  • Reliability: System failures are easier to recover from
  • Scalability: It's simple to add more server resources to handle more requests

However, it also comes with the trade-off that requests to the server are larger and contain repetitive data when a client has multiple interactions with the server.

3. What is HTTP?

Unlike REST, the HyperText Transfer Protocol (HTTP) is a standard with well-defined constraints. HTTP is the communication protocol that powers most of our everyday interactions on the internet:

  • Web browsers loading web pages
  • Streaming a video
  • Using a mobile device to turn off the lights in a home

So, is REST the same thing as HTTP? The short answer is no.

HTTP is a protocol that is maintained by the Internet Engineering Task Force. While it is not the same as REST, it exhibits many features of a RESTful system. This is not by accident, as Roy Fielding was one of the original authors of RFC for HTTP.

It's important to remember that the use of HTTP is not required for a RESTful system. It just so happens that HTTP is a good starting because it exhibits many RESTful qualities.

Let's take a closer look at some of the qualities that make HTTP a RESTful protocol.

3.1. URLs and Media Types

In the world of HTTP, resources are typically files on a remote server. These could be HTML, CSS, JavaScript, images, and all the other files that comprise modern web pages. Each file is treated as a distinct resource that is addressable using a unique URL.

HTTP is not just for files, though. The term resource can also refer to arbitrary data on a remote server: customers, products, configuration settings, and so much more. This is why HTTP has become popular for building modern APIs. It provides a consistent and predictable way to access and manipulate remote data.

Additionally, HTTP allows clients to choose different representations for some resources. In HTTP, this is handled using headers and a variety of well-known media types.

For example, a weather web site may provide both HTML and JSON representations for the same weather forecast. One is suitable for displaying in a web browser, while the other is suitable for processing by another system that archives historical weather data.

3.2. HTTP Methods

Another way in which HTTP adheres to the principles of REST is that it provides the same set of methods for every resource. While there are nearly a dozen available HTTP methods, most services deal primarily with the 4 that map to CRUD operations: POST, GET, PUT, and DELETE.

Knowing these operations ahead of time makes it easy to create clients that consume a web service. Compared to protocols such as SOAP, where operations can be customized and unlimited, HTTP keeps the known set of operations minimal and consistent.

Of course, individual web services may choose to deny certain methods for some resources. Or they require authentication for sensitive resources. Regardless, the set of possible HTTP methods are well known and cannot vary from one web site to another.

3.3. HTTP is Not Always RESTful

However, for all the ways in which HTTP implements RESTful principles, there are multiple ways in which it can also violate them.

First, REST is not a communications protocol, while HTTP is.

Next, and perhaps most controversially, is that most modern web servers use cookies and sessions to store state. When these are used to refer to the state on the server-side, this violates the principle of statelessness.

Finally, using URLs (as defined by the IETF) might allow a web server to violate the uniform interface. For example, consider the following URL:

https://www.foo.com/api/v1/customers?id=17&action=clone

While this URL has to be requested using one of the pre-defined HTTP methods such as GET, it is using query parameters to provide additional operations. In this case, we're specifying an action named clone that isn't obviously available to all resources in the system. It's also not clear what the response would be without more detailed knowledge of the service.

4. Conclusion

While many people continue to use the terms REST and HTTP interchangeably, the truth is that they are different things. REST refers to a set of attributes of a particular architectural style, while HTTP is a well-defined protocol that happens to exhibit many features of a RESTful system.

The post Difference Between REST and HTTP first appeared on Baeldung.
        

Using a Byte Array as Map Key in Java

$
0
0

1. Introduction

In this tutorial, we'll learn how to use a byte array as a key in HashMap. Because of how HashMap works, we, unfortunately, can't do that directly. We'll investigate why is that and look at several ways to solve that problem.

2. Designing a Good Key for HashMap

2.1. How HashMap Works

HashMap uses the mechanism of hashing for storing and retrieving values from itself. When we invoke the put(key, value) method, HashMap calculates the hash code based on the key's hashCode() method. This hash is used to identify a bucket in which the value is finally stored:

public V put(K key, V value) {
    if (key == null)
        return putForNullKey(value);
    int hash = hash(key.hashCode());
    int i = indexFor(hash, table.length);
    for (Entry e = table[i]; e != null; e = e.next) {
        Object k;
        if (e.hash == hash && ((k = e.key) == key || key.equals(k))) {
            V oldValue = e.value;
            e.value = value;
            e.recordAccess(this);
            return oldValue;
        }
    }
 
    modCount++;
    addEntry(hash, key, value, i);
    return null;
}

When we retrieve a value using the get(key) method, a similar process is involved. The key is used to compute the hash code and then to find the bucket. Then each entry in the bucket is checked for equality using the equals() method. Finally, the value of the matching entry is returned:

public V get(Object key) {
    if (key == null)
        return getForNullKey();
    int hash = hash(key.hashCode());
    for (Entry e = table[indexFor(hash, table.length)]; e != null; e = e.next) {
        Object k;
        if (e.hash == hash && ((k = e.key) == key || key.equals(k)))
            return e.value;
    }
    return null;
}

2.2. Contract Between equals() and hashCode()

Both equals and hashCode methods have contracts that should be observed. In the context of HashMaps, one aspect is especially important: objects that are equal to each other must return the same hashCode. However, objects that return the same hashCode don't need to be equal to each other. That's why we can store several values in one bucket.

2.3. Immutability

The hashCode of the key in HashMap should not change. While it's not mandatory, it's highly recommended for keys to be immutable. If an object is immutable, its hashCode won't have an opportunity to change, regardless of the implementation of the hashCode method.

By default, the hash is computed based on all fields of the object. If we would like to have a mutable key, we'd need to override the hashCode method to ensure that mutable fields aren't used in its computation. To maintain the contract, we would also need to change the equals method.

2.4. Meaningful Equality

To be able to successfully retrieve values from the map, equality must be meaningful. In most cases, we need to be able to create a new key object that will be equal to some existing key in the map. For that reason, object identity isn't very useful in this context.

This is also the main reason why using a primitive byte array isn't really an option. Arrays in Java use object identity to determine equality. If we create HashMap with byte array as the key, we'll be able to retrieve a value only using exactly the same array object.

Let's create a naive implementation with a byte array as a key:

byte[] key1 = {1, 2, 3};
byte[] key2 = {1, 2, 3};
Map<byte[], String> map = new HashMap<>();
map.put(key1, "value1");
map.put(key2, "value2");

Not only do we have two entries with virtually the same key, but also, we can't retrieve anything using a newly created array with the same values:

String retrievedValue1 = map.get(key1);
String retrievedValue2 = map.get(key2);
String retrievedValue3 = map.get(new byte[]{1, 2, 3});
assertThat(retrievedValue1).isEqualTo("value1");
assertThat(retrievedValue2).isEqualTo("value2");
assertThat(retrievedValue3).isNull();

3. Using Existing Containers

Instead of the byte array, we can use existing classes whose equality implementation is based on content, not object identity.

3.1. String

String equality is based on the content of the character array:

public boolean equals(Object anObject) {
    if (this == anObject) {
        return true;
    }
    if (anObject instanceof String) {
        String anotherString = (String)anObject;
        int n = count;
        if (n == anotherString.count) {
            char v1[] = value;
            char v2[] = anotherString.value;
            int i = offset;
            int j = anotherString.offset;
            while (n-- != 0) {
                if (v1[i++] != v2[j++])
                   return false;
            }
            return true;
        }
    }
    return false;
}

Strings are also immutable, and creating a String based on a byte array is fairly straightforward. We can easily encode and decode a String using the Base64 scheme:

String key1 = Base64.getEncoder().encodeToString(new byte[]{1, 2, 3});
String key2 = Base64.getEncoder().encodeToString(new byte[]{1, 2, 3});

Now we can create a HashMap with String as keys instead of byte arrays. We'll put values into the Map in a manner similar to the previous example:

Map<String, String> map = new HashMap<>();
map.put(key1, "value1");
map.put(key2, "value2");

Then we can retrieve a value from the map. For both keys, we'll get the same, second value. We can also check that the keys are truly equal to each other:

String retrievedValue1 = map.get(key1);
String retrievedValue2 = map.get(key2);
assertThat(key1).isEqualTo(key2);
assertThat(retrievedValue1).isEqualTo("value2");
assertThat(retrievedValue2).isEqualTo("value2");

3.2. Lists

Similarly to String, the List#equals method will check for equality of each of its elements. If these elements have a sensible equals() method and are immutable, List will work correctly as the HashMap key. We only need to make sure we're using an immutable List implementation:

List<Byte> key1 = ImmutableList.of((byte)1, (byte)2, (byte)3);
List<Byte> key2 = ImmutableList.of((byte)1, (byte)2, (byte)3);
Map<List<Byte>, String> map = new HashMap<>();
map.put(key1, "value1");
map.put(key2, "value2");
assertThat(map.get(key1)).isEqualTo(map.get(key2));

Mind that the List of the Byte object will take a lot more memory than the array of byte primitives. So that solution, while convenient, isn't viable for most scenarios.

4. Implementing Custom Container

We can also implement our own wrapper to take full control of hash code computation and equality. That way we can make sure the solution is fast and doesn't have a big memory footprint.

Let's make a class with one final, private byte array field. It'll have no setter, and its getter will make a defensive copy to ensure full immutability:

public final class BytesKey {
    private final byte[] array;
    public BytesKey(byte[] array) {
        this.array = array;
    }
    public byte[] getArray() {
        return array.clone();
    }
}

We also need to implement our own equals and hashCode methods. Fortunately, we can use the Arrays utility class for both of these tasks:

@Override
public boolean equals(Object o) {
    if (this == o) return true;
    if (o == null || getClass() != o.getClass()) return false;
    BytesKey bytesKey = (BytesKey) o;
    return Arrays.equals(array, bytesKey.array);
}
@Override
public int hashCode() {
    return Arrays.hashCode(array);
}

Finally, we can use our wrapper as a key in a HashMap:

BytesKey key1 = new BytesKey(new byte[]{1, 2, 3});
BytesKey key2 = new BytesKey(new byte[]{1, 2, 3});
Map<BytesKey, String> map = new HashMap<>();
map.put(key1, "value1");
map.put(key2, "value2");

Then, we can retrieve the second value using either of the declared keys or we may use one created on the fly:

String retrievedValue1 = map.get(key1);
String retrievedValue2 = map.get(key2);
String retrievedValue3 = map.get(new BytesKey(new byte[]{1, 2, 3}));
assertThat(retrievedValue1).isEqualTo("value2");
assertThat(retrievedValue2).isEqualTo("value2");
assertThat(retrievedValue3).isEqualTo("value2");

5. Conclusion

In this tutorial, we looked at different problems and solutions for using a byte array as a key in HashMap. First, we investigated why we can't use arrays as keys. Then we used some built-in containers to mitigate that problem and, finally, implemented our own wrapper.

As usual, the source code for this tutorial can be found over on GitHub.

The post Using a Byte Array as Map Key in Java first appeared on Baeldung.
        

Difference Between REST and HTTP

$
0
0

1. Introduction

Often times the terms REST and HTTP are used interchangeably. In this article, we'll look at what each term really means and why they are two different things.

2. What is REST?

REST stands for Representational State Transfer. It was first described in Roy Fielding's now-famous dissertation. In this paper, Fielding laid out his vision of an ideal software architecture for the World Wide Web.

REST is not a standard or a specification. Instead, Fielding described REST as an architectural style for distributed hypermedia systems. He believed there are several attributes of a RESTful architecture that would make it ideal for large interconnected systems such as the internet.

Next, we'll look at the attributes that define RESTful systems.

2.1. Resources and Representations

The core building blocks of RESTful systems are resources. A resource can be a web page, a video stream, or an image, for example. A resource can even be an abstract concept, such as the list of all users in a database or the weather forecast for a particular location. The only real constraint is that every resource in a system is uniquely identifiable.

Additionally, resources may be available in multiple representations. In a client-server model, the server is responsible for managing the state of the resource, but a client can choose which representation they prefer to interact with.

2.2. Uniform Interface

The uniform interface is one of the distinctive attributes of RESTful systems. It requires clients to access all resources using the same set of standard operations.

The benefits of a uniform interface are the ease of creating implementations that are decoupled from the services they provide. This allows services to evolve without impacting clients. The trade-off is that a uniform interface may impose unnecessary restrictions on some systems or require servers to perform less efficiently than they could with specialized operations.

2.3. Stateless

All operations in a RESTful system should be stateless. This means each call from the client to the server must not rely on any shared state. It also implies that every request to the server must include all required data for the server to fulfill the request.

The stateless requirement in REST gives way to several key properties:

  • Visibility: Each request can be analyzed in isolation to monitor system health and responsiveness
  • Reliability: System failures are easier to recover from
  • Scalability: It's simple to add more server resources to handle more requests

However, it also comes with the trade-off that requests to the server are larger and contain repetitive data when a client has multiple interactions with the server.

3. What is HTTP?

Unlike REST, the HyperText Transfer Protocol (HTTP) is a standard with well-defined constraints. HTTP is the communication protocol that powers most of our everyday interactions on the internet:

  • Web browsers loading web pages
  • Streaming a video
  • Using a mobile device to turn off the lights in a home

So, is REST the same thing as HTTP? The short answer is no.

HTTP is a protocol that is maintained by the Internet Engineering Task Force. While it is not the same as REST, it exhibits many features of a RESTful system. This is not by accident, as Roy Fielding was one of the original authors of RFC for HTTP.

It's important to remember that the use of HTTP is not required for a RESTful system. It just so happens that HTTP is a good starting because it exhibits many RESTful qualities.

Let's take a closer look at some of the qualities that make HTTP a RESTful protocol.

3.1. URLs and Media Types

In the world of HTTP, resources are typically files on a remote server. These could be HTML, CSS, JavaScript, images, and all the other files that comprise modern web pages. Each file is treated as a distinct resource that is addressable using a unique URL.

HTTP is not just for files, though. The term resource can also refer to arbitrary data on a remote server: customers, products, configuration settings, and so much more. This is why HTTP has become popular for building modern APIs. It provides a consistent and predictable way to access and manipulate remote data.

Additionally, HTTP allows clients to choose different representations for some resources. In HTTP, this is handled using headers and a variety of well-known media types.

For example, a weather web site may provide both HTML and JSON representations for the same weather forecast. One is suitable for displaying in a web browser, while the other is suitable for processing by another system that archives historical weather data.

3.2. HTTP Methods

Another way in which HTTP adheres to the principles of REST is that it provides the same set of methods for every resource. While there are nearly a dozen available HTTP methods, most services deal primarily with the 4 that map to CRUD operations: POST, GET, PUT, and DELETE.

Knowing these operations ahead of time makes it easy to create clients that consume a web service. Compared to protocols such as SOAP, where operations can be customized and unlimited, HTTP keeps the known set of operations minimal and consistent.

Of course, individual web services may choose to deny certain methods for some resources. Or they require authentication for sensitive resources. Regardless, the set of possible HTTP methods are well known and cannot vary from one web site to another.

3.3. HTTP is Not Always RESTful

However, for all the ways in which HTTP implements RESTful principles, there are multiple ways in which it can also violate them.

First, REST is not a communications protocol, while HTTP is.

Next, and perhaps most controversially, is that most modern web servers use cookies and sessions to store state. When these are used to refer to the state on the server-side, this violates the principle of statelessness.

Finally, using URLs (as defined by the IETF) might allow a web server to violate the uniform interface. For example, consider the following URL:

https://www.foo.com/api/v1/customers?id=17&action=clone

While this URL has to be requested using one of the pre-defined HTTP methods such as GET, it is using query parameters to provide additional operations. In this case, we're specifying an action named clone that isn't obviously available to all resources in the system. It's also not clear what the response would be without more detailed knowledge of the service.

4. Conclusion

While many people continue to use the terms REST and HTTP interchangeably, the truth is that they are different things. REST refers to a set of attributes of a particular architectural style, while HTTP is a well-defined protocol that happens to exhibit many features of a RESTful system.

The post Difference Between REST and HTTP first appeared on Baeldung.
        

Character#isAlphabetic vs. Character#isLetter

$
0
0

1. Overview

In this tutorial, we'll start by briefly going through some general category types for every defined Unicode code point or character range to understand the difference between letters and alphabetic characters.

Further, we'll look at the isAlphabetic() and isLetter() methods of the Character class in Java. Finally, we'll cover the similarities and distinctions between these methods.

2. General Category Types of Unicode Characters

The Unicode Character Set (UCS) contains 1,114,112 code points: U+0000—U+10FFFF. Characters and code point ranges are grouped by categories.

The Character class provides two overloaded versions of the getType() method that returns a value indicating the character's general category type.

Let's look at the signature of the first method:

public static int getType(char ch)

This method cannot handle supplementary characters. To handle all Unicode characters, including supplementary characters, Java's Character class provides an overloaded getType method which has the following signature:

public static int getType(int codePoint)

Next, let's start looking at some general category types.

2.1. UPPERCASE_LETTER

The UPPERCASE_LETTER general category type represents upper-case letters.

When we call the Character#getType method on an upper-case letter, for example, ‘U‘, the method returns the value 1, which is equivalent to the UPPERCASE_LETTER enum value:

assertEquals(Character.UPPERCASE_LETTER, Character.getType('U'));

2.2. LOWERCASE_LETTER

The LOWERCASE_LETTER general category type is associated with lower-case letters.

When calling the Character#getType method on a lower-case letter, for instance, ‘u‘, the method will return the value 2, which is the same as the enum value of LOWERCASE_LETTER:

assertEquals(Character.LOWERCASE_LETTER, Character.getType('u'));

2.3. TITLECASE_LETTER

Next, the TITLECASE_LETTER general category represents title case characters.

Some characters look like pairs of Latin letters. When we call the Character#getType method on such Unicode characters, this will return the value 3, which is equal to the TITLECASE_LETTER enum value:

assertEquals(Character.TITLECASE_LETTER, Character.getType('\u01f2'));

Here, the Unicode character ‘\u01f2‘ represents the Latin capital letter ‘D‘ followed by a small ‘Z‘ with a caron.

2.4. MODIFIER_LETTER

A modifier letter, in the Unicode Standard, is “a letter or symbol typically written next to another letter that it modifies in some way”.

The MODIFIER_LETTER general category type represents such modifier letters.

For example, the modifier letter small H, ‘ʰ‘, when passed to Character#getType method returns the value of 4, which is the same as the enum value of MODIFIER_LETTER:

assertEquals(Character.MODIFIER_LETTER, Character.getType('\u02b0'));

The Unicode character ‘\u020b‘ represents the modifier letter small H.

2.5. OTHER_LETTER

The OTHER_LETTER general category type represents an ideograph or a letter in a unicase alphabet. An ideograph is a graphic symbol representing an idea or a concept, independent of any particular language.

A unicase alphabet has just one case for its letters. For example, Hebrew is a unicase writing system.

Let's look at an example of a Hebrew letter Alef, ‘א‘, when we pass it to the Character#getType method, it returns the value of 5, which is equal to the enum value of OTHER_LETTER:

assertEquals(Character.OTHER_LETTER, Character.getType('\u05d0'));

The Unicode character ‘\u05d0‘ represents the Hebrew letter Alef.

2.6. LETTER_NUMBER

Finally, the LETTER_NUMBER category is associated with numerals composed of letters or letterlike symbols.

For example, the Roman numerals come under LETTER_NUMBER general category. When we call the Character#getType method with Roman Numeral Five, ‘Ⅴ', it returns the value 10, which is equal to the enum LETTER_NUMBER value:

assertEquals(Character.LETTER_NUMBER, Character.getType('\u2164'));

The Unicode character ‘\u2164‘ represents the Roman Numeral Five.

Next, let's look at the Character#isAlphabetic method.

3. Character#isAlphabetic

First, let's look at the signature of the isAlphabetic method:

public static boolean isAlphabetic(int codePoint)

This takes the Unicode code point as the input parameter and returns true if the specified Unicode code point is alphabetic and false otherwise.

A character is alphabetic if its general category type is any of the following:

  • UPPERCASE_LETTER
  • LOWERCASE_LETTER
  • TITLECASE_LETTER
  • MODIFIER_LETTER
  • OTHER_LETTER
  • LETTER_NUMBER

Additionally, a character is alphabetic if it has contributory property Other_Alphabetic as defined by the Unicode Standard.

Let's look at a few examples of characters that are alphabets:

assertTrue(Character.isAlphabetic('A'));
assertTrue(Character.isAlphabetic('\u01f2'));

In the above examples, we pass the UPPERCASE_LETTER ‘A' and TITLECASE_LETTER ‘\u01f2' which represents the Latin capital letter ‘D‘ followed by a small ‘Z‘ with a caron to the isAlphabetic method and it returns true.

4. Character#isLetter

Java's Character class provides the isLetter() method to determine if a specified character is a letter. Let's look at the method signature:

public static boolean isLetter(char ch)

It takes a character as an input parameter and returns true if the specified character is a letter and false otherwise.

A character is considered to be a letter if its general category type, provided by Character#getType method, is any of the following:

  • UPPERCASE_LETTER
  • LOWERCASE_LETTER
  • TITLECASE_LETTER
  • MODIFIER_LETTER
  • OTHER_LETTER

However, this method cannot handle supplementary characters. To handle all Unicode characters, including supplementary characters, Java's Character class provides an overloaded version of the isLetter() method:

public static boolean isLetter(int codePoint)

This method can handle all the Unicode characters as it takes a Unicode code point as the input parameter. Furthermore, it returns true if the specified Unicode code point is a letter as we defined earlier.

Let's look at a few examples of characters that are letters:

assertTrue(Character.isAlphabetic('a'));
assertTrue(Character.isAlphabetic('\u02b0'));

In the above examples, we input the LOWERCASE_LETTER ‘a' and MODIFIER_LETTER ‘\u02b0' which represents the modifier letter small H to the isLetter method and it returns true.

5. Compare and Contrast

Finally, we can see that all letters are alphabetic characters, but not all alphabetic characters are letters.

In other words, the isAlphabetic method returns true if a character is a letter or has the general category LETTER_NUMBER. Besides, it also returns true if the character has the Other_Alphabetic property defined by the Unicode Standard.

First, let's look at an example of a character which is a letter as well as an alphabet —  character ‘a‘:

assertTrue(Character.isLetter('a')); 
assertTrue(Character.isAlphabetic('a'));

The character ‘a‘, when passed to both isLetter() as well as isAlphabetic() methods as an input parameter, returns true.

Next, let's look at an example of a character that is an alphabet but not a letter. In this case, we'll use the Unicode character ‘\u2164‘, which represents the Roman Numeral Five:

assertFalse(Character.isLetter('\u2164'));
assertTrue(Character.isAlphabetic('\u2164'));

The Unicode character ‘\u2164‘ when passed to the isLetter() method returns false. On the other hand, when passed to the isAlphabetic() method, it returns true.

Certainly, for the English language, the distinction makes no difference. Since all the letters of the English language come under the category of alphabets. On the other hand, some characters in other languages might have a distinction.

6. Conclusion

In this article, we learned about the different general categories of the Unicode code point. Moreover, we covered the similarities and differences between the isAlphabetic() and isLetter() methods.

As always, all these code samples are available over on GitHub.

The post Character#isAlphabetic vs. Character#isLetter first appeared on Baeldung.
        
Viewing all 4458 articles
Browse latest View live


<script src="https://jsc.adskeeper.com/r/s/rssing.com.1596347.js" async> </script>