Quantcast
Channel: Baeldung
Viewing all 4464 articles
Browse latest View live

A Guide to Auto-Commit in JDBC

$
0
0

1. Introduction

Database connections created with the JDBC API have a feature called auto-commit mode.

Turning this mode on can help eliminate boilerplate code needed for managing transactions. In spite of this, however, its purpose and how it influences transaction handling when executing SQL statements can sometimes be unclear.

In this article, we'll discuss what auto-commit mode is and how to use it correctly for both automatic and explicit transaction management. We'll also cover various problems to avoid when auto-commit is either on or off.

2. What Is JDBC Auto-Commit Mode?

Developers will not necessarily understand how to manage database transactions effectively when using JDBC. Thus, if handling transactions manually, developers may not start them where appropriate or not at all. The same problem applies to issuing commits or rollbacks where necessary.

To get around this problem, auto-commit mode in JDBC provides a way to execute SQL statements with transaction management handled automatically by the JDBC driver.

Thus, the intention of auto-commit mode is to lift the burden from developers of having to manage transactions themselves. In this way, turning it on can make it easier to develop applications with the JDBC API. Of course, this only helps where it's acceptable for data updates to be persisted immediately after each SQL statement completes.

3. Automatic Transaction Management When Auto-Commit Is True

JDBC drivers turn on auto-commit mode for new database connections by default. When it's on, they automatically run each individual SQL statement inside its own transaction.

Besides using this default setting, we can also turn on auto-commit manually by passing true to the connection's setAutoCommit method:

connection.setAutoCommit(true);

This way of switching it on ourselves is useful for when we've previously switched it off, but then later we need automatic transaction management restored.

Now that we've covered how to ensure that auto-commit is on, we'll demonstrate that when set as such, JDBC drivers run SQL statements in their own transactions. That is, they automatically commit any data updates from each statement to the database right away.

3.1. Setting Up the Example Code

In this example, we'll use the H2 in-memory database to store our data. To use it, we first need to define the Maven dependency:

<dependency>
    <groupId>com.h2database</groupId>
    <artifactId>h2</artifactId>
    <version>1.4.200</version>
</dependency>

To start with, let's create a database table to hold details about people:

CREATE TABLE Person (
    id INTEGER not null,
    name VARCHAR(50),
    lastName VARCHAR(50),
    age INTEGER,PRIMARY KEY (id)
)

Next, we'll create two connections to the database. We'll use the first one to run our SQL queries and updates on the table. And we'll use the second connection to test if updates have been made to that table:

Connection connection1 = DriverManager.getConnection("jdbc:h2:mem:testdb", "sa", "");
Connection connection2 = DriverManager.getConnection("jdbc:h2:mem:testdb", "sa", "");

Note, we need to use a separate connection to test for committed data. This is because if we run any select queries on the first connection, then they will see updates that haven't been committed yet.

Now we'll create a POJO to represent a database record that holds information about a person:

public class Person {
    private Integer id;
    private String name;
    private String lastName;
    private Integer age;
    // standard constructor, getters, and setters
}

To insert a record into our table, let's create a method named insertPerson:

private static int insertPerson(Connection connection, Person person) throws SQLException {    
    try (PreparedStatement preparedStatement = connection.prepareStatement(
      "INSERT INTO Person VALUES (?,?,?,?)")) {
        
        preparedStatement.setInt(1, person.getId());
        preparedStatement.setString(2, person.getName());
        preparedStatement.setString(3, person.getLastName());
        preparedStatement.setInt(4, person.getAge());
        
        return preparedStatement.executeUpdate();
    }        
}     

We'll then add a updatePersonAgeById method to update a specific record in the table:

private static void updatePersonAgeById(Connection connection, int id, int newAge) throws SQLException {
    try (PreparedStatement preparedStatement = connection.prepareStatement(
      "UPDATE Person SET age = ? WHERE id = ?")) {
        preparedStatement.setInt(1, newAge);
        preparedStatement.setInt(2, id);
        
        preparedStatement.executeUpdate();
    }
}

Lastly, let's add a selectAllPeople method to select all records from the table. We'll use this to check the results of our SQL insert and update statements:

private static List selectAllPeople(Connection connection) throws SQLException {
    
    List people = null;
    
    try (Statement statement = connection.createStatement()) {
        people = new ArrayList();
        ResultSet resultSet = statement.executeQuery("SELECT * FROM Person");
        while (resultSet.next()) {
            Person person = new Person();
            person.setId(resultSet.getInt("id"));
            person.setName(resultSet.getString("name"));
            person.setLastName(resultSet.getString("lastName"));
            person.setAge(resultSet.getInt("age"));
            
            people.add(person);
        }
    }
    
    return people;
}

With these utility methods now in place, we'll test the effects of turning on auto-commit.

3.2. Running the Tests

To test our example code, let's first insert a person into the table. Then after that, from a different connection, we'll check that the database has been updated without us issuing a commit:

Person person = new Person(1, "John", "Doe", 45);
insertPerson(connection1, person);
List people = selectAllPeople(connection2);
assertThat("person record inserted OK into empty table", people.size(), is(equalTo(1)));
Person personInserted = people.iterator().next();
assertThat("id correct", personInserted.getId(), is(equalTo(1)));

Then, with this new record inserted into the table, let's update the person's age. Thereafter, we'll check from the second connection that the change has been saved to the database without us needing to call commit:

updatePersonAgeById(connection1, 1, 65);
people = selectAllPeople(connection2);
Person personUpdated = people.iterator().next();
assertThat("updated age correct", personUpdated.getAge(), is(equalTo(65)));

Thus, we have verified with our tests that when the auto-commit mode is on, the JDBC driver implicitly runs every SQL statement in its own transaction. As such, we don't need to call commit to persist updates to the database ourselves.

4. Explicit Transaction Management When Auto-Commit Is False

We need to disable auto-commit mode when we want to handle transactions ourselves and group multiple SQL statements into one transaction.

We do this by passing false to the connection's setAutoCommit method:

connection.setAutoCommit(false);

When auto-commit mode is off, we need to manually mark the end of each transaction by calling either commit or rollback on the connection.

We need to note, however, that even with auto-commit turned off, the JDBC driver will still automatically start a transaction for us when needed. For example, this happens before we run our first SQL statement, and also after each commit or rollback.

Let's demonstrate that when we execute multiple SQL statements with auto-commit off, the resulting updates will only be saved to the database when we call commit.

4.1. Running the Tests

To start with, let's insert the person record using the first connection. Then without calling commit, we'll assert that we cannot see the inserted record in the database from the other connection:

Person person = new Person(1, "John", "Doe", 45);
insertPerson(connection1, person);
List<Person> people = selectAllPeople(connection2);
assertThat("No people have been inserted into database yet", people.size(), is(equalTo(0)));

Next, we'll update the person's age on that record. And as before, we'll then assert without calling commit, that we still can't select the record from the database using the second connection:

updatePersonAgeById(connection1, 1, 65);
people = selectAllPeople(connection2);
assertThat("No people have been inserted into database yet", people.size(), is(equalTo(0)));

To complete our testing, we'll call commit and then assert that we can now see all the updates in the database using the second connection:

connection1.commit();
people = selectAllPeople(connection2);
Person personUpdated = people.iterator().next();
assertThat("person's age updated to 65", personUpdated.getAge(), is(equalTo(65)));

As we have verified in our tests above, when auto-commit mode is off we need to manually call commit to persist our changes to the database. Doing so will save any updates from all the SQL statements we've executed since the start of our current transaction. That is either, since we opened the connection if this is our first transaction, or otherwise after our last commit or rollback.

5. Considerations and Potential Problems

It can be convenient for us to run SQL statements with auto-commit turned on for relatively trivial applications. That is, where manual transaction control is not necessary. However, in more complex situations we should consider that when the JDBC driver handles transactions automatically, this may sometimes lead to unwanted side effects or problems.

One thing we need to consider is that when auto-commit is on it can potentially waste significant processing time and resources. This is because it causes the driver to run every SQL statement in its own transaction whether necessary or not.

For example, if we execute the same statement many times with different values, each call is wrapped in its own transaction. Therefore, this can lead to unnecessary execution and resource management overhead.

Thus in such cases, it's usually better for us to turn auto-commit off and explicitly batch multiple calls to the same SQL statement into one transaction. In doing so, we'll likely see a substantial improvement in application performance.

Something else to note is that it's not advisable for us to switch auto-commit back on during an open transaction. This is because turning auto-commit mode on mid-transaction will commit all pending updates to the database, whether the current transaction is complete or not. Thus, we should probably avoid doing this as it may lead to data inconsistencies.

6. Conclusion

In this article, we discussed the purpose of auto-commit mode in the JDBC API. We also covered how to enable both implicit and explicit transaction management by turning it on or off respectively. Lastly, we touched on various issues or problems to consider whilst using it.

As always, the full source code of the examples can be found over on GitHub.

The post A Guide to Auto-Commit in JDBC first appeared on Baeldung.
       

How to Set JSON Content Type In Spring MVC

$
0
0

1. Introduction

The content type indicates how to interpret the data present in the request/response. Whenever a controller receives a web request, it consumes or produces some media types. In this request-response model, several media types can be consumed/produced, and JSON is one of them.

In this quick tutorial, we're going to look at different ways to set the content type in Spring MVC.

2. @RequestMapping in Spring

Simply put, @RequestMapping is an important annotation that maps web requests to a Spring controller. It has various attributes including HTTP method, request parameters, headers, and media types.

Generally, media types fall into two categories: consumable and producible. Other than these two, we can also define a custom media type in Spring. The main purpose is, to restrict the primary mapping, to a list of media types for our request handler.

2.1. Consumable Media Type

With the consumes attribute, we specify the media type that the controller will accept from a client. We can provide a list of media types too. Let's define a simple endpoint:

@RequestMapping(value = "/greetings", method = RequestMethod.POST, consumes="application/json")
public void addGreeting(@RequestBody ContentType type, Model model) {
    // code here
}

If a client specifies a media type that is unable to consume by resource, the system will generate an HTTP “415 Unsupported Media Type” error.

2.2. Producible Media Type

As opposed to the consumes attribute, produces specifies the media type a resource can produce and send back to the client. Without a doubt, we can use a list of options. If a resource is unable to produce the requested resource, the system will generate an HTTP “406 Not Acceptable” error.

Let's start with a simple example – an API exposing a JSON string.

Here's our endpoint:

@RequestMapping(
  value = "/greetings-with-response-body", 
  method = RequestMethod.GET, 
  produces="application/json"
) 
@ResponseBody
public String getGreetingWhileReturnTypeIsString() { 
    return "{\"test\": \"Hello using @ResponseBody\"}";
}

Let's test this using CURL:

curl http://localhost:8080/greetings-with-response-body

The above command produces the response:

{ "test": "Hello using @ResponseBody" }

Based on the content type present in the header, @ResponseBody only binds a method return value to the web response body.

3. Content-Type Not Being Set Properly

When a method has a return type String, and no JSON Mapper present at classpath. In this case, the return value is handled by StringHttpMessageConverter class which sets the content type to “text/plain”. This often leads to an issue where the controller is unable to produce the expected content type.

Let's look at different approaches to solve this issue.

3.1. Using @ResponseBody with JSON Mapper

The Jackson ObjectMapper class parses a JSON from a string, stream, or file. If Jackson is on the classpath, any controller in Spring applications renders the JSON response by default.

To include Jackson on the classpath, we need to add the following dependency in pom.xml:

<dependency>
    <groupId>com.fasterxml.jackson.core</groupId>
    <artifactId>jackson-databind</artifactId>
    <version>2.12.4</version>
</dependency>

Let's add a unit test to verify from the response:

@Test
public void givenReturnTypeIsString_whenJacksonOnClasspath_thenDefaultContentTypeIsJSON() 
  throws Exception {
    
    // Given
    String expectedMimeType = "application/json";
    
    // Then
    String actualMimeType = this.mockMvc.perform(MockMvcRequestBuilders.get("/greetings-with-response-body", 1))
      .andReturn().getResponse().getContentType();
    Assert.assertEquals(expectedMimeType, actualMimeType);
}

3.2. Using ResponseEntiy

In contrast to @ResponseBody, the ResponseEntity is a generic type that represents the entire HTTP response. As a result, we can control anything that goes into it: status code, header, and the body.

Let's define a new endpoint:

@RequestMapping(
  value = "/greetings-with-response-entity",
  method = RequestMethod.GET, 
  produces = "application/json"
)
public ResponseEntity<String> getGreetingWithResponseEntity() {
    final HttpHeaders httpHeaders= new HttpHeaders();
    httpHeaders.setContentType(MediaType.APPLICATION_JSON);
    return new ResponseEntity<String>("{\"test\": \"Hello with ResponseEntity\"}", httpHeaders, HttpStatus.OK);
}

In the developer console of our browser, we can see the following response:

{"test": "Hello with ResponseEntity"}

With ResponseEntity, we should have the annotation-driven tag in our dispatcher servlet:

<mvc:annotation-driven />

Simply put, the above tag gives greater control over the inner working of Spring MVC.

Let's verify the response's content type with a test case:

@Test
public void givenReturnTypeIsResponseEntity_thenDefaultContentTypeIsJSON() throws Exception {
    
    // Given
    String expectedMimeType = "application/json";
    
    // Then
    String actualMimeType = this.mockMvc.perform(MockMvcRequestBuilders.get("/greetings-with-response-entity", 1))
      .andReturn().getResponse().getContentType();
    Assert.assertEquals(expectedMimeType, actualMimeType);
}

3.3. Using Map<String, Object> return type

Last but not the least, we can also set the content type by changing the return type from String to Map. This Map return type will need marshalling and returns JSON object.

Here's our new endpoint:

@RequestMapping(
  value = "/greetings-with-map-return-type", 
  method = RequestMethod.GET, 
  produces = "application/json"
)
@ResponseBody
public Map<String, Object> getGreetingWhileReturnTypeIsMap() {
    HashMap<String, Object> map = new HashMap<String, Object>();
    map.put("test", "Hello from map");
    return map;
}

Let's see this in action:

curl http://localhost:8080/greetings-with-map-return-type

The curl command returns a JSON response:

{ "test": "Hello from map" }

4. Conclusion

This article explains how to set content type in Spring MVC, first adding Json mapper in the classpath, then using ResponseEntity, and finally changing the return type from String to Map.

As always, all the code snippets can be found over on GitHub.

The post How to Set JSON Content Type In Spring MVC first appeared on Baeldung.
       

Diagnosing a Running JVM

$
0
0

1. Overview

The Java Virtual Machine (JVM) is a virtual machine that enables a computer to run Java programs. In this article, we'll see how we can diagnose a running JVM with ease.

We have many tools available in the JDK itself which can be used for various development, monitoring, and troubleshooting activities. Let's have a look at jcmd, which is quite easy to use and can provide a variety of information about a running JVM. In addition, jcmd is a recommended tool from JDK 7 onwards for enhanced JVM diagnostics with no or minimum performance overhead.

2. What is jcmd?

This is a utility that sends diagnostic command requests to a running JVM. However, it must be used on the same machine on which JVM is running. Additional details are available in its documentation.

Let's see how we can use this utility with a sample Java application running on a server.

3. How to Use jcmd?

Let's create a quick demo web application using Spring Initializr with JDK11. Now, let's start the server and diagnose it using jcmd.

3.1. Getting the PID

We know that each process has an associated process id known as PID. Hence to get the associated PID for our application, we can use jcmd which will list all applicable Java processes as below:

root@c6b47b129071:/# jcmd
65 jdk.jcmd/sun.tools.jcmd.JCmd
18 /home/pgm/demo-0.0.1-SNAPSHOT.jar
root@c6b47b129071:/# 

Here, we can see the PID of our running application is 18.

3.2. Get List of Possible jcmd Usage

Let's find out possible options available with the jcmd PID help command to start with:

root@c6b47b129071:/# jcmd 18 help
18:
The following commands are available:
Compiler.CodeHeap_Analytics
Compiler.codecache
Compiler.codelist
Compiler.directives_add
Compiler.directives_clear
Compiler.directives_print
Compiler.directives_remove
Compiler.queue
GC.class_histogram
GC.class_stats
GC.finalizer_info
GC.heap_dump
GC.heap_info
GC.run
GC.run_finalization
JFR.check
JFR.configure
JFR.dump
JFR.start
JFR.stop
JVMTI.agent_load
JVMTI.data_dump
ManagementAgent.start
ManagementAgent.start_local
ManagementAgent.status
ManagementAgent.stop
Thread.print
VM.class_hierarchy
VM.classloader_stats
VM.classloaders
VM.command_line
VM.dynlibs
VM.flags
VM.info
VM.log
VM.metaspace
VM.native_memory
VM.print_touched_methods
VM.set_flag
VM.stringtable
VM.symboltable
VM.system_properties
VM.systemdictionary
VM.uptime
VM.version
help

The available diagnostic commands may be different in different versions of HotSpot VM.

4. jcmd Commands

Let's explore some of the most useful jcmd command options to diagnose our running JVM.

4.1. VM.version

This is to get JVM basic details as shown below:

root@c6b47b129071:/# jcmd 18 VM.version
18:
OpenJDK 64-Bit Server VM version 11.0.11+9-Ubuntu-0ubuntu2.20.04
JDK 11.0.11
root@c6b47b129071:/# 

Here we can see that we are using OpenJDK 11 for our sample application.

4.2. VM.system_properties

This will print all the system properties set for our VM. There can be several hundred lines of information displayed:

root@c6b47b129071:/# jcmd 18 VM.system_properties
18:
#Thu Jul 22 10:56:13 IST 2021
awt.toolkit=sun.awt.X11.XToolkit
java.specification.version=11
sun.cpu.isalist=
sun.jnu.encoding=ANSI_X3.4-1968
java.class.path=/home/pgm/demo-0.0.1-SNAPSHOT.jar
java.vm.vendor=Ubuntu
sun.arch.data.model=64
catalina.useNaming=false
java.vendor.url=https\://ubuntu.com/
user.timezone=Asia/Kolkata
java.vm.specification.version=11
...

4.3. VM.flags

For our sample application, this will print all VM arguments used, either given by us or used default by JVM. Here, we can notice various default VM arguments as below:

root@c6b47b129071:/# jcmd 18 VM.flags            
18:
-XX:CICompilerCount=3 -XX:CompressedClassSpaceSize=260046848 -XX:ConcGCThreads=1 -XX:G1ConcRefinementThreads=4 -XX:G1HeapRegionSize=1048576 -XX:GCDrainStackTargetSize=64 -XX:InitialHeapSize=536870912 -XX:MarkStackSize=4194304 -XX:MaxHeapSize=536870912 -XX:MaxMetaspaceSize=268435456 -XX:MaxNewSize=321912832 -XX:MinHeapDeltaBytes=1048576 -XX:NonNMethodCodeHeapSize=5830732 -XX:NonProfiledCodeHeapSize=122913754 -XX:ProfiledCodeHeapSize=122913754 -XX:ReservedCodeCacheSize=251658240 -XX:+SegmentedCodeCache -XX:ThreadStackSize=256 -XX:+UseCompressedClassPointers -XX:+UseCompressedOops -XX:+UseFastUnorderedTimeStamps -XX:+UseG1GC 
root@c6b47b129071:/#

Similarly, other commands, like VM.command_line, VM.uptime, VM.dynlibs, also provide other basic and useful details about various other properties used.

All of the above commands are to majorly get different JVM-related details. Now let's look into some more commands that can help in some troubleshooting related to JVM.

4.4. Thread.print

This command is to get the instant thread dump. Hence, it will print the stack trace of all running threads. Following is the way to use it, which can give long output depending on the number of threads in use:

root@c6b47b129071:/# jcmd 18 Thread.print
18:
2021-07-22 10:58:08
Full thread dump OpenJDK 64-Bit Server VM (11.0.11+9-Ubuntu-0ubuntu2.20.04 mixed mode, sharing):
Threads class SMR info:
_java_thread_list=0x00007f21cc0028d0, length=25, elements={
0x00007f2210244800, 0x00007f2210246800, 0x00007f221024b800, 0x00007f221024d800,
0x00007f221024f800, 0x00007f2210251800, 0x00007f2210253800, 0x00007f22102ae800,
0x00007f22114ef000, 0x00007f21a44ce000, 0x00007f22114e3800, 0x00007f221159d000,
0x00007f22113ce800, 0x00007f2210e78800, 0x00007f2210e7a000, 0x00007f2210f20800,
0x00007f2210f22800, 0x00007f2210f24800, 0x00007f2211065000, 0x00007f2211067000,
0x00007f2211069000, 0x00007f22110d7800, 0x00007f221122f800, 0x00007f2210016000,
0x00007f21cc001000
}
"Reference Handler" #2 daemon prio=10 os_prio=0 cpu=2.32ms elapsed=874.34s tid=0x00007f2210244800 nid=0x1a waiting on condition  [0x00007f221452a000]
   java.lang.Thread.State: RUNNABLE
	at java.lang.ref.Reference.waitForReferencePendingList(java.base@11.0.11/Native Method)
	at java.lang.ref.Reference.processPendingReferences(java.base@11.0.11/Reference.java:241)
	at java.lang.ref.Reference$ReferenceHandler.run(java.base@11.0.11/Reference.java:213)
"Finalizer" #3 daemon prio=8 os_prio=0 cpu=0.32ms elapsed=874.34s tid=0x00007f2210246800 nid=0x1b in Object.wait()  [0x00007f22144e9000]
   java.lang.Thread.State: WAITING (on object monitor)
	at java.lang.Object.wait(java.base@11.0.11/Native Method)
	- waiting on <0x00000000f7330898> (a java.lang.ref.ReferenceQueue$Lock)
	at java.lang.ref.ReferenceQueue.remove(java.base@11.0.11/ReferenceQueue.java:155)
	- waiting to re-lock in wait() <0x00000000f7330898> (a java.lang.ref.ReferenceQueue$Lock)
	at java.lang.ref.ReferenceQueue.remove(java.base@11.0.11/ReferenceQueue.java:176)
	at java.lang.ref.Finalizer$FinalizerThread.run(java.base@11.0.11/Finalizer.java:170)
"Signal Dispatcher" #4 daemon prio=9 os_prio=0 cpu=0.40ms elapsed=874.33s tid=0x00007f221024b800 nid=0x1c runnable  [0x0000000000000000]
   java.lang.Thread.State: RUNNABLE

Detailed discussion on capturing a thread dump using other options can be found here.

4.5. GC.class_histogram

Let's use another jcmd command that will provide important information about heap usage. Additionally, this will list all classes (either external or application-specific) with many instances. Again, the list can be of hundreds of lines depending on the number of classes in use:

root@c6b47b129071:/# jcmd 18 GC.class_histogram
18:
 num     #instances         #bytes  class name (module)
-------------------------------------------------------
   1:         41457        2466648  [B (java.base@11.0.11)
   2:         38656         927744  java.lang.String (java.base@11.0.11)
   3:          6489         769520  java.lang.Class (java.base@11.0.11)
   4:         21497         687904  java.util.concurrent.ConcurrentHashMap$Node (java.base@11.0.11)
   5:          6570         578160  java.lang.reflect.Method (java.base@11.0.11)
   6:          6384         360688  [Ljava.lang.Object; (java.base@11.0.11)
   7:          9668         309376  java.util.HashMap$Node (java.base@11.0.11)
   8:          7101         284040  java.util.LinkedHashMap$Entry (java.base@11.0.11)
   9:          3033         283008  [Ljava.util.HashMap$Node; (java.base@11.0.11)
  10:          2919         257000  [I (java.base@11.0.11)
  11:           212         236096  [Ljava.util.concurrent.ConcurrentHashMap$Node; (java.base@11.0.11)

However, if this doesn't give a clear picture, we can get a heap dump. Let's look at it next.

4.6. GC.heap_dump

This command will give an instant JVM heap dump. Therefore we can extract heap dump into a file to analyze later as below:

root@c6b47b129071:/# jcmd 18 GC.heap_dump ./demo_heap_dump
18:
Heap dump file created
root@c6b47b129071:/# 

Here, demo_heap_dump is the heap dump file name. In addition, this will be created at the same location where our application jar is located.

4.7. JFR Command Options

In our earlier article, we discussed Java application monitoring using JFR and JMC. Now, let's look into the jcmd commands that we can use to analyze performance issues with our application.

JFR (or Java Flight Recorder) is a profiling and event collection framework built into the JDK. JFR allows us to gather detailed low-level information about how JVM and Java applications are behaving. In addition, we can use JMC to visualize the data collected by JFR. Hence, JFR and JMC together create a complete toolchain to continuously collect low-level and detailed runtime information.

Although how to use JMC is not in the scope of this article, we will see how we can create a JFR file using jcmd. JFR is a commercial feature. Hence by default, it's disabled.  However, that can be enabled using ‘jcmd PID VM.unlock_commercial_features‘.

However, we have used OpenJDK for our article. Hence JFR is enabled for us. Now let's generate a JFR file using the jcmd command as below:

root@c6b47b129071:/# jcmd 18 JFR.start name=demo_recording settings=profile delay=10s duration=20s filename=./demorecording.jfr
18:
Recording 1 scheduled to start in 10 s. The result will be written to:
/demorecording.jfr
root@c6b47b129071:/# jcmd 18 JFR.check
18:
Recording 1: name=demo_recording duration=20s (delayed)
root@c6b47b129071:/# jcmd 18 JFR.check
18:
Recording 1: name=demo_recording duration=20s (running)
root@c6b47b129071:/# jcmd 18 JFR.check
18:
Recording 1: name=demo_recording duration=20s (stopped)

We have created a sample JFR recording file name demorecording.jfr at the same location where our jar application is located. Additionally, this recording is of 20seconds and configured as per requirements.

In addition, we can check the status of the JFR recording using the JFR.check command. And, we can instantly stop and discard the recording using the JFR.stop command. On the other hand, the JFR.dump command can be used to instantly stop and dump the recording.

4.8. VM.native_memory

This is one of the best commands that can provide a lot of useful details about heap and non-heap memory on a JVM. Therefore, this can be used to tune memory usage and detect any memory leak. As we know, JVM memory can be broadly classified as heap and non-heap memory. And to get the details of complete JVM memory usage, we can use this utility. In addition, this can be useful in defining memory size for a container-based application.

To use this feature we need to restart our application with additional VM argument i.e. –XX:NativeMemoryTracking=summary   or  -XX:NativeMemoryTracking=detail. Note that enabling NMT causes a 5% -10% performance overhead.

This will give us a new PID to diagnose:

root@c6b47b129071:/# jcmd 19 VM.native_memory
19:
Native Memory Tracking:
Total: reserved=1159598KB, committed=657786KB
-                 Java Heap (reserved=524288KB, committed=524288KB)
                            (mmap: reserved=524288KB, committed=524288KB) 
 
-                     Class (reserved=279652KB, committed=29460KB)
                            (classes #6425)
                            (  instance classes #5960, array classes #465)
                            (malloc=1124KB #15883) 
                            (mmap: reserved=278528KB, committed=28336KB) 
                            (  Metadata:   )
                            (    reserved=24576KB, committed=24496KB)
                            (    used=23824KB)
                            (    free=672KB)
                            (    waste=0KB =0.00%)
                            (  Class space:)
                            (    reserved=253952KB, committed=3840KB)
                            (    used=3370KB)
                            (    free=470KB)
                            (    waste=0KB =0.00%)
 
-                    Thread (reserved=18439KB, committed=2699KB)
                            (thread #35)
                            (stack: reserved=18276KB, committed=2536KB)
                            (malloc=123KB #212) 
                            (arena=39KB #68)
 
-                      Code (reserved=248370KB, committed=12490KB)
                            (malloc=682KB #3839) 
                            (mmap: reserved=247688KB, committed=11808KB) 
 
-                        GC (reserved=62483KB, committed=62483KB)
                            (malloc=10187KB #7071) 
                            (mmap: reserved=52296KB, committed=52296KB) 
 
-                  Compiler (reserved=146KB, committed=146KB)
                            (malloc=13KB #307) 
                            (arena=133KB #5)
 
-                  Internal (reserved=460KB, committed=460KB)
                            (malloc=428KB #1421) 
                            (mmap: reserved=32KB, committed=32KB) 
 
-                     Other (reserved=16KB, committed=16KB)
                            (malloc=16KB #3) 
 
-                    Symbol (reserved=6593KB, committed=6593KB)
                            (malloc=6042KB #72520) 
                            (arena=552KB #1)
 
-    Native Memory Tracking (reserved=1646KB, committed=1646KB)
                            (malloc=9KB #113) 
                            (tracking overhead=1637KB)
 
-        Shared class space (reserved=17036KB, committed=17036KB)
                            (mmap: reserved=17036KB, committed=17036KB) 
 
-               Arena Chunk (reserved=185KB, committed=185KB)
                            (malloc=185KB) 
 
-                   Logging (reserved=4KB, committed=4KB)
                            (malloc=4KB #191) 
 
-                 Arguments (reserved=18KB, committed=18KB)
                            (malloc=18KB #489) 
 
-                    Module (reserved=124KB, committed=124KB)
                            (malloc=124KB #1521) 
 
-              Synchronizer (reserved=129KB, committed=129KB)
                            (malloc=129KB #1089) 
 
-                 Safepoint (reserved=8KB, committed=8KB)
                            (mmap: reserved=8KB, committed=8KB) 
 

Here, we can notice details about different memory types apart from Java Heap Memory. The Class defines the JVM memory used to store class metadata. Similarly, the Thread defines the memory that our application threads are using. And the Code gives the memory used to store JIT-generated code, the Compiler itself has some space usage, and GC occupies some space too.

In addition, the reserved can give an estimation of the memory required for our application. And the committed shows the minimum allocated memory.

5. Diagnose Memory Leak

Let's see how we can identify if there is any memory leak in our JVM. Hence to start with, we need to first have a baseline. And then need to monitor for some time to understand if there is any consistent increase in memory in any of the memory types mentioned above.

Let's first baseline the JVM memory usage as below:

root@c6b47b129071:/# jcmd 19 VM.native_memory baseline
19:
Baseline succeeded

Now, use the application for normal or heavy usage for some time. In the end, just use diff to identify the change since baseline as below:

root@c6b47b129071:/# jcmd 19 VM.native_memory summary.diff
19:
Native Memory Tracking:
Total: reserved=1162150KB +2540KB, committed=660930KB +3068KB
-                 Java Heap (reserved=524288KB, committed=524288KB)
                            (mmap: reserved=524288KB, committed=524288KB)
 
-                     Class (reserved=281737KB +2085KB, committed=31801KB +2341KB)
                            (classes #6821 +395)
                            (  instance classes #6315 +355, array classes #506 +40)
                            (malloc=1161KB +37KB #16648 +750)
                            (mmap: reserved=280576KB +2048KB, committed=30640KB +2304KB)
                            (  Metadata:   )
                            (    reserved=26624KB +2048KB, committed=26544KB +2048KB)
                            (    used=25790KB +1947KB)
                            (    free=754KB +101KB)
                            (    waste=0KB =0.00%)
                            (  Class space:)
                            (    reserved=253952KB, committed=4096KB +256KB)
                            (    used=3615KB +245KB)
                            (    free=481KB +11KB)
                            (    waste=0KB =0.00%)
 
-                    Thread (reserved=18439KB, committed=2779KB +80KB)
                            (thread #35)
                            (stack: reserved=18276KB, committed=2616KB +80KB)
                            (malloc=123KB #212)
                            (arena=39KB #68)
 
-                      Code (reserved=248396KB +21KB, committed=12772KB +213KB)
                            (malloc=708KB +21KB #3979 +110)
                            (mmap: reserved=247688KB, committed=12064KB +192KB)
 
-                        GC (reserved=62501KB +16KB, committed=62501KB +16KB)
                            (malloc=10205KB +16KB #7256 +146)
                            (mmap: reserved=52296KB, committed=52296KB)
 
-                  Compiler (reserved=161KB +15KB, committed=161KB +15KB)
                            (malloc=29KB +15KB #341 +34)
                            (arena=133KB #5)
 
-                  Internal (reserved=495KB +35KB, committed=495KB +35KB)
                            (malloc=463KB +35KB #1429 +8)
                            (mmap: reserved=32KB, committed=32KB)
 
-                     Other (reserved=52KB +36KB, committed=52KB +36KB)
                            (malloc=52KB +36KB #9 +6)
 
-                    Symbol (reserved=6846KB +252KB, committed=6846KB +252KB)
                            (malloc=6294KB +252KB #76359 +3839)
                            (arena=552KB #1)
 
-    Native Memory Tracking (reserved=1727KB +77KB, committed=1727KB +77KB)
                            (malloc=11KB #150 +2)
                            (tracking overhead=1716KB +77KB)
 
-        Shared class space (reserved=17036KB, committed=17036KB)
                            (mmap: reserved=17036KB, committed=17036KB)
 
-               Arena Chunk (reserved=186KB, committed=186KB)
                            (malloc=186KB)
 
-                   Logging (reserved=4KB, committed=4KB)
                            (malloc=4KB #191)
 
-                 Arguments (reserved=18KB, committed=18KB)
                            (malloc=18KB #489)
 
-                    Module (reserved=124KB, committed=124KB)
                            (malloc=124KB #1528 +7)
 
-              Synchronizer (reserved=132KB +3KB, committed=132KB +3KB)
                            (malloc=132KB +3KB #1111 +22)
 
-                 Safepoint (reserved=8KB, committed=8KB)
                            (mmap: reserved=8KB, committed=8KB)

Over time as GC works, we'll notice an increase and decrease in memory usage. However, if there is an uncontrolled increase in memory usage, then this could be a memory leak issue. Hence, we can identify the memory leak area, like Heap, Thread, Code, Class, etc., from these stats. And if our application needs more memory, we can tune corresponding VM arguments respectively.

If the memory leak is in Heap, we can take a heap dump (as explained earlier) or maybe just tune Xmx. Similarly, if the memory leak is in Thread, we can look for unhandled recursive instructions or tune Xss.

6. Conclusion

In this article, we've covered a utility to diagnose JVM for different scenarios.

We also covered the jcmd command and its various usage to get heap dump, thread dump, JFR recording for various performance-related analyses. In the end, we also looked at a way to diagnose a memory leak using jcmd.

The post Diagnosing a Running JVM first appeared on Baeldung.
       

Java Weekly, Issue 397

$
0
0

1. Spring and Java

>> Interview with Brian Goetz on Java Language [inside.java]

A controversial take on Project Loom and its impact on the reactive model, but also an interesting discussion on other Java features.

>> GraalVM 21.2 Improves Native Components [infoq.com]

Faster native compilation, better integration with JFR, native testing, and more, all in a new GraalVM release.

>> Spring Data JPA – How to Return DTOs from Native Queries [thorben-janssen.com]

A practical guide to interface and class-based projections with Spring Data and native queries.

Also worth reading:

Webinars and presentations:

Time to upgrade:

2. Technical & Musings

>> Kubernetes 1.22: Reaching New Peaks [kubernetes.io]

Be aware of the removal of some beta resources in the 1.22 release! also including server-side applications, external credential providers, and many more.

>> Feature Parity [martinfowler.com]

A pattern to replicate the existing functionality of a legacy system using a new technology stack.

Also worth reading:

3. Comics

And my favorite Dilberts of the week:

>> Lanyards And Hugs [dilbert.com]

>> Dilbert Simulation [dilbert.com]

>> Wally Multi Zooms [dilbert.com]

4. Pick of the Week

>> The Four Quadrants of Conformism [paulgraham.com]

The post Java Weekly, Issue 397 first appeared on Baeldung.
       

Bitmasking in Java with Bitwise Operators

$
0
0

1. Overview

In this tutorial, we'll look at how to implement low-level bitmasking using bitwise operators. We'll see how we can treat a single int variable as a container for a separate piece of data.

2. Bitmasking

Bitmasking allows us to store multiple values inside one numerical variable. Instead of thinking about this variable as a whole number, we treat its every bit as a separate value.

Because a bit can equal either zero or one, we can also think of it as either false or true. We can also slice a group of bits and treat them as a smaller number variable or even a String.

2.1. Example

Suppose we have a minimal memory footprint and need to store all information about a user's account inside one int variable. The first eight bits (from 32 available) will store boolean information like “is the account active?” or “is the account premium?”

As for the remaining 24 bits, we'll convert them to three characters that will serve as the user's identifier.

2.2. Encoding

Our user will have an identifier “AAA”, and he'll have an active and premium account (stored in the first two bits). In binary representation, it will look like:

String stringRepresentation = "01000001010000010100000100000011";

This can be easily encoded into an int variable using the built-in Integer#parseUnsignedInt method:

int intRepresentation = Integer.parseUnsignedInt(stringRepresentation, 2);
assertEquals(intRepresentation, 1094795523);

2.3. Decoding

This process can also be reversed using the Integer#toBinaryString method:

String binaryString = Integer.toBinaryString(intRepresentation);
String stringRepresentation = padWithZeros(binaryString);
assertEquals(stringRepresentation, "01000001010000010100000100000011");

3. Extracting One Bit

3.1. First Bit

If we want to check the first bit of our account variable, all we need is the bitwise “and” operator and the number “one as a bitmask. Because number “one” in binary form has only the first bit set to one and the rest of them are zeros, it will erase all the bits from our variable, leaving only the first one intact:

10000010100000101000001000000011
00000000000000000000000000000001
-------------------------------- &
00000000000000000000000000000001

Then we need to check if the produced value is not equal to zero:

intRepresentation & 1 != 0

3.2. Bit at Arbitrary Position

If we want to check some other bit, we need to create an appropriate mask, which needs to have a bit at the given position set to one and the rest set to zeros. The easiest way to do that is to shift the mask we already have:

1 << (position - 1)

The above line of code with the position variable set to 3 will change our mask from:

00000000000000000000000000000001
to:

00000000000000000000000000000100

So now, the bitwise equation will look like:

10000010100000101000001000000011
00000000000000000000000000000100
-------------------------------- &
00000000000000000000000000000000

Putting all of this together, we can write a method for extracting a single bit at the given position:

private boolean extractValueAtPosition(int intRepresentation, int position) {
    return ((intRepresentation) & (1 << (position - 1))) != 0;
}

To the same effect, we could also shift the intRepresentation variable in the reverse direction instead of changing the mask.

4. Extracting Multiple Bits

We can use similar methods to extract multiple bits from an integer. Let's extract the last three bytes of our user account variable and convert them into a string. First, we need to get rid of the first eight bits by shifting the variable to the right:

int lastThreeBites = intRepresentation >> 8;
String stringRepresentation = getStringRepresentation(lastThreeBites);
assertEquals(stringRepresentation, "00000000010000010100000101000001");

We still have 32 bits because the int will always have 32 bits. However, now we're interested in the first 24 bits, and the rest of them are zeros and will be easy to ignore. The int variable we created could be easily used as an integer ID, but because we want to have a string ID, we have one more step to do.

We'll split the string representation of the binary into groups of eight characters, parse them to char variables, and join them into one final String.

For convenience, we'll also ignore empty bytes:

Arrays.stream(stringRepresentation.split("(?<=\\G.{8})"))
  .filter(eightBits -> !eightBits.equals("00000000"))
  .map(eightBits -> (char)Integer.parseInt(eightBits, 2))
  .collect(StringBuilder::new, StringBuilder::append, StringBuilder::append)
  .toString();

5. Applying a Bitmask

Instead of extracting and checking values of single bits, we can also create a mask to check many of them at the same time. We want to check if our user has an active and premium account, so his variable has the first two bits both set to one.

We could check them separately using previous methods, but it's faster to create a mask that will select them both:

int user = Integer.parseUnsignedInt("00000000010000010100000101000001", 2);
int mask = Integer.parseUnsignedInt("00000000000000000000000000000011", 2);
int masked = user & mask;

Because our user has an active account, but it's not premium, the masked value will have only the first bit set to one:

assertEquals(getStringRepresentation(masked), "00000000000000000000000000000001");

Now, we can easily and cheaply assert whether a user meets our conditions:

assertFalse((user & mask) == mask);

6. Conclusion

In this tutorial, we learned how to use bitwise operators to create bitmasks and apply them to extract binary information from integers. As always, all the code examples are available over on GitHub.

The post Bitmasking in Java with Bitwise Operators first appeared on Baeldung.
       

Java Annotation Attribute Value Restrictions

$
0
0

1. Overview

These days, it's hard to imagine Java without annotations, a powerful tool in the Java language.

Java provides a set of built-in annotations. Additionally, there are plenty of annotations from different libraries. We can even define and process our own annotations. We can tune these annotations with attribute values, however, these attribute values have limitations. Particularly, an annotation attribute value must be a constant expression.

In this tutorial, we're going to learn some reasons for that limitation and look under the hood of the JVM to explain it better. We'll also take a look at some examples of problems and solutions involving annotation attribute values.

2. Java Annotation Attributes Under the Hood

Let's consider how Java class files store annotation attributes. Java has a special structure for it called element_value. This structure stores a particular annotation attribute.

The structure element_value can store values of four different types:

  • a constant from the pool of constants
  • a class literal
  • a nested annotation
  • an array of values

So, a constant from an annotation attribute is a compile-time constant. Otherwise, the compiler wouldn't know what value it should put into the constant pool and use as an annotation attribute.

The Java specification defines operations producing constant expressions. If we apply these operations to compile-time constants, we'll get compile-time constants.

Let's assume we have an annotation @Marker that has an attribute value:

@Target(ElementType.TYPE)
@Retention(RetentionPolicy.RUNTIME)
public @interface Marker {
    String value();
}

For example, this code compiles without errors:

@Marker(Example.ATTRIBUTE_FOO + Example.ATTRIBUTE_BAR)
public class Example {
    static final String ATTRIBUTE_FOO = "foo";
    static final String ATTRIBUTE_BAR = "bar";
    // ...
}

Here, we define an annotation attribute as a concatenation of two strings. A concatenation operator produces a constant expression.

3. Using Static Initializer

Let's consider a constant initialized in a static block:

@Marker(Example.ATTRIBUTE_FOO)
public class Example {
    static final String[] ATTRIBUTES = {"foo", "Bar"};
    static final String ATTRIBUTE_FOO;
    static {
        ATTRIBUTE_FOO = ATTRIBUTES[0];
    }
    
    // ...
}

It initializes the field in the static block and tries to use that field as an annotation attribute. This approach leads to a compilation error.

First, the variable ATTRIBUTE_FOO has static and final modifiers, but the compiler can't compute that field. The application computes it at runtime.

Second, annotation attributes must have an exact value before the JVM loads the class. However, when the static initializer runs, the class is already loaded. So, this limitation makes sense.

The same error shows up when in the field initialization. This code is incorrect for the same reason:

@Marker(Example.ATTRIBUTE_FOO)
public class Example {
    static final String[] ATTRIBUTES = {"foo", "Bar"};
    static final String ATTRIBUTE_FOO = ATTRIBUTES[0];
    // ...
}

How does the JVM initialize ATTRIBUTE_FOO? Array access operator ATTRIBUTES[0] runs in a class initializer. So, ATTRIBUTE_FOO is a runtime constant. It's not defined at compile-time.

4. Array Constant as an Annotation Attribute

Let's consider an array annotation attribute:

@Target(ElementType.TYPE)
@Retention(RetentionPolicy.RUNTIME)
public @interface Marker {
    String[] value();
}

This code will not compile:

@Marker(value = Example.ATTRIBUTES)
public class Example {
    static final String[] ATTRIBUTES = {"foo", "bar"};
    // ...
}

First, although the final modifier protects the reference from being changed, we can still modify array elements.

Second, array literals can't be runtime constants. The JVM sets each element up in the static initializer — a limitation we described earlier.

Finally, a class file stores values of each element of that array. So, the compiler calculates each element of the attribute array, and it happens at compile-time.

Thus, we can only specify an array attribute each time:

@Marker(value = {"foo", "bar"})
public class Example {
    // ...
}

We can still use a constant as a primitive element of an array attribute.

5. Annotations in a Marker Interface: Why Doesn't it Work?

So, if an annotation attribute is an array, we have to repeat it each time. But we would like to avoid this copy-paste. Why don't we make our annotation @Inherited? We could add our annotation to a marker interface:

@Marker(value = {"foo", "bar"})
public interface MarkerInterface {
}

Then, we could make the classes that require this annotation implement it:

public class Example implements MarkerInterface {
    // ...
}

This approach won't work. The code will compile without errors. However, Java doesn't support annotation inheritance from interfaces, even if the annotations have the @Inherited annotation itself. So, a class implementing the marker interface won't inherit the annotation.

The reason for this is the problem of multiple inheritance. Indeed, if multiple interfaces have the same annotation, Java can't choose one.

So, we can't avoid this copy-paste with a marker interface.

6. Array Element as an Annotation Attribute

Suppose we have an array constant and we use this constant as an annotation attribute:

@Marker(Example.ATTRIBUTES[0])
public class Example {
    static final String[] ATTRIBUTES = {"Foo", "Bar"};
    // ...
}

This code won't compile. Annotation parameters must be a compile-time constant. But, as we considered before, an array is not a compile-time constant.

Moreover, an array access expression is not a constant expression.

What if we had a List instead of an array? Method calls do not belong to the constant expressions. Thus, using the get method of the List class results in the same error.

Instead, we should explicitly refer to a constant:

@Marker(Example.ATTRIBUTE_FOO)
public class Example {
    static final String ATTRIBUTE_FOO = "Foo";
    static final String[] ATTRIBUTES = {ATTRIBUTE_FOO, "Bar"};
    // ...
}

This way, we specify the annotation attribute value in the string constant, and the Java compiler can unambiguously find the attribute value.

7. Conclusion

In this article, we looked through the limitations of annotation parameters. We considered some examples of problems with annotation attributes. We also discussed the JVM internals in the context of these limitations.

In all examples, we used the same classes for constants and annotations. However, all these limitations hold for the cases where the constant comes from another class.

The post Java Annotation Attribute Value Restrictions first appeared on Baeldung.
       

Disable the Maven Javadoc Plugin

$
0
0

1. Overview

The Apache Maven Javadoc plugin allows us to generate Javadocs for the specified project during the Maven build. Furthermore, the plugin is pretty convenient since it generates the Javadocs automatically using the standard javadoc tool.

In this quick tutorial, we'll take a look at how to disable the Javadoc generation in Maven builds temporarily.

2. Introduction to the Problem

We can configure the Maven Javadoc plugin in our pom.xml to generate Javadocs and attach them to the built jar files, for example:

...
<plugin>
    <groupId>org.apache.maven.plugins</groupId>
    <artifactId>maven-javadoc-plugin</artifactId>
    <executions>
        <execution>
            <id>attach-javadocs</id>
            <goals>
                <goal>jar</goal>
            </goals>
        </execution>
    </executions>
</plugin>
...

This is convenient. However, sometimes, when we do a release, we don't want to attach the Javadocs to the jar file. But, we don't want to remove the Maven Javadoc plugin, either.

Therefore, we need a way to skip the Javadoc generation in a build. Next, let's see how to achieve it.

3. The maven.javadoc.skip Option

The Maven Javadoc plugin has provided a maven.javadoc.skip option to skip the Javadoc generation.

Our Maven build won't generate Javadocs if we pass this option with the value true when we build our project:

mvn clean install -Dmaven.javadoc.skip=true

4. Skip Javadoc Generation With the Maven Release Plugin

The Maven Release Plugin is widely used for automatic release management.

Let's say we've configured both the Maven Release plugin and the Javadoc plugin in our project.

Now, we'd like to ask the Maven Javadoc plugin to generate Javadocs for regular builds but skip the Javadoc generation only for the release builds.

There are two approaches we can use to achieve this goal.

The first way to go is to pass an argument to the mvn command line when we start a release build:

mvn release:perform -Darguments="-Dmaven.javadoc.skip=true"

Alternatively, we can add the maven.javadoc.skip=true argument in our Maven Release plugin configuration:

<plugin>
    <groupId>org.apache.maven.plugins</groupId>
    <artifactId>maven-release-plugin</artifactId>
    <configuration>
        <arguments>-Dmaven.javadoc.skip=true</arguments>
    </configuration>
</plugin>

In this way, all builds with the Maven Release plugin will skip the Javadoc generation.

5. Conclusion

In this quick article, we've addressed how to skip Javadoc generation when the Maven Javadoc plugin is configured in our pom.xml.

The post Disable the Maven Javadoc Plugin first appeared on Baeldung.
       

An Intro to Dapr with Spring Cloud Gateway

$
0
0

1. Overview

In this article, we'll start with a Spring Cloud Gateway application and a Spring Boot application. Then, we'll update it to use Dapr (Distributed Application Runtime) instead. Finally, we'll update the Dapr configuration to show the flexibility that Dapr provides when integrating with cloud-native components.

2. Intro to Dapr

With Dapr, we can manage the deployment of a cloud-native application without any impact on the application itself. Dapr uses the sidecar pattern to off-load deployment concerns from the application, which allows us to deploy it into other environments (such as on-premise, different proprietary Cloud platforms, Kubernetes, and others) without any changes to the application itself. For more details, check out this overview on the Dapr website.

3. Create Sample Applications

We'll start by creating a sample Spring Cloud Gateway and Spring Boot application. In the great tradition of “Hello world” examples, the gateway will proxy requests to a back-end Spring Boot application for the standard “Hello world” greeting.

3.1. Greeting Service

First, let's create a Spring Boot application for the greeting service. This is a standard Spring Boot application with spring-boot-starter-web as the only dependency, the standard main class, and the server port configured as 3001.

Let's add a controller to respond to the hello endpoint:

@RestController
public class GreetingController {
    @GetMapping(value = "/hello")
    public String getHello() {
        return "Hello world!";
    }
}

After building our greeting service app, we'll start it up:

java -jar greeting/target/greeting-1.0-SNAPSHOT.jar

We can test it out using curl to return the “Hello world!” message:

curl http://localhost:3001/hello

3.2. Spring Cloud Gateway

Now, we'll create a Spring Cloud Gateway on port 3000 as a standard Spring Boot application with spring-cloud-starter-gateway as the only dependency and the standard main class. We'll also configure the routing to access the greeting service:

spring:
  cloud:
    gateway:
      routes:
        - id: greeting-service
          uri: http://localhost:3001/
          predicates:
            - Path=/**
          filters:
          - RewritePath=/?(?<segment>.*), /$\{segment}

Once we build the gateway app, we can start the gateway:

java -Dspring.profiles.active=no-dapr -jar gateway/target/gateway-1.0-SNAPSHOT.jar

We can test it out using curl to return the “Hello world!” message from the greeting service:

curl http://localhost:3000/hello

4. Add Dapr

Now that we have a basic example in place, let’s add Dapr to the mix.

We do this by configuring the gateway to communicate with the Dapr sidecar instead of directly with the greeting service. Dapr will then be responsible for finding the greeting service and forwarding the request to it; the communication path will now be from the gateway, through the Dapr sidecars, and to the greeting service.

4.1. Deploy Dapr Sidecars

First, we need to deploy two instances of the Dapr sidecar – one for the gateway and one for the greeting service. We do this using the Dapr CLI.

We'll use a standard Dapr configuration file:

apiVersion: dapr.io/v1alpha1
kind: Configuration
metadata:
  name: daprConfig
spec: {}

Let's start the Dapr sidecar for the gateway on port 4000 using the dapr command:

dapr run --app-id gateway --dapr-http-port 4000 --app-port 3000 --config dapr-config/basic-config.yaml

Next, let's start the Dapr sidecar for the greeting service on port 4001 using the dapr command:

dapr run --app-id greeting --dapr-http-port 4001 --app-port 3001 --config dapr-config/basic-config.yaml

Now that the sidecars are running, we can see how they take care of intercepting and forwarding requests to the greeting service. When we test it out using curl, it should return the “Hello world!” greeting:

curl http://localhost:4001/v1.0/invoke/greeting/method/hello

Let's try the same test using the gateway sidecar to confirm that it also returns the “Hello world!” greeting:

curl http://localhost:4000/v1.0/invoke/greeting/method/hello

What's going on here behind the scenes? The Dapr sidecar for the gateway uses service discovery (in this case, mDNS for a local environment) to find the Dapr sidecar for the greeting service. Then, it uses Service Invocation to call the specified endpoint on the greeting service.

4.2. Update Gateway Configuration

The next step is to configure the gateway routing to use its Dapr sidecar instead:

spring:
  cloud:
    gateway:
      routes:
        - id: greeting-service
          uri: http://localhost:4000/
          predicates:
            - Path=/**
          filters:
          - RewritePath=//?(?<segment>.*), /v1.0/invoke/greeting/method/$\{segment}

Then, we'll restart the gateway with the updated routing:

java -Dspring.profiles.active=with-dapr -jar gateway/target/gateway-1.0-SNAPSHOT.jar

We can test it out using the curl command to once again get the “Hello world” greeting from the greeting service:

curl http://localhost:3000/hello

When we look at what's happening on the network using Wireshark, we can see that the traffic between the gateway and the service goes through the Dapr sidecars.

Congratulations! We have now successfully brought Dapr into the picture. Let's review what this has gained us: The gateway no longer needs to be configured to find the greeting service (that is, the port number for the greeting service no longer needs to be specified in the routing configuration), and the gateway no longer needs to know the details of how the request is forwarded to the greeting service.

5. Update Dapr Configuration

Now that we have Dapr in place, we can configure Dapr to use other cloud-native components instead.

5.1. Use Consul for Service Discovery

Let's use Consul for Service Discovery instead of mDNS.

First, we need to install and start Consul on the default port of 8500, and then update the Dapr sidecar configuration to use Consul:

apiVersion: dapr.io/v1alpha1
kind: Configuration
metadata:
  name: daprConfig
spec:
  nameResolution:
    component: "consul"
    configuration:
      selfRegister: true

Then we'll restart both Dapr sidecars with the new configuration:

dapr run --app-id greeting --dapr-http-port 4001 --app-port 3001 --config dapr-config/consul-config.yaml
dapr run --app-id gateway --dapr-http-port 4000 --app-port 3000 --config dapr-config/consul-config.yaml

Once the sidecars are restarted, we can access the Services page in the consul UI and see the gateway and greeting apps listed. Notice that we did not need to restart the application itself.

See how easy that was? A simple configuration change for the Dapr sidecars now gives us support for Consul and, most importantly, with no impact on the underlying application. This differs from using Spring Cloud Consul, which requires updating the application itself.

5.2. Use Zipkin for Tracing

Dapr also supports integration with Zipkin for tracing calls across applications.

First, install and start up Zipkin on the default port of 9411, and then update the configuration for the Dapr sidecar to add Zipkin:

apiVersion: dapr.io/v1alpha1
kind: Configuration
metadata:
  name: daprConfig
spec:
  nameResolution:
    component: "consul"
    configuration:
      selfRegister: true
  tracing:
    samplingRate: "1"
    zipkin:
      endpointAddress: "http://localhost:9411/api/v2/spans"

We'll need to restart both Dapr sidecars to pick up the new configuration:

dapr run --app-id greeting --dapr-http-port 4001 --app-port 3001 --config dapr-config/consul-zipkin-config.yaml
dapr run --app-id gateway --dapr-http-port 4000 --app-port 3000 --config dapr-config/consul-zipkin-config.yaml

Once Dapr is restarted, you can issue a curl command and check out the Zipkin UI to see the call trace.

Once again, there's no need to restart the gateway and greeting service. It requires only an easy update to the Dapr configuration. Compare this to using Spring Cloud Zipkin instead.

5.3. Other Components

There are many components that Dapr supports to address other concerns such as security, monitoring, and reporting. Check out the Dapr documentation for a full list.

6. Conclusion

We have added Dapr to a simple example of a Spring Cloud Gateway communicating with a back-end Spring Boot service. We've shown how to configure and start the Dapr sidecar and how it then takes care of cloud-native concerns such as service discovery, communication, and tracing.

Although this comes at the cost of deploying and managing a sidecar application, Dapr provides flexibility for deployment into different cloud-native environments and cloud-native concerns without requiring changes to the applications once the integration with Dapr is in place.

This approach also means that developers don't need to be encumbered with cloud-native concerns as they are writing the code, which frees them up to focus on business functionality. Once the application is configured to use the Dapr sidecar, different deployment concerns can be addressed without any impact on the application – no need for re-coding, re-building, or re-deploying applications. Dapr provides a clean separation between application and deployment concerns.

As always, the complete code for this article can be found over on GitHub.

The post An Intro to Dapr with Spring Cloud Gateway first appeared on Baeldung.
       

Looking for a Java Developer with Spring Experience (Remote) (Part Time)

$
0
0

Description

We're looking for a Java developer with extensive Spring experience.

On the non-technical side – a good level of command over the English language is also important.

You're going to be working with me and the team on developing projects and written guides for teaching purposes, with a focus on different Spring modules (security, persistence, web, etc).

This includes creating new material based on our internal guidelines, as well as maintaining/upgrading the existing projects.

The Admin Details

Type of Engagement: Fully Remote

Time: 8-10 Hours / Week (flexible)

We use: Git, Maven

We communicate on: JIRA, Slack

Budget: 20$ / hour

Apply

You can apply with a quick message (and a link to your LinkedIn profile), here, or over email jobs@baeldung.com.

Best of luck,

Eugen.

The post Looking for a Java Developer with Spring Experience (Remote) (Part Time) first appeared on Baeldung.

Choosing a GC Algorithm in Java

$
0
0

1. Introduction

The JVM ships with various options for garbage collection to support a variety of deployment options. With this, we get flexibility in choosing which garbage collector to use for our application.

By default, the JVM chooses the most appropriate garbage collector based on the class of the host computer. However, sometimes, our application experiences major GC-related bottlenecks requiring us to take more control over which algorithm is used. The question is, “how does one settle on a GC algorithm?”

In this article, we attempt to answer that question.

2. What is a GC?

Java being a garbage-collected language, we are shielded from the burden of manually allocating and deallocating memory to applications. The whole chunk of memory allocated to a JVM process by the OS is called the heap. The JVM then breaks this heap into two groups called generations. This breakdown enables it to apply a variety of techniques for efficient memory management.

The young (Eden) generation is where newly created objects are allocated. It's usually small (100-500MB) and also has two survivor spaces. The old generation is where older or aged objects are stored — these are typically long-lived objects. This space is much larger than the young generation.

The collector continuously tracks the fullness of the young generation and triggers minor collections during which live objects are moved to one of the survivor spaces and dead ones removed. If an object has survived a certain number of minor GCs, the collector moves it to the old generation. When the old space is considered full, a major GC happens and dead objects are removed from the old space.

During each of these GCs, there are stop-the-world phases during which nothing else happens — the application can't service any requests. We call this pause time.

3. Variables to Consider

Much as GC shields us from manual memory management, it achieves this at a cost. We should aim to keep the GC runtime overhead as low as possible. There are several variables that can help us decide which collector would best serve our application needs. We'll go over them in the remainder of this section.

3.1. Heap Size

This is the total amount of working memory allocated by the OS to the JVM. Theoretically, the larger the memory, the more objects can be kept before collection, leading to longer GC times. The minimum and maximum heap sizes can be set using -Xms=<n> and -Xmx=<m> command-line options.

3.2. Application Data Set Size

This is the total size of objects an application needs to keep in memory to work effectively. Since all new objects are loaded in the young generation space, this will definitely affect the maximum heap size and, hence, the GC time.

3.3. Number of CPUs

This is the number of cores the machine has available. This variable directly affects which algorithm we choose. Some are only efficient when there are multiple cores available, and the reverse is true for other algorithms.

3.4. Pause Time

The pause time is the duration during which the garbage collector stops the application to reclaim memory. This variable directly affects latency, so the goal is to limit the longest of these pauses.

3.5. Throughput

By this, we mean the time processes spend actually doing application work. The higher the application time vs. overhead time spent in doing GC work, the higher the throughput of the application.

3.6. Memory Footprint

This is the working memory used by a GC process. When a setup has limited memory or many processes, this variable may dictate scalability.

3.7. Promptness

This is the time between when an object becomes dead and when the memory it occupies is reclaimed. It's related to the heap size. In theory, the larger the heap size, the lower the promptness as it will take longer to trigger collection.

3.8. Java Version

As new Java versions emerge, there are usually changes in the supported GC algorithms and also the default collector. We recommend starting off with the default collector as well as its default arguments. Tweaking each argument has varying effects depending on the chosen collector.

3.9. Latency

This is the responsiveness of an application. GC pauses affect this variable directly.

4. Garbage Collectors

Besides serial GC, all the other collectors are most effective when there's more than one core available:

4.1. Serial GC

The serial collector uses a single thread to perform all the garbage collection work. It's selected by default on certain small hardware and operating system configurations, or it can be explicitly enabled with the option -XX:+UseSerialGC.

Pros:

  • Without inter-thread communication overhead, it's relatively efficient.
  • It's suitable for client-class machines and embedded systems.
  • It's suitable for applications with small datasets.
  • Even on multiprocessor hardware, if data sets are small (up to 100 MB), it can still be the most efficient.

Cons:

  • It's not efficient for applications with large datasets.
  • It can't take advantage of multiprocessor hardware.

4.2. Parallel/Throughput GC

This collector uses multiple threads to speed up garbage collection. In Java version 8 and earlier, it's the default for server-class machines. We can override this default by using the -XX:+UseParallelGC option.

Pros:

  • It can take advantage of multiprocessor hardware.
  • It's more efficient for larger data sets than serial GC.
  • It provides high overall throughput.
  • It attempts to minimize the memory footprint.

Cons:

  • Applications incur long pause times during stop-the-world operations.
  • It doesn't scale well with heap size.

It's best if we want more throughput and don't care about pause time, as is the case with non-interactive apps like batch tasks, offline jobs, and web servers.

4.3. Concurrent Mark Sweep (CMS) GC

We consider CMS a mostly concurrent collector. This means it performs some expensive work concurrently with the application. It's designed for low latency by eliminating the long pause associated with the full GC of parallel and serial collectors.

We can use the option -XX:+UseConcMarkSweepGC to enable the CMS collector. The core Java team deprecated it as of Java 9 and completely removed it in Java 14.

Pros:

  • It's great for low latency applications as it minimizes pause time.
  • It scales relatively well with heap size.
  • It can take advantage of multiprocessor machines.

Cons:

  • It's deprecated as of Java 9 and removed in Java 14.
  • It becomes relatively inefficient when data sets reach gigantic sizes or when collecting humongous heaps.
  • It requires the application to share resources with GC during concurrent phases.
  • There may be throughput issues as there's more time spent overall in GC operations.
  • Overall, it uses more CPU time due to its mostly concurrent nature.

4.4. G1 (Garbage-First) GC

G1 uses multiple background GC threads to scan and clear the heap just like CMS. Actually, the core Java team designed G1 as an improvement over CMS, patching some of its weaknesses with additional strategies.

In addition to the incremental and concurrent collection, it tracks previous application behavior and GC pauses to achieve predictability. It then focuses on reclaiming space in the most efficient areas first — those mostly filled with garbage. We call it Garbage-First for this reason.

Since Java 9, G1 is the default collector for server-class machines. We can explicitly enable it by providing -XX:+UseG1GC on the command line.

Pros:

  • It's very efficient with gigantic datasets.
  • It takes full advantage of multiprocessor machines.
  • It's the most efficient in achieving pause time goals.

Cons:

  • It's not the best when there are strict throughput goals.
  • It requires the application to share resources with GC during concurrent collections.

G1 works best for applications with very strict pause-time goals and a modest overall throughput, such as real-time applications like trading platforms or interactive graphics programs.

5. Conclusion

For many applications, the choice of the collector is never an issue, as the JVM default usually suffices. That means the application can perform well in the presence of garbage collection with pauses of acceptable frequency and duration. However, this isn't the case for a large class of applications, especially those with humongous datasets, many threads, and high transaction rates.

In this article, we've explored the garbage collectors supported by the JVM. We've also looked at key variables that can help us choose the right collector for the needs of our application.

The post Choosing a GC Algorithm in Java first appeared on Baeldung.
       

Hosting a Maven Repository on GitHub

$
0
0

1. Overview

In this tutorial, we'll understand how to host a Maven repository on GitHub with sources using the site-maven plugin. This is an affordable alternative to using a repository like Nexus.

2. Prerequisites

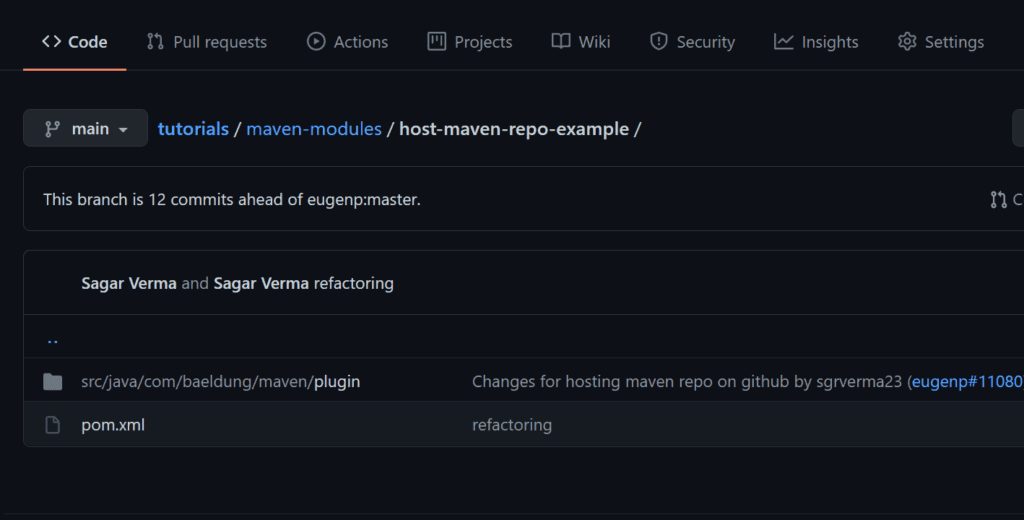
We need to create a repo for a Maven project on GitHub if we don't have it already. In this article, we're using one repository, “host-maven-repo-example“, and the branch “main“. This is an empty repo on GitHub:

3. Maven Project

Let's create a simple Maven project. We'll push the generated artifacts of this project to GitHub.

Here's the pom.xml of the project:

<project xmlns="http://maven.apache.org/POM/4.0.0" xmlns:xsi="http://www.w3.org/2001/XMLSchema-instance" xsi:schemaLocation="http://maven.apache.org/POM/4.0.0 http://maven.apache.org/xsd/maven-4.0.0.xsd">
    <modelVersion>4.0.0</modelVersion>
    <groupId>org.baeldung.maven.plugin</groupId>
    <artifactId>host-maven-repo-example</artifactId>
    <version>1.0-SNAPSHOT</version>
    <build>
        <pluginManagement>
            <plugins>
                <plugin>
                    <groupId>org.apache.maven.plugins</groupId>
                    <artifactId>maven-compiler-plugin</artifactId>
                    <configuration>
                        <source>1.8</source>
                        <target>1.8</target>
                    </configuration>
                </plugin>
            </plugins>
        </pluginManagement>
    </build>
<project>

First, we need to create an internal repo locally in our project. The Maven artifact will be deployed to this location in the project build directory before pushing to GitHub.

We'll add the local repo definition to our pom.xml:

<distributionManagement> 
    <repository>
        <id>internal.repo</id> 
        <name>Temporary Staging Repository</name> 
        <url>file://${project.build.directory}/mvn-artifact</url> 
    </repository> 
</distributionManagement>

Now, let's add the maven-deploy-plugin configuration to our pom.xml. We'll use this plugin to add our artifact(s) to a local repository in the directory ${project.build.directory}/mvn-artifact:

<plugin>
    <artifactId>maven-deploy-plugin</artifactId>
    <version>2.8.2</version>
    <configuration>
        <altDeploymentRepository>
            internal.repo::default::file://${project.build.directory}/mvn-artifact
        </altDeploymentRepository>
    </configuration>
</plugin>

Also, if we want to push the source files with Maven artifacts to GitHub, then we need to include the source plugin as well:

<plugin>
    <groupId>org.apache.maven.plugins</groupId>
    <artifactId>maven-source-plugin</artifactId>
    <version>3.1.0</version>
    <executions>
        <execution>
            <id>attach-sources</id>
                <goals>
                    <goal>jar</goal>
                </goals>
        </execution>
    </executions>
</plugin>

Once the above configurations and plugins are added to pom.xml, the build will deploy the Maven artifact locally in the directory target/mvn-artifact.

Now, the next step is to deploy these artifacts to GitHub from the local directory.

4. Configure GitHub Authentication

Before deploying artifacts to GitHub, we'll configure authentication information in ~/.m2/settings.xml. This is to enable the site-maven-plugin to push the artifacts to GitHub.

Depending on how we want to authenticate, we'll add one of two configurations to our settings.xml. Let's check these options next.

4.1. Using a GitHub Username and Password

To use a GitHub username and password, we'll configure them in our settings.xml:

<settings>
    <servers>
        <server>
            <id>github</id>
            <username><<em>your Github username</em>></username>
            <password><<em>your Github password</em>></password>
        </server>
    </servers>
</settings>

4.2. Using a Personal Access Token

The recommended way to authenticate when using the GitHub API or command line is to use a personal access token (PAT):

<settings>
    <servers> 
        <server>
            <id>github</id>
            <password><<em>YOUR GitHub OAUTH-TOKEN></em></password>
        </server>
    </servers>
</settings>

5. Push Artifact to GitHub Using site-maven-plugin

And the last step is to configure the site-maven plugin to push our local staging repo. This staging repo is present in the target directory:

<plugin>
    <groupId>com.github.github</groupId>
    <artifactId>site-maven-plugin</artifactId>
    <version>0.12</version>
    <configuration>
        <message>Maven artifacts for ${project.version}</message>
        <noJekyll>true</noJekyll>
        <outputDirectory>${project.build.directory}</outputDirectory>
        <branch>refs/heads/<<em>Branch-Name</em>></branch>
        <includes>
            <include>**/*</include>
        </includes>
        <merge>true</merge>
        <repositoryName><<em>Repo-Name</em>></repositoryName>
        <repositoryOwner><<em>Repo-Owner</em>></repositoryOwner>
        <server>github</server>
    </configuration>
    <executions>
        <execution>
            <goals>
                <goal>site</goal>
            </goals>
            <phase>deploy</phase>
        </execution>
    </executions>
</plugin>

As an example, for this tutorial, let's say we have the repository eugenp/host-maven-repo-example. Then the repositoryName tag value will be host-maven-repo-example and the repositoryOwner tag value will be eugenp.

Now, we'll execute the mvn deploy command to upload the artifact to GitHub. The main branch will automatically be created if not present. After a successful build, check the repo on GitHub in the browser and under the main branch. All our binaries will be present in the repo.

In our case, it will look like:

6. Conclusion

Finally, we've seen how to host Maven artifacts on GitHub using the site-maven-plugin.

As always, the code for these examples is available over on GitHub.

The post Hosting a Maven Repository on GitHub first appeared on Baeldung.
       

Throwing Exceptions in Constructors

$
0
0

1. Overview

Exceptions provide separation of error handling code from the normal flow of the application. It's not uncommon to throw an exception during the instantiation of an object.

In this article, we'll examine all the details about throwing exceptions in constructors.

2. Throwing Exceptions in Constructors

Constructors are special types of methods invoked to create an object. In the following sections, we'll look into how to throw exceptions, which exceptions to throw, and why we would throw exceptions in constructors.

2.1. How?

Throwing exceptions in the constructor is no different from doing so in any other method. Let's start by creating an Animal class with a no-arg constructor:

public Animal() throws InstantiationException {
    throw new InstantiationException("Cannot be instantiated");
}

Here, we're throwing InstantiationException, which is a checked exception.

2.2. Which Ones?

Even though throwing any type of exception is allowed, let's establish some best practices.

First, we don't want to throw “java.lang.Exception”. This is because the caller cannot possibly identify what kind of exception and thereby handle it.

Second, we should throw a checked exception if the caller has to forcibly handle it.

Third, we should throw an unchecked exception if a caller cannot recover from the exception.

It's important to note that these practices are equally applicable for both methods and constructors.

2.3. Why?

In this section, let's understand why we might want to throw exceptions in the constructor.

Argument validation is a common use case for throwing exceptions in the constructor. Constructors are mostly used to assign values of variables. If the arguments passed to the constructor are invalid, we can throw exceptions. Let's consider a quick example:

public Animal(String id, int age) {
    if (id == null)
        throw new NullPointerException("Id cannot be null");
    if (age < 0)
        throw new IllegalArgumentException("Age cannot be negative");
}

In the above example, we're performing argument validation before initializing the object. This helps to ensure that we're creating only valid objects.

Here, if the id passed to the Animal object is null, we can throw NullPointerException For arguments that are non-null but still invalid, such as a negative value for age, we can throw an IllegalArgumentException.

Security checks are another common use case for throwing exceptions in the constructor. Some of the objects need security checks during their creation. We can throw exceptions if the constructor performs a possibly unsafe or sensitive operation.

Let's consider our Animal class is loading attributes from a user input file:

public Animal(File file) throws SecurityException, IOException {
    if (file.isAbsolute()) {
        throw new SecurityException("Traversal attempt");
    }
    if (!file.getCanonicalPath()
        .equals(file.getAbsolutePath())) {
        throw new SecurityException("Traversal attempt");
    }
}

In our example above, we prevented the Path Traversal attack. This is achieved by not allowing absolute paths and directory traversal. For example, consider file “a/../b.txt”. Here, the canonical path and the absolute path are different, which can be a potential Directory Traversal attack.

3. Inherited Exceptions in Constructors

Now, let's talk about handling superclass exceptions in constructors.

Let's create a child class, Bird, that extends our Animal class:

public class Bird extends Animal {
    public Bird() throws ReflectiveOperationException {
        super();
    }
    public Bird(String id, int age) {
        super(id, age);
    }
}

Since super() has to be the first line in the constructor, we can't simply insert a try-catch block to handle the checked exception thrown by the superclass.

Since our parent class Animal throws the checked exception InstantiationException, we can't handle the exception in the Bird constructor. Instead, we can propagate the same exception or its parent exception.

It's important to note that the rule for exception handling with respect to method overriding is different. In method overriding, if the superclass method declares an exception, the subclass overridden method can declare the same, subclass exception, or no exception, but cannot declare a parent exception.

On the other hand, unchecked exceptions need not be declared, nor can they be handled inside subclass constructors.

4. Security Concerns

Throwing an exception in a constructor can lead to partially initialized objects. As described in Guideline 7.3 of Java Secure Coding Guidelines, partially initialized objects of a non-final class are prone to a security concern known as a Finalizer Attack.

In short, a Finalizer attack is induced by subclassing partially initialized objects and overriding its finalize() method, and attempts to create a new instance of that subclass. This will possibly bypass the security checks done inside the constructor of the subclass.

Overriding the finalize() method and marking it final can prevent this attack.

However, the finalize() method has been deprecated in Java 9, thus preventing this type of attack.

5. Conclusion

In this tutorial, we've learned about throwing exceptions in constructors, along with the associated benefits and security concerns. Also, we took a look at some best practices for throwing exceptions in constructors.

As always, the source code used in this tutorial is available over on GitHub.

The post Throwing Exceptions in Constructors first appeared on Baeldung.
       

Java Weekly, Issue 398

$
0
0

1. Spring and Java

>> What's New in Java 16 [infoq.com]

An overview of new features in Java 16: records, pattern matching for instanceof, sealed classes, and more!

>> JEP 416: Reimplement Core Reflection with Method Handles [openjdk.java.net]

Reimplementing the method, constructor, and field-related reflection implementations with MethodHandles – no changes in API, though.

>> Panache – Active Record Pattern [thorben-janssen.com]

An entity object encapsulating data and database operations – an in-depth guide on how to implement the active record pattern with Panache.

Also worth reading:

Webinars and presentations:

Time to upgrade:

2. Technical & Musings

>> Gateway Pattern [martinfowler.com]

How to use the Gateway Pattern to encapsulate the access to an external system or resource.

>> New in Kubernetes v1.22: alpha support for using swap memory [kubernetes.io]

K8S 1.22 comes with experimental support for swap memory usage for workloads on a per-node basis.

Also worth reading:

3. Comics

And my favorite Dilberts of the week:

>> Monitoring Internal Messages [dilbert.com]

>> Tech Support Is Last Hope [dilbert.com]

>> Lanyards And Hugs [dilbert.com]

4. Pick of the Week

>> I hate MVPs. So do your customers. Make it SLC instead. [asmartbear.com]

The post Java Weekly, Issue 398 first appeared on Baeldung.
       

Inserting Delays Between Requests in Apache JMeter

$
0
0

1. Overview

When we're testing with Apache JMeter, we may wish to add a delay between the requests to make a better model of our user behavior.

In this tutorial, we’ll create a simple test plan. We'll look at the available parameters for tuning the generated workload, and then configure timers to add delays.

2. Use Case

Sometimes we may wish to add a delay between requests:

  • Avoid errors connected with too many requests sent in a given amount of time
  • Emulate real user actions with natural gaps for performed actions
  • Tune the number of requests per minute to have a finer controlled configuration of workload

3. Using Delays

Firstly, we need to define the loading profile. We can have various aims here:

  • See how the system behaves under a growing workload to find performance limits
  • Check how the application recovers after peak load

There are two JMeter options for simulating these use cases:

  • Thread group – how many parallel users
  • Timer – the delays between requests for each user

4. Test Plan

4.1. A Basic Plan

Let's create a basic test plan with one Thread Group. We'll set the number of parallel requests, the ramp-up period, and the number of times to execute the test. We should note that one thread in JMeter notation means one concurrent user.

We can use the ramp-up period to create increases in workload. Here we need to set the period to reach the defined Number of Threads starting from 1 thread.

To create a more sophisticated loading profile, we can also specify the thread lifetime. This setting means 2 things:

  • Startup delay – how much time JMeter waits to start a thread
  • Duration – how long it runs for

The Loop Count is also a useful setting to specify the amount of repetition of specified HTTP requests.

4.2. Adding Requests

Next, we'll add two HTTP Requests. We'll use the Online REST API at https://gorest.co.in/ to test our script. HTTP Request settings are configured in the user interface:

Let's also add two assertions, just to check that requests return some data.

We need to check that our test works without errors. For this reason, let's add the View Results Tree element and then run our test plan.

The result of running the first request is shown in the View Results Tree panel.

Let's look at the Sampler result output for our second request. Here, Sample Start is 2021-05-17 15:00:40, the same time as the first request. It means that by default, we don't have any delays  between the requests.

Thread Name:Thread Group 1-1
Sample Start:2021-05-17 15:00:40 SAMT

With this in mind, let's see how we can increase this gap between the requests.

5. Adding Timers

5.1. Constant Timer

To add a timer element, we need to right-click on the Thread Group element and select Add, Timer, Constant Timer.

Here, we've added a Constant Timer with a Thread Delay of three seconds to our thread group. This timer adds a delay between each request.

Let's now re-run our test plan and check the View Results Tree. We should see that requests were run with the delay that we set in the timer element.

Thread Name:Thread Group 1-1
Sample Start:2021-05-17 15:18:17 SAMT

And we can see that the next HTTP Request was run three seconds after the first.

Thread Name:Thread Group 1-1
Sample Start:2021-05-17 15:18:20 SAMT

5.2. Alternative to Constant Timer

As an alternative to Constant Timer, we can use Uniform Random Timer. This type of timer can be added in the same way as Constant Timer.

In the dropdown menu, it's right after Constant Timer.

As we can see from the timer name, we should use it when we want this delay to vary in some specified range. Let's add this timer to our sample and see how it works:

Constant Delay Offset adds a permanent part for each delay. Random Delay Maximum helps us to define an additional random part that will be added to Constant Delay Offset. These settings allow us to provide a random factor without the delay becoming too small.

Let's run this test and take a look at the View Results Tree element:

If we take a closer look at Sample Start points, we'll see that random delays were added in according to the defined Timer parameters.

Thread Name:Thread Group 1-1
Sample Start:2021-07-15 09:43:45 SAMT
Thread Name:Thread Group 1-1
Sample Start:2021-07-15 09:43:49 SAMT
Thread Name:Thread Group 1-1
Sample Start:2021-07-15 09:43:55 SAMT

Here we've looked at a couple of timer options, though there are other timers configurations available.

6. Conclusion

In this tutorial, we've seen how we can insert a custom delay between two requests in Apache JMeter and use Thread Group settings to add more flexibility for the created workload model.

The post Inserting Delays Between Requests in Apache JMeter first appeared on Baeldung.
       

Validate String as Filename in Java

$
0
0

1. Overview

In this tutorial, we'll discuss different ways to validate if a given String has a valid filename for the OS, using Java. We want to check the value against restricted characters or length limits.

Through examples, we'll just focus on core solutions, without using any external dependencies. We'll check the SDK's java.io and NIO2 packages, and finally implement our own solutions.

2. Using java.io.File

Let's start with the very first example, using the java.io.File class. In this solution, we need to create a File instance with a given string and then create a file on the local disk:

public static boolean validateStringFilenameUsingIO(String filename) throws IOException {
    File file = new File(filename);
    boolean created = false;
    try {
        created = file.createNewFile();
        return created;
    } finally {
        if (created) {
            file.delete();
        }
    }
}

When the given filename is incorrect, it throws an IOException. Let's note, due to the file creation inside, this method requires that the given filename String doesn't correspond to the already existing file.

We know that different file systems have their own filename limitations. Thus, by using java.io.File methods, we don't need to specify the rules per OS, because Java automatically takes care of it for us.

However, we need to create a dummy file. When we succeed, we must remember to delete it at the end. Moreover, we must ensure that we have proper permissions to perform those actions. Any failures might also cause an IOException, so it's also better to check the error message:

// Windows invalid filename
assertThatThrownBy(() -> validateStringFilenameUsingIO("baeldung?.txt"))
  .isInstanceOf(IOException.class)
  .hasMessageContaining("Invalid file path");

3. Using NIO2 API

As we know the java.io package has many drawbacks, because it was created in the first versions of Java. The NIO2 API, the successor of the java.io package, brings many improvements, which also greatly simplifies our previous solution:

public static boolean validateStringFilenameUsingNIO2(String filename) {
    Paths.get(filename);
    return true;
}

Our function is now streamlined, so it's the fastest way to perform such a test. We don't create any files, so we don't need to have any disk permissions and perform cleaning after the test.

The invalid filename throws the InvalidPathExceptionwhich extends the RuntimeException. The error message also contains more details than the previous one:

// Windows invalid filename
assertThatThrownBy(() -> validateStringFilenameUsingNIO2(filename))
  .isInstanceOf(InvalidPathException.class)
  .hasMessageContaining("character not allowed");

This solution has one serious drawback connected with the file system limitations. The Path class might represent the file path with subdirectories. Unlike the first example, this method doesn't check the filename characters' overflow limit. Let's check it against a five-hundred-character random String generated using the randomAlphabetic() method from the Apache Commons:

String filename = RandomStringUtils.randomAlphabetic(500);
assertThatThrownBy(() -> validateStringFilenameUsingIO(filename))
  .isInstanceOf(IOException.class)
  .hasMessageContaining("File name too long");
assertThat(validateStringFilenameUsingNIO2(filename)).isTrue();

To fix that, we should, as previously, create a file and check the result.

4. Custom Implementations

Finally, let's try to implement our own custom function to test filenames. We'll also try to avoid any I/O functionalities and use only core Java methods.

These kinds of solutions give more control and allow us to implement our own rules. However, we must consider many additional limitations for different systems.

4.1. Using String.contains

We can use the String.contains() method to check if the given String holds any of the forbidden characters. First of all, we need to manually specify some example values:

public static final Character[] INVALID_WINDOWS_SPECIFIC_CHARS = {'"', '*', ':', '<', '>', '?', '\\', '|', 0x7F};
public static final Character[] INVALID_UNIX_SPECIFIC_CHARS = {'\000'};

In our example, let's focus only on those two OS. As we know Windows filenames are more restricted than UNIX. Also, some whitespace characters might be problematic.

After defining the restricted character sets, let's determine the current OS:

public static Character[] getInvalidCharsByOS() {
    String os = System.getProperty("os.name").toLowerCase();
    if (os.contains("win")) {
        return INVALID_WINDOWS_SPECIFIC_CHARS;
    } else if (os.contains("nix") || os.contains("nux") || os.contains("mac")) {
        return INVALID_UNIX_SPECIFIC_CHARS;
    } else {
        return new Character[]{};
    }
}

And now we can use it to test the given value:

public static boolean validateStringFilenameUsingContains(String filename) {
    if (filename == null || filename.isEmpty() || filename.length() > 255) {
        return false;
    }
    return Arrays.stream(getInvalidCharsByOS())
      .noneMatch(ch -> filename.contains(ch.toString()));
}

This Stream predicate returns true if any of our defined characters is not in a given filename. Additionally, we implemented support for null values and incorrect length.

4.2. Regex Pattern Matching

We can also use regular expressions directly on the given String. Let's implement a pattern accepting only alphanumeric and dot characters, with the length not larger than 255:

public static final String REGEX_PATTERN = "^[A-za-z0-9.]{1,255}$";
public static boolean validateStringFilenameUsingRegex(String filename) {
    if (filename == null) {
        return false;
    }
    return filename.matches(REGEX_PATTERN);
}

Now, we can test the given value against the previously prepared pattern. We can also easily modify the pattern. We skipped the OS check feature in this example.

5. Conclusion

In this article, we focused on filenames and their limitations. We introduced different algorithms to detect an invalid filename using Java.

We started from the java.io package, which takes care of most of the system limitations for us, but performs additional I/O actions and might require some permissions. Then we checked the NIO2 API, which is the fastest solution, with the filename length check limitation.

Finally, we implemented our own methods, without using any I/O API, but requiring the custom implementation of file system rules.

You can find all the examples with additional tests over on GitHub.

The post Validate String as Filename in Java first appeared on Baeldung.
       

Spring @EnableWebSecurity vs. @EnableGlobalMethodSecurity

$
0
0

1. Overview

We may wish to apply multiple security filters within the different paths of our Spring Boot applications.

In this tutorial, we'll take a look at two approaches to customizing our security – via the use of @EnableWebSecurity and @EnableGlobalMethodSecurity.

To illustrate the differences, we'll use a simple application that has some admin resources, authenticated user resources. We'll also give it a section with public resources that we are happy for anyone to download.

2. Spring Boot Security

2.1. Maven Dependencies

Whichever approach we take, we first need to add the spring boot starter for security:

<dependency>
    <groupId>org.springframework.boot</groupId>
    <artifactId>spring-boot-starter-security</artifactId>
</dependency>

2.2. Spring Boot Auto-Configuration

With Spring Security on the classpath, Spring Boot Security Auto-Configuration‘s WebSecurityEnablerConfiguration activates @EnableWebSecurity for us.

This applies Spring's default security configuration to our application.

Default security activates both HTTP security filters and the security filter chain and applies basic authentication to our endpoints.

3. Protecting Our Endpoints

For our first approach, let's start by creating a MySecurityConfigurer class that extends WebSecurityConfigurerAdapter, making sure that we annotate it with @EnableWebSecurity.

@EnableWebSecurity
public class MySecurityConfigurer extends WebSecurityConfigurerAdapter {
}

By extending the adapter, we get the benefits of Spring Security's other defenses while also being able to add customizations.

3.1. A Quick Look at Default Web Security

First, let's take a look at WebSecurityConfigurerAdapter‘s default configure method, so we know what we're about to override:

@Override
protected void configure(HttpSecurity http) {
    http.authorizeRequests((requests) -> requests.anyRequest().authenticated());
    http.formLogin();
    http.httpBasic();
}

Here we see that any request we receive is authenticated, and we have a basic form login to prompt for credentials.

When we want to use the HttpSecurity DSL, we write this as:

http.authorizeRequests().anyRequest().authenticated()
  .and().formLogin()
  .and().httpBasic()

3.2. Require Users to Have an Appropriate Role

Now let's configure our security to allow only users with an ADMIN role to access our /admin endpoint. We'll also allow only users with a USER role to access our /protected endpoint.

We achieve this by overriding the HttpSecurity overload of configure:

@Override
protected void configure(HttpSecurity http) {
    http.authorizeRequests()
      .antMatchers("/admin/**")
      .hasRole("ADMIN")
      .antMatchers("/protected/**")
      .hasRole("USER");
}

3.3. Relax Security for Public Resources

We don't need authentication for our public /hello resources, so we'll configure WebSecurity to do nothing for them.

Just like before, let's override one of WebSecurityConfigurerAdapter‘s configure methods, but this time the WebSecurity overload:

@Override
public void configure(WebSecurity web) {
    web.ignoring()
      .antMatchers("/hello/*");
}

3.4. Replacing Spring's Default Security

Although most of our requirements can be met by extending WebSecurityConfigurerAdapter, there may be occasions where we want to replace Spring's default Security configuration entirely. To do this, we can implement WebSecurityConfigurer rather than extend WebSecurityConfigurerAdapter.

We should note that by implementing WebSecurityConfigurer, we lose Spring's standard security defenses, so we should consider very carefully before taking this path.

4. Protect Our Endpoints Using Annotations

To apply security using an annotation-driven approach, we can use @EnableGlobalMethodSecurity.

4.1. Require Users to Have an Appropriate Role Using Security Annotations

Now let's use method annotations to configure our security to allow only ADMIN users to access our /admin endpoint and our USER users to access our /protected endpoint.

Let's enable JSR-250 annotations by setting jsr250Enabled=true in our EnableGlobalMethodSecurity annotation:

@EnableGlobalMethodSecurity(jsr250Enabled = true)
@Controller
public class AnnotationSecuredController {
    @RolesAllowed("ADMIN")
    @RequestMapping("/admin")
    public String adminHello() {
        return "Hello Admin";
    }
    @RolesAllowed("USER")
    @RequestMapping("/protected")
    public String jsr250Hello() {
        return "Hello Jsr250";
    }
}

4.2. Enforce All Public Methods Have Security

When we use annotations as our way of implementing security, we may forget to annotate a method. This would inadvertently create a security hole.

To safeguard against this, we should deny access to all methods that don't have authorization annotations.

4.3. Allow Access to Public Resources

Spring's default security enforces authentication to all our endpoints, whether we add role-based security or not.

Although our previous example applies security to our /admin and /protected endpoints, we still want to allow access to file-based resources in /hello.

Whilst we could extend WebSecurityAdapter again, Spring provides us a simpler alternative.

Having protected our methods with annotations, we can now add the WebSecurityCustomizer to open the /hello/* resources:

public class MyPublicPermitter implements WebSecurityCustomizer {
    public void customize(WebSecurity webSecurity) {
        webSecurity.ignoring()
          .antMatchers("/hello/*");
    }
}

Alternatively, we can simply create a bean that implements it inside our configuration class:

@Configuration
public class MyWebConfig {
    @Bean
    public WebSecurityCustomizer ignoreResources() {
        return (webSecurity) -> webSecurity
          .ignoring()
          .antMatchers("/hello/*");
    }
}

When Spring Security initializes, it invokes any WebSecurityCustomizers it finds, including ours.

5. Testing Our Security

Now that we have configured our security, we should check that it behaves as we intended.

Depending on the approach we chose for our security, we have one or two options for our automated tests. We can either send web requests to our application or invoke our controller methods directly.

5.1. Testing Via Web Requests

For the first option, we'll create a @SpringBootTest test class with a @TestRestTemplate:

@RunWith(SpringRunner.class)
@SpringBootTest(webEnvironment = RANDOM_PORT)
public class WebSecuritySpringBootIntegrationTest {
    @Autowired
    private TestRestTemplate template;
}

Now, let's add a test to make sure our public resources are available:

@Test
public void givenPublicResource_whenGetViaWeb_thenOk() {
    ResponseEntity<String> result = template.getForEntity("/hello/baeldung.txt", String.class);
    assertEquals("Hello From Baeldung", result.getBody());
}

We can also see what happens when we try to access one of our protected resources:

@Test
public void whenGetProtectedViaWeb_thenForbidden() {
    ResponseEntity<String> result = template.getForEntity("/protected", String.class);
    assertEquals(HttpStatus.FORBIDDEN, result.getStatusCode());
}

Here we get a FORBIDDEN response, as our anonymous request does not have the required role.

So, we can use this method to test our secured application, whichever security approach we choose.

5.2. Testing Via Auto-Wiring and Annotations

Now let's look at our second option. Let's set up a @SpringBootTest and autowire our AnnotationSecuredController:

@RunWith(SpringRunner.class)
@SpringBootTest(webEnvironment = RANDOM_PORT)
public class GlobalMethodSpringBootIntegrationTest {
    @Autowired
    private AnnotationSecuredController api;
}

Let's start by testing our publicly accessible method using @WithAnonymousUser:

@Test
@WithAnonymousUser
public void givenAnonymousUser_whenPublic_thenOk() {
    assertThat(api.publicHello()).isEqualTo(HELLO_PUBLIC);
}

Now that we've accessed our public resource, let's use @WithMockUser annotations to access our protected methods.

First, let's test our JSR-250 protected method with a user that has the “USER” role:

@WithMockUser(username="baeldung", roles = "USER")
@Test
public void givenUserWithRole_whenJsr250_thenOk() {
    assertThat(api.jsr250Hello()).isEqualTo("Hello Jsr250");
}

And now, let's attempt to access the same method when our user doesn't have the right role:

@WithMockUser(username="baeldung", roles = "NOT-USER")
@Test(expected = AccessDeniedException.class)
public void givenWrongRole_whenJsr250_thenAccessDenied() {
    api.jsr250Hello();
}

Our request was intercepted by Spring Security, and an AccessDeniedException was thrown.

We can only use this approach when we choose annotation-based security.

6. Annotation Cautions

When we choose the annotation-based approach, there are some important points to note.

Our annotated security only gets applied when we enter a class via a public method.

6.1. Indirect Method Invocation

Earlier, when we called an annotated method, we saw our security successfully applied. However, now let's create a public method in the same class but without a security annotation. We'll make it call our annotated jsr250Hello method:

@GetMapping("/indirect")
public String indirectHello() {
    return jsr250Hello();
}

Now let's invoke our “/indirect” endpoint just using anonymous access:

@Test
@WithAnonymousUser
public void givenAnonymousUser_whenIndirectCall_thenNoSecurity() {
    assertThat(api.indirectHello()).isEqualTo(HELLO_JSR_250);
}

Our test passes as our  ‘secured' method was invoked without triggering any security. In other words, no security is applied to the internal calls within the same class.

6.2. Indirect Method Invocation to a Different Class

Now let's see what happens when our unprotected method invokes an annotated method on a different class.

First, let's create a DifferentClass with an annotated method, differentJsr250Hello:

@Component
public class DifferentClass {
    @RolesAllowed("USER")
    public String differentJsr250Hello() {
        return "Hello Jsr250";
    }
}

Now, let's autowire DifferentClass into our controller and add an unprotected differentClassHello public method to call it.

@Autowired
DifferentClass differentClass;
@GetMapping("/differentclass")
public String differentClassHello() {
    return differentClass.differentJsr250Hello();
}

And finally, let's test the invocation and see that our security is enforced:

@Test(expected = AccessDeniedException.class)
@WithAnonymousUser
public void givenAnonymousUser_whenIndirectToDifferentClass_thenAccessDenied() {
    api.differentClassHello();
}

So, we see that although our security annotations won't be respected when we call another method in the same class when we call an annotated method in a different class, then they are respected.

6.3. A Final Note of Caution

We should make sure that we configure our @EnableGlobalMethodSecurity correctly. If we don't, then despite all of our security annotations, they could have no effect at all.

For example, if we're using JSR-250 annotations but instead of jsr250Enabled=true we specify prePostEnabled=true, then our JSR-250 annotations will do nothing!

@EnableGlobalMethodSecurity(prePostEnabled = true)

We can, of course, declare that we will use more than one annotation type by adding them both to our @EnableGlobalMethodSecurity annotation:

@EnableGlobalMethodSecurity(jsr250Enabled = true, prePostEnabled = true)

7. When We Need More

Compared to JSR-250, we can also use Spring Method Security. This includes using the more powerful Spring Security Expression Language (SpEL) for more advanced authorization scenarios. We can enable SpEL on our EnableGlobalMethodSecurity annotation by setting prePostEnabled=true:

@EnableGlobalMethodSecurity(prePostEnabled = true)

In addition, when we want to enforce security based on whether a domain object is owned by the user, we can use Spring Security Access Control Lists.

We should also note that when we write reactive applications, we use @EnableWebFluxSecurity and @EnableReactiveMethodSecurity instead.

8. Conclusion

In this tutorial, we first looked at how to secure our application using a centralized security rules approach with @EnableWebSecurity.

Then, we built upon this by configuring our security to put those rules nearer to the code that they affect. We did this by using @EnableGlobalMethodSecurity and annotating the methods we wanted to secure.

Finally, we introduced an alternative way of relaxing security for public resources that don't need it.

As always, the example code is available over on GitHub.

The post Spring @EnableWebSecurity vs. @EnableGlobalMethodSecurity first appeared on Baeldung.
       

Spring Data with ArangoDB

$
0
0

1. Introduction

In this tutorial, we'll learn how to work with the Spring Data module and ArangoDB database. ArangoDB is a free and open-source multi-model database system. It supports key-value, document, and graph data models with one database core and a unified query language: AQL (ArangoDB Query Language).

We'll cover the required configuration, basic CRUD operations, custom queries, and entities relations.

2. Dependencies

To use Spring Data with ArangoDB in our application, we'll need the following dependency:

<dependency>
    <groupId>com.arangodb</groupId>
    <artifactId>arangodb-spring-data</artifactId>
    <version>3.5.0</version>
</dependency>

3. Configuration

Before we start working with the data, we need to set up a connection to ArangoDB. We should do it by creating a configuration class that implements the ArangoConfiguration interface:

@Configuration
public class ArangoDbConfiguration implements ArangoConfiguration {}

Inside we'll need to implement two methods. The first one should create ArangoDB.Builder object that will generate an interface to our database:

@Override
public ArangoDB.Builder arango() {
    return new ArangoDB.Builder()
      .host("127.0.0.1", 8529)
      .user("root")
      .password("password");
}

There are four required parameters o create a connection: host, port, username, and password.

Alternatively, we can skip setting these parameters in the configuration class:

@Override
public ArangoDB.Builder arango() {
    return new ArangoDB.Builder();
}

As we can store them in arango.properties resource file:

arangodb.host=127.0.0.1
arangodb.port=8529
arangodb.user=baeldung
arangodb.password=password

It's a default location for Arango to look for. It can be overwritten by passing an InputStream to a custom properties file:

InputStream in = MyClass.class.getResourceAsStream("my.properties");
ArangoDB.Builder arango = new ArangoDB.Builder()
  .loadProperties(in);

The second method we have to implement is simply providing a database name that we need in our application:

@Override
public String database() {
    return "baeldung-database";
}

Additionally, the configuration class needs the @EnableArangoRepositories annotation that tells Spring Data where to look for ArangoDB repositories:

@EnableArangoRepositories(basePackages = {"com.baeldung"})

4. Data Model

As a next step, we'll create a data model. For this piece, we'll use an article representation with a name, author, and publishDate fields:

@Document("articles")
public class Article {
    @Id
    private String id;
    @ArangoId
    private String arangoId;
    private String name;
    private String author;
    private ZonedDateTime publishDate;
    // constructors
}

The ArangoDB entity must have the @Document annotation that takes the collection name as an argument. By default, it's a decapitalize class name.

Next, we have two id fields. One with a Spring's @Id annotation and a second one with Arango's @ArangoId annotation. The first one stores the generated entity id. The second one stores the same id nut with a proper location in the database. In our case, these values could be accordingly 1 and articles/1.

Now, when we have the entity defined, we can create a repository interface for data access:

@Repository
public interface ArticleRepository extends ArangoRepository<Article, String> {}

It should extend the ArangoRepository interface with two generic parameters. In our case, it's an Article class with an id of type String.

5. CRUD Operations

Finally, we can create some concrete data.

As a start point, we'll need a dependency to the articles repository:

@Autowired
ArticleRepository articleRepository;

And a simple instance of the Article class:

Article newArticle = new Article(
  "ArangoDb with Spring Data",
  "Baeldung Writer",
  ZonedDateTime.now()
);

Now, if we want to store this article in our database, we should simply invoke the save method:

Article savedArticle = articleRepository.save(newArticle);

After that, we can make sure that both the id and arangoId fields were generated:

assertNotNull(savedArticle.getId());
assertNotNull(savedArticle.getArangoId());

To fetch the article from a database, we'll need to get its id first:

String articleId = savedArticle.getId();

Then simply call the findById method:

Optional<Article> articleOpt = articleRepository.findById(articleId);
assertTrue(articleOpt.isPresent());

Having the article entity, we can change its properties:

Article article = articleOpt.get();
article.setName("New Article Name");
articleRepository.save(article);

Finally, invoke again the save method to update the database entry. It won't create a new entry because the id was already assigned to the entity.

Deleting entries is also a straightforward operation. We simply invoke the repository's delete method:

articleRepository.delete(article)

Delete it by the id is also possible:

articleRepository.deleteById(articleId)

6. Custom Queries

With Spring Data and ArangoDB, we can make use of the derived repositories and simply define the query by a method name:

@Repository
public interface ArticleRepository extends ArangoRepository<Article, String> {
    Iterable<Article> findByAuthor(String author);
}

The second option is to use AQL (ArangoDb Query Language). It's a custom syntax language that we can apply with the @Query annotation.

Now, let's take a look at a basic AQL query that'll find all articles with a given author and sort them by the publish date:

@Query("FOR a IN articles FILTER a.author == @author SORT a.publishDate ASC RETURN a")
Iterable<Article> getByAuthor(@Param("author") String author);

7. Relations

ArangoDB gives as a possibility to create relations between entities.

As an example, let's create a relation between an Author class and its articles.

To do so, we need to define a new collection property with @Relations annotation that will contain links to each article written by a given author:

@Relations(edges = ArticleLink.class, lazy = true)
private Collection<Article> articles;

As we can see, the relations in ArangoDB are defined through a separate class annotated with @Edge:

@Edge
public class ArticleLink {
    @From
    private Article article;
    @To
    private Author author;
    // constructor, getters and setters
}

It comes with two fields annotated with @From and @To. They define the incoming and outcoming relation.

8. Conclusion

In this tutorial, we've learned how to configure ArangoDB and use it with Spring Data. We've covered basic CRUD operations, custom queries, and entity relations.

As always, all source code is available over on GitHub.

The post Spring Data with ArangoDB first appeared on Baeldung.
       

Introduction to ksqlDB

$
0
0

1. Introduction

ksqlDB can be described as a real-time event-streaming database built on top of Apache Kafka and Kafka Streams. It combines powerful stream processing with a relational database model using SQL syntax.

In this tutorial, we'll cover the fundamental concepts of ksqlDB and build a sample application to demonstrate a practical use case.

2. Overview

Since ksqlDB is an event streaming database, streams and tables are its core abstractions. Essentially, these are collections of data that can be transformed and processed in real-time.

Stream processing enables continuous computations over these unbounded streams of events. We can transform, filter, aggregate, and join the collections to derive new collections or materialized views using SQL. Furthermore, new events continuously update these collections and views to provide real-time data.

Finally, queries publish the results of the various stream processing operations. ksqlDB queries support both asynchronous real-time application flows and synchronous request/response flows, similar to a traditional database.

3. Setup

To see ksqlDB in action, we'll build an event-driven Java application. This will aggregate and query an unbounded stream of readings from various sensor sources.

The main use case is to detect situations when the average value of the readings exceeds a specified threshold, within a specific time period. Furthermore, a key requirement is that the application must provide real-time information that could, for example, be used when building a dashboard or warning system.

We'll be using the ksqlDB Java client to interact with the server in order to create tables, aggregate queries, and execute various queries.

3.1. Docker

As ksqlDB runs on top of Kafka, we'll use Docker Compose to run the Kafka components, ksqlDB server, and the ksqlDB CLI client:

services:
  zookeeper:
    image: confluentinc/cp-zookeeper:6.2.0
    hostname: zookeeper
    ...
  broker:
    image: confluentinc/cp-kafka:6.2.0
    hostname: broker
    ...
  ksqldb-server:
    image: confluentinc/ksqldb-server:0.19.0
    hostname: ksqldb-server
    depends_on:
      - broker
    ports:
      - "8088:8088"
    healthcheck:
      test: curl -f http://ksqldb-server:8088/ || exit 1
    environment:
      KSQL_LISTENERS: http://0.0.0.0:8088
      KSQL_BOOTSTRAP_SERVERS: broker:9092
      KSQL_KSQL_LOGGING_PROCESSING_STREAM_AUTO_CREATE: "true"
      KSQL_KSQL_LOGGING_PROCESSING_TOPIC_AUTO_CREATE: "true"
  ksqldb-cli:
    image: confluentinc/ksqldb-cli:0.19.0
    container_name: ksqldb-cli
    depends_on:
      - broker
      - ksqldb-server
    entrypoint: /bin/sh
    tty: true

Additionally, we'll also use this docker-compose.yml file in our Java application to spin up an environment for our integration tests using the Testcontainers framework.

First, let's bring up the stack by running:

docker-compose up

Next, let's connect to the interactive CLI, once all the services have started. This is useful for testing and interacting with the server:

docker exec -it ksqldb-cli ksql http://ksqldb-server:8088

We'll also tell ksqlDB to start all queries from the earliest point in each topic:

ksql> SET 'auto.offset.reset' = 'earliest';

3.2. Dependencies

In this project, we'll primarily be using the Java client to interact with ksqlDB. More specifically, we'll be using ksqlDB for Confluent Platform (CP), so we'll need to add the CP Maven repository to our POM file:

<repository>
    <id>confluent</id>
    <name>confluent-repo</name>
    <url>http://packages.confluent.io/maven/</url>
</repository>

Now, let's add the dependency for the client:

<dependency>
    <groupId>io.confluent.ksql</groupId>
    <artifactId>ksqldb-api-client</artifactId>
    <version>6.2.0</version>
</dependency>

4. Real-Time Data Aggregation

In this section, we'll see how to create a materialized view that represents the real-time aggregation required by our application.

4.1. Creating the Stream

In Kafka, a topic stores the collection of events. Similarly, in ksqkDB, a stream represents the events, backed by a Kafka topic.

Let's begin by creating our stream to store the incoming sensor data:

CREATE STREAM readings (sensor_id VARCHAR KEY, timestamp VARCHAR, reading INT)
  WITH (KAFKA_TOPIC = 'readings',
        VALUE_FORMAT = 'JSON',
        TIMESTAMP = 'timestamp',
        TIMESTAMP_FORMAT = 'yyyy-MM-dd HH:mm:ss',
        PARTITIONS = 1);

Here, ksqlDB creates the readings topic to store the stream data in JSON format. Since the events represent temporal data, it's important that each reading contains a timestamp indicating the event time. The timestamp field stores this data in the specified format. This ensures that ksqlDB applies event-time semantics for time-related operations and out-of-order events.

Next, we'll create an instance of the Client with ksqlDB server connection details and use this to execute our SQL statement:

ClientOptions options = ClientOptions.create()
  .setHost(KSQLDB_SERVER_HOST)
  .setPort(KSQLDB_SERVER_PORT);
Client client = Client.create(options);
Map<String, Object> properties = Collections.singletonMap(
  "auto.offset.reset", "earliest"
);
CompletableFuture<ExecuteStatementResult> result = 
  client.executeStatement(CREATE_READINGS_STREAM, properties);

As previously with the CLI, we set the value of the auto.offset.reset property to “earliest“. This ensures that in the absence of a Kafka offset, the query reads the relevant topic from the earliest offset.

The executeStatement method is part of the async API provided by the client. It immediately returns a CompletableFuture, before sending any requests to the server. The calling code may then decide to block and wait for completion (by invoking the get or join method) or to perform other non-blocking operations.

4.2. Creating the Materialized View

Now that we have the underlying event stream, we can derive a new alerts table from the readings stream. This persistent query (or materialized view) runs on the server indefinitely and processes events from the source stream or table.

In our case, it should raise an alert when the average reading, per sensor, exceeds a value of 25 over a 30-minute period:

CREATE TABLE alerts AS
  SELECT
    sensor_id,
    TIMESTAMPTOSTRING(WINDOWSTART, 'yyyy-MM-dd HH:mm:ss', 'UTC') 
      AS start_period,
    TIMESTAMPTOSTRING(WINDOWEND, 'yyyy-MM-dd HH:mm:ss', 'UTC') 
      AS end_period,
    AVG(reading) AS average_reading
  FROM readings
  WINDOW TUMBLING (SIZE 30 MINUTES)
  GROUP BY id 
  HAVING AVG(reading) > 25
  EMIT CHANGES;

In this query, we're aggregating new incoming events in a tumbling window of 30 minutes, per sensor. We've also used the TIMESTAMPTOSTRING function to convert the UNIX timestamp into something more readable.

Importantly, the materialized view only updates with data when the new event successfully integrates with the aggregation function.

As previously, let's use the client to execute this statement asynchronously and create our materialized view:

CompletableFuture<ExecuteStatementResult> result = 
  client.executeStatement(CREATE_ALERTS_TABLE, properties)

Once created, such views update in an incremental manner. This is the key to efficient and highly-performant queries for real-time updates.

4.3. Inserting Sample Data

Before we can run queries, let's produce some sample events that represent various readings at 10-minute intervals.

Let's provide key/value mappings for the stream columns using KsqlObject:

List<KsqlObject> rows = Arrays.asList(
  new KsqlObject().put("sensor_id", "sensor-1")
    .put("timestamp", "2021-08-01 09:00:00").put("reading", 22),
  new KsqlObject().put("sensor_id", "sensor-1")
    .put("timestamp", "2021-08-01 09:10:00").put("reading", 20),
  new KsqlObject().put("sensor_id", "sensor-2")
    .put("timestamp", "2021-08-01 10:00:00").put("reading", 26),
  
  // additional rows
);
CompletableFuture<Void> result = CompletableFuture.allOf(
  rows.stream()
    .map(row -> client.insertInto(READINGS_TABLE, row))
    .toArray(CompletableFuture[]::new)
);

Here, we combine all the individual insert operations into a single Future for convenience. This completes upon the successful completion of all underlying CompletableFuture instances.

5. Querying the Data

Queries allow the callers to bring the materialized view data into the application. These can be classified into two types.

5.1. Push Query

This type of query pushes a continuous stream of updates to the client. These queries are particularly suitable for asynchronous application flows as they enable the clients to react to new information in real-time.

However, unlike persistent queries, the server does not store the results of such queries in a Kafka topic. Therefore, we should keep these queries as simple as possible while moving all the heavy lifting into persistent queries.

Let's create a simple push query to subscribe to the results from our alerts materialized view, created earlier:

SELECT * FROM alerts EMIT CHANGES;

Here, it's important to note the EMIT clause, which emits all changes to the client. As the query contains no limit, it will continue to stream all results until terminated.

Next, we subscribe to the results of the query in order to receive streaming data:

public CompletableFuture<Void> subscribeOnAlerts(Subscriber<Row> subscriber) {
    return client.streamQuery(ALERTS_QUERY, PROPERTIES)
      .thenAccept(streamedQueryResult -> streamedQueryResult.subscribe(subscriber))
      .whenComplete((result, ex) -> {
          if (ex != null) {
              log.error("Alerts push query failed", ex);
          }
      });
}

Here, we've invoked the streamQuery method, which returns a StreamedQueryResult for obtaining streaming data. This extends the Publisher interface from Reactive Streams. Therefore, we're able to asynchronously consume the results by using a reactive Subscriber. In fact, the subscriber is a simple Reactive Streams implementation that receives the ksqlDB rows as JSON and converts them to Alert POJO.

We can now test this using our Compose file and the DockerComposeContainer from Testcontainers:

@Testcontainers
class KsqlDBApplicationLiveTest {
    @Container
    public static DockerComposeContainer dockerComposeContainer =
      new DockerComposeContainer<>(KSQLDB_COMPOSE_FILE)
        .withServices("zookeeper", "broker", "ksqldb-server")
        .withExposedService("ksqldb-server", 8088,
          Wait.forHealthcheck().withStartupTimeout(Duration.ofMinutes(5)))
        .withLocalCompose(true);
    // setup and teardown
    @Test
    void givenSensorReadings_whenSubscribedToAlerts_thenAlertsAreConsumed() {
        createAlertsMaterializedView();
        
        // Reactive Streams Subscriber impl for receiving streaming data
        RowSubscriber<Alert> alertSubscriber = new RowSubscriber<>(Alert.class);
        ksqlDBApplication.subscribeOnAlerts(alertSubscriber);
        insertSampleData();
        await().atMost(Duration.ofMinutes(3)).untilAsserted(() ->
          assertThat(alertSubscriber.consumedItems)
            .containsOnly(
              expectedAlert("sensor-1", "2021-08-01 09:30:00", "2021-08-01 10:00:00", 28.0),
              expectedAlert("sensor-2", "2021-08-01 10:00:00", "2021-08-01 10:30:00", 26.0)
            )
        );
    }
}

Here, we've spun up a complete ksqlDB environment for the integration tests. The test inserts sample rows into the stream and ksqlDB performs the windowed aggregation. Finally, we assert that our subscriber consumes the latest alerts, as expected.

5.2. Pull Query

In contrast to push queries, pull queries retrieve data that does not update dynamically, much like a traditional RDBMS. Such queries return immediately with a finite result set. Hence, pull queries are well suited to synchronous request/response application flows.

As a simple example, let's create a query to retrieve all the alerts triggered for a particular sensor id:

String pullQuery = "SELECT * FROM alerts WHERE sensor_id = 'sensor-2';";
List<Row> rows = client.executeQuery(pullQuery, PROPERTIES).get()

In contrast to the push query, this query returns all the available data from the materialized view at execution time. This is useful for querying the current state of the materialized view.

5.3. Miscellaneous Operations

The API docs for the client provide further information on other operations such as describing sources; listing streams, tables, topics; terminating queries, and more.

6. Conclusion

In this article, we covered the core concepts of streams, tables, and queries that support ksqlDB as an efficient event-streaming database.

Along the way, we built a simple, reactive application using concise and composable SQL constructs. We also saw how to use the Java client to create streams and tables and issue queries against materialized views and retrieve real-time data.

As always, the full source code is available over on GitHub.


Compare the Content of Two Files in Java

$
0
0

1. Overview

In this tutorial, we'll review different approaches to determine if the contents of two files are equal. We'll be using core Java Stream I/O libraries to read the contents of the files and implement basic comparisons.

To finish, we'll review the support provided in Apache Commons I/O to check for content equality of two files.

2. Byte by Byte Comparison

Let's start with a simple approach to reading the bytes from the two files to compare them sequentially.

To speed up reading the files, we'll use BufferedInputStream. As we'll see, BufferedInputStream reads large chunks of bytes from the underlying InputStream into an internal buffer. When the client reads all the bytes in the chunk, the buffer reads another block of bytes from the stream.

Obviously, using BufferedInputStream is much faster than reading one byte at a time from the underlying stream.

Let's write a method that uses BufferedInputStreams to compare two files:

public static long filesCompareByByte(Path path1, Path path2) throws IOException {
    try (BufferedInputStream fis1 = new BufferedInputStream(new FileInputStream(path1.toFile()));
         BufferedInputStream fis2 = new BufferedInputStream(new FileInputStream(path2.toFile()))) {
        
        int ch = 0;
        long pos = 1;
        while ((ch = fis1.read()) != -1) {
            if (ch != fis2.read()) {
                return pos;
            }
            pos++;
        }
        if (fis2.read() == -1) {
            return -1;
        }
        else {
            return pos;
        }
    }
}

We use the try-with-resources statement to ensure that the two BufferedInputStreams are closed at the end of the statement.

With the while loop, we read each byte of the first file and compare it with the corresponding byte of the second file. If we find a discrepancy, we return the byte position of the mismatch. Otherwise, the files are identical and the method returns -1L.

We can see that if the files are of different sizes but the bytes of the smaller file match the corresponding bytes of the larger file, then it returns the size in bytes of the smaller file.

3. Line by Line Comparison

To compare text files, we can do an implementation that reads the files line by line and checks for equality between them.

Let's work with a BufferedReader that uses the same strategy as InputStreamBuffer, copying chunks of data from the file to an internal buffer to speed up the reading process.

Let's review our implementation:

public static long filesCompareByLine(Path path1, Path path2) throws IOException {
    try (BufferedReader bf1 = Files.newBufferedReader(path1);
         BufferedReader bf2 = Files.newBufferedReader(path2)) {
        
        long lineNumber = 1;
        String line1 = "", line2 = "";
        while ((line1 = bf1.readLine()) != null) {
            line2 = bf2.readLine();
            if (line2 == null || !line1.equals(line2)) {
                return lineNumber;
            }
            lineNumber++;
        }
        if (bf2.readLine() == null) {
            return -1;
        }
        else {
            return lineNumber;
        }
    }
}

The code follows a similar strategy as the previous example. In the while loop, instead of reading bytes, we read a line of each file and check for equality. If all the lines are identical for both files, then we return -1L, but if there's a discrepancy, we return the line number where the first mismatch is found.

If the files are of different sizes but the smaller file matches the corresponding lines of the larger file, then it returns the number of lines of the smaller file.

4. Comparing with Files::mismatch

The method Files::mismatch, added in Java 12, compares the contents of two files. It returns -1L if the files are identical, and otherwise, it returns the position in bytes of the first mismatch.

This method internally reads chunks of data from the files' InputStreams and uses Arrays::mismatch, introduced in Java 9, to compare them.

As with our first example, for files that are of different sizes but for which the contents of the small file are identical to the corresponding contents in the larger file, it returns the size (in bytes) of the smaller file.

To see examples of how to use this method, please see our article covering the new features of Java 12.

5. Using Memory Mapped Files

A memory-mapped file is a kernel object that maps the bytes from a disk file to the computer's memory address space. The heap memory is circumvented, as the Java code manipulates the contents of the memory-mapped files as if we're directly accessing the memory.

For large files, reading and writing data from memory-mapped files is much faster than using the standard Java I/O library. It's important that the computer has an adequate amount of memory to handle the job to prevent thrashing.

Let's write a very simple example that shows how to compare the contents of two files using memory-mapped files:

public static boolean compareByMemoryMappedFiles(Path path1, Path path2) throws IOException {
    try (RandomAccessFile randomAccessFile1 = new RandomAccessFile(path1.toFile(), "r"); 
         RandomAccessFile randomAccessFile2 = new RandomAccessFile(path2.toFile(), "r")) {
        
        FileChannel ch1 = randomAccessFile1.getChannel();
        FileChannel ch2 = randomAccessFile2.getChannel();
        if (ch1.size() != ch2.size()) {
            return false;
        }
        long size = ch1.size();
        MappedByteBuffer m1 = ch1.map(FileChannel.MapMode.READ_ONLY, 0L, size);
        MappedByteBuffer m2 = ch2.map(FileChannel.MapMode.READ_ONLY, 0L, size);
        return m1.equals(m2);
    }
}

The method returns true if the contents of the files are identical, otherwise, it returns false.

We open the files using the RamdomAccessFile class and access their respective FileChannel to get the MappedByteBuffer. This is a direct byte buffer that is a memory-mapped region of the file. In this simple implementation, we use its equals method to compare in memory the bytes of the whole file in one pass.

6. Using Apache Commons I/O

The methods IOUtils::contentEquals and IOUtils::contentEqualsIgnoreEOL compare the contents of two files to determine equality. The difference between them is that contentEqualsIgnoreEOL ignores line feed (\n) and carriage return (\r). The motivation for this is due to operating systems using different combinations of these control characters to define a new line.

Let's see a simple example to check for equality:

@Test
public void whenFilesIdentical_thenReturnTrue() throws IOException {
    Path path1 = Files.createTempFile("file1Test", ".txt");
    Path path2 = Files.createTempFile("file2Test", ".txt");
    InputStream inputStream1 = new FileInputStream(path1.toFile());
    InputStream inputStream2 = new FileInputStream(path2.toFile());
    Files.writeString(path1, "testing line 1" + System.lineSeparator() + "line 2");
    Files.writeString(path2, "testing line 1" + System.lineSeparator() + "line 2");
    assertTrue(IOUtils.contentEquals(inputStream1, inputStream2));
}

If we want to ignore newline control characters but otherwise check for equality of the contents:

@Test
public void whenFilesIdenticalIgnoreEOF_thenReturnTrue() throws IOException {
    Path path1 = Files.createTempFile("file1Test", ".txt");
    Path path2 = Files.createTempFile("file2Test", ".txt");
    Files.writeString(path1, "testing line 1 \n line 2");
    Files.writeString(path2, "testing line 1 \r\n line 2");
    Reader reader1 = new BufferedReader(new FileReader(path1.toFile()));
    Reader reader2 = new BufferedReader(new FileReader(path2.toFile()));
    assertTrue(IOUtils.contentEqualsIgnoreEOL(reader1, reader2));
}

7. Conclusion

In this article, we've covered several ways to implement comparison of the contents of two files to check for equality.

The source code can be found over on GitHub.


Java Weekly, Issue 399

$
0
0

1. Spring and Java

>> What are they building—and why? 6 questions for the top Java architects [blogs.oracle.com]

The Java architects talking about its vibrance, prioritizing language features, project Loom, reactive programming, records, and more. Definitely an interesting, forward-looking read!

>> 5 Hibernate Features You Should Use With Spring Data JPA [thorben-janssen.com]

Getting the most out of Hibernate & JPA – a practical guide on Hibernate's statistics, slow query logs, optimized sequences, padding, and natural identifiers.

>> JEP 417: Vector API (Third Incubator) [openjdk.java.net]

The third incubator version of Vector API takes advantage of some ARM optimizations and brings even more performance improvements.

Also worth reading:

Webinars and presentations:

Time to upgrade:

2. Technical & Musings

>> Continuous Configuration at the Speed of Sound [allthingsdistributed.com]

An insightful read on how continuous configuration came to be: creating, managing, and deploying application configurations at scale!

Also worth reading:

3. Comics

And my favorite Dilberts of the week:

>> Dilbert Is Not A Doctor [dilbert.com]

>> Lazy Wally Robot [dilbert.com]

>> Recommend A Good Microphone [dilbert.com]

4. Pick of the Week

Fauna reached out a while back about working together and I've been on a sort of “discovery journey” ever since with it 🙂

I'll definitely write more about their system as I use it.

Basically, Fauna is a flexible, easy to start with, transactional database delivered to you as a web-native API with GraphQL:

>> A look at Fauna

And it's serverless, which means we can move fast and scale up with basically no need for Ops. That's pretty cool.

       
Viewing all 4464 articles
Browse latest View live


<script src="https://jsc.adskeeper.com/r/s/rssing.com.1596347.js" async> </script>