Quantcast
Channel: Baeldung
Viewing all 4833 articles
Browse latest View live

JMX Data to the Elastic Stack (ELK)

$
0
0

1. Overview

In this quick tutorial, we’re going to have a look at how to send JMX data from our Tomcat server to the Elastic Stack (formerly known as ELK).

We’ll discuss how to configure Logstash to read data from JMX and send it to Elasticsearch.

2. Install the Elastic Stack

First, we need to install Elastic stack (ElastichsearchLogstashKibana)

Then, to make sure everything is connected and working properly, we’ll send the JMX data to Logstash and visualize it over on Kibana.

2.1. Test Logstash

First, we will go to the Logstash installation directory which varies by operating system (in our case Ubuntu):

cd /opt/logstash

We can set a simple configuration to Logstash from the command line:

bin/logstash -e 'input { stdin { } } output { elasticsearch { hosts => ["localhost:9200"] } }'

Then, we can simply type some sample data in the console – and use the CTRL-D command to close pipeline when we’re done.

2.2. Test Elasticsearch

After adding the sample data, a Logstash index should be available on Elasticsearch – which we can check as follows:

curl -X GET 'http://localhost:9200/_cat/indices'

Sample Output:

yellow open logstash-2017.11.10 5 1 3531 0 506.3kb 506.3kb 
yellow open .kibana             1 1    3 0   9.5kb   9.5kb 
yellow open logstash-2017.11.11 5 1 8671 0   1.4mb   1.4mb

2.3. Test Kibana

Kibana runs by default on port 5601 – we can access the homepage at:

http://localhost:5601/app/kibana

We should be able to create a new index with the pattern “logstash-*” – and see our sample data there.

3. Configure Tomcat

Next, we need to enable JMX by adding the following to CATALINA_OPTS:

-Dcom.sun.management.jmxremote
  -Dcom.sun.management.jmxremote.port=9000
  -Dcom.sun.management.jmxremote.ssl=false
  -Dcom.sun.management.jmxremote.authenticate=false

Note that:

  • You can configure CATALINA_OPTS by modifying setenv.sh
  • For Ubuntu users setenv.sh can be found in ‘/usr/share/tomcat8/bin’

4. Connect JMX and Logstash

Now, let’s connect our JMX metrics to Logstash – for which we’ll need to have the JMX input plugin installed there (more on that later).

4.1. Configure JMX Metrics

First we need to configure the JMX metrics we want to stash; we’ll provide the configuration in JSON format.

Here’s our jmx_config.json:

{
  "host" : "localhost",
  "port" : 9000,
  "alias" : "reddit.jmx.elasticsearch",
  "queries" : [
  {
    "object_name" : "java.lang:type=Memory",
    "object_alias" : "Memory"
  }, {
    "object_name" : "java.lang:type=Threading",
    "object_alias" : "Threading"
  }, {
    "object_name" : "java.lang:type=Runtime",
    "attributes" : [ "Uptime", "StartTime" ],
    "object_alias" : "Runtime"
  }]
}

Note that:

  • We used the same port for JMX from CATALINA_OPTS 
  • We can provide as many configuration files as we want, but we need them to be in the same directory (in our case, we saved jmx_config.json in ‘/monitor/jmx/’)

4.2. JMX Input Plugin

Next, let’s install JMX input plugin by running the following command in the Logstash installation directory:

bin/logstash-plugin install logstash-input-jmx

Then, we need to create a Logstash configuration file (jmx.conf), where the input is JMX metrics and output directed to Elasticsearch:

input {
  jmx {
    path => "/monitor/jmx"
    polling_frequency => 60
    type => "jmx"
    nb_thread => 3
  }
}

output {
    elasticsearch {
        hosts => [ "localhost:9200" ]
    }
}

Finally, we need to run Logstash and specify our configuration file:

bin/logstash -f jmx.conf

Note that our Logstash configuration file jmx.conf is saved in the Logstash home directory (in our case /opt/logstash)

5. Visualize JMX Metrics

Finally, let’s create a simple visualization of our JMX metrics data, over on Kibana. We’ll create a simple chart – to monitor the heap memory usage.

5.1. Create New Search

First, we’ll create a new search to get metrics related to heap memory usage:

  • Click on “New Search” icon in search bar
  • Type the following query
    metric_path:reddit.jmx.elasticsearch.Memory.HeapMemoryUsage.used
  • Press Enter
  • Make sure to add ‘metric_path‘ and ‘metric_value_number‘ fields from sidebar
  • Click on ‘Save Search’ icon in search bar
  • Name the search ‘used memory’

In case any fields from sidebar marked as unindexed, go to ‘Settings’ tab and refresh the field list in the ‘logstash-*‘ index.

5.2. Create Line Chart

Next, we’ll create a simple line chart to monitor our heap memory usage over time:

  • Go to ‘Visualize’ tab
  • Choose ‘Line Chart’
  • Choose ‘From saved search’
  • Choose ‘used memory’ search that we created earlier

For Y-Axis, make sure to choose:

  • Aggregation: Average
  • Field: metric_value_number

For the X-Axis, choose ‘Date Histogram’ – then save the visualization.

5.3. Use Scripted Field

As the memory usage is in bytes, it’s not very readable. We can convert the metric type and value by adding a scripted field in Kibana:

  • From ‘Settings’, go to indices and choose ‘logstash-*‘ index
  • Go to ‘Scripted fields’ tab and click ‘Add Scripted Field’
  • Name: metric_value_formatted
  • Format: Bytes
  • For Script, we will simply use value of ‘metric_value_number‘:
    doc['metric_value_number'].value

Now, you can change your search and visualization to use field ‘metric_value_formatted‘ instead of ‘metric_value_number‘ – and the data is going to be properly displayed.

6. Conclusion

And we’re done. As you can see, the configuration isn’t particularly difficult, and getting the JMX data to be visible in Kibana allows us to do a lot of interesting visualization work to create a fantastic production monitoring dashboard.


REST API Testing with Karate

$
0
0

1. Overview

In this article, we’ll introduce Karate, a Behavior Driven Development (BDD) testing framework for Java.

2. Karate and BDD

Karate is built on top of Cucumber, another BDD testing framework, and shares some of the same concepts. One of these is the use of a Gherkin file, which describes the tested feature. However, unlike Cucumber, tests aren’t written in Java and are fully described in the Gherkin file.

A Gherkin file is saved with the “.feature” extension. It begins with the Feature keyword, followed by the feature name on the same line. It also contains different test scenarios, each beginning with the keyword Scenario and consisting of multiple steps with the keywords GivenWhenThenAnd, and But.

More about Cucumber and the Gherkin structure can be found here.

3. Maven Dependencies

To make use of Karate in a Maven project, we need to add the karate-apache dependency to the pom.xml:

<dependency>
    <groupId>com.intuit.karate</groupId>
    <artifactId>karate-apache</artifactId>
    <version>0.6.0</version>
</dependency>

We’ll also need the karate-junit4 dependency to facilitate JUnit testing:

<dependency>
    <groupId>com.intuit.karate</groupId>
    <artifactId>karate-junit4</artifactId>
    <version>0.6.0</version>
</dependency>

4. Creating Tests

We’ll start by writing tests for some common scenarios in a Gherkin Feature file.

4.1. Testing the Status Code

Let’s write a scenario that tests a GET endpoint and checks if it returns a 200 (OK) HTTP status code:

Scenario: Testing valid GET endpoint
Given url 'http://localhost:8080/user/get'
When method GET
Then status 200

This works obviously with all possible HTTP status codes.

4.2. Testing the Response

Let’s a write another scenario that tests that the REST endpoint returns a specific response:

Scenario: Testing the exact response of a GET endpoint
Given url 'http://localhost:8080/user/get'
When method GET
Then status 200
And match $ == {id:"1234",name:"John Smith"}

The match operation is used for the validation where ‘$’ represents the response. So the above scenario checks that the response exactly matches ‘{id:”1234″,name:”John Smith”}’.

We can also check specifically for the value of the id field:

And match $.id == "1234"

The match operation can also be used to check if the response contains certain fields. This is helpful when only certain fields need to be checked or when not all response fields are known:

Scenario: Testing that GET response contains specific field
Given url 'http://localhost:8080/user/get'
When method GET
Then status 200
And match $ contains {id:"1234"}

4.3. Validating Response Values with Markers

In the case where we don’t know the exact value that is returned, we can still validate the value using markers — placeholders for matching fields in the response.

For example, we can use a marker to indicate whether we expect a null value or not:

  • #null
  • #notnull

Or we can use a marker to match a certain type of value in a field:

  • #boolean
  • #number
  • #string

Other markers are available for when we expect a field to contain a JSON object or array:

  • #array
  • #object

And there’re markers for matching on a certain format or regular expression and one that evaluates a boolean expression:

  • #uuid — value conforms to the UUID format
  • #regex STR — value matches the regular expression STR
  • #? EXPR — asserts that the JavaScript expression EXPR evaluates to true

Finally, if we don’t want any kind of check on a field, we can use the #ignore marker.

Let’s rewrite the above scenario to check that the id field is not null:

Scenario: Test GET request exact response
Given url 'http://localhost:8080/user/get'
When method GET
Then status 200
And match $ == {id:"#notnull",name:"John Smith"}

4.4. Testing a POST Endpoint with a Request Body

Let’s look at a final scenario that tests a POST endpoint and takes a request body:

Scenario: Testing a POST endpoint with request body
Given url 'http://localhost:8080/user/create'
And request { id: '1234' , name: 'John Smith'}
When method POST
Then status 200
And match $ contains {id:"#notnull"}

5. Running Tests

Now that the test scenarios are complete, we can run our tests by integrating Karate with JUnit.

We’ll use the @CucumberOptions annotation to specify the exact location of the Feature files:

@RunWith(Karate.class)
@CucumberOptions(features = "classpath:karate")
public class KarateUnitTest {
//...     
}

To demonstrate the REST API, we’ll use a WireMock server. 

For this example, we mock all the endpoints that are being tested in the method annotated with @BeforeClass. We’ll shut down the WireMock server in the method annotated with @AfterClass:

private static WireMockServer wireMockServer
  = new WireMockServer();

@BeforeClass
public static void setUp() throws Exception {
    wireMockServer.start();
    configureFor("localhost", 8080);
    stubFor(
      get(urlEqualTo("/user/get"))
        .willReturn(aResponse()
          .withStatus(200)
          .withHeader("Content-Type", "application/json")
          .withBody("{ \"id\": \"1234\", name: \"John Smith\" }")));

    stubFor(
      post(urlEqualTo("/user/create"))
        .withHeader("content-type", equalTo("application/json"))
        .withRequestBody(containing("id"))
        .willReturn(aResponse()
          .withStatus(200)
          .withHeader("Content-Type", "application/json")
          .withBody("{ \"id\": \"1234\", name: \"John Smith\" }")));

}

@AfterClass
public static void tearDown() throws Exception {
    wireMockServer.stop();
}

When we run the KarateUnitTest class, the REST Endpoints are created by the WireMock Server, and all the scenarios in the specified feature file are run.

6. Conclusion

In this tutorial, we looked at how to test REST APIs using the Karate Testing Framework.

Complete source code and all code snippets for this article can be found over on GitHub.

Java Weekly, Issue 203

$
0
0

Here we go…

1. Spring and Java

>> Elegant delegates in Kotlin [blog.codecentric.de]

Kotlin has many powerful features that should be used with extra care – and delegation is one of them.

>> 10 Common Hibernate Mistakes That Cripple Your Performance [thoughts-on-java.org]

If you’re working with Hibernate, these are definitely good things to keep in mind.

Also worth reading:

Webinars and presentations:

Time to upgrade:

2. Technical

>> Building a Microservices Ecosystem with Kafka Streams and KSQL [confluent.io]

A comprehensive guide to piecing together a microservice-based system making good use of Kafka Streams and KSQL.

>> Startup Mistakes: Choice of Datastore [stavros.io]

Adopting trendy technologies without evaluating their pros and cons doesn’t end well.

>> Grafana vs. Kibana: How to Get the Most Out of Your Data Visualization [blog.takipi.com]

A quick comparison of two fantastic tools, both doing data visualization well.

Also worth reading:

3. Musings

>> Is Object-Oriented Programming compatible with an enterprise context? [blog.frankel.ch]

It’s surely doable but migrating to the OOP-compatible design has its price.

Also worth reading:

4. Comics

And my favorite Dilberts of the week:

>> Wally Is Working If You Don’t See Him [dilbert.com]

>> Traffic App [dilbert.com]

>> Wally’s Watch is a Snitch [dilbert.com]

5. Pick of the Week

>> How Do You Focus? [m.signalvnoise.com]

The Java continue and break Keywords

$
0
0

1. Overview

In this quick article, we’ll introduce continue and break Java keywords and focus on how to use them in practice.

Simply put, execution of these statements causes branching of the current control flow and terminates the execution of the code in the current iteration.

2. The break Statement

The break statement comes in two forms: unlabeled and labeled.

2.1. Unlabeled break

We can use the unlabeled statement to terminate a for, while or do-while loop as well as the switch-case block:

for (int i = 0; i < 5; i++) {
    if (i == 3) {
        break;
    }
}

This snippet defines a for loop that is supposed to iterate five times. But when counter equals 3, the if condition becomes true and the break statement terminates the loop. This causes the control flow to be transferred to the statement that follows after the end of for loop.

In case of nested loops, an unlabeled break statement only terminates the inner loop that it’s in. Outer loops continue execution:

for (int rowNum = 0; rowNum < 3; rowNum++) {
    for (int colNum = 0; colNum < 4; colNum++) {
        if (colNum == 3) {
            break;
        }
    }
}

This snippet has nested for loops. When colNum equals 3, the if the condition evaluates to true and the break statement causes the inner for loop to terminate. However, the outer for loop continues iterating.

2.2. Labeled break

We can also use a labeled break statement to terminate a for, while or do-while loop. A labeled break terminates the outer loop.

Upon termination, the control flow is transferred to the statement immediately after the end of the outer loop:

compare: 
for (int rowNum = 0; rowNum < 3; rowNum++) {
    for (int colNum = 0; colNum < 4; colNum++) {
        if (rowNum == 1 && colNum == 3) {
            break compare;
        }
    }
}

In this example, we introduced a label just before the outer loop. When rowNum equals 1 and colNum equals 3, the if condition evaluates to true and the break statement terminates the outer loop.

The control flow is then transferred to the statement following the end of outer for loop.

3. The continue Statement

The continue statement also comes in two forms: unlabeled and labeled.

3.1. Unlabeled continue

We can use an unlabeled statement to bypass the execution of rest of the statements in the current iteration of a for, while or do-while loop. It skips to the end of the inner loop and continues the loop:

int counter = 0;
for (int rowNum = 0; rowNum < 3; rowNum++) {
    for (int colNum = 0; colNum < 4; colNum++) {
        if (colNum != 3) {
            continue;
        }
        counter++;
    }
}

In this snippet, whenever colNum is not equal to 3, the unlabeled continue statement skips the current iteration, thus bypassing the increment of the variable counter in that iteration. However, the outer for loop continues to iterate. So, the increment of counter happens only when colNum equals 3 in each iteration of the outer for loop.

3.2. Labeled continue

We can also use a labeled continue statement which skips the outer loop. Upon skipping, the control flow is transferred to the end of the outer loop, effectively continuing the iteration of the outer loop:

int counter = 0;
compare: 
for (int rowNum = 0; rowNum < 3; rowNum++) {
    for (int colNum = 0; colNum < 4; colNum++) {
        if (colNum == 3) {
            counter++;
            continue compare;
        }
    }
}

We introduced a label just before the outer loop. Whenever colNum equals 3, the variable counter is incremented. The labeled continue statement causes the iteration of outer for loop to skip.

The control flow is transferred to the end of the outer for loop, which continues with the next iteration.

4. Conclusion

In this tutorial, we’ve seen different ways of using the keywords break and continue as branching statements in Java.

The complete code presented in this article is available over on GitHub.

Lazy Verification with Mockito 2

$
0
0

1. Introduction

In this short tutorial, we’ll look at lazy verifications in Mockito 2.

Instead of failing-fast, Mockito allows us to see all results collected and reported at the end of a test.

2. Maven Dependencies

Let’s start by adding the Mockito 2 dependency:

<dependency>
    <groupId>org.mockito</groupId>
    <artifactId>mockito-core</artifactId>
    <version>2.12.0</version>
</dependency>

3. Lazy Verification

The default behavior of Mockito is to stop at the first failure i.e. eagerly – the approach is also known as fail-fast.

Sometimes we might need to execute and report all verifications – regardless of previous failures.

VerificationCollector is a JUnit rule which collects all verifications in test methods.

They’re executed and reported at the end of the test if there are failures:

public class LazyVerificationTest {
 
    @Rule
    public VerificationCollector verificationCollector = MockitoJUnit.collector();

    // ...
}

Let’s add a simple test:

@Test
public void testLazyVerification() throws Exception {
    List mockList = mock(ArrayList.class);
    
    verify(mockList).add("one");
    verify(mockList).clear();
}

When this test is executed, failures of both verifications will be reported:

org.mockito.exceptions.base.MockitoAssertionError: There were multiple verification failures:
1. Wanted but not invoked:
arrayList.add("one");
-> at com.baeldung.mockito.java8.LazyVerificationTest.testLazyVerification(LazyVerificationTest.java:21)
Actually, there were zero interactions with this mock.

2. Wanted but not invoked:
arrayList.clear();
-> at com.baeldung.mockito.java8.LazyVerificationTest.testLazyVerification(LazyVerificationTest.java:22)
Actually, there were zero interactions with this mock.

Without VerificationCollector rule, only the first verification gets reported:

Wanted but not invoked:
arrayList.add("one");
-> at com.baeldung.mockito.java8.LazyVerificationTest.testLazyVerification(LazyVerificationTest.java:19)
Actually, there were zero interactions with this mock.

4. Conclusion

We had a quick look at how we can use lazy verification in Mockito 2.

Also, as always, code samples can be found over on GitHub.

An Example of Backward Chaining in Drools

$
0
0

1. Overview

In this article, we’ll see how what Backward Chaining is and how we can use it with Drools.

This article is a part of a series showcasing the Drools Business Rules Engine.

2. Maven Dependencies

Let’s start by importing the drools-core dependency:

<dependency>
    <groupId>org.drools</groupId>
    <artifactId>drools-core</artifactId>
    <version>7.4.1.Final</version>
</dependency>

3. Forward Chaining

First of all, with forward chaining, we start by analyzing data and make our way towards a particular conclusion.

An example of applying forward chaining would be a system that discovers new routes by inspecting already known connections between nodes.

4. Backward Chaining

As opposed to forward chaining, backward chaining starts directly with the conclusion (hypothesis) and validates it by backtracking through a sequence of facts.

When comparing forward chaining and backward chaining, the first one can be described as “data-driven” (data as input), while the latter one can be described as “event(or goal)-driven” (goals as inputs).

An example of applying backward chaining would be to validate if there’s a route connecting two nodes.

5. Drools Backward Chaining

The Drools project was created primarily as a forward chaining system. But, starting with version 5.2.0, it supports backward chaining as well.

Let’s create a simple application and try to validate a simple hypothesis – if the Great Wall of China is on Planet Earth.

5.1. The Data

Let’s create a simple fact base describing things and its location:

  1. Planet Earth
  2. Asia, Planet Earth
  3. China, Asia
  4. Great Wall of China, China

5.2. Defining Rules

Now, let’s create a “.drl” file called BackwardChaining.drl which we’ll place in /resources/com/baeldung/drools/rules/. This will contain all necessary queries and rules to be used in the example.

The main belongsTo query, that will utilize backward chaining, can be written as:

query belongsTo(String x, String y)
    Fact(x, y;)
    or
    (Fact(z, y;) and belongsTo(x, z;))
end

Additionally, let’s add two rules that will make it possible to review our results easily:

rule "Great Wall of China BELONGS TO Planet Earth"
when
    belongsTo("Great Wall of China", "Planet Earth";)
then
    result.setValue("Decision one taken: Great Wall of China BELONGS TO Planet Earth");
end

rule "print all facts"
when
    belongsTo(element, place;)
then
    result.addFact(element + " IS ELEMENT OF " + place);
end

5.3. Creating the Application

Now, we’ll need a Java class for representing facts:

public class Fact {
 
    @Position(0)
    private String element;

    @Position(1)
    private String place;

    // getters, setters, contructors, and other methods ...    
}

Here we use the @Position annotation to tell the application in which order Drools will supply values for those attributes.

Also, we’ll create the POJO representing results:

public class Result {
    private String value;
    private List<String> facts = new ArrayList<>();
 
    //... getters, setters, constructors, and other methods
}

And now, we can run the example:

public class BackwardChainingTest {

    @Before
    public void before() {
        result = new Result();
        ksession = new DroolsBeanFactory().getKieSession();
    }

    @Test
    public void whenWallOfChinaIsGiven_ThenItBelongsToPlanetEarth() {

        ksession.setGlobal("result", result);
        ksession.insert(new Fact("Asia", "Planet Earth"));
        ksession.insert(new Fact("China", "Asia"));
        ksession.insert(new Fact("Great Wall of China", "China"));

        ksession.fireAllRules();
        
        assertEquals(
          result.getValue(),
          "Decision one taken: Great Wall of China BELONGS TO Planet Earth");
    }
}

When the test cases are executed, they add the given facts (“Asia belongs to Planet Earth“, “China belongs to Asia”, “Great Wall of China belongs to China”).

After that, the facts are processed with the rules described in BackwardChaining.drl, which provides a recursive query belongsTo(String x, String y). 

This query is invoked by the rules which use backward chaining to find if the hypothesis (“Great Wall of China BELONGS TO Planet Earth”), is true or false.

6. Conclusion

We’ve shown an overview of Backward Chaining, a feature of Drools used to retrieve a list of facts to validate if a decision is true.

As always, the full example can be found in our GitHub repository.

Introduction to Spring Cloud Stream

$
0
0

1. Overview

Spring Cloud Stream is a framework built on top of Spring Boot and Spring Integration that helps in creating event-driven or message-driven microservices.

In this article, we’ll introduce concepts and constructs of Spring Cloud Stream with some simple examples.

2. Maven Dependencies

To get started, we’ll need to add the Spring Cloud Starter Stream with the broker RabbitMQ Maven dependency as messaging-middleware to our pom.xml:

<dependency>
    <groupId>org.springframework.cloud</groupId>
    <artifactId>spring-cloud-starter-stream-rabbit</artifactId>
    <version>1.3.0.RELEASE</version>
</dependency>

And we’ll add the module dependency from Maven Central to enable JUnit support as well:

<dependency>
    <groupId>org.springframework.cloud</groupId>
    <artifactId>spring-cloud-stream-test-support</artifactId>
    <version>1.3.0.RELEASE</version>
    <scope>test</scope>
</dependency>

3. Main Concepts

Microservices architecture follows the “smart endpoints and dumb pipes” principle. Communication between endpoints is driven by messaging-middleware parties like RabbitMQ or Apache Kafka. Services communicate by publishing domain events via these endpoints or channels.

Let’s walk through the concepts that make up the Spring Cloud Stream framework, along with the essential paradigms that we must be aware of to build message-driven services.

3.1. Constructs

Let’s look at a simple service in Spring Cloud Stream that listens to input binding and sends a response to the output binding:

@SpringBootApplication
@EnableBinding(Processor.class)
public class MyLoggerServiceApplication {
    public static void main(String[] args) {
        SpringApplication.run(MyLoggerServiceApplication.class, args);
    }

    @StreamListener(Processor.INPUT)
    @SendTo(Processor.OUTPUT)
    public LogMessage enrichLogMessage(LogMessage log) {
        return new LogMessage(String.format("[1]: %s", log.getMessage()));
    }
}

The annotation @EnableBinding configures the application to bind the channels INPUT and OUTPUT defined within the interface Processor. Both channels are bindings that can be configured to use a concrete messaging-middleware or binder.

Let’s take a look at the definition of all these concepts:

  • Bindings — a collection of interfaces that identify the input and output channels declaratively
  • Binder — messaging-middleware implementation such as Kafka or RabbitMQ
  • Channel — represents the communication pipe between messaging-middleware and the application
  • StreamListeners — message-handling methods in beans that will be automatically invoked on a message from the channel after the MessageConverter does the serialization/deserialization between middleware-specific events and domain object types / POJOs
  • Message Schemas — used for serialization and deserialization of messages, these schemas can be statically read from a location or loaded dynamically, supporting the evolution of domain object types

3.2. Communication Patterns

Messages designated to destinations are delivered by the Publish-Subscribe messaging pattern. Publishers categorize messages into topics, each identified by a name. Subscribers express interest in one or more topics. The middleware filters the messages, delivering those of the interesting topics to the subscribers.

Now, the subscribers could be grouped. A consumer group is a set of subscribers or consumers, identified by a group id, within which messages from a topic or topic’s partition are delivered in a load-balanced manner.

4. Programming Model

This section describes the basics of building Spring Cloud Stream applications.

4.1. Functional Testing

The test support is a binder implementation that allows interacting with the channels and inspecting messages.

Let’s send a message to the above enrichLogMessage service and check whether the response contains the text “[1]: “ at the beginning of the message:

@RunWith(SpringJUnit4ClassRunner.class)
@ContextConfiguration(classes = MyLoggerServiceApplication.class)
@DirtiesContext
public class MyLoggerApplicationTests {

    @Autowired
    private Processor pipe;

    @Autowired
    private MessageCollector messageCollector;

    @Test
    public void whenSendMessage_thenResponseShouldUpdateText() {
        pipe.input()
          .send(MessageBuilder.withPayload(new LogMessage("This is my message"))
          .build());

        Object payload = messageCollector.forChannel(pipe.output())
          .poll()
          .getPayload();

        assertEquals("[1]: This is my message", payload.toString());
    }
}

4.2. Custom Channels

In the above example, we used the Processor interface provided by Spring Cloud, which has only one input and one output channel.

If we need something different, like one input and two output channels, we can create a custom processor:

public interface MyProcessor {
    String INPUT = "myInput";

    @Input
    SubscribableChannel myInput();

    @Output("myOutput")
    MessageChannel anOutput();

    @Output
    MessageChannel anotherOutput();
}

Spring will provide the proper implementation of this interface for us. The channel names can be set using annotations like in @Output(“myOutput”).

Otherwise, Spring will use the method names as the channel names. Therefore, we’ve got three channels called myInput, myOutput, and anotherOutput.

Now, let’s imagine we want to route the messages to one output if the value is less than 10 and into another output is the value is greater than or equal to 10:

@Autowired
private MyProcessor processor;

@StreamListener(MyProcessor.INPUT)
public void routeValues(Integer val) {
    if (val < 10) {
        processor.anOutput().send(message(val));
    } else {
        processor.anotherOutput().send(message(val));
    }
}

private static final <T> Message<T> message(T val) {
    return MessageBuilder.withPayload(val).build();
}

4.3. Conditional Dispatching

Using the @StreamListener annotation, we also can filter the messages we expect in the consumer using any condition that we define with SpEL expressions.

As an example, we could use conditional dispatching as another approach to route messages into different outputs:

@Autowired
private MyProcessor processor;

@StreamListener(
  target = MyProcessor.INPUT, 
  condition = "payload < 10")
public void routeValuesToAnOutput(Integer val) {
    processor.anOutput().send(message(val));
}

@StreamListener(
  target = MyProcessor.INPUT, 
  condition = "payload >= 10")
public void routeValuesToAnotherOutput(Integer val) {
    processor.anotherOutput().send(message(val));
}

The only limitation of this approach is that these methods must not return a value.

5. Setup

Let’s set up the application that will process the message from the RabbitMQ broker.

5.1. Binder Configuration

We can configure our application to use the default binder implementation via META-INF/spring.binders:

rabbit:\
org.springframework.cloud.stream.binder.rabbit.config.RabbitMessageChannelBinderConfiguration

Or we can add the binder library for RabbitMQ to the classpath by including this dependency:

<dependency>
    <groupId>org.springframework.cloud</groupId>
    <artifactId>spring-cloud-stream-binder-rabbit</artifactId>
    <version>1.3.0.RELEASE</version>
</dependency>

If no binder implementation is provided, Spring will use direct message communication between the channels.

5.2. RabbitMQ Configuration

To configure the example in section 3.1 to use the RabbitMQ binder, we need to update the application.yml located at src/main/resources:

spring:
  cloud:
    stream:
      bindings:
        input:
          destination: queue.log.messages
          binder: local_rabbit
        output:
          destination: queue.pretty.log.messages
          binder: local_rabbit
      binders:
        local_rabbit:
          type: rabbit
          environment:
            spring:
              rabbitmq:
                host: <host>
                port: 5672
                username: <username>
                password: <password>
                virtual-host: /

The input binding will use the exchange called queue.log.messages, and the output binding will use the exchange queue.pretty.log.messages. Both bindings will use the binder called local_rabbit.

Note that we don’t need to create the RabbitMQ exchanges or queues in advance. When running the application, both exchanges are automatically created.

To test the application, we can use the RabbitMQ management site to publish a message. In the Publish Message panel of the exchange queue.log.messages, we need to enter the request in JSON format.

5.3. Customizing Message Conversion

Spring Cloud Stream allows us to apply message conversion for specific content types. In the above example, instead of using JSON format, we want to provide plain text.

To do this, we’ll to apply a custom transformation to LogMessage using a MessageConverter:

@SpringBootApplication
@EnableBinding(Processor.class)
public class MyLoggerServiceApplication {
    //...

    @Bean
    public MessageConverter providesTextPlainMessageConverter() {
        return new TextPlainMessageConverter();
    }

    //...
}
public class TextPlainMessageConverter extends AbstractMessageConverter {

    public TextPlainMessageConverter() {
        super(new MimeType("text", "plain"));
    }

    @Override
    protected boolean supports(Class<?> clazz) {
        return (LogMessage.class == clazz);
    }

    @Override
    protected Object convertFromInternal(Message<?> message, 
        Class<?> targetClass, Object conversionHint) {
        Object payload = message.getPayload();
        String text = payload instanceof String 
          ? (String) payload 
          : new String((byte[]) payload);
        return new LogMessage(text);
    }
}

After applying these changes, going back to the Publish Message panel, if we set the header “contentTypes” to “text/plain” and the payload to “Hello World“, it should work as before.

5.4. Consumer Groups

When running multiple instances of our application, every time there is a new message in an input channel, all subscribers will be notified.

Most of the time, we need the message to be processed only once. Spring Cloud Stream implements this behavior via consumer groups.

To enable this behavior, each consumer binding can use the spring.cloud.stream.bindings.<CHANNEL>.group property to specify a group name:

spring:
  cloud:
    stream:
      bindings:
        input:
          destination: queue.log.messages
          binder: local_rabbit
          group: logMessageConsumers
          ...

6. Message-Driven Microservices

In this section, we introduce all the required features for running our Spring Cloud Stream applications in a microservices context.

6.1. Scaling Up

When multiple applications are running, it’s important to ensure the data is split properly across consumers. To do so, Spring Cloud Stream provides two properties:

  • spring.cloud.stream.instanceCount — number of running applications
  • spring.cloud.stream.instanceIndex — index of the current application

For example, if we’ve deployed two instances of the above MyLoggerServiceApplication application, the property spring.cloud.stream.instanceCount should be 2 for both applications, and the property spring.cloud.stream.instanceIndex should be 0 and 1 respectively.

These properties are automatically set if we deploy the Spring Cloud Stream applications using Spring Data Flow as described in this article.

6.2. Partitioning

The domain events could be Partitioned messages. This helps when we are scaling up the storage and improving application performance.

The domain event usually has a partition key so that it ends up in the same partition with related messages.

Let’s say that we want the log messages to be partitioned by the first letter in the message, which would be the partition key, and grouped into two partitions.

There would be one partition for the log messages that start with A-M and another partition for N-Z. This can be configured using two properties:

  • spring.cloud.stream.bindings.output.producer.partitionKeyExpression — the expression to partition the payloads
  • spring.cloud.stream.bindings.output.producer.partitionCount — the number of groups

Sometimes the expression to partition is too complex to write it in only one line. For these cases, we can write our custom partition strategy using the property spring.cloud.stream.bindings.output.producer.partitionKeyExtractorClass.

6.3. Health Indicator

In a microservices context, we also need to detect when a service is down or starts failing. Spring Cloud Stream provides the property management.health.binders.enabled to enable the health indicators for binders.

When running the application, we can query the health status at http://<host>:<port>/health.

7. Conclusion

In this tutorial, we presented the main concepts of Spring Cloud Stream and showed how to use it through some simple examples over RabbitMQ. More info about Spring Cloud Stream can be found here.

The source code for this article can be found over on GitHub.

A Guide to Google-Http-Client

$
0
0

1. Overview

In this article, we’ll have a look at the Google HTTP Client Library for Java, which is a fast, well-abstracted library for accessing any resources via the HTTP connection protocol.

The main features of the client are:

  • an HTTP abstraction layer that lets you decouple any low-level library
  • fast, efficient and flexible JSON and XML parsing models of the HTTP response and request content
  • easy to use annotations and abstractions for HTTP resource mappings

The library can also be used in Java 5 and above, making it a considerable choice for legacy (SE and EE ) projects.

In this article, we’re going to develop a simple application that will connect to the GitHub API and retrieve users, while covering some of the most interesting features of the library.

2. Maven Dependencies

To use the library we’ll need the google-http-client dependency:

<dependency>
    <groupId>com.google.http-client</groupId>
    <artifactId>google-http-client</artifactId>
    <version>1.23.0</version>
</dependency>

The latest version can be found at Maven Central.

3. Making a Simple Request

Let’s start by making a simple GET request to the GitHub page to showcase how the Google Http Client works out of the box:

HttpRequestFactory requestFactory
  = new NetHttpTransport().createRequestFactory();
HttpRequest request = requestFactory.buildGetRequest(
  new GenericUrl("https://github.com"));
String rawResponse = request.execute().parseAsString()

To make the simplest of request we’ll need at least:

  • HttpRequestFactory this is used to build our requests
  • HttpTransport an abstraction of the low-level HTTP transport layer
  • GenericUrl a class that wraps the Url
  • HttpRequest handles the actual execution of the request

We’ll go through all these and a more complex example with an actual API that returns a JSON format in the following sections.

4. Pluggable HTTP Transport

The library has a well-abstracted HttpTransport class that allows us to build on top of it and change to the underlying low-level HTTP transport library of choice:

public class GitHubExample {
    static HttpTransport HTTP_TRANSPORT = new NetHttpTransport();
}

In this example, we’re using the NetHttpTransport, which is based on the HttpURLConnection that is found in all Java SDKs. This is a good starting choice since it’s well-known and reliable.

Of course, there might be the case where we need some advanced customization, and thus the requirement of a more complex low-level library.

For this kind of cases, there is the ApacheHttpTransport:

public class GitHubExample {
    static HttpTransport HTTP_TRANSPORT = new ApacheHttpTransport();
}

The ApacheHttpTransport is based on the popular Apache HttpClient which includes a wide variety of choices to configure connections.

Additionally, the library provides the option to build your low-level implementation, making it very flexible.

5. JSON Parsing

The Google Http Client includes another abstraction for JSON parsing. A major advantage of this is that the choice of low-level parsing library is interchangeable.

There’re three built-in choices, all of which extend JsonFactory, and it also includes the possibility of implementing our own.

5.1. Interchangeable Parsing library

In our example, we’re going to use the Jackson2 implementation, which requires the google-http-client-jackson2 dependency:

<dependency>
    <groupId>com.google.http-client</groupId>
    <artifactId>google-http-client-jackson2</artifactId>
    <version>1.23.0</version>
</dependency>

Following this, we can now include the JsonFactory:

public class GitHubExample {

    static HttpTransport HTTP_TRANSPORT = new NetHttpTransport();
    staticJsonFactory JSON_FACTORY = new JacksonFactory();
}

The JacksonFactory is the fastest and most popular library for parsing/serialization operations. 

This comes at the cost of the library size (which could be a concern in certain situations). For this reason, Google also provides the GsonFactory, which is an implementation of the Google GSON library, a light-weight JSON parsing library.

There is also the possibility of writing our low-level parser implementation.

5.2. The @Key annotation

We can use the @Key annotation to indicate fields that need to be parsed from or serialized to JSON:

public class User {
 
    @Key
    private String login;
    @Key
    private long id;
    @Key("email")
    private String email;

    // standard getters and setters
}

Here we’re making a User abstraction, which we receive in batch from the GitHub API (we will get to the actual parsing later in this article).

Please note that fields that don’t have the @Key annotation are considered internal and are not parsed from or serialized to JSON. Also, the visibility of the fields does not matter, nor does the existence of the getter or setter methods.

We can specify the value of the @Key annotation, to map it to the correct JSON key.

5.3. GenericJson

Only the fields we declare, and mark as @Key are parsed.

To retain the other content, we can declare our class to extend GenericJson:

public class User extends GenericJson {
    //...
}

GenericJson implements the Map interface, which means we can use the get and put methods to set/get JSON content in the request/response.

6. Making the Call

To connect to an endpoint with the Google Http Client, we’ll need an HttpRequestFactory, which will be configured with our previous abstractions HttpTransport and JsonFactory:

public class GitHubExample {

    static HttpTransport HTTP_TRANSPORT = new NetHttpTransport();
    static JsonFactory JSON_FACTORY = new JacksonFactory();

    private static void run() throws Exception {
        HttpRequestFactory requestFactory 
          = HTTP_TRANSPORT.createRequestFactory(
            (HttpRequest request) -> {
              request.setParser(new JsonObjectParser(JSON_FACTORY));
          });
    }
}

The next thing we’re going to need is a URL to connect to. The library handles this as a class extending GenericUrl on which any field declared is treated as a query parameter:

public class GitHubUrl extends GenericUrl {

    public GitHubUrl(String encodedUrl) {
        super(encodedUrl);
    }

    @Key
    public int per_page;
 
}

Here in our GitHubUrl, we declare the per_page property to indicate how many users we want in a single call to the GitHub API.

Let’s continue building our call using the GitHubUrl:

private static void run() throws Exception {
    HttpRequestFactory requestFactory
      = HTTP_TRANSPORT.createRequestFactory(
        (HttpRequest request) -> {
          request.setParser(new JsonObjectParser(JSON_FACTORY));
        });
    GitHubUrl url = new GitHubUrl("https://api.github.com/users");
    url.per_page = 10;
    HttpRequest request = requestFactory.buildGetRequest(url);
    Type type = new TypeToken<List<User>>() {}.getType();
    List<User> users = (List<User>)request
      .execute()
      .parseAs(type);
}

Notice how we specify how many users we’ll need for the API call, and then we build the request with the HttpRequestFactory.

Following this, since the GitHub API’s response contains a list of users, we need to provide a complex Type, which is a List<User>.

Then, on the last line, we make the call and parse the response to a list of our User class.

7. Custom Headers

One thing we usually do when making an API request is to include some kind of custom header or even a modified one:

HttpHeaders headers = request.getHeaders();
headers.setUserAgent("Baeldung Client");
headers.set("Time-Zone", "Europe/Amsterdam");

We do this by getting the HttpHeaders after we’ve created our request but before executing it and adding the necessary values.

Please be aware that the Google Http Client includes some headers as special methods. The User-Agent header for example, if we try to include it with just the set method it would throw an error.

8. Exponential Backoff

Another important feature of the Google Http Client is the possibility to retry requests based on certain status codes and thresholds.

We can include our exponential backoff settings right after we’ve created our request object:

ExponentialBackOff backoff = new ExponentialBackOff.Builder()
  .setInitialIntervalMillis(500)
  .setMaxElapsedTimeMillis(900000)
  .setMaxIntervalMillis(6000)
  .setMultiplier(1.5)
  .setRandomizationFactor(0.5)
  .build();
request.setUnsuccessfulResponseHandler(
  new HttpBackOffUnsuccessfulResponseHandler(backoff));

Exponential Backoff is turned off by default in HttpRequest, so we must include an instance of HttpUnsuccessfulResponseHandler to the HttpRequest to activate it.

9. Logging

The Google Http Client uses java.util.logging.Logger for logging HTTP request and response details, including URL, headers, and content.

Commonly, logging is managed using a logging.properties file:

handlers = java.util.logging.ConsoleHandler
java.util.logging.ConsoleHandler.level = ALL
com.google.api.client.http.level = ALL

In our example we use ConsoleHandler, but it’s also possible to choose the FileHandler.

The properties file configures the operation of the JDK logging facility. This config file can be specified as a system property:

-Djava.util.logging.config.file=logging.properties

So after setting the file and system property, the library will produce a log like the following:

-------------- REQUEST  --------------
GET https://api.github.com/users?page=1&per_page=10
Accept-Encoding: gzip
User-Agent: Google-HTTP-Java-Client/1.23.0 (gzip)

Nov 12, 2017 6:43:15 PM com.google.api.client.http.HttpRequest execute
curl -v --compressed -H 'Accept-Encoding: gzip' -H 'User-Agent: Google-HTTP-Java-Client/1.23.0 (gzip)' -- 'https://api.github.com/users?page=1&per_page=10'
Nov 12, 2017 6:43:16 PM com.google.api.client.http.HttpResponse 
-------------- RESPONSE --------------
HTTP/1.1 200 OK
Status: 200 OK
Transfer-Encoding: chunked
Server: GitHub.com
Access-Control-Allow-Origin: *
...
Link: <https://api.github.com/users?page=1&per_page=10&since=19>; rel="next", <https://api.github.com/users{?since}>; rel="first"
X-GitHub-Request-Id: 8D6A:1B54F:3377D97:3E37B36:5A08DC93
Content-Type: application/json; charset=utf-8
...

10. Conclusion

In this tutorial, we’ve shown the Google HTTP Client Library for Java and its more useful features. Their Github contains more information about it as well as the source code of the library.

As always, the full source code of this tutorial is available over on GitHub.


Spring Security 5 for Reactive Applications

$
0
0

1. Introduction

In this article, we’ll explore new features of the Spring Security 5 framework for securing reactive applications. This release is aligned with Spring 5 and Spring Boot 2.

In this article, we won’t go into details about the reactive applications themselves, which is a new feature of the Spring 5 framework. Be sure to check out the article Intro to Reactor Core for more details.

2. Maven Setup

We’ll use Spring Boot starters to bootstrap our project together with all required dependencies.

The basic setup requires a parent declaration, web starter, and security starter dependencies. We’ll also need the Spring Security test framework:

<parent>
    <groupId>org.springframework.boot</groupId>
    <artifactId>spring-boot-starter-parent</artifactId>
    <version>2.0.0.M6</version>
    <relativePath/>
</parent>

<dependencies>
    <dependency>
        <groupId>org.springframework.boot</groupId>
        <artifactId>spring-boot-starter-web</artifactId>
    </dependency>
    <dependency>
        <groupId>org.springframework.boot</groupId>
        <artifactId>spring-boot-starter-security</artifactId>
    </dependency>
    <dependency>
        <groupId>org.springframework.security</groupId>
        <artifactId>spring-security-test</artifactId>
        <scope>test</scope>
    </dependency>
</dependencies>

At the time of this writing, the latest version of Spring Security 5 is in the release candidate state. The Spring Boot library, which supports it, is in the milestone state.

So we’ll need to provide the milestone repository for Maven setup:

<repositories>
    <repository>
        <id>spring-milestones</id>
        <name>Spring Milestones</name>
        <url>https://repo.spring.io/milestone</url>
        <snapshots>
            <enabled>false</enabled>
        </snapshots>
    </repository>
</repositories>

We can check out the current version of Spring Boot security starter over at Maven Central.

3. Project Setup

3.1. Bootstrapping the Reactive Application

We won’t use the standard @SpringBootApplication configuration but instead, configure a Netty-based web server. Netty is an asynchronous NIO-based framework which is a good foundation for reactive applications.

The @EnableWebFlux annotation enables the standard Spring Web Reactive configuration for the application:

@ComponentScan(basePackages = {"com.baeldung.security"})
@EnableWebFlux
public class SpringSecurity5Application {

    public static void main(String[] args) {
        try (AnnotationConfigApplicationContext context 
         = new AnnotationConfigApplicationContext(
            SpringSecurity5Application.class)) {
 
            context.getBean(NettyContext.class).onClose().block();
        }
    }

Here, we create a new application context and wait for Netty to shut down by calling .onClose().block() chain on the Netty context.

After Netty is shut down, the context will be automatically closed using the try-with-resources block.

We’ll also need to create a Netty-based HTTP server, a handler for the HTTP requests, and the adapter between the server and the handler:

@Bean
public NettyContext nettyContext(ApplicationContext context) {
    HttpHandler handler = WebHttpHandlerBuilder
      .applicationContext(context).build();
    ReactorHttpHandlerAdapter adapter 
      = new ReactorHttpHandlerAdapter(handler);
    HttpServer httpServer = HttpServer.create("localhost", 8080);
    return httpServer.newHandler(adapter).block();
}

3.2. Spring Security Configuration Class

For our basic Spring Security configuration, we’ll create a configuration class – SecurityConfig.

To enable WebFlux support in Spring Security 5, we only need to specify the @EnableWebFluxSecurity annotation:

@EnableWebFluxSecurity
public class SecurityConfig {
    // ...
}

Now we can take advantage of the class ServerHttpSecurity to build our security configuration.

This class is a new feature of Spring 5. It’s similar to HttpSecurity builder, but it’s only enabled for WebFlux applications.

The ServerHttpSecurity is already preconfigured with some sane defaults, so we could skip this configuration completely. But for starters, we’ll provide the following minimal config:

@Bean
public SecurityWebFilterChain securitygWebFilterChain(
  ServerHttpSecurity http) {
    return http.authorizeExchange()
      .anyExchange().authenticated()
      .and().build();
}

Also, we’ll need a user details service. Spring Security provides us with a convenient mock user builder and an in-memory implementation of the user details service:

@Bean
public MapReactiveUserDetailsService userDetailsService() {
    UserDetails user = User.withDefaultPasswordEncoder()
      .username("user")
      .password("password")
      .roles("USER")
      .build();
    return new MapReactiveUserDetailsService(user);
}

Since we’re in reactive land, the user details service should also be reactive. If we check out the ReactiveUserDetailsService interface, we’ll see that its findByUsername method actually returns a Mono publisher:

public interface ReactiveUserDetailsService {

    Mono<UserDetails> findByUsername(String username);
}

Now we can run our application and observe a regular HTTP basic authentication form.

4. Styled Login Form

A small but striking improvement in Spring Security 5 is a new styled login form which uses the Bootstrap 4 CSS framework. The stylesheets in the login form link to CDN, so we’ll only see the improvement when connected to the Internet.

To use the new login form, let’s add the corresponding formLogin() builder method to the ServerHttpSecurity builder:

public SecurityWebFilterChain securitygWebFilterChain(
  ServerHttpSecurity http) {
    return http.authorizeExchange()
      .anyExchange().authenticated()
      .and().formLogin()
      .and().build();
}

If we now open the main page of the application, we’ll see that it looks much better than the default form we’re used to since previous versions of Spring Security:


Note that this is not a production-ready form, but it’s a good bootstrap of our application.

If we now log in and then go to the http://localhost:8080/logout URL, we’ll see the logout confirmation form, which is also styled.

5. Reactive Controller Security

To see something behind the authentication form, let’s implement a simple reactive controller that greets the user:

@RestController
public class GreetController {

    @GetMapping("/")
    public Mono<String> greet(Mono<Principal> principal) {
        return principal
          .map(Principal::getName)
          .map(name -> String.format("Hello, %s", name));
    }

}

After logging in, we’ll see the greeting. Let’s add another reactive handler that would be accessible by admin only:

@GetMapping("/admin")
public Mono<String> greetAdmin(Mono<Principal> principal) {
    return principal
      .map(Principal::getName)
      .map(name -> String.format("Admin access: %s", name));
}

Now let’s create a second user with the role ADMIN: in our user details service:

UserDetails admin = User.withDefaultPasswordEncoder()
  .username("admin")
  .password("password")
  .roles("ADMIN")
  .build();

We can now add a matcher rule for the admin URL that requires the user to have the ROLE_ADMIN authority.

Note that we have to put matchers before the .anyExchange() chain call. This call applies to all other URLs which were not yet covered by other matchers:

return http.authorizeExchange()
  .pathMatchers("/admin").hasAuthority("ROLE_ADMIN")
  .anyExchange().authenticated()
  .and().formLogin()
  .and().build();

If we now log in with user or admin, we’ll see that they both observe initial greeting, as we’ve made it accessible for all authenticated users.

But only the admin user can go to the http://localhost:8080/admin URL and see her greeting.

6. Reactive Method Security

We’ve seen how we can secure the URLs, but what about methods?

To enable method-based security for reactive methods, we only need to add the @EnableReactiveMethodSecurity annotation to our SecurityConfig class:

@EnableWebFluxSecurity
@EnableReactiveMethodSecurity
public class SecurityConfig {
    // ...
}

Now let’s create a reactive greeting service with the following content:

@Service
public class GreetService {

    public Mono<String> greet() {
        return Mono.just("Hello from service!");
    }
}

We can inject it into the controller, go to http://localhost:8080/greetService and see that it actually works:

@RestController
public class GreetController {

    private GreetService greetService

    @GetMapping("/greetService")
    public Mono<String> greetService() {
        return greetService.greet();
    }

    // standard constructors...
}

But if we now add the @PreAuthorize annotation on the service method with the ADMIN role, then the greet service URL won’t be accessible to a regular user:

@Service
public class GreetService {

@PreAuthorize("hasRole('ADMIN')")
public Mono<String> greet() {
    // ...
}

7. Mocking Users in Tests

Let’s check out how easy it is to test our reactive Spring application.

First, we’ll create a test with an injected application context:

@ContextConfiguration(classes = SpringSecurity5Application.class)
public class SecurityTest {

    @Autowired
    ApplicationContext context;

    // ...
}

Now we’ll set up a simple reactive web test client, which is a feature of the Spring 5 test framework:

@Before
public void setup() {
    this.rest = WebTestClient
      .bindToApplicationContext(this.context)
      .configureClient()
      .build();
}

This allows us to quickly check that the unauthorized user is redirected from the main page of our application to the login page:

@Test
public void whenNoCredentials_thenRedirectToLogin() {
    this.rest.get()
      .uri("/")
      .exchange()
      .expectStatus().is3xxRedirection();
}

If we now add the @MockWithUser annotation to a test method, we can provide an authenticated user for this method.

The login and password of this user would be user and password respectively, and the role is USER. This, of course, can all be configured with the @MockWithUser annotation parameters.

Now we can check that the authorized user sees the greeting:

@Test
@WithMockUser
public void whenHasCredentials_thenSeesGreeting() {
    this.rest.get()
      .uri("/")
      .exchange()
      .expectStatus().isOk()
      .expectBody(String.class).isEqualTo("Hello, user");
}

The @WithMockUser annotation is available since Spring Security 4. However, in Spring Security 5 it was also updated to cover reactive endpoints and methods.

8. Conclusion

In this tutorial, we’ve discovered new features of the upcoming Spring Security 5 release, especially in the reactive programming arena.

As always, the source code for the article is available over on GitHub.

Guide to Java String Pool

$
0
0

1. Overview

The String object is the most used class in the Java language.

In this quick article, we’ll explore the Java String Pool — the special memory region where Strings are stored by the JVM.

2. String Interning

Thanks to the immutability of Strings in Java, the JVM can optimize the amount of memory allocated for them by storing only one copy of each literal String in the pool. This process is called interning.

When we create a String variable and assign a value to it, the JVM searches the pool for a String of equal value.

If found, the Java compiler will simply return a reference to its memory address, without allocating additional memory.

If not found, it’ll be added to the pool (interned) and its reference will be returned.

Let’s write a small test to verify this:

String constantString1 = "Baeldung";
String constantString2 = "Baeldung";
        
assertThat(constantString1)
  .isSameAs(constantString2);

3. Strings Allocated using the Constructor

When we create a String via the new operator, the Java compiler will create a new object and store it in the heap space reserved for the JVM.

Every String created like this will point to a different memory region with its own address.

Let’s see how this is different from the previous case:

String constantString = "Baeldung";
String newString = new String("Baeldung");

assertThat(constantString).isNotSameAs(newString);

4. Manual Interning

We can manually intern a String in the Java String Pool by calling the intern() method on the object we want to intern.

Manually interning the String will store its reference in the pool, and the JVM will return this reference when needed.

Let’s create a test case for this:

String constantString = "interned Baeldung";
String newString = new String("interned Baeldung");

assertThat(constantString).isNotSameAs(newString);

String internedString = newString.intern();

assertThat(constantString)
  .isSameAs(internedString);

5. Garbage Collection

Before Java 7, the JVM placed the Java String Pool in the PermGen space, which has a fixed size — it can’t be expanded at runtime and is not eligible for garbage collection.

The risk of interning Strings in the PermGen (instead of the Heap) is that we can get an OutOfMemory error from the JVM if we intern too many Strings.

From Java 7 onwards, the Java String Pool is stored in the Heap space, which is garbage collected by the JVMThe advantage of this approach is the reduced risk of OutOfMemory error because unreferenced Strings will be removed from the pool, thereby releasing memory.

6. Performance and Optimizations

In Java 6, the only optimization we can perform is increasing the PermGen space during the program invocation with the MaxPermSize JVM option:

-XX:MaxPermSize=1G

In Java 7, we have more detailed options to examine and expand/reduce the pool size. Let’s see the two options for viewing the pool size:

-XX:+PrintFlagsFinal
-XX:+PrintStringTableStatistics

The default pool size is 1009. If we want to increase the pool size, we can use the StringTableSize JVM option:

-XX:StringTableSize=4901

Note that increasing the pool size will consume more memory but has the advantage of reducing the time required to insert the Strings into the table.

7. A Note About Java 9

Until Java 8, Strings were internally represented as an array of characters – char[], encoded in UTF-16, so that every character uses two bytes of memory.

With Java 9 a new representation is provided, called Compact Strings. This new format will choose the appropriate encoding between char[] and byte[] depending on the stored content.

Since the new String representation will use the UTF-16 encoding only when necessary, the amount of heap memory will be significantly lower, which in turn causes less Garbage Collector overhead on the JVM.

8. Conclusion

In this guide, we showed how the JVM and the Java compiler optimize memory allocations for String objects via the Java String Pool.

All code samples used in the article are available over on Github.

A Guide to Spring AbstractRoutingDatasource

$
0
0

1. Overview

In this quick article, we’ll look at Spring’s AbstractRoutingDatasource as a way of dynamically determining the actual DataSource based on the current context.

As a result, we’ll see that we can keep DataSource lookup logic out of the data access code.

2. Maven Dependencies

Let’s start by declaring  spring-context, spring-jdbc, spring-test, and h2 as dependencies in the pom.xml:

<dependencies>
    <dependency>
        <groupId>org.springframework</groupId>
        <artifactId>spring-context</artifactId>
        <version>4.3.8.RELEASE</version>
    </dependency>

    <dependency>
        <groupId>org.springframework</groupId>
        <artifactId>spring-jdbc</artifactId>
        <version>4.3.8.RELEASE</version>
    </dependency>

    <dependency> 
        <groupId>org.springframework</groupId> 
        <artifactId>spring-test</artifactId>
        <version>4.3.8.RELEASE</version>
        <scope>test</scope>
    </dependency>
    <dependency>
        <groupId>com.h2database</groupId>
        <artifactId>h2</artifactId>
        <version>1.4.195</version>
        <scope>test</scope>
    </dependency>
</dependencies>

The latest version of the dependencies can be found here.

3. Datasource Context

AbstractRoutingDatasource requires information to know which actual DataSource to route to. This information is typically referred to as a Context.

While the Context used with AbstractRoutingDatasource can be any Object, an enum is used for defining them. In our example, we’ll use the notion of a ClientDatabase as our context with the following implementation:

public enum ClientDatabase {
    CLIENT_A, CLIENT_B
}

Its worth noting that, in practice, the context can be whatever makes sense for the domain in question.

For example, another common use case involves using the notion of an Environment to define the context. In such a scenario, the context could be an enum containing PRODUCTION, DEVELOPMENT, and TESTING.

4. Context Holder

The context holder implementation is a container that stores the current context as a ThreadLocal reference.

In addition to holding the reference, it should contain static methods for setting, getting, and clearing it. AbstractRoutingDatasource will query the ContextHolder for the Context and will then use the context to look up the actual DataSource.

It’s critically important to use ThreadLocal here so that the context is bound to the currently executing thread.

It’s essential to take this approach so that behavior is reliable when data access logic spans multiple data sources and uses transactions:

public class ClientDatabaseContextHolder {

    private static ThreadLocal<ClientDatabase> CONTEXT
      = new ThreadLocal<>();

    public static void set(ClientDatabase clientDatabase) {
        Assert.notNull(clientDatabase, "clientDatabase cannot be null");
        CONTEXT.set(clientDatabase);
    }

    public static ClientDatabase getClientDatabase() {
        return CONTEXT.get();
    }

    public static void clear() {
        CONTEXT.remove();
    }
}

5. Datasource Router

We define our ClientDataSourceRouter to extend the Spring AbstractRoutingDataSource. We implement the necessary determineCurrentLookupKey method to query our ClientDatabaseContextHolder and return the appropriate key.

The AbstractRoutingDataSource implementation handles the rest of the work for us and transparently returns the appropriate DataSource:

public class ClientDataSourceRouter
  extends AbstractRoutingDataSource {

    @Override
    protected Object determineCurrentLookupKey() {
        return ClientDatabaseContextHolder.getClientDatabase();
    }
}

6. Configuration

We need a Map of contexts to DataSource objects to configure our AbstractRoutingDataSource. We can also specify a default DataSource to use if there is no context set.

The DataSources we use can come from anywhere but will typically be either created at runtime or looked up using JNDI:

@Configuration
public class RoutingTestConfiguration {

    @Bean
    public ClientService clientService() {
        return new ClientService(new ClientDao(clientDatasource()));
    }
 
    @Bean
    public DataSource clientDatasource() {
        Map<Object, Object> targetDataSources = new HashMap<>();
        DataSource clientADatasource = clientADatasource();
        DataSource clientBDatasource = clientBDatasource();
        targetDataSources.put(ClientDatabase.CLIENT_A, 
          clientADatasource);
        targetDataSources.put(ClientDatabase.CLIENT_B, 
          clientBDatasource);

        ClientDataSourceRouter clientRoutingDatasource 
          = new ClientDataSourceRouter();
        clientRoutingDatasource.setTargetDataSources(targetDataSources);
        clientRoutingDatasource.setDefaultTargetDataSource(clientADatasource);
        return clientRoutingDatasource;
    }

    // ...
}

7. Usage

When using our AbstractRoutingDataSource, we first set the context and then perform our operation. We make use of a service layer that takes the context as a parameter and sets it before delegating to data-access code and clearing the context after the call.

As an alternative to manually clearing the context within a service method, the clearing logic can be handled by an AOP point cut.

It’s important to remember that the context is thread bound especially if data access logic will be spanning multiple data sources and transactions:

public class ClientService {

    private ClientDao clientDao;

    // standard constructors

    public String getClientName(ClientDatabase clientDb) {
        ClientDatabaseContextHolder.set(clientDb);
        String clientName = this.clientDao.getClientName();
        ClientDatabaseContextHolder.clear();
        return clientName;
    }
}

8. Conclusion

In this tutorial, we looked at the example how to use the Spring AbstractRoutingDataSource. We implemented a solution using the notion of a Client – where each client has its DataSource.

And, as always, examples can found over on GitHub.

Introduction to Spring Cloud CLI

$
0
0

1. Introduction

In this article, we take a look at Spring Boot Cloud CLI (or Cloud CLI for short). The tool provides a set of command line enhancements to the Spring Boot CLI that helps in further abstracting and simplifying Spring Cloud deployments.

The CLI was introduced in late 2016 and allows quick auto-configuration and deployment of standard Spring Cloud services using a command line, .yml configuration files, and Groovy scripts.

2. Set Up

Spring Boot Cloud CLI 1.3.x requires Spring Boot CLI 1.5.x, so make sure to grab the latest version of Spring Boot CLI from Maven Central (installation instructions) and the most recent version of the Cloud CLI from Maven Repository (the official Spring repository)!

To make sure the CLI is installed and ready to use, simply run:

$ spring --version

After verifying your Spring Boot CLI installation, install the latest stable version of Cloud CLI:

$ spring install org.springframework.cloud:spring-cloud-cli:1.3.2.RELEASE

Then verify the Cloud CLI:

$ spring cloud --version

Advanced installation features can be found on the official Cloud CLI page!

3. Default Services and Configuration

The CLI provides seven core services that can be run and deployed with single line commands.

To launch a Cloud Config server on http://localhost:8888:

$ spring cloud configserver

To start a Eureka server on http://localhost:8761:

$ spring cloud eureka

To initiate an H2 server on http://localhost:9095:

$ spring cloud h2

To launch a Kafka server on http://localhost:9091:

$ spring cloud kafka

To start a Zipkin server on http://localhost:9411:

$ spring cloud zipkin

To launch a Dataflow server on http://localhost:9393:

$ spring cloud dataflow

To start a Hystrix dashboard on http://localhost:7979:

$ spring cloud hystrixdashboard

List currently running cloud services:

$ spring cloud --list

The handy help command:

$ spring help cloud

For more details about these commands, please check out the official blog.

4. Customizing Cloud Services with YML

Each of the services that are deployable through the Cloud CLI can also be configured using correspondingly-named .yml files:

spring:
  profiles:
    active: git
  cloud:
    config:
      server:
        git:
          uri: https://github.com/spring-cloud-samples/config-repo

This constitutes a simple configuration file that we can use for launching the Cloud Config Server.

We can, for example, specify a Git repository as the URI source that will be automatically cloned and deployed when we issue the ‘spring cloud configserver’ command.

Cloud CLI uses the Spring Cloud Launcher under the hood. That means that Cloud CLI supports most of the Spring Boot configuration mechanisms. Here’s the official list of Spring Boot properties.

Spring Cloud configuration conforms to the ‘spring.cloud…‘ convention. Settings for Spring Cloud and Spring Config Server can be found at this link.

We can also specify several different modules and services directly into the cloud.yml:

spring:
  cloud:
    launcher:
      deployables:
        - name: configserver
          coordinates: maven://...:spring-cloud-launcher-configserver:1.3.2.RELEASE
          port: 8888
          waitUntilStarted: true
          order: -10
        - name: eureka
          coordinates: maven:/...:spring-cloud-launcher-eureka:1.3.2.RELEASE
          port: 8761

The cloud.yml allows custom services or modules to be added and the use of Maven and Git repositories to be used.

5. Running Custom Groovy Scripts

Custom components can be written in Groovy and deployed efficiently since Cloud CLI can compile and deploy Groovy code.

Here’s an example minimal REST API implementation:

@RestController
@RequestMapping('/api')
class api {
 
    @GetMapping('/get')
    def get() { [message: 'Hello'] }
}

Assuming that the script is saved as rest.groovy, we can launch our minimal server like this:

$ spring run rest.groovy

Pinging http://localhost:8080/api/get should reveal:

{"message":"Hello"}

6. Encrypt/Decrypt

Cloud CLI also provides a tool for encryption and decryption (found in the package org.springframework.cloud.cli.command.*) that can be used directly through the command line or indirectly by passing a value to a Cloud Config Server endpoint.

Let’s set it up and see how to use it.

6.1. Setup

Both Cloud CLI as well as Spring Cloud Config Server use org.springframework.security.crypto.encrypt.* for handling encrypt and decrypt commands.

As such, both require the JCE Unlimited Strength Extension provided by Oracle here.

6.2. Encrypt and Decrypt By Command

To encrypt ‘my_value‘ via the terminal, invoke:

$ spring encrypt my_value --key my_key

File paths can be substituted for the key name (e.g. ‘my_key‘ above) by using ‘@’ followed by the path (commonly used for RSA public keys):

$ spring encrypt my_value --key @${WORKSPACE}/foos/foo.pub

my_value‘ will now be encrypted to something like:

c93cb36ce1d09d7d62dffd156ef742faaa56f97f135ebd05e90355f80290ce6b

Furthermore, it will be stored in memory under key ‘my_key‘. This allows us to decrypt ‘my_key‘ back into’my_value‘ via command line:

$ spring decrypt --key my_key

We can also now use the encrypted value in a configuration YAML or properties file, where it will be automatically decrypted by the Cloud Config Server when loaded:

encrypted_credential: "{cipher}c93cb36ce1d09d7d62dffd156ef742faaa56f97f135ebd05e90355f80290ce6b"

6.3. Encrypt and Decrypt with Config Server

Spring Cloud Config Server exposes RESTful endpoints where keys and encrypted value pairs can be stored in the Java Security Store or memory.

For more information on how to correctly set up and configure your Cloud Config Server to accept symmetric or asymmetric encryption, please check out our article or the official docs.

Once Spring Cloud Config Server is configured and up running using the ‘spring cloud configserver‘ command, you’ll be able to call its API:

$ curl localhost:8888/encrypt -d mysecret
//682bc583f4641835fa2db009355293665d2647dade3375c0ee201de2a49f7bda
$ curl localhost:8888/decrypt -d 682bc583f4641835fa2db009355293665d2647dade3375c0ee201de2a49f7bda
//mysecret

7. Conclusion

We’ve focused here on an introduction to Spring Boot Cloud CLI. For more information, please check out the official docs.

The configuration and bash examples used in this article are available over on GitHub.

Introduction to Creational Design Patterns

$
0
0

1. Introduction

In software engineering, a Design Pattern describes an established solution to the most commonly encountered problems in software design. It represents the best practices evolved over a long period through trial and error by experienced software developers.

Design Patterns gained popularity after the book Design Patterns: Elements of Reusable Object-Oriented Software was published in 1994 by Erich Gamma, John Vlissides, Ralph Johnson, and Richard Helm (also known as Gang of Four or GoF).

In this article, we’ll explore creational design patterns and their types. We’ll also look at some code samples and discuss the situations when these patterns fit our design.

2. Creational Design Patterns

Creational Design Patterns are concerned with the way in which objects are created. They reduce complexities and instability by creating objects in a controlled manner.

The new operator is often considered harmful as it scatters objects all over the application. Over time it can become challenging to change an implementation because classes become tightly coupled.

Creational Design Patterns address this issue by decoupling the client entirely from the actual initialization process.

In this article, we’ll discuss four types of Creational Design Pattern:

  1. Singleton – Ensures that at most only one instance of an object exists throughout application
  2. Factory Method – Creates objects of several related classes without specifying the exact object to be created
  3. Abstract Factory – Creates families of related dependent objects
  4. Builder – Constructs complex objects using step-by-step approach

Let’s now discuss each of these patterns in detail.

3. Singleton Design Pattern

The Singleton Design Pattern aims to keep a check on initialization of objects of a particular class by ensuring that only one instance of the object exists throughout the Java Virtual Machine.

A Singleton class also provides one unique global access point to the object so that each subsequent call to the access point returns only that particular object.

3.1. Singleton Pattern Example

Although the Singleton pattern was introduced by GoF, the original implementation is known to be problematic in multithreaded scenarios.

So here, we’re going to follow a more optimal approach that makes use of a static inner class:

public class Singleton  {    
    private Singleton() {}
    
    private static class SingletonHolder {    
        public static final Singleton instance = new Singleton();
    }

    public static Singleton getInstance() {    
        return SingletonHolder.instance;    
    }
}

Here, we’ve created a static inner class that holds the instance of the Singleton class. It creates the instance only when someone calls the getInstance() method and not when the outer class is loaded.

This is a widely used approach for a Singleton class as it doesn’t require synchronization, is thread safe, enforces lazy initialization and has comparatively less boilerplate.

Also, note that the constructor has the private access modifier. This is a requirement for creating a Singleton since a public constructor would mean anyone could access it and start creating new instances.

Remember, this isn’t the original GoF implementation. For the original version, please visit this linked Baeldung article on Singletons in Java.

3.2. When to Use Singleton Design Pattern

  • For resources that are expensive to create (like database connection objects)
  • It’s good practice to keep all loggers as Singletons which increases performance
  • Classes which provide access to configuration settings for the application
  • Classes that contain resources that are accessed in shared mode

4. Factory Method Design Pattern

The Factory Design Pattern or Factory Method Design Pattern is one of the most used design patterns in Java.

According to GoF, this pattern “defines an interface for creating an object, but let subclasses decide which class to instantiate. The Factory method lets a class defer instantiation to subclasses”.

This pattern delegates the responsibility of initializing a class from the client to a particular factory class by creating a type of virtual constructor.

To achieve this, we rely on a factory which provides us with the objects, hiding the actual implementation details. The created objects are accessed using a common interface.

4.1. Factory Method Design Pattern Example

In this example, we’ll create a Polygon interface which will be implemented by several concrete classes. A PolygonFactory will be used to fetch objects from this family:

Factory Method Design Pattern - Class Diagram

Let’s first create the Polygon interface:

public interface Polygon {
    String getType();
}

Next, we’ll create a few implementations like Square, Triangle, etc. that implement this interface and return an object of Polygon type.

Now we can create a factory that takes the number of sides as an argument and returns the appropriate implementation of this interface:

public class PolygonFactory {
    public Polygon getPolygon(int numberOfSides) {
        if(numberOfSides == 3) {
            return new Triangle();
        }
        if(numberOfSides == 4) {
            return new Square();
        }
        if(numberOfSides == 5) {
            return new Pentagon();
        }
        if(numberOfSides == 4) {
            return new Heptagon();
        }
        else if(numberOfSides == 8) {
            return new Octagon();
        }
        return null;
    }
}

Notice how the client can rely on this factory to give us an appropriate Polygon, without having to initialize the object directly.

4.2. When to Use Factory Method Design Pattern

  • When the implementation of an interface or an abstract class is expected to change frequently
  • When the current implementation cannot comfortably accommodate new change
  • When the initialization process is relatively simple, and the constructor only requires a handful of parameters

5. Abstract Factory Design Pattern

In the previous section, we saw how the Factory Method design pattern could be used to create objects related to a single family.

By contrast, the Abstract Factory Design Pattern is used to create families of related or dependent objects. It’s also sometimes called a factory of factories.

The GoF definition states that an Abstract Factory “provides an interface for creating families of related or dependent objects without specifying their concrete classes”.

5.1. Abstract Factory Design Pattern Example

In this example, we’ll create two implementations of the Factory Method Design pattern: AnimalFactory and ColorFactory.

We’ll then manage access to them using an Abstract Factory AbstractFactory:

Abstract Factory Design Pattern - Class Diagram

First, we’ll create a family of Animal class and will, later on, use it in our Abstract Factory.

Here’s the Animal interface:

public interface Animal {
    String getAnimal();
    String makeSound();
}

and a concrete implementation Duck:

public class Duck implements Animal {

    @Override
    public String getAnimal() {
        return "Duck";
    }

    @Override
    public String makeSound() {
        return "Squeks";
    }
}

We can create more concrete implementations of Animal interface (like Dog, Bear, etc.) exactly in this manner.

The Abstract Factory deals with families of dependent objects. With that in mind, we’re going to introduce one more family Color as an interface with a few implementations (White, Brown,…).

We’ll skip the actual code for now, but it can be found here.

Now that we’ve got multiple families ready, we can create an AbstractFactory interface for them:

public interface AbstractFactory {
    Animal getAnimal(String animalType) ;
    Color getColor(String colorType);
}

Next, we’ll implement an AnimalFactory using the Factory Method design pattern that we discussed in the previous section:

public class AnimalFactory implements AbstractFactory {

    @Override
    public Animal getAnimal(String animalType) {
        if ("Dog".equalsIgnoreCase(animalType)) {
            return new Dog();
        } else if ("Duck".equalsIgnoreCase(animalType)) {
            return new Duck();
        }

        return null;
    }

    @Override
    public Color getColor(String color) {
        throw new UnsupportedOperationException();
    }

}

Similarly, we can implement a factory for the Color interface using the same design pattern.

When all this is set, we’ll create a FactoryProvider class that will provide us with an implementation of AnimalFactory or ColorFactory depending on the argument supplied to the getFactory() method:

public class FactoryProvider {
    public static AbstractFactory getFactory(String choice){
        
        if("Animal".equalsIgnoreCase(choice)){
            return new AnimalFactory();
        }
        else if("Color".equalsIgnoreCase(choice)){
            return new ColorFactory();
        }
        
        return null;
    }
}

5.2. When to Use Abstract Factory Pattern:

  • The client should be independent of how the products are created and composed in the system
  • The system consists of multiple families of products, and these families are designed to be used together
  • We need a run-time value to construct a particular dependency

6. Builder Design Pattern

The Builder Design Pattern is another creational pattern designed to deal with the construction of comparatively complex objects.

When the complexity of creating object increases, the Builder pattern can separate out the instantiation process by using another object (a builder) to construct the object.

This builder can then be used to create many other similar representations using a simple step-by-step approach.

6.1. Builder Pattern Example

The original Builder Design Pattern introduced by GoF focuses on abstraction and is very good when dealing with complex objects, however, the design is a little complicated.

Joshua Bloch, in his book Effective Java, introduced an improved version of the builder pattern which is clean, highly readable (because it makes use of fluent design) and easy to use from client’s perspective. In this example, we’ll discuss that version.

This example has only one class, BankAccount which contains a builder as a static inner class:

public class BankAccount {
    
    private String name;
    private String accountNumber;
    private String email;
    private boolean newsletter;

    // constructors/getters
    
    public static class BankAccountBuilder {
        // builder code
    }
}

Note that all the access modifiers on the fields are declared private since we don’t want outer objects to access them directly.

The constructor is also private so that only the Builder assigned to this class can access it. All of the properties set in the constructor are extracted from the builder object which we supply as an argument.

We’ve defined BankAccountBuilder in a static inner class:

public static class BankAccountBuilder {
    
    private String name;
    private String accountNumber;
    private String email;
    private boolean newsletter;
    
    public BankAccountBuilder(String name, String accountNumber) {
        this.name = name;
        this.accountNumber = accountNumber;
    }

    public BankAccountBuilder withEmail(String email) {
        this.email = email;
        return this;
    }

    public BankAccountBuilder wantNewsletter(boolean newsletter) {
        this.newsletter = newsletter;
        return this;
    }
    
    public BankAccount build() {
        return new BankAccount(this);
    }
}

Notice we’ve declared the same set of fields that the outer class contains. Any mandatory fields are required as arguments to the inner class’s constructor while the remaining optional fields can be specified using the setter methods.

This implementation also supports the fluent design approach by having the setter methods return the builder object.

Finally, the build method calls the private constructor of the outer class and passes itself as the argument. The returned BankAccount will be instantiated with the parameters set by the BankAccountBuilder.

Let’s see a quick example of the builder pattern in action:

BankAccount newAccount = new BankAccount
  .BankAccountBuilder("Jon", "22738022275")
  .withEmail("jon@example.com")
  .wantNewsletter(true)
  .build();

6.2. When to Use Builder Pattern

  1. When the process involved in creating an object is extremely complex, with lots of mandatory and optional parameters
  2. When an increase in the number of constructor parameters leads to a large list of constructors
  3. When client expects different representations for the object that’s constructed

7. Conclusion

In this article, we learned about creational design patterns in Java. We also discussed their four different types, i.e., Singleton, Factory Method, Abstract Factory and Builder Pattern, their advantages, examples and when should we use them.

As always, the complete code snippets are available over on GitHub.

Spring 5 Testing with @EnabledIf Annotation

$
0
0

1. Introduction

In this quick article, we’ll discover the @EnabledIf and @DisabledIf annotations in Spring 5 using JUnit 5.

Simply put, those annotations make it possible to disable/enable particular test if a specified condition is met.

We’ll use a simple test class to show how these annotations work:

@SpringJUnitConfig(Spring5EnabledAnnotationTest.Config.class)
public class Spring5EnabledAnnotationTest {
 
    @Configuration
    static class Config {}
}

2. @EnabledIf

Let’s add to our class this simple test with a text literal “true”:

@EnabledIf("true")
@Test
void givenEnabledIfLiteral_WhenTrue_ThenTestExecuted() {
    assertTrue(true);
}

If we run this test, it executes normally.

However, if we replace the provided String with “false” it’s not executed:

Keep in mind that if you want to statically disable a test, there’s a dedicated @Disabled annotation for this.

3. @EnabledIf with a Property Placeholder

A more practical way of using @EnabledIf is by using a property placeholder:

@Test
@EnabledIf(
  expression = "${tests.enabled}", 
  loadContext = true)
void givenEnabledIfExpression_WhenTrue_ThenTestExecuted() {
    // ...
}

First of all, we need to make sure that the loadContext parameter is set to true so that the Spring context gets loaded.

By default, this parameter is set to false to avoid unnecessary context loading.

4. @EnabledIf with a SpEL Expression

Finally, we can use the annotation with Spring Expression Language (SpEL) expressions.

For example, we can enable tests only when running JDK 1.8

@Test
@EnabledIf("#{systemProperties['java.version'].startsWith('1.8')}")
void givenEnabledIfSpel_WhenTrue_ThenTestExecuted() {
    assertTrue(true);
}

5. @DisabledIf

This annotation is the opposite of @EnabledIf.

For example, we can disable test when running on Java 1.7:

@Test
@DisabledIf("#{systemProperties['java.version'].startsWith('1.7')}")
void givenDisabledIf_WhenTrue_ThenTestNotExecuted() {
    assertTrue(true);
}

6. Conclusion

In this brief article, we went through several examples of the usage of @EnabledIf and @DisabledIf annotations in JUnit 5 tests using the SpringExtension.

The full source code for the examples is available over on GitHub.

Display All Time Zones With GMT And UTC in Java

$
0
0

1. Overview

Whenever we deal with times and dates, we need a frame of reference. The standard for that is UTC, but we also see GMT in some applications.

In short, UTC is the standard, while GMT is a time zone.

This is what Wikipedia tells us regarding what to use:

For most purposes, UTC is considered interchangeable with Greenwich Mean Time (GMT), but GMT is no longer precisely defined by the scientific community.

In other words, once we compile a list with time zone offsets in UTC, we’ll have it for GMT as well.

First, we’ll have a look at the Java 8 way of achieving this and then we’ll see how we can get the same result in Java 7.

2. Getting a List Of Zones

To start with, we need to retrieve a list of all defined time zones.

For this purpose, the ZoneId class has a handy static method:

Set<String> availableZoneIds = ZoneId.getAvailableZoneIds();

Then, we can use the Set to generate a sorted list of time zones with their corresponding offsets:

public List<String> getTimeZoneList(OffsetBase base) {
 
    LocalDateTime now = LocalDateTime.now();
    return ZoneId.getAvailableZoneIds().stream()
      .map(ZoneId::of)
      .sorted(new ZoneComparator())
      .map(id -> String.format(
        "(%s%s) %s", 
        base, getOffset(now, id), id.getId()))
      .collect(Collectors.toList());
}

The method above uses an enum parameter which represents the offset we want to see:

public enum OffsetBase {
    GMT, UTC
}

Now let’s go over the code in more detail.

Once we’ve retrieved all available zone IDs, we need an actual time reference, represented by LocalDateTime.now().

After that, we use Java’s Stream API to iterate over each entry in our set of time zone String id’s and transform it into a list of formatted time zones with the corresponding offset.

For each of these entries, we generate a ZoneId instance with map(ZoneId::of). 

3. Getting Offsets

We also need to find actual UTC offsets. For example, in the case of Central European Time, the offset would be +01:00.

To get the UTC offset for any given zone, we can use LocalDateTime’s getOffset() method.

Also note that Java represents +00:00 offsets as Z.

So, to have a consistent looking String for time zones with the zero offset, we’ll replace Z with +00:00:

private String getOffset(LocalDateTime dateTime, ZoneId id) {
    return dateTime
      .atZone(id)
      .getOffset()
      .getId()
      .replace("Z", "+00:00");
}

4. Making Zones Comparable

Optionally, we can also sort the time zones according to offset.

For this, we’ll use a ZoneComparator class:

private class ZoneComparator implements Comparator<ZoneId> {

    @Override
    public int compare(ZoneId zoneId1, ZoneId zoneId2) {
        LocalDateTime now = LocalDateTime.now();
        ZoneOffset offset1 = now.atZone(zoneId1).getOffset();
        ZoneOffset offset2 = now.atZone(zoneId2).getOffset();

        return offset1.compareTo(offset2);
    }
}

5. Displaying Time Zones

All that’s left to do is putting the above pieces together by calling the getTimeZoneList() method for each OffsetBase enum value and displaying the lists:

public class TimezoneDisplayApp {

    public static void main(String... args) {
        TimezoneDisplay display = new TimezoneDisplay();

        System.out.println("Time zones in UTC:");
        List<String> utc = display.getTimeZoneList(
          TimezoneDisplay.OffsetBase.UTC);
        utc.forEach(System.out::println);

        System.out.println("Time zones in GMT:");
        List<String> gmt = display.getTimeZoneList(
          TimezoneDisplay.OffsetBase.GMT);
        gmt.forEach(System.out::println);
    }
}

When we run the above code, it’ll print the time zones for UTC and GMT.

Here’s a snippet of how the output will look like:

Time zones in UTC:
(UTC+14:00) Pacific/Apia
(UTC+14:00) Pacific/Kiritimati
(UTC+14:00) Pacific/Tongatapu
(UTC+14:00) Etc/GMT-14

6. Java 7 and Before

Java 8 makes this task easier by using the Stream and Date and Time APIs.

However, if we have a Java 7 and before a project, we can still achieve the same result by relying on the java.util.TimeZone class with its getAvailableIDs() method:

public List<String> getTimeZoneList(OffsetBase base) {
    String[] availableZoneIds = TimeZone.getAvailableIDs();
    List<String> result = new ArrayList<>(availableZoneIds.length);

    for (String zoneId : availableZoneIds) {
        TimeZone curTimeZone = TimeZone.getTimeZone(zoneId);
        String offset = calculateOffset(curTimeZone.getRawOffset());
        result.add(String.format("(%s%s) %s", base, offset, zoneId));
    }
    Collections.sort(result);
    return result;
}

The main difference with the Java 8 code is the offset calculation.

The rawOffset we get from TimeZone()‘s getRawOffset() method expresses the time zone’s offset in milliseconds.

Therefore, we need to convert this to hours and minutes using the TimeUnit class:

private String calculateOffset(int rawOffset) {
    if (rawOffset == 0) {
        return "+00:00";
    }
    long hours = TimeUnit.MILLISECONDS.toHours(rawOffset);
    long minutes = TimeUnit.MILLISECONDS.toMinutes(rawOffset);
    minutes = Math.abs(minutes - TimeUnit.HOURS.toMinutes(hours));

    return String.format("%+03d:%02d", hours, Math.abs(minutes));
}

7. Conclusion

In this quick tutorial, we’ve seen how we can compile a list of all available time zones with their UTC and GMT offsets.

And, as always, the full source code for the examples is available over on GitHub, both the Java 8 version and Java 7 version.


Java Weekly, Issue 204

$
0
0

Lots of interesting writeups on Java 9 this week.

Here we go…

1. Spring and Java

>> First Contact With ‘var’ In Java 10 [blog.codefx.org]

Java 9 was released two months ago and there’s already quite a lot of excitement around features of the next version.

>> Fresh Async With Kotlin: Roman Elizarov Presents at QCon SF [infoq.com]

Kotlin has some cool features for asynchronous programming.

>> Dynamic Validation with Spring Boot Validation [blog.codecentric.de]

An interesting case of making the Bean Validation dynamic in Spring.

>> Java 10 – The Story So Far [infoq.com]

Here’s what we already know about Java 10.

Also worth reading:

Webinars and presentations:

Time to upgrade:

2. Technical

>> The Myth of Advanced TDD [blog.thecodewhisperer.com]

Before you start looking at advanced TDD techniques, it’s important to make sure you have basics mastered first.

>> Install IntelliJ IDEA on Ubuntu with Snaps [blog.jetbrains.com]

Ubuntu users can finally install IntelliJ IDEA easily 🙂

Also worth reading: 

3. Musings

>> On developer shortage [blog.frankel.ch]

Simply put, if you don’t want to face the problem of not being able to find and attract good developers, make sure that you’re an attractive place for them to work.

>> Customize Your Agile Approach: What Do You Need for Estimation? [infoq.com]

Agile is less restrictive than you’d think – when you adapt only practices that actually work for you.

Also worth reading:

4. Comics

And my favorite Dilberts of the week:

>> Wally is a Maverick [dilbert.com]

>> Tina the Whistleblower [dilbert.com]

>> Logical Reasons for Learning to Negotiate [dilbert.com]

5. Pick of the Week

>> Finally, An Official Shell in Java 9 – Introducing JShell [stackify.com]

How to Copy a File with Java

$
0
0

1. Overview

In this article, we’ll cover common ways of copying files in Java.

First, we’ll use the standard IO and NIO.2 APIs, and two external libraries: commons-io and guava.

2. IO API (Before JDK7)

First of all, to copy a file with java.io API, we’re required to open a stream, loop through the content and write it out to another stream:

@Test
public void givenIoAPI_whenCopied_thenCopyExistsWithSameContents() 
  throws IOException {
 
    File copied = new File("src/test/resources/copiedWithIo.txt");
    try (
      InputStream in = new BufferedInputStream(
        new FileInputStream(original));
      OutputStream out = new BufferedOutputStream(
        new FileOutputStream(copied))) {
 
        byte[] buffer = new byte[1024];
        int lengthRead;
        while ((lengthRead = in.read(buffer)) > 0) {
            out.write(buffer, 0, lengthRead);
            out.flush();
        }
    }
 
    assertThat(copied).exists();
    assertThat(Files.readAllLines(original.toPath())
      .equals(Files.readAllLines(copied.toPath())));
}

Quite a lot of work to implement such basic functionality.

Luckily for us, Java has improved its core APIs and we have a simpler way of copying files using NIO.2 API.

3. NIO.2 API (JDK7)

Using NIO.2 can significantly increase file copying performance since the NIO.2 utilizes lower-level system entry points.

Let’s take a closer look at how the Files.copy() method works.

The copy() method gives us the ability to specify an optional argument representing a copy option. By default, copying files and directories won’t overwrite existing ones, nor will it copy file attributes.

This behavior can be changed using the following copy options:

  • REPLACE_EXISTING – replace a file if it exists
  • COPY_ATTRIBUTES – copy metadata to the new file
  • NOFOLLOW_LINKS – shouldn’t follow symbolic links

The NIO.2 Files class provides a set of overloaded copy() methods for copying files and directories within the file system.

Let’s take a look at an example using copy() with two Path arguments:

@Test
public void givenNIO2_whenCopied_thenCopyExistsWithSameContents() 
  throws IOException {
 
    Path copied = Paths.get("src/test/resources/copiedWithNio.txt");
    Path originalPath = original.toPath();
    Files.copy(originalPath, copied, StandardCopyOption.REPLACE_EXISTING);
 
    assertThat(copied).exists();
    assertThat(Files.readAllLines(originalPath)
      .equals(Files.readAllLines(copied)));
}

Note that directory copies are shallow, meaning that files and sub-directories within the directory are not copied.

4. Apache Commons IO

Another common way to copy a file with Java is by using the commons-io library. 

First, we need to add the dependency:

<dependency>
    <groupId>commons-io</groupId>
    <artifactId>commons-io</artifactId>
    <version>2.6</version>
</dependency>

The latest version can be downloaded from Maven Central.

Then, to copy a file we just need to use the copyFile() method defined in the FileUtils class. The method takes a source and a target file.

Let’s take a look at a JUnit test using the copyFile() method:

@Test
public void givenCommonsIoAPI_whenCopied_thenCopyExistsWithSameContents() 
  throws IOException {
    
    File copied = new File(
      "src/test/resources/copiedWithApacheCommons.txt");
    FileUtils.copyFile(original, copied);
    
    assertThat(copied).exists();
    assertThat(Files.readAllLines(original.toPath())
      .equals(Files.readAllLines(copied.toPath())));
}

5. Guava

Finally, we’ll take a look at Google’s Guava library.

Again, if we want to use Guavawe need to include the dependency:

<dependency>
    <groupId>com.google.guava</groupId>
    <artifactId>guava</artifactId>
    <version>23.0</version>
</dependency>

The latest version can be found on Maven Central.

And here’s the Guava’s way of copying a file:

@Test
public void givenGuava_whenCopied_thenCopyExistsWithSameContents() 
  throws IOException {
 
    File copied = new File("src/test/resources/copiedWithGuava.txt");
    com.google.common.io.Files.copy(original, copied);
 
    assertThat(copied).exists();
    assertThat(Files.readAllLines(original.toPath())
      .equals(Files.readAllLines(copied.toPath())));
}

6. Conclusion

In this article, we explored the most common ways to copy a file in Java.

The full implementation of this article can be found over on Github.

Introduction to Gradle

$
0
0

1. Overview

Gradle is a Groovy-based build management system designed specifically for building Java-based projects.

Installation instructions can be found here.

2. Building Blocks – Projects and Tasks

In Gradle, Builds consist of one or more projects and each project consists of one or more tasks.

A project in Gradle can be assembling a jar, war or even a zip file.

A task is a single piece of work. This can include compiling classes, or creating and publishing Java/web archives.

A simple task can be defined as:

task hello {
    doLast {
        println 'Baeldung'
    }
}

If we execute above task using gradle -q hello command from the same location where build.gradle resides, we should see the output in the console.

2.1. Tasks

Gradle’s build scripts are nothing but Groovy:

task toLower {
    doLast {
        String someString = 'HELLO FROM BAELDUNG'
        println "Original: "+ someString
        println "Lower case: " + someString.toLowerCase()
    }
}

We can define tasks that depend on other tasks. Task dependency can be defined by passing the dependsOn: taskName argument in a task definition:

task helloGradle {
    doLast {
        println 'Hello Gradle!'
    }
}

task fromBaeldung(dependsOn: helloGradle) {
    doLast {
        println "I'm from Baeldung"
    }
}

2.2. Adding Behavior to a Task

We can define a task and enhance it with some additional behaviour:

task helloBaeldung {
    doLast {
        println 'I will be executed second'
    }
}

helloBaeldung.doFirst {
    println 'I will be executed first'
}

helloBaeldung.doLast {
    println 'I will be executed third'
}

helloBaeldung {
    doLast {
        println 'I will be executed fourth'
    }
}

doFirst and doLast add actions at the top and bottom of the action list, respectively, and can be defined multiple times in a single task.

2.3. Adding Task Properties

We can also define properties:

task ourTask {
    ext.theProperty = "theValue"
}

Here, we’re setting “theValue” as theProperty of the ourTask task.

3. Managing Plugins

There’re two types of plugins in Gradle – script and binary.

To benefit from an additional functionality, every plugin needs to go through two phases: resolving and applying.

Resolving means finding the correct version of the plugin jar and adding that to the classpath of the project. 

Applying plugins is executing Plugin.apply(T) on the project.

3.1. Applying Script Plugins

In the aplugin.gradle, we can define a task:

task fromPlugin {
    doLast {
        println "I'm from plugin"
    }
}

If we want to apply this plugin to our project build.gradle file, all we need to do is add this line to our build.gradle:

apply from: 'aplugin.gradle'

Now, executing gradle tasks command should display the fromPlugin task in the task list.

3.2. Applying Binary Plugins Using Plugins DSL

In the case of adding a core binary plugin, we can add short names or a plugin id:

plugins {
    id 'application'
}

Now the run task from application plugin should be available in a project to execute any runnable jar. To apply a community plugin, we have to mention a fully qualified plugin id :

plugins {
    id "org.shipkit.bintray" version "0.9.116"
}

Now, Shipkit tasks should be available on gradle tasks list.

The limitations of the plugins DSL are:

  • It doesn’t support Groovy code inside the plugins block
  • plugins block needs to be the top level statement in project’s build scripts (only buildscripts{} block is allowed before it)
  • Plugins DSL cannot be written in scripts plugin, settings.gradle file or in init scripts

Plugins DSL is still incubating. The DSL and other configuration may change in the later Gradle versions.

3.3. Legacy Procedure for Applying Plugins

We can also apply plugins using the “apply plugin”:

apply plugin: 'war'

If we need to add a community plugin, we have to add the external jar to the build classpath using buildscript{} block.

Then, we can apply the plugin in the build scripts but only after any existing plugins{} block:

buildscript {
    repositories {
        maven {
            url "https://plugins.gradle.org/m2/"
        }
    }
    dependencies {
        classpath "org.shipkit:shipkit:0.9.117"
    }
}
apply plugin: "org.shipkit.bintray-release"

4. Dependency Management

Gradle supports very flexible dependency management system, it’s compatible with the wide variety of available approaches.

Best practices for dependency management in Gradle are versioning, dynamic versioning, resolving version conflicts and managing transitive dependencies.

4.1. Dependency Configuration

Dependencies are grouped into different configurations. A configuration has a name and they can extend each other.

If we apply the Java plugin, we’ll have compile, testCompile, runtime configurations available for grouping our dependencies. The default configuration extends “runtime”.

4.2. Declaring Dependencies

Let’s look at an example of adding some dependencies (Spring and Hibernate) using several different ways:

dependencies {
    compile group: 
      'org.springframework', name: 'spring-core', version: '4.3.5.RELEASE'
    compile 'org.springframework:spring-core:4.3.5.RELEASE',
            'org.springframework:spring-aop:4.3.5.RELEASE'
    compile(
        [group: 'org.springframework', name: 'spring-core', version: '4.3.5.RELEASE'],
        [group: 'org.springframework', name: 'spring-aop', version: '4.3.5.RELEASE']
    )
    testCompile('org.hibernate:hibernate-core:5.2.12.Final') {
        transitive = true
    }
    runtime(group: 'org.hibernate', name: 'hibernate-core', version: '5.2.12.Final') {
        transitive = false
    }
}

We’re declaring dependencies in various configurations: compiletestCompile, and runtime in various formats.

Sometimes we need dependencies that have multiple artifacts. In such cases, we can add an artifact-only notations @extensionName (or ext in the expanded form) to download the desired artifact:

runtime "org.codehaus.groovy:groovy-all:2.4.11@jar"
runtime group: 'org.codehaus.groovy', name: 'groovy-all', version: '2.4.11', ext: 'jar'

Here, we added the @jar notation to download only the jar artifact without the dependencies.

To add dependencies to any local files, we can use something like this:

compile files('libs/joda-time-2.2.jar', 'libs/junit-4.12.jar')
compile fileTree(dir: 'libs', include: '*.jar')

When we want to avoid transitive dependencies, we can do it on configuration level or on dependency level:

configurations {
    testCompile.exclude module: 'junit'
}
 
testCompile("org.springframework.batch:spring-batch-test:3.0.7.RELEASE"){
    exclude module: 'junit'
}

5. Multi-Project Builds

5.1. Build Lifecycle

In the initialization phase, Gradle determines which projects are going to take part in a multi-project build.

This is usually mentioned in settings.gradle file, which is located in the project root. Gradle also creates instances of the participating projects.

In the configuration phase, all created projects instances are configured based on Gradle feature configuration on demand.

In this feature, only required projects are configured for a specific task execution. This way, configuration time is highly reduced for a large multi-project build. This feature is still incubating.

Finally, in the execution phase, a subset of tasks, created and configured are executed. We can include code in the settings.gradle and build.gradle files to perceive these three phases.

In settings.gradle :

println 'At initialization phase.'

In build.gradle :

println 'At configuration phase.'

task configured { println 'Also at the configuration phase.' }

task execFirstTest { doLast { println 'During the execution phase.' } }

task execSecondTest {
    doFirst { println 'At first during the execution phase.' }
    doLast { println 'At last during the execution phase.' }
    println 'At configuration phase.'
}

5.2. Creating Multi-Project Build

We can execute the gradle init command in the root folder to create a skeleton for both settings.gradle and build.gradle file.

All common configuration will be kept in the root build script:

allprojects {
    repositories {
        mavenCentral() 
    }
}

subprojects {
    version = '1.0'
}

The setting file needs to include root project name and subproject name:

rootProject.name = 'multi-project-builds'
include 'greeting-library','greeter'

Now we need to have a couple of subproject folders named greeting-library and greeter to have a demo of a multi-project build. Each subproject needs to have an individual build script to configure their individual dependencies and other necessary configurations.

If we’d like to have our greeter project dependent on the greeting-library, we need to include the dependency in the build script of greeter:

dependencies {
    compile project(':greeting-library') 
}

6. Using Gradle Wrapper

If a Gradle project has gradlew file for Linux and gradlew.bat file for Windows, we don’t need to install Gradle to build the project.

If we execute gradlew build in Windows and ./gradlew build in Linux, a Gradle distribution specified in gradlew file will be downloaded automatically.

If we’d like to add the Gradle wrapper to our project:

gradle wrapper --gradle-version 4.2.1

The command needs to be executed from the root of the project. This will create all necessary files and folders to tie Gradle wrapper to the project. The other way to do the same is to add the wrapper task to the build script:

task wrapper(type: Wrapper) {
    gradleVersion = '4.2.1'
}

Now we need to execute the wrapper task and the task will tie our project to the wrapper. Besides the gradlew files, a wrapper folder is generated inside the gradle folder containing a jar and a properties file.

If we want to switch to a new version of Gradle, we only need to change an entry in gradle-wrapper.properties.

7. Conclusion

In this article, we had a look at Gradle and saw that it has greater flexibility over other existing build tools in terms of resolving version conflicts and managing transitive dependencies.

The source code for this article is available over on GitHub.

Send the Logs of a Java App to the Elastic Stack (ELK)

$
0
0

1. Overview

In this quick tutorial, we’ll discuss, step by step, how to send out application logs to the Elastic Stack (ELK).

In an earlier article, we focused on setting up the Elastic Stack and sending JMX data into it.

2. Configure Logback

let’s start by configuring Logback to write app logs into a file using FileAppender:

<appender name="STASH" class="ch.qos.logback.core.rolling.RollingFileAppender">
    <file>logback/redditApp.log</file>
    <rollingPolicy class="ch.qos.logback.core.rolling.TimeBasedRollingPolicy">
        <fileNamePattern>logback/redditApp.%d{yyyy-MM-dd}.log</fileNamePattern>
        <maxHistory>7</maxHistory>
    </rollingPolicy>  
    <encoder class="net.logstash.logback.encoder.LogstashEncoder"/>
</appender>
<root level="DEBUG">
    <appender-ref ref="STASH" />        
</root>

Note that:

  • We keep logs of each day in a separate file by using RollingFileAppender with TimeBasedRollingPolicy (more about this appender here)
  • We’ll keep old logs for only a week (7 days) by setting maxHistory to 7

Also notice how we’re using the LogstashEncoder to do the encoding into a JSON format – which is easier to use with Logstash.

To make use of this encoder, we need to add the following dependency into our pom.xml:

<dependency> 
    <groupId>net.logstash.logback</groupId> 
    <artifactId>logstash-logback-encoder</artifactId> 
    <version>4.11</version> 
</dependency>

Finally, let’s make sure the app has permissions to access logging directory:

sudo chmod a+rwx /var/lib/tomcat8/logback

3. Configure Logstash

Now, we need to configure Logstash to read data from log files created by our app and send it to ElasticSearch.

Here is our configuration file logback.conf:

input {
    file {
        path => "/var/lib/tomcat8/logback/*.log"
        codec => "json"
        type => "logback"
    }
}

output {
    if [type]=="logback" {
         elasticsearch {
             hosts => [ "localhost:9200" ]
             index => "logback-%{+YYYY.MM.dd}"
        }
    }
}

Note that:

  • input file is used as Logstash will read logs this time from logging files
  • path is set to our logging directory and all files with .log extension will be processed
  • index is set to new index “logback-%{+YYYY.MM.dd}” instead of default “logstash-%{+YYYY.MM.dd}”

To run Logstash with new configuration, we’ll use:

bin/logstash -f logback.conf

4. Visualize Logs using Kibana

We can now see our Logback data in the ‘logback-*‘ index.

We’ll create a new search ‘Logback logs’ to make sure to separate Logback data by using the following query:

type:logback

Finally, we can create a simple visualization of our Logback data:

  • Navigate to ‘Visualize’ tab
  • Choose ‘Vertical Bar Chart’
  • Choose ‘From Saved Search’
  • Choose ‘Logback logs’ search we just created

For Y-axis, make sure to choose Aggregation: Count

For X-axis, choose:

  • Aggregation: Terms
  • Field: level

After running the visualization, you should see multiple bars represent count of logs per level (DEBUG, INFO, ERROR, …)

5. Conclusion

In this article, we learned the basics of setting up Logstash in our system to push the log data it generates into Elasticsearch – and visualize that data with the help of Kibana.

CAS SSO With Spring Security

$
0
0

1. Overview

In this article, we’re going to look at integrating the Central Authentication Service (CAS) with Spring Security. CAS is a Single Sign-On (SSO) service.

Let’s say we have applications requiring user authentication. The most common method is to implement a security mechanism for each application. However, it’d be better to implement user authentication for all the apps in one place.

This is precisely what the CAS SSO system does. This article gives more details on the architecture. The protocol diagram can be found here.

2. Project Setup and Installation

There’re at least two components involved in setting up a Central Authentication Service. One component is a Spring-based server – called cas-server. Other components are made up of one or more clients.

A client can be any web application that’s using the server for authentication.

2.1. CAS Server Setup

The server uses the Maven (Gradle) War Overlay style to facilitate easy setup and deployment. There’s a quick start template that can be cloned and used.

Let’s clone it:

git clone https://github.com/apereo/cas-overlay-template.git cas-server

This command clones the cas-overlay-template into the cas-server directory on the local machine.

Next, let’s add additional dependencies to the root pom.xml. These dependencies enable service registration via a JSON configuration.

Also, they facilitate connections to the database:

<dependency>
    <groupId>org.apereo.cas</groupId>
    <artifactId>cas-server-support-json-service-registry</artifactId>
    <version>${cas.version}</version>
</dependency>
<dependency>
    <groupId>org.apereo.cas</groupId>
    <artifactId>cas-server-support-jdbc</artifactId>
    <version>${cas.version}</version>
</dependency>
<dependency>
    <groupId>org.apereo.cas</groupId>
    <artifactId>cas-server-support-jdbc-drivers</artifactId>
    <version>${cas.version}</version>
</dependency>

The latest version of cas-server-support-json-service-registry, cas-server-support-jdbc and cas-server-support-jdbc-drivers dependencies can be found on Maven Central. Please note that the parent pom.xml automatically manages the artifact versions.

Next, let’s create the folder cas-server/src/main/resources and copy the folder cas-server/etc. into it. We’re also going to change the port of the application as well as the path of the SSL key store.

We configure these by editing the associated entries in cas-server/src/main/resources/application.properties:

server.port=6443
server.ssl.key-store=classpath:/etc/cas/thekeystore
cas.standalone.config=classpath:/etc/cas/config

The config folder path was also set to classpath:/etc/cas/config. It points to the cas-server/src/main/resources/etc/cas/config.

The next step is to generate a local SSL key store. The key store is used for establishing HTTPS connections. This step is important and may not be skipped.

From the terminal, change directory to cas-server/src/main/resources/etc/cas. After that run the following command:

keytool -genkey -keyalg RSA -alias thekeystore -keystore thekeystore 
-storepass changeit -validity 360 -keysize 2048

It’s important to use localhost when prompted for a first and last name, organization name and even organization unit. Failure to do this may lead an to error during SSL Handshake. Other fields such as city, state and country can be set as appropriate.

The above command generates a key store with the name thekeystore and password changeit. It’s stored in the current directory.

Next, the generated key store need to be exported to a .crt format for use by the client applications. So, still in the same directory, run the following command to export the generated thekeystore file to thekeystore.crt. The password remains unchanged:

keytool -export -alias thekeystore -file thekeystore.crt 
-keystore thekeystore

Now, let’s import the exported thekeystore.crt into the Java cacerts key store. The terminal prompt should still be in the directory cas-server/src/main/resources/etc/cas directory.

From there, execute the command:

keytool -import -alias thekeystore -storepass changeit -file thekeystore.crt
 -keystore "C:\Program Files\Java\jdk1.8.0_152\jre\lib\security\cacerts"

Just to be double sure, we can also import the certificate into a JRE that is outside of the JDK installation:

keytool -import -alias thekeystore -storepass changeit -file thekeystore.crt 
-keystore "C:\Program Files\Java\jre1.8.0_152\lib\security\cacerts"

Note that the -keystore flag points to the location of the Java key store on the local machine. This location may be different depending on the Java installation at hand.

Moreover, ensure that the JRE that is referenced as the location of the key store is the same as the one that is used for the client application.

After successfully adding thekeystore.crt to the Java key store, we need to restart the system. Equivalently, we can kill every instance of the JVM running on the local machine.

Next, from the root project directory, cas-server, invoke the commands build package and build run from the terminal. Starting the server may take some time. When it’s ready, it prints READY in the console.

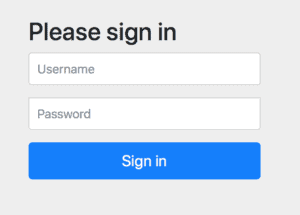
At this point, visiting https://localhost:6443/cas with a browser renders a login form. The default username is casuser and password is Mellon.

2.2. CAS Client Setup

Let’s use the Spring Initializr to generate the project with the following dependencies: Web, Security, Freemarker and optionally DevTools.

In addition to the dependencies generated by Spring Initializr, let’s add the dependency for the Spring Security CAS module:

<dependency>
    <groupId>org.springframework.security</groupId>
    <artifactId>spring-security-cas</artifactId>
</dependency>

The latest version of the dependency can be found on Maven Central. Let’s also configure the server’s port to listen on port 9000 by adding the following entry in application.properties:

server.port=9000

3. Registering Services/Clients with CAS Server

The server doesn’t allow just any client to access it for authentication. The clients/services must be registered in the CAS server services registry.

There’re a couple of ways of registering a service with the server. These include YAML, JSON, Mongo, LDAP, and others.

Depending on the method, there are dependencies to be included in the pom.xml file. In this article, we use the JSON Service Registry method. The dependency was already included in the pom.xml file in the previous section.

Let’s create a JSON file that contains the definition of the client application. Inside the cas-server/src/main/resources folder, let’s create yet another folder – services. It’s this services folder that contains the JSON files.

Next, we create a JSON file named, casSecuredApp-19991.json in the cas-server/src/main/resources/services directory with the following content:

{
    "@class" : "org.apereo.cas.services.RegexRegisteredService",
    "serviceId" : "^http://localhost:9000/login/cas",
    "name" : "CAS Spring Secured App",
    "description": "This is a Spring App that usses the CAS Server for it's authentication",
    "id" : 19991,
    "evaluationOrder" : 1
}

The serviceId attribute defines a regex URL pattern for the client application that intends to use the server for authentication. In this case, the pattern matches an application running on localhost and listening on port 9000.

The id attribute should be unique to avoid conflicts and accidentally overriding configurations. The service configuration file name follows the convention serviceName-id.json. Other configurable attributes such as theme, proxyPolicy, logo, privacyUrl, and others can be found here.

For now, let’s just add two more configuration items to turn the JSON Service Registry on. One is to inform the server on the directory where the service configuration files are located. The other is to enable initialization of the service registry from JSON configuration files.

Both these configuration items are placed in another file, named cas.properties. We create this file in the cas-server/src/main/resources directory:

cas.serviceRegistry.initFromJson=true
cas.serviceRegistry.config.location=classpath:/services

Let’s execute the build run command again and take note of lines such as “Loaded [3] service(s) from [JsonServiceRegistryDao]” on the console.

4. Spring Security Configuration

4.1. Configuring Single Sign-On

Now that the Spring Boot Application has been registered with the CAS Server as a service. Let’s configure Spring Security to work in concert with the server for user authentication. The full sequence of interactions between Spring Security and server can be found here.

Let’s first configure the beans that are related to the CAS module of Spring Security. This enables Spring Security to collaborate with the central authentication service.

To this extent, we need to add config beans to the CasSecuredAppApplication class – the entry point to the Spring Boot application:

@Bean
public ServiceProperties serviceProperties() {
    ServiceProperties serviceProperties = new ServiceProperties();
    serviceProperties.setService("http://localhost:9000/login/cas");
    serviceProperties.setSendRenew(false);
    return serviceProperties;
}

@Bean
@Primary
public AuthenticationEntryPoint authenticationEntryPoint(
  ServiceProperties sP) {
 
    CasAuthenticationEntryPoint entryPoint
      = new CasAuthenticationEntryPoint();
    entryPoint.setLoginUrl("https://localhost:6443/cas/login");
    entryPoint.setServiceProperties(sP);
    return entryPoint;
}

@Bean
public TicketValidator ticketValidator() {
    return new Cas30ServiceTicketValidator(
      "https://localhost:6443/cas");
}

@Bean
public CasAuthenticationProvider casAuthenticationProvider() {
 
    CasAuthenticationProvider provider = new CasAuthenticationProvider();
    provider.setServiceProperties(serviceProperties());
    provider.setTicketValidator(ticketValidator());
    provider.setUserDetailsService(
      s -> new User("casuser", "Mellon", true, true, true, true,
        AuthorityUtils.createAuthorityList("ROLE_ADMIN")));
    provider.setKey("CAS_PROVIDER_LOCALHOST_9000");
    return provider;
}

We configure the ServiceProperties bean with the default service login URL that the CasAuthenticationFilter will be internally mapped to. The sendRenew property of ServiceProperties is set to false. As a consequence, a user only needs to present login credentials to the server once.

Subsequent authentication will be done automatically, i.e., without asking the user for username and password again. This behavior means that a single user that has access to multiple services that use the same server for authentication.

As we’ll see later, if a user logs out from the server completely, his ticket is invalidated. As a consequence, the user is logged out of all applications connected to the server at the same time. This is called the Single Logout.

We configure the AuthenticationEntryPoint bean with the default login URL of the server. Note that this URL is different from the Service login URL. This server login URL is the location where the user will be redirected to for authentication.

The TicketValidator is the bean that the service app uses to validate a service ticket granted to a user upon successful authentication with the server.

The flow is:

  1. A user attempts to access a secured page
  2. The AuthenticationEntryPoint is triggered and takes the user to the server. The login address of the server has been specified in the AuthenticationEntryPoint
  3. On a successful authentication with the server, it redirects the request back to the service URL that has been specified, with the service ticket appended as a query parameter
  4. CasAuthenticationFilter is mapped to a URL that matches the pattern and in turn, triggers the ticket validation internally.
  5. If the ticket is valid, a user will be redirected to the originally requested URL

Now, we need to configure Spring Security to protect some routes and use the CasAuthenticationEntryPoint bean.

Let’s create SecurityConfig.java that extends WebSecurityConfigurerAdapter and override the config():

@Override
protected void configure(HttpSecurity http) throws Exception {
  http
    .authorizeRequests()
    .regexMatchers("/secured.*", "/login")
    .authenticated()
    .and()
    .authorizeRequests()
    .regexMatchers("/")
    .permitAll()
    .and()
    .httpBasic()
    .authenticationEntryPoint(authenticationEntryPoint);
}

Also, in the SecurityConfig class, we override the following methods and create the CasAuthenticationFilter bean at the same time:

@Override
protected void configure(AuthenticationManagerBuilder auth) 
  throws Exception {
    auth.authenticationProvider(authenticationProvider);
}

@Override
protected AuthenticationManager authenticationManager() throws Exception {
    return new ProviderManager(
      Arrays.asList(authenticationProvider));
}

@Bean
public CasAuthenticationFilter casAuthenticationFilter(ServiceProperties sP) 
  throws Exception {
    CasAuthenticationFilter filter = new CasAuthenticationFilter();
    filter.setServiceProperties(sP);
    filter.setAuthenticationManager(authenticationManager());
    return filter;
}

Let’s create controllers that handle requests directed to /secured, /login and the home page as well.

The homepage is mapped to an IndexController that has a method index(). This method merely returns the index view:

@GetMapping("/")
public String index() {
    return "index";
}

The /login path is mapped to the login() method from the AuthController class. It just redirects to the default login successful page.

Notice that while configuring the HttpSecurity above, we configured the /login path so that it requires authentication. This way, we redirect the user to the CAS server for authentication.

This mechanism is a bit different from the normal configuration where the /login path is not a protected route and returns a login form:

@GetMapping("/login")
public String login() {
    return "redirect:/secured";
}

The /secured path is mapped to the index() method from the SecuredPageController class. It gets the username of the authenticated user and displays it as part of the welcome message:

@GetMapping
public String index(ModelMap modelMap) {
  Authentication auth = SecurityContextHolder.getContext()
    .getAuthentication();
  if(auth != null 
    && auth.getPrincipal() != null
    && auth.getPrincipal() instanceof UserDetails) {
      modelMap.put("username", ((UserDetails) auth.getPrincipal()).getUsername());
  }
  return "secure/index";
}

Note that all the views are available in the resources folder of the cas-secured-app. At this point, the cas-secured-app should be able to use the server for authentication.

Finally, we execute build run from the terminal and simultaneously start the Spring boot app as well. Note that SSL is key in this whole process, so the SSL generation step above should not be skipped!

4.2. Configuring Single Logout

Let’s proceed with the authentication process by logging out a user from the system. There are two places a user can be logged out from: the client app and the server.

Logging a user out of the client app/service is the first thing to do. This does not affect the authentication state of the user in other applications connected to the same server. Of course, logging a user out from the server also logs the user out from all other registered services/clients.

Let’s start by defining some bean configurations in CasSecuredAppApplicaiton class:

@Bean
public SecurityContextLogoutHandler securityContextLogoutHandler() {
    return new SecurityContextLogoutHandler();
}

@Bean
public LogoutFilter logoutFilter() {
    LogoutFilter logoutFilter = new LogoutFilter(
      "https://localhost:6443/cas/logout", 
      securityContextLogoutHandler());
    logoutFilter.setFilterProcessesUrl("/logout/cas");
    return logoutFilter;
}

@Bean
public SingleSignOutFilter singleSignOutFilter() {
    SingleSignOutFilter singleSignOutFilter = new SingleSignOutFilter();
    singleSignOutFilter.setCasServerUrlPrefix("https://localhost:6443/cas");
    singleSignOutFilter.setIgnoreInitConfiguration(true);
    return singleSignOutFilter;
}

@EventListener
public SingleSignOutHttpSessionListener singleSignOutHttpSessionListener(
  HttpSessionEvent event) {
    return new SingleSignOutHttpSessionListener();
}

We configure the logoutFilter to intercept the URL pattern /logout/cas and to redirect the application to the server for a system-wide log-out. The server sends a single logout request to all services concerned. Such a request is handled by the SingleSignOutFilter, which invalidates the HTTP session.

Let’s modify the HttpSecurity configuration in the config() of SecurityConfig class. The CasAuthenticationFilter and LogoutFilter that were configured earlier are now added to the chain as well:

http
  .authorizeRequests()
  .regexMatchers("/secured.*", "/login")
  .authenticated()
  .and()
  .authorizeRequests()
  .regexMatchers("/")
  .permitAll()
  .and()
  .httpBasic()
  .authenticationEntryPoint(authenticationEntryPoint)
  .and()
  .logout().logoutSuccessUrl("/logout")
  .and()
  .addFilterBefore(singleSignOutFilter, CasAuthenticationFilter.class)
  .addFilterBefore(logoutFilter, LogoutFilter.class);

For the logout to work correctly, we should implement a logout() method that first logs a user out of the system locally and shows a page with a link to optionally log the user out from all other services connected to the server.

The link is the same as the one set as the filter process URL of the LogoutFilter we configured above:

@GetMapping("/logout")
public String logout(
  HttpServletRequest request, 
  HttpServletResponse response, 
  SecurityContextLogoutHandler logoutHandler) {
    Authentication auth = SecurityContextHolder
      .getContext().getAuthentication();
    logoutHandler.logout(request, response, auth );
    new CookieClearingLogoutHandler(
      AbstractRememberMeServices.SPRING_SECURITY_REMEMBER_ME_COOKIE_KEY)
      .logout(request, response, auth);
    return "auth/logout";
}

The logout view:

<html>
<head>
    <title>Cas Secured App - Logout</title>
</head>
<body>
<h1>You have logged out of Cas Secured Spring Boot App Successfully</h1>
<br>
<a href="/logout/cas">Log out of all other Services</a>
</body>
</html>

5. Connecting the CAS Server to a Database

We’ve been using static user credentials for authentication. However, in production environments, user credentials are stored in a database most of the time. So, next, we show how to connect our server to a MySQL database (database name: test) running locally.

We do this by appending the following data to the application.properties file in the cas-server/src/main/resources directory:

cas.authn.accept.users=
cas.authn.accept.name=

cas.authn.jdbc.query[0].sql=SELECT * FROM users WHERE email = ?
cas.authn.jdbc.query[0].url=jdbc:mysql://127.0.0.1:3306/test?useUnicode=true&useJDBCCompliantTimezoneShift=true&useLegacyDatetimeCode=false&serverTimezone=UTC
cas.authn.jdbc.query[0].dialect=org.hibernate.dialect.MySQLDialect
cas.authn.jdbc.query[0].user=root
cas.authn.jdbc.query[0].password=root
cas.authn.jdbc.query[0].ddlAuto=none
cas.authn.jdbc.query[0].driverClass=com.mysql.cj.jdbc.Driver
cas.authn.jdbc.query[0].fieldPassword=password
cas.authn.jdbc.query[0].passwordEncoder.type=NONE

Remember that the complete content of application.properties can be found in the source code. Leaving the value of cas.authn.accept.users blank deactivates the use of static user repositories by the server.

Furthermore, we define the SQL statement that gets the users from the database. The ability to configure the SQL itself makes the storage of users in the database very flexible.

According to the SQL above, a users’ record is stored in the users table. The email column is what represents the users’ principal (username). Further down the configuration, we set the name of the password field, cas.authn.jdbc.query[0].fieldPassword. We set it to the value password to increase the flexibility further.

Other attributes that we configured are the database user (root) and password (blank), dialect and the JDBC connection String. The list of supported databases, available drivers and dialects can be found here.

Another essential attribute is the encryption type used for storing the password. In this case, it is set to NONE.

However, the server supports more encryption mechanisms, such as Bcrypt. These encryption mechanisms that can be found here, together with other configurable properties.

Running the server (build run) now enables the authentication of users with credentials that are present in the configured database. Note again that the principal in the database that the server uses must be the same as that of the client applications.

In this case, the Spring Boot app should have the same value (test@test.com) for the principal (username) as that of the database connected to the server.

Let’s then modify the UserDetails connected to the CasAuthenticationProvider bean configured in the CasSecuredAppApplication class of the Spring Boot application:

@Bean
public CasAuthenticationProvider casAuthenticationProvider() {
    CasAuthenticationProvider provider = new CasAuthenticationProvider();
    provider.setServiceProperties(serviceProperties());
    provider.setTicketValidator(ticketValidator());
    provider.setUserDetailsService((s) -> new User(
      "test@test.com", "testU",
      true, true, true, true,
    AuthorityUtils.createAuthorityList("ROLE_ADMIN")));
    provider.setKey("CAS_PROVIDER_LOCALHOST_9000");
    return provider;
}

Another thing to take note of is that although the UserDetails is given a password, it’s not used. However, if the username differs from that of the server, authentication will fail.

For the application to authenticate successfully with the credentials stored in the database, start a MySQL server running on 127.0.0.1 and port 3306 with username root and password root.

Then use the SQL file, cas-server\src\main\resources\create_test_db_and_users_tbl.sql, which is part of the source code, to create the table users in database test.

By default, it contains the email test@test.com and password Mellon. Remember, we can always modify the database connection settings in application.properties.

Start the CAS Server once again with build run, go to https://localhost:6443/cas and use those credentials for authentication. The same credentials will also work for the cas-secured Spring Boot App.

6. Conclusion

We’ve looked extensively at how to use CAS Server SSO with Spring Security and many of the configuration files involved.

There are many other aspects of a server that can be configured ranging from themes and protocol types to authentication policies. These can all be found here in the docs.

The source code for the server in this article and it’s configuration files can be found here, and that of the Spring Boot application can be found here.

Viewing all 4833 articles
Browse latest View live


<script src="https://jsc.adskeeper.com/r/s/rssing.com.1596347.js" async> </script>